Building a Single Page Application with Symfony PHP and React

July 31, 2019
Written by
Oluyemi Olususi
Contributor
Opinions expressed by Twilio contributors are their own

Building a Single Page Application with Symfony PHP and React.png

Introduction

Every modern web application built with PHP now requires a huge amount of logic handled at the frontend to enhance and provide a great user experience. PHP frameworks such as Laravel come bundled with support for crafting the client side logic using Vue.js. This amongst other things gives developers the ability to rapidly build applications by combining these technologies.

Contrary to the structure of Laravel, Symfony as a set of reusable PHP components does not favor a particular library or fronted framework over another. It gives you the flexibility to decide what runs and powers the frontend logic of your application. In this tutorial, I will show you how to seamlessly build a single page application using Symfony and React.

Once we are done with this tutorial, you would have learned how to combine reusable user interface components built with React and Symfony together.

Prerequisites

Basic knowledge of building applications with React, Symfony and a reasonable knowledge of objected-oriented programming with PHP is advised to follow along properly and get the best results from this tutorial.

Also, you need to ensure that you have Node.js and Yarn package manager installed on your development machine. Lastly, you need to install Composer to manage dependencies.

What is Symfony?

Symfony as a set of PHP components has a reputation of powering a lot of enterprise web applications, which makes it a top choice for high performant applications. It is a web framework with an elegant structure and appropriate for creating any web application project, irrespective of the size and complexity. You can check its official documentation to learn more about its awesome features and concepts.

What is React

React is known for being an incredible JavaScript framework used for building the frontend logic of a web application. It is an open-source library, quite popular and preferable by lots of Javascript developers. React makes the experience of building a creative user interface painless and allows you to easily manage the state of your application. At the heart of all React applications are self-contained modules named components. Amongst other things, components make your code reusable and give your application a modularized and organized structure.

Combining React and Symfony

Some years ago, handling frontend logic of any web application was mostly powered by either using "Vanilla" JavaScript or JQuery. While this was the trend, and in some markets is still the case, our current applications are larger and more complex. These requirements require a library that is well structured, intuitive and robust enough to reduce the amount of code you will need to write just to get things done.

Because PHP is traditionally a server-side language, a modern framework is expected to include support for seamlessly integrating Javascript libraries with the backend. The introduction of a pure-JavaScript library called Symfony Webpack Encore is the game-changer, as it offers a simplified process for working with both CSS and JavaScript in a Symfony application.

At the time of writing, React is one of the most widely used JavaScript frontend libraries for building user interfaces because of its simplicity and large developer community. We will focus on it in this tutorial and as you proceed, you will be enlightened on how to combine React and Symfony into a single project successfully.

What you will build with React and Symfony

To get started, we will keep things simple by building an application that will be used to fetch a list of users and posts from APIs. This will be a two-page application where you will be able to navigate between two different pages and view the contents rendered accordingly as shown below:

Animation of the SPA in Symfony & React

Keep in mind, this application represents a little bit of deviation from how Symfony as a framework traditionally works. From state management of data, to page rendering, and routing from one page to another, the approach that we will employ depends fully on using React Router for routing and management of the state of the application. It differs by using the local state object within each React reusable component to store history, providing real-time responsiveness.

To fetch the list of users, we will build a backend API with dummy data using Symfony. To fetch the list of posts, we will make use of a fake online REST API for testing and prototyping named JSONPlaceholder.

Scaffolding the Symfony Application

To begin, we will use Composer to quickly create a new Symfony application for this article. Alternatively, you can also use Symfony installer to set up your project by following the instructions here. To proceed, access the terminal in your operating system and navigate to your development directory. Then run the following command to create a project named symfony-react-project.

composer create-project symfony/website-skeleton symfony-react-project

The preceding command will install the new Symfony application successfully on your computer.

Start the application

Start the application using the built-in Symfony PHP web server by changing directory into the newly created project. Run the following command to start the application:

// Change directory
$ cd symfony-react-project
// Start the server
$ php bin/console server:run

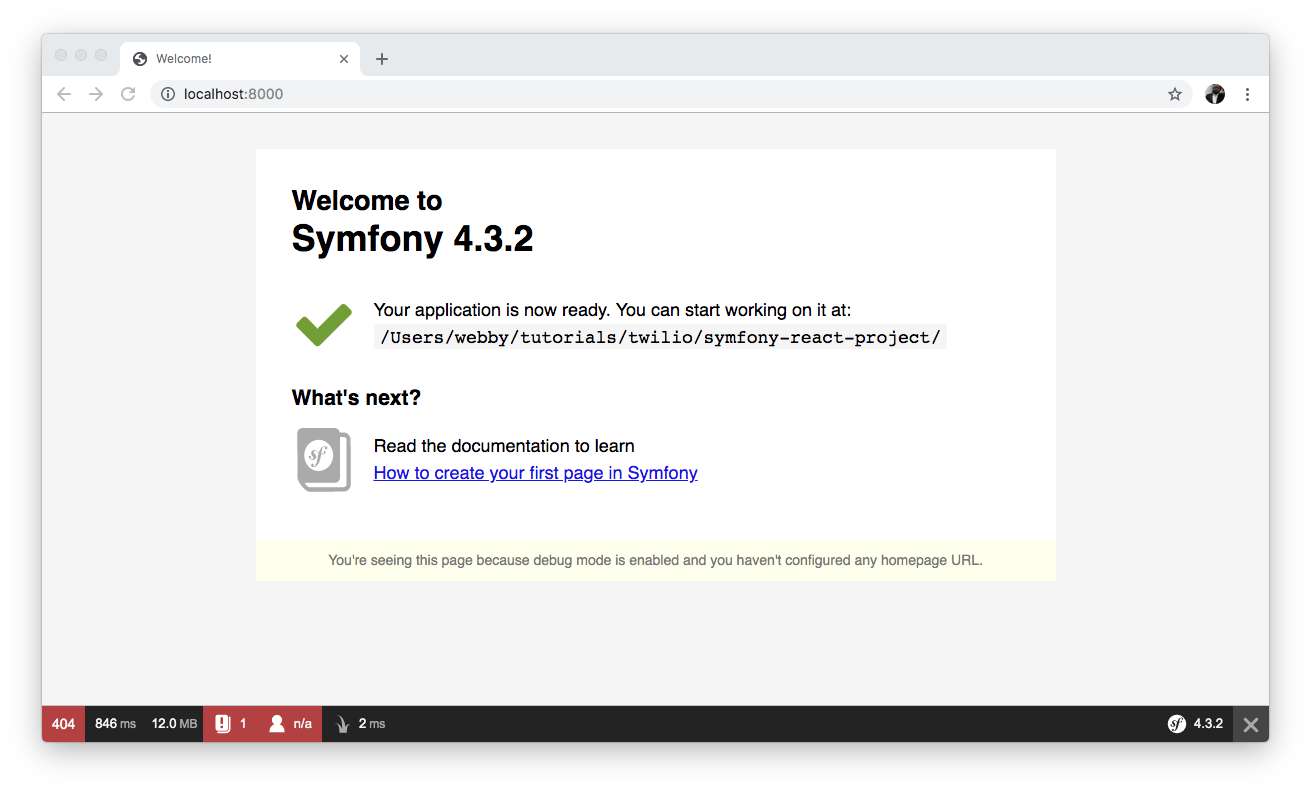
Open your browser and navigate to http://localhost:8000 to view the welcome page. The version displayed here is the current one for Symfony at the time of writing, which might not be the same as yours:

Symfony default homepage

Create a DefaultController

Now that we have a Symfony project installed, we need to generate a new controller to handle the rendering of content and also for building the backend API to fetch a list of users. Stop the development server from running using CTRL + C and run the following command afterward:

$ php bin/console make:controller DefaultController

This will create two new files for you; a controller located in src/Controller/DefaultController.php and a view page in templates/default/index.html.twig. Open the DefaultController.php file and replace its content with:

// ./src/Controller/DefaultController
    
<?php
    
namespace App\Controller;
    
use Symfony\Bundle\FrameworkBundle\Controller\AbstractController;
use Symfony\Component\HttpFoundation\Response;
use Symfony\Component\Routing\Annotation\Route;
    
class DefaultController extends AbstractController
{
    /**
     * @Route("/{reactRouting}", name="home", defaults={"reactRouting": null})
     */
    public function index()
    {
        return $this->render('default/index.html.twig');
    }
}

Controllers in Symfony handle all HTTP requests sent to an application and return the appropriate view or response. In this case, we have modified that behavior to include a different parameter {reactRouting} within the route annotation of the controller. With this annotation in place, all routes to the homepage will be handled by React.

Get the list of users

Still within the DefaultController, you will add another method to fetch the list of users. Add the getUsers() method below immediately after the index() method:

// ./src/Controller/DefaultController
    
<?php
 ...
class DefaultController extends AbstractController
{
    ...
    
    /**
     * @Route("/api/users", name="users")
     * @return \Symfony\Component\HttpFoundation\JsonResponse
     */
    public function getUsers()
    {
        $users = [
            [
                'id' => 1,
                'name' => 'Olususi Oluyemi',
                'description' => 'Lorem ipsum dolor sit amet, consectetur adipiscing elit, sed do eiusmod tempor incididunt ut labore et dolore magna aliqua. Ut enim ad minim veniam, quis nostrud exercitation',
                'imageURL' => 'https://randomuser.me/api/portraits/women/50.jpg'
            ],
            [
                'id' => 2,
                'name' => 'Camila Terry',
                'description' => 'Lorem ipsum dolor sit amet, consectetur adipiscing elit, sed do eiusmod tempor incididunt ut labore et dolore magna aliqua. Ut enim ad minim veniam, quis nostrud exercitation',
                'imageURL' => 'https://randomuser.me/api/portraits/men/42.jpg'
            ],
            [
                'id' => 3,
                'name' => 'Joel Williamson',
                'description' => 'Lorem ipsum dolor sit amet, consectetur adipiscing elit, sed do eiusmod tempor incididunt ut labore et dolore magna aliqua. Ut enim ad minim veniam, quis nostrud exercitation',
                'imageURL' => 'https://randomuser.me/api/portraits/women/67.jpg'
            ],
            [
                'id' => 4,
                'name' => 'Deann Payne',
                'description' => 'Lorem ipsum dolor sit amet, consectetur adipiscing elit, sed do eiusmod tempor incididunt ut labore et dolore magna aliqua. Ut enim ad minim veniam, quis nostrud exercitation',
                'imageURL' => 'https://randomuser.me/api/portraits/women/50.jpg'
            ],
            [
                'id' => 5,
                'name' => 'Donald Perkins',
                'description' => 'Lorem ipsum dolor sit amet, consectetur adipiscing elit, sed do eiusmod tempor incididunt ut labore et dolore magna aliqua. Ut enim ad minim veniam, quis nostrud exercitation',
                'imageURL' => 'https://randomuser.me/api/portraits/men/89.jpg'
            ]
        ];
    
        $response = new Response();

        $response->headers->set('Content-Type', 'application/json');
        $response->headers->set('Access-Control-Allow-Origin', '*');

        $response->setContent(json_encode($users));
        
        return $response;
    }
}

Here, the getUsers() method returned the list of users in JSON format. This response will make it very easy for our React application to consume and update the view with the returned data. Also, instead of using dummy data as displayed above, you can get the list of users from your application’s database and return a JSON response from your controller.

Next, open templates/default/index.html.twig and paste the following into it:

{# ./templates/default/index.html.twig #}
    
{% extends 'base.html.twig' %}
    
 {% block title %} Symfony React Project {% endblock %}
    
 {% block body %}
    
     <div id="root"></div>
    
 {% endblock %}


This template will render the React application within Symfony by binding the React app to the div with an id of root.

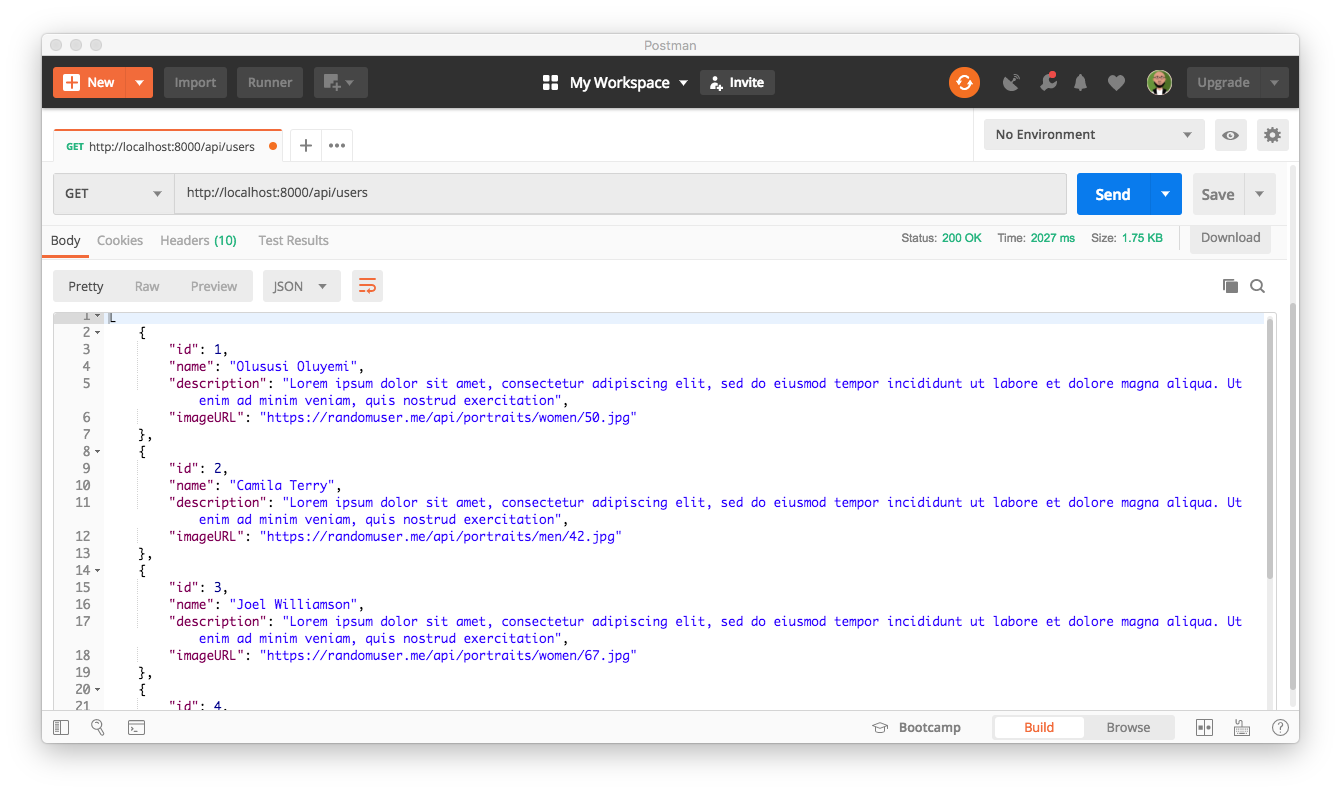
Next, you can test the backend API using Postman. Start the application again from the terminal using the development server by running php bin/console server:run. Next, try accessing the user list endpoint on http://localhost:8000/api/users. You will see the list of users as shown here:

Postman GET request for /api/users

At the moment, we have successfully set up the Symfony application. In the next section, we will start building the frontend with React.

Building the Frontend App with React

To successfully set up the React application, we will install Symfony Webpack Encore. To begin, open another terminal and run the following command to install Webpack Encore using Composer. Make sure you are still in the project directory.

$ composer require symfony/webpack-encore-bundle

followed by:

$ yarn install


The command above will create a webpack.config.js file, an assets folder and add node_modules folder to the .gitignore file.

Once the installation process is complete, use Yarn to install React, React-router, Axios and other dependencies.

$ yarn add @babel/preset-react --dev
$ yarn add react-router-dom
$ yarn add --dev react react-dom prop-types axios
$ yarn add @babel/plugin-proposal-class-properties @babel/plugin-transform-runtime

Configuring Webpack Encore

Next we will configure Webpack Encore by enabling React and also set up an entry point within the webpack.config.js file at the root of your project as shown here:

var Encore = require('@symfony/webpack-encore');
    
// It's useful when you use tools that rely on webpack.config.js file.
if (!Encore.isRuntimeEnvironmentConfigured()) {
    Encore.configureRuntimeEnvironment(process.env.NODE_ENV || 'dev');
}
    
Encore
    // directory where compiled assets will be stored
    .setOutputPath('public/build/')
    // public path used by the web server to access the output path
    .setPublicPath('/build')
    .enableReactPreset()
    // only needed for CDN's or sub-directory deploy
    //.setManifestKeyPrefix('build/')
    
    /*
     * ENTRY CONFIG
     *
     * Add 1 entry for each "page" of your app
     * (including one that's included on every page - e.g. "app")
     *
     * Each entry will result in one JavaScript file (e.g. app.js)
     * and one CSS file (e.g. app.css) if you JavaScript imports CSS.
     */
    .addEntry('app', './assets/js/app.js')
    
    // When enabled, Webpack "splits" your files into smaller pieces for greater optimization.
    .splitEntryChunks()
    
    // will require an extra script tag for runtime.js
    // but, you probably want this, unless you're building a single-page app
    .enableSingleRuntimeChunk()
    
    /*
     * FEATURE CONFIG
     *
     * Enable & configure other features below. For a full
     * list of features, see:
     * https://symfony.com/doc/current/frontend.html#adding-more-features
     */
    .cleanupOutputBeforeBuild()
    .enableBuildNotifications()
    .enableSourceMaps(!Encore.isProduction())
    // enables hashed filenames (e.g. app.abc123.css)
    .enableVersioning(Encore.isProduction())
    
    // enables @babel/preset-env polyfills
    .configureBabel(() => {}, {
        useBuiltIns: 'usage',
        corejs: 3
    })
;
    
module.exports = Encore.getWebpackConfig();

From the configuration above, Encore will load ./assets/js/app.js as the entry point of the application and use it to manage any JavaScript related files.

Building React components

React is well known in the tech community for giving JavaScript developers the ability to build reusable components for use within a project. This makes it easy to build modular, reusable code that enhances the structure of an application.

To begin, create a new folder within the assets/js directory and name its components. This components folder will house the following reusable components:

  • Home.js: This component will be the homepage for the application and be used to display the contents from the public route to users.
  • Posts.js: This component will handle the fetching of contents from the JSONPlaceholder public API
  • Users.js: This component will be used to fetch and display the users’ list from the backend API created within our Symfony project

Update the AppComponent

First, we will start with the entry point of the application by adding the necessary content to initialize React, and bind it to an HTML element with an id of root. To proceed, within the assets folder that was automatically generated earlier by Webpack Encore, locate the ./assets/js/app.js and replace its content with:

// ./src/js/app.js
    
import React from 'react';
import ReactDOM from 'react-dom';
import { BrowserRouter as Router } from 'react-router-dom';
import '../css/app.css';
import Home from './components/Home';
    
ReactDOM.render(<Router><Home /></Router>, document.getElementById('root'));

Add a stylesheet

To make the page more appealing, we will add some styles within ./assets/css/app.css. Open the file and paste the following in it:

// assets/css/app.css
    
.row-section{float:left; width:100%; background: #42275a;  /* fallback for old browsers */
}
.row-section h2{float:left; width:100%; color:#fff; margin-bottom:30px; font-size: 14px;}
.row-section h2 span{font-family: 'Libre Baskerville', serif; display:block; font-size:45px; text-transform:none; margin-bottom:20px; margin-top:30px;font-weight:700;}
.row-section h2 a{color:#d2abce;}
.row-section .row-block{background:#fff; padding:20px; margin-bottom:50px;}
.row-section .row-block ul{margin:0; padding:0;}
.row-section .row-block ul li{list-style:none; margin-bottom:20px;}
.row-section .row-block ul li:last-child{margin-bottom:0;}
.row-section .row-block ul li:hover{cursor:grabbing;}
.row-section .row-block .media{border:1px solid #d5dbdd; padding:5px 20px; border-radius: 5px; box-shadow:0px 2px 1px rgba(0,0,0,0.04); background:#fff;}
.row-section .media .media-left img{width:75px;}
.row-section .media .media-body p{padding: 0 15px; font-size:14px;}
.row-section .media .media-body h4 {color: #6b456a; font-size: 18px; font-weight: 600; margin-bottom: 0; padding-left: 14px; margin-top:12px;}
.btn-default{background:#6B456A; color:#fff; border-radius:30px; border:none; font-size:16px;}
.fa-spin {
    margin: 0 auto;}
body {
    background-color: lightgray;
}

The Home component

Now, create the HomeComponent by opening the ./assets/js/components/Home.js file created earlier, and add the following code:

// ./assets/js/components/Home.js
    
import React, {Component} from 'react';
import {Route, Switch,Redirect, Link, withRouter} from 'react-router-dom';
import Users from './Users';
import Posts from './Posts';
    
class Home extends Component {
    
    render() {
        return (
           <div>
               <nav className="navbar navbar-expand-lg navbar-dark bg-dark">
                   <Link className={"navbar-brand"} to={"/"}> Symfony React Project </Link>
                   <div className="collapse navbar-collapse" id="navbarText">
                       <ul className="navbar-nav mr-auto">
                           <li className="nav-item">
                               <Link className={"nav-link"} to={"/posts"}> Posts </Link>
                           </li>
    
                           <li className="nav-item">
                               <Link className={"nav-link"} to={"/users"}> Users </Link>
                           </li>
                       </ul>
                   </div>
               </nav>
               <Switch>
                   <Redirect exact from="/" to="/users" />
                   <Route path="/users" component={Users} />
                   <Route path="/posts" component={Posts} />
               </Switch>
           </div>
        )
    }
}
    
export default Home;

Here we imported the required modules (some of the files will be created later in this section) and within the render()method, included the navigation bar, and used React-Router to render the appropriate components.

The User Component

To fetch the list of users from the backend API created earlier, open ./assets/js/components/Users.js and paste the following code in it:

// ./assets/js/components/Users.js
    
import React, {Component} from 'react';
import axios from 'axios';
    
class Users extends Component {
    constructor() {
        super();
        this.state = { users: [], loading: true};
    }
    
    componentDidMount() {
        this.getUsers();
    }
    
    getUsers() {
       axios.get(`http://localhost:8000/api/users`).then(users => {
           this.setState({ users: users.data, loading: false})
       })
    }
    
    render() {
        const loading = this.state.loading;
        return(
            <div>
                <section className="row-section">
                    <div className="container">
                        <div className="row">
                            <h2 className="text-center"><span>List of users</span>Created with <i
                                className="fa fa-heart"></i> by yemiwebby</h2>
                        </div>
                        {loading ? (
                            <div className={'row text-center'}>
                                <span className="fa fa-spin fa-spinner fa-4x"></span>
                            </div>
                        ) : (
                            <div className={'row'}>
                                { this.state.users.map(user =>
                                    <div className="col-md-10 offset-md-1 row-block" key={user.id}>
                                        <ul id="sortable">
                                            <li>
                                                <div className="media">
                                                    <div className="media-left align-self-center">
                                                        <img className="rounded-circle"
                                                             src={user.imageURL}/>
                                                    </div>
                                                    <div className="media-body">
                                                        <h4>{user.name}</h4>
                                                        <p>{user.description}</p>
                                                    </div>
                                                    <div className="media-right align-self-center">
                                                        <a href="#" className="btn btn-default">Contact Now</a>
                                                    </div>
                                                </div>
                                            </li>
                                        </ul>
                                    </div>
                                )}
                            </div>
                        )}
                    </div>
                </section>
            </div>
        )
    }
}
export default Users;

From the component above, we created a method named getUsers() and used it to retrieve the list of users from the backend API, invoked this method immediately the component is mounted and loop through the list and update the view with it.

The Posts Component

Next, you will fetch the list of posts by using the following code within assets/js/components/Posts.js:

// ./assets/js/components/Posts.js
    
import React, {Component} from 'react';
import axios from 'axios';
    
    
class Posts extends Component {
    constructor() {
        super();
        
        this.state = { posts: [], loading: true}
    }
    
    componentDidMount() {
        this.getPosts();
    }
    
    getPosts() {
        axios.get(`https://jsonplaceholder.typicode.com/posts/`).then(res => {
            const posts = res.data.slice(0,15);
            this.setState({ posts, loading: false })
        })
    }
    
    render() {
        const loading = this.state.loading;
        return (
            <div>
                <section className="row-section">
                    <div className="container">
                        <div className="row">
                            <h2 className="text-center"><span>List of posts</span>Created with <i
                                className="fa fa-heart"></i> by yemiwebby </h2>
                        </div>
    
                        {loading ? (
                            <div className={'row text-center'}>
                                <span className="fa fa-spin fa-spinner fa-4x"></span>
                            </div>
    
                        ) : (
                            <div className={'row'}>
                                {this.state.posts.map(post =>
                                    <div className="col-md-10 offset-md-1 row-block" key={post.id}>
                                        <ul id="sortable">
                                            <li>
                                                <div className="media">
                                                    <div className="media-body">
                                                        <h4>{post.title}</h4>
                                                        <p>{post.body}</p>
                                                    </div>
                                                </div>
                                            </li>
                                        </ul>
                                    </div>
                                )}
                            </div>
                        )}
                    </div>
                </section>
            </div>
        )
    }
}
    
export default Posts;

Within this component, we created a method named getPosts() to retrieve the list of sample posts from the public API and looped through it to update the view with the list.

Update the Base Template

Navigate to templates/base.html.twig and update it with the following code:

// templates/base.html.twig
    
<!DOCTYPE html>
<html>
<head>
    <meta charset="UTF-8">
    <title>{% block title %}Welcome!{% endblock %}</title>
    {% block stylesheets %}
        {{ encore_entry_link_tags('app') }}
    {% endblock %}
    
    <link href="//maxcdn.bootstrapcdn.com/bootstrap/4.0.0/css/bootstrap.min.css" rel="stylesheet">
    <link href="https://fonts.googleapis.com/css?family=Libre+Baskerville:400,700">
    <link href="//netdna.bootstrapcdn.com/font-awesome/4.0.3/css/font-awesome.css" rel="stylesheet">
</head>
<body>
{% block body %}{% endblock %}
{% block javascripts %}
    {{ encore_entry_script_tags('app') }}
{% endblock %}
</body>
</html>

We included the CDN files for Bootstrap, Font Awesome and Google Fonts. Also we added the script encore_entry_script_tags() and link tag encore_entry_link_tags() thanks to Webpack Encore Bundle.

Running your React and Symfony App

Now, run the application and test its functionality. Before that, ensure that both the Symfony and React application are currently running from separate terminals within your project directory. In case you have closed it already use the command below to resume the Symfony application:

$ php bin/console server:run

And from the second terminal, run the following command to compile the React application and watch the JavaScript files for any changes:

$ yarn encore dev --watch

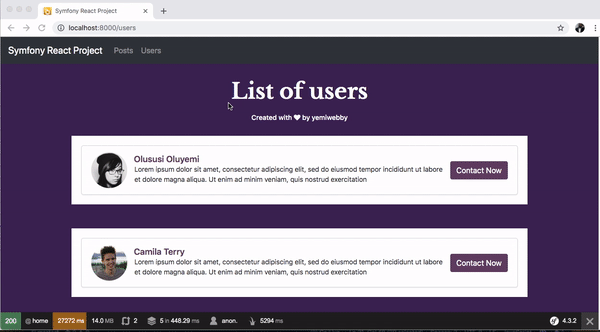
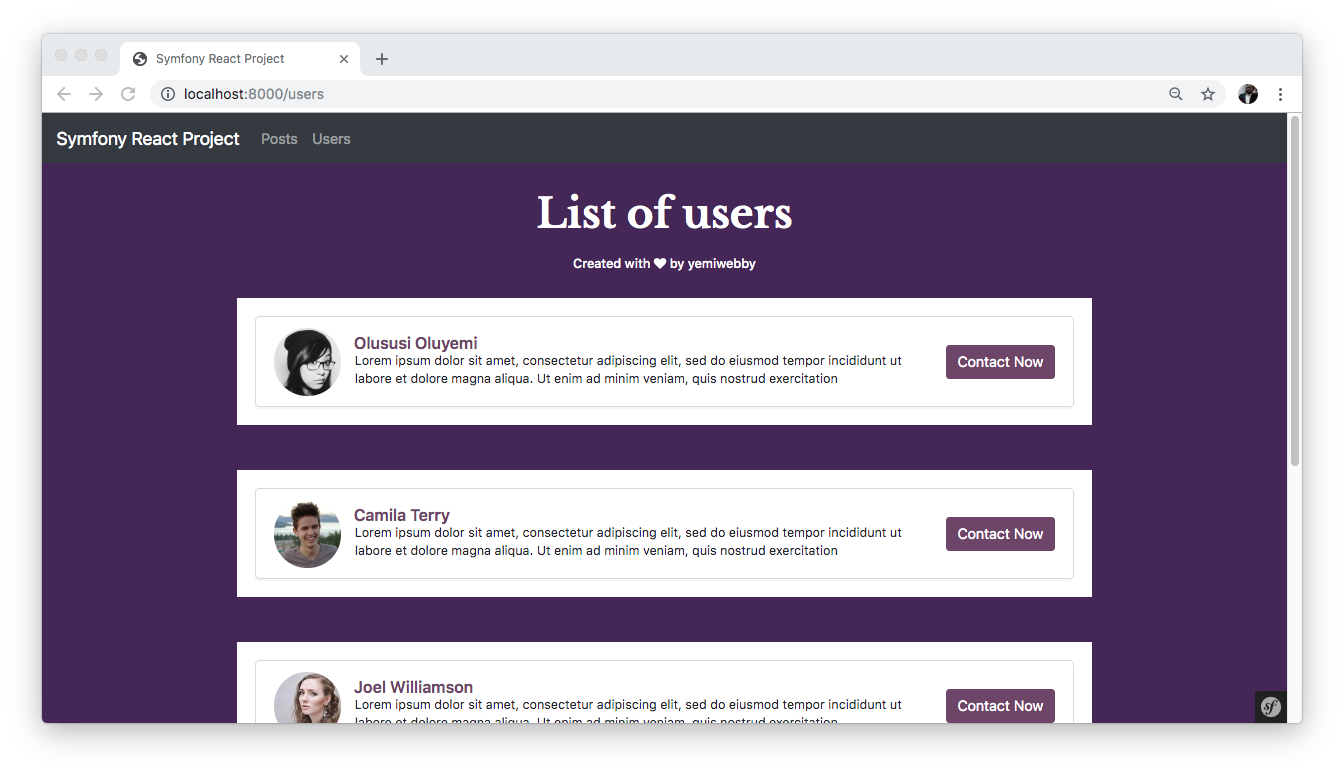
Navigate to http://localhost:8000 to view the list of users:

Homepage of our single page application listing users

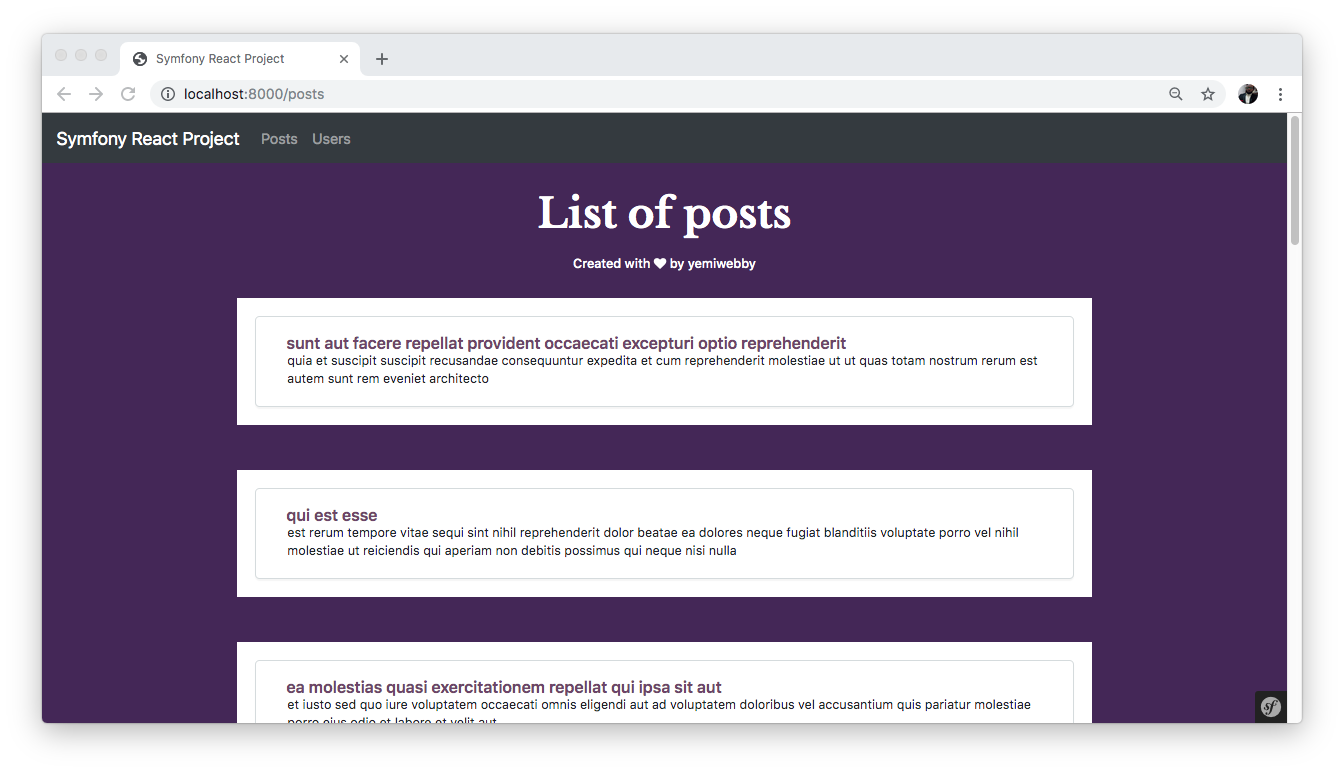
Next, click on Posts from the navigation bar to view the list of posts fetched from the JSONPlaceholder:

Homepage of our single page application listing posts

Conclusion

Being able to structure an application that makes Ajax call to fetch contents from a remote location is one of the beauties of Single Page Applications (SPA). It improves performance of an application and also helps to make navigation between different pages very easy.

In this tutorial, you have learned how to build a single page application, using Symfony as the backend and frontend logic powered by React. This gave you an exposure to how seamless it is to combine React and Symfony.

I hope you found this tutorial helpful. Feel free to go through the source code of this application on GitHub and add more features as you deem fit. Looking forward to hearing about what you will build using the knowledge gained from this tutorial.

Olususi Oluyemi is a tech enthusiast, programming freak and a web development junkie who loves to embrace new technology.


Twitter: https://twitter.com/yemiwebby 
GitHub: https://github.com/yemiwebby 
Website: https://yemiwebby.com.ng/