How to Create an SMS Portal With Laravel and Twilio

March 22, 2019
Written by
Brian Iyoha
Contributor
Opinions expressed by Twilio contributors are their own

xfZiGIwY7kMFumujtS99SsDUOzzE3HEluKNzI4Td5Ba7yorAqM9583sLeRzWPPuI2iDcAOjRAj2f0OZoGkCTjizc-ZoKWtWz98AHxpunO00UwgncR4v9XNn3bgJrLKPySdF2rbC0f2CuaGby8A

At some point in your application workflow, you may need to pass important information to your users. Thanks to the advancement in web technologies, this can easily be done with push notifications. However, most of these services require your users to have an internet connection and unfortunately, this isn’t always the case. Luckily, we can overcome this by using a notification system that does not rely on the internet.

In this tutorial, we will teach you how to use Twilio’s Programmable SMS to create an SMS notification portal using Laravel. After we’re finished, you would have developed a custom SMS notification portal that allows you to notify your users via a dashboard with SMS.

Prerequisites 

In order to follow this tutorial, you will need:

Setup Project

Firstly, we need to create a new Laravel project, either using the Laravel installer or Composer. We will be making use of the Laravel installer in this tutorial. If you don’t have it installed, you can check out how to do so from the Laravel documentation. To generate a fresh Laravel project, run this command in your terminal:

$ laravel new sms-portal

Now change your working directory to sms-portal and install the Twilio SDK via Composer:

$ cd sms-portal
$ composer require twilio/sdk 

If you don’t have composer installed on your PC you can do so by following the instructions here.

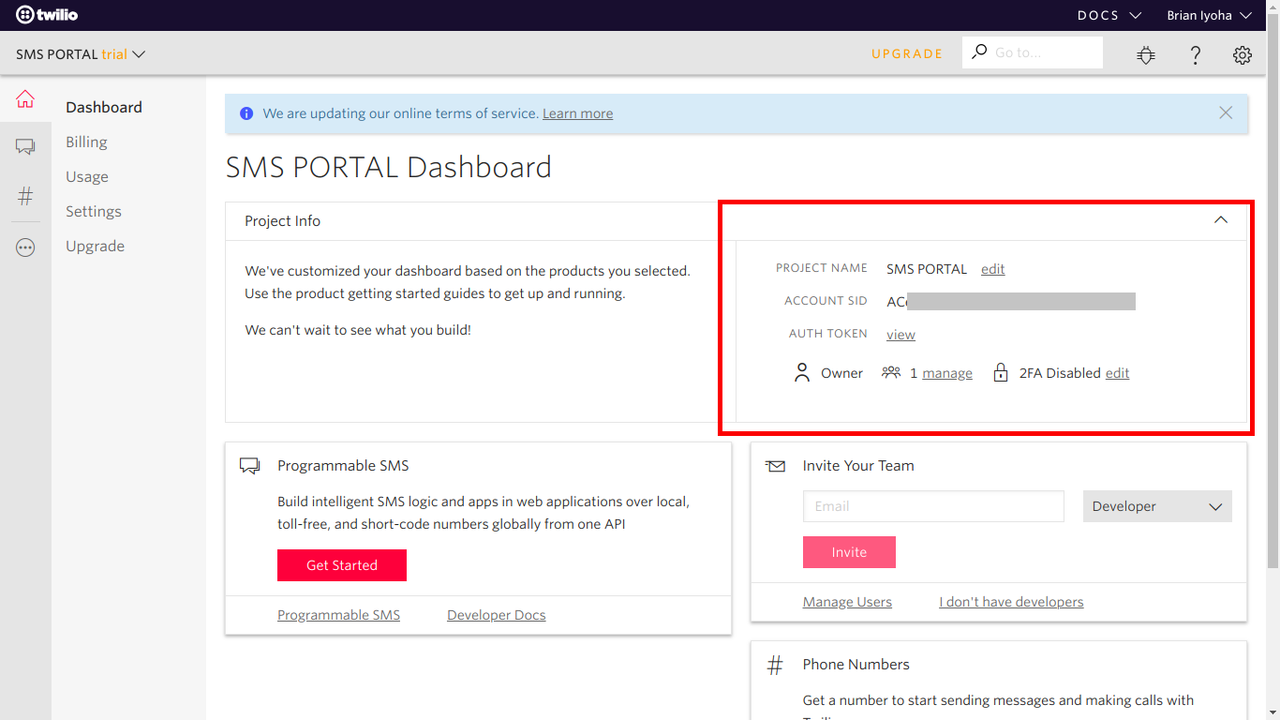
After installing the Twilio PHP SDK, we need to get our Twilio credentials from the Twilio dashboard. Head over to your dashboard and grab your account_sid and auth_token.

Twilio credentials screen shot

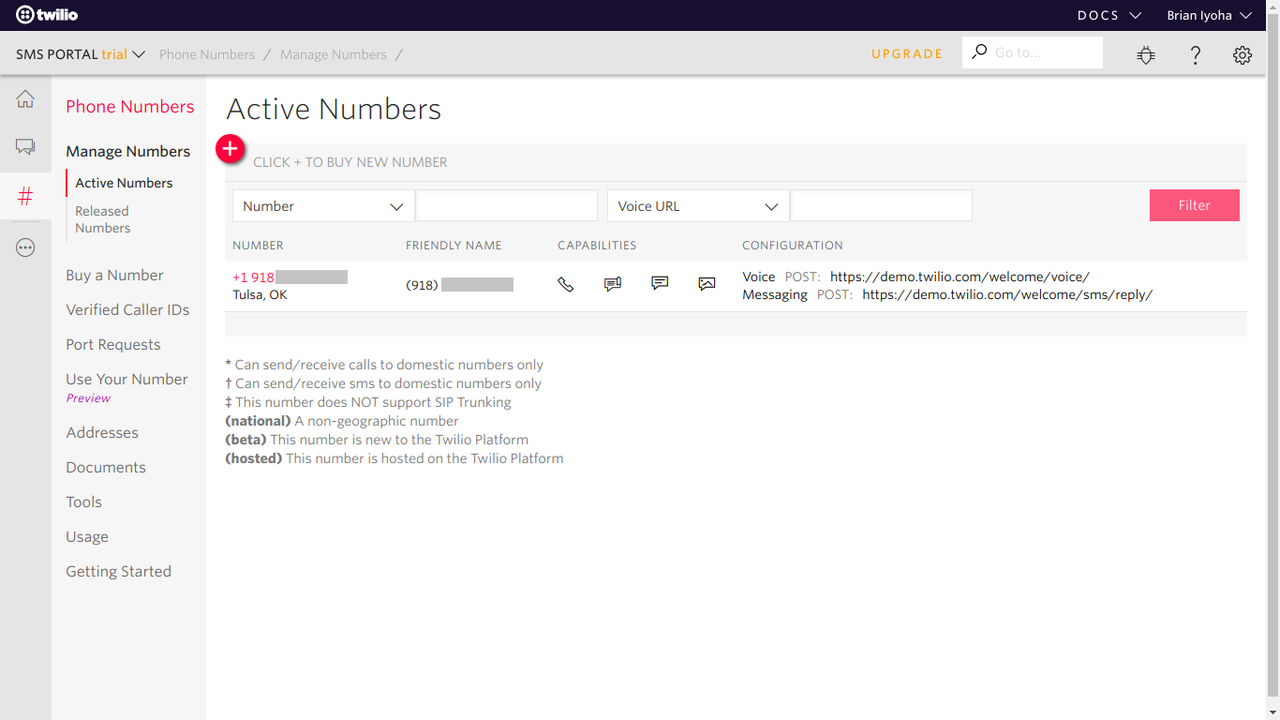
Now navigate to the Phone Number section to get your SMS enabled phone number.

Active number panel in Twilio

The next step is to update the .env file with our Twilio credentials. So open up .env located at the root of the project directory and add these values:

TWILIO_SID="INSERT YOUR TWILIO SID HERE"
TWILIO_AUTH_TOKEN="INSERT YOUR TWILIO TOKEN HERE"
TWILIO_NUMBER="INSERT YOUR TWILIO NUMBER IN [E.164] FORMAT"

Setup Database

Now that we have a basic Laravel project with the Twilio SDK installed, let’s create our database. If you use a GUI application like phpMyAdmin to manage your database then go ahead and create a database named sms_portal and skip this section. If you don’t have that,  an equivalent tool and don’t have MySQL installed, then install MySQL from the official site for your platform.

Fire up the terminal and run this command to log in to MySQL:

$ mysql -u {your_user_name}

NOTE: Add the -p flag if you have a password for your MySQL instance.

Once you are logged in, run the following command to create a new database:

mysql> create database sms_portal;
mysql> exit;

Let’s proceed to change our database configuration accordingly in the .env file at the root of our project folder.

DB_DATABASE=sms_portal
DB_USERNAME=root
DB_PASSWORD=

Create Migration

Since we have our database created, let’s create our database migration. We can simply do this by running this command in our terminal:

$ php artisan make:migration create_users_phone_number_table

This will generate a migration file {current_time_stamp}_create_users_phone_number_table in the /database/migrations directory.

Now, open up the project folder in your favorite IDE/text editor so we can begin making changes as needed. Open the migration file we just created. We should have the same content as this:

Creating a migration in the IDE

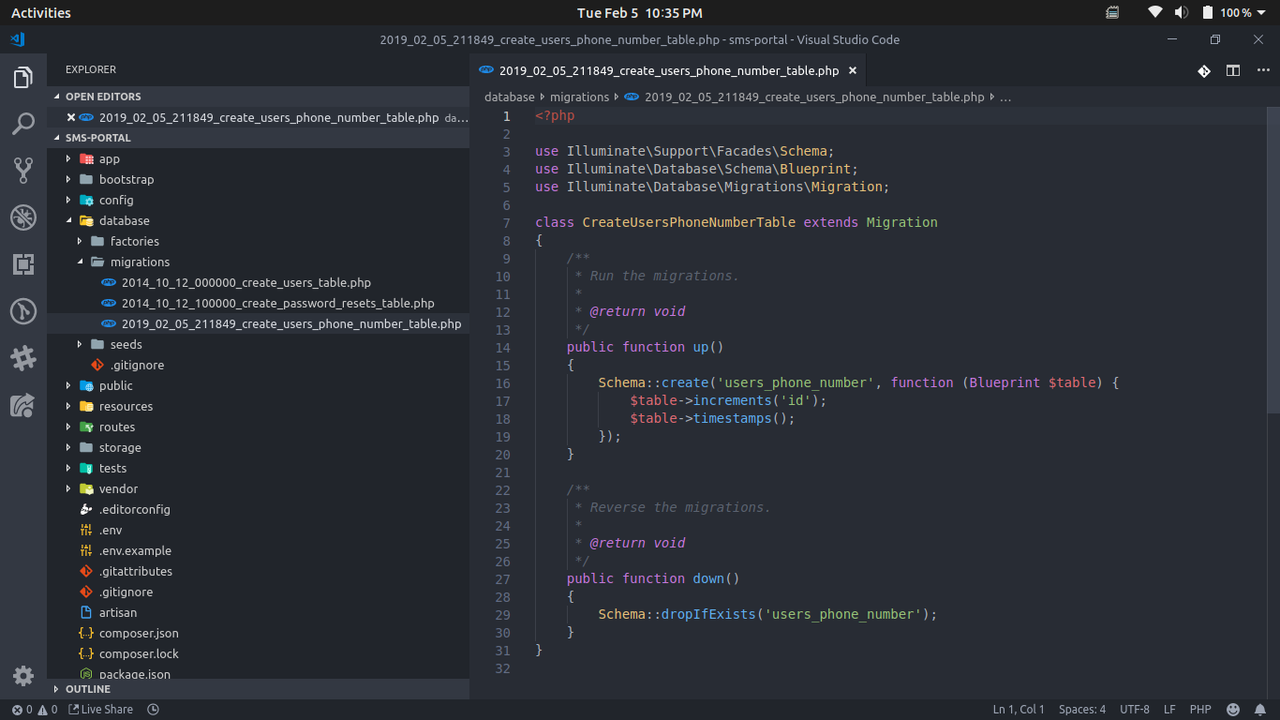
We need to add the phone_number column to our table. We can do that by editing the up() method as follows:

public function up() {
    Schema::create('users_phone_number', function (Blueprint $table) {
        $table->increments('id');
        $table->string('phone_number'); 
        $table->timestamps();
    });
}

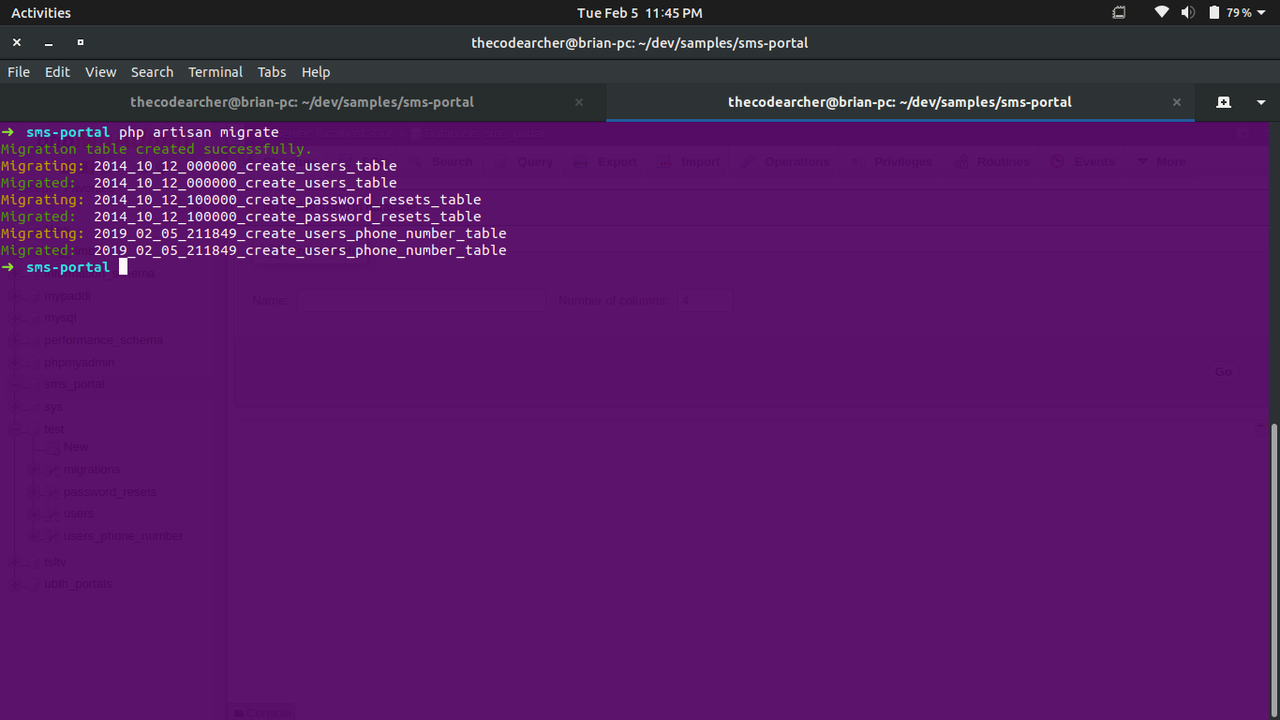
We now have our migration file ready to be migrated. We can simply do that by running the following in our terminal:

$ php artisan migrate

We should have an output similar to this:

Console output from artisan migrate

Creating the User Interface

At this point, we have our project setup. It’s time to build a simple user interface for adding data to our database and also for sending out SMS notifications.

Open up /resources/views/welcome.blade.php and make the following changes to the <head> block.

<head>
    <meta charset="utf-8">
    <meta name="viewport" content="width=device-width, initial-scale=1">
    <title>SMS Portal With Twilio</title>
    <!-- Bootstrap styles CDN -->
     <link href="https://stackpath.bootstrapcdn.com/bootstrap/4.2.1/css/bootstrap.min.css" rel="stylesheet" integrity="sha384-GJzZqFGwb1QTTN6wy59ffF1BuGJpLSa9DkKMp0DgiMDm4iYMj70gZWKYbI706tWS" crossorigin="anonymous">
</head>

We simply removed the initial styling in the page and added Bootstrap using BootstrapCDN to ease styling. Next, we are going to create two forms on the page. One for registering users phone number, and another to send out custom notification messages to selected users. Make the following changes to the body  block.

<body>
    <div class="container">
        <div class="jumbotron">
            <div class="row">
                <div class="col">
                    <div class="card">
                        <div class="card-header">
                            Add Phone Number
                        </div>
                        <div class="card-body">
                            <form>
                                <div class="form-group">
                                    <label>Enter Phone Number</label>
             <input type="tel" class="form-control" placeholder="Enter Phone Number">
                                </div>
                  <button type="submit" class="btn btn-primary">Register User</button>
                            </form>
                        </div>
                    </div>
                </div>
                <div class="col">
                    <div class="card">
                        <div class="card-header">
                            Send SMS message
                        </div>
                        <div class="card-body">
                            <form>
                                <div class="form-group">
                                    <label>Select users to notify</label>
                                    <select multiple class="form-control">
                                        @foreach ($users as $user)
                                        <option>{{$user->phone_number}}</option>
                                        @endforeach
                                    </select>
                                </div>
                                <div class="form-group">
                                    <label>Notification Message</label>
                                 <textarea class="form-control" rows="3"></textarea>
                                </div>
             <button type="submit" class="btn btn-primary">Send Notification</button>
                            </form>
                        </div>
                    </div>
                </div>
            </div>
        </div>
    </div>
</body>

If you take a closer look at the code above you will notice we have:

      <select multiple class="form-control">
            @foreach ($users as $user)
              <option>{{$user->phone_number}}</option>
           @endforeach
      </select>

This snippet helps generate an option field for each available user phone number returned with this view. We will be implementing this feature shortly.  

Storing Users Phone Number

Firstly, let’s create a model which we will use to query and also insert records to the database. Fire up your terminal on the project directory and run:

 $ php artisan make:model UsersPhoneNumber

Open up the created file at app/UsersPhoneNumber.php and add the following code:

<?php
namespace App;

use Illuminate\Database\Eloquent\Model;

class UsersPhoneNumber extends Model
{
   protected $table= "users_phone_number";
   protected $fillable = [
        'phone_number'
    ];
}

NOTE: Here are a couple of things to consider

  • Adding protected $table= "users_phone_number"; tells Eloquent the table name to make use of. If this is not provided, the plural name of the class will be used as the table name. 
  • Adding protected $fillabletells Eloquent to make the field mass assignable (Read more from the link above).

The next thing to do is create the controller where we will be implementing the logic needed for each request route. Once more, let’s fire up the terminal and run:

$ php artisan make:controller HomeController

This will generate a controller file at app/Http/Controllers/HomeController.php with the following content:

<?php
namespace App\Http\Controllers;

use Illuminate\Http\Request;

class HomeController extends Controller
{
    //
}

Creating the Save Phone Number Method

Let’s create a function that instantiates a new UsersPhoneNumber model with the data passed from the request body:

<?php

/**
 * Store a new user phone number.
 *
 * @param  Request  $request
 * @return Response
 */
public function storePhoneNumber(Request $request)
{
    //run validation on data sent in
    $validatedData = $request->validate([
        'phone_number' => 'required|unique:users_phone_number|numeric'
    ]);
    $user_phone_number_model = new UsersPhoneNumber($request->all());
    $user_phone_number_model->save();
    return back()->with(['success'=>"{$request->phone_number} registered"]);
}

From the above code, we are running validation on the data passed in from the $request body before proceeding to create a new instance of UsersPhoneNumber. After storing the user's phone number, we are taken back to the welcome page with a success message flashed to the session.

Returning View with Users Phone Numbers

Now we need to return the view with data of registered phone numbers. Let’s write a simple function in the HomeController that queries the users_phone_number table and returns the results from the query to the view:

<?php

/**
 * Show the forms with users phone number details.
 *
 * @return Response
 */
public function show()
{
    $users = UsersPhoneNumber::all(); //query db with model
    return view('welcome', compact("users")); //return view with data
}

NOTE: compact() is a PHP function that allows you to create an array with variable names and their values.

Sending Messages with Twilio Programmable SMS

Next step, we implement the sending of SMS using Twilio’s Programmable SMS library. Create a private function in the HomeController to serve as a helper function for sending messages:

<?php

/**
 * Sends sms to user using Twilio's programmable sms client
 * @param String $message Body of sms
 * @param Number $recipients string or array of phone number of recepient
 */
private function sendMessage($message, $recipients)
{
    $account_sid = getenv("TWILIO_SID");
    $auth_token = getenv("TWILIO_AUTH_TOKEN");
    $twilio_number = getenv("TWILIO_NUMBER");
    $client = new Client($account_sid, $auth_token);
    $client->messages->create($recipients, 
            ['from' => $twilio_number, 'body' => $message] );
}

The function receives two parameters of $message and $recipients. We then get our stored Twilio credentials from the environment variables using the built-in PHP getenv() function, after which we instantiate a new Twilio client with the credentials. We can now proceed to send the SMS by calling:

$client->messages->create($recipients, [
    'from' => $twilio_number, 
    'body' => $message
]);

The Twilio messages->create() function takes in two parameters of a receiver of the message and an array with the properties of from and body where from is your active Twilio phone number.

Send User Notification When Registered

So far, we have completed our sendMessage() function which we will use to send messages to users. Now let’s update our storePhoneNumber() function to notify users when they get successfully registered. To do this, make the following changes to the storePhoneNumber() function:

<?php

/**
 * Store a new user phone number.
 *
 * @param  Request  $request
 * @return Response
 */
public function storePhoneNumber(Request $request)
{
    //run validation on data sent in
    $validatedData = $request->validate([
        'phone_number' => 'required|unique:users_phone_number|numeric',
    ]);
    $user_phone_number_model = new UsersPhoneNumber($request->all());
    $user_phone_number_model->save();
    $this->sendMessage('User registration successful!!', $request->phone_number);
    return back()->with(['success' => "{$request->phone_number} registered"]);
}

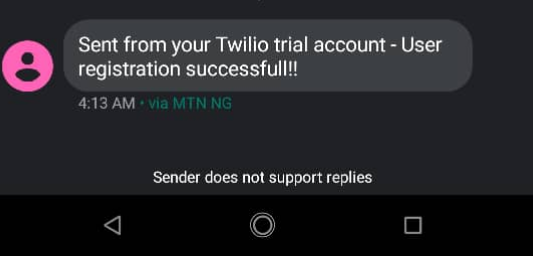
Great! Now whenever a user’s phone number is added to our database, we can send the user a notification message alerting them about the action which was carried out.

Sending Custom Notifications

Next, let’s write a function to send out custom messages to selected users. Add the following code to the HomeController:

<?php 

/**
 * Send message to a selected users
 */
public function sendCustomMessage(Request $request)
{
    $validatedData = $request->validate([
        'users' => 'required|array',
        'body' => 'required',
    ]);
    $recipients = $validatedData["users"];
    // iterate over the array of recipients and send a twilio request for each
    foreach ($recipients as $recipient) {
        $this->sendMessage($validatedData["body"], $recipient);
    }
    return back()->with(['success' => "Messages on their way!"]);
}

This function passes the validated data from the $request body into the $validatedData variable, allowing us to iterate over the array of $validatedData[users] and send each user the message received from $validatedData["body"]. After which, we redirect back to the welcome page with a message flashed to the session.

Creating Routes

We have successfully created our controller functions. Now let’s add our routes to the application. Open routes/web.php and make the following changes:

<?php
Route::get('/', 'HomeController@show');
Route::post('/', 'HomeController@storePhoneNumber');
Route::post('/custom', 'HomeController@sendCustomMessage');

Updating Form Field With Routes

Now head over to resources/views/welcome.blade.php and make the following changes to the forms field:

//add the method attribute to the Register User form
// also add the name attributes to the input field 
<form method="POST">
    @csrf
    <div class="form-group">
        <label>Enter Phone Number</label>
        <input type="tel" class="form-control" name="phone_number" placeholder="Enter Phone Number">
    </div>
    <button type="submit" class="btn btn-primary">Register User</button>  
</form>

and

//add the method and action attributes to the Send custom message form
// also add the name attributes to the input fields 
<form method="POST" action="/custom">
    @csrf
    <div class="form-group">
        <label>Select users to notify</label>
        <select name="users[]" multiple class="form-control">
            @foreach ($users as $user)
            <option>{{$user->phone_number}}</option>
            @endforeach
        </select>
    </div>
    <div class="form-group">
        <label>Notification Message</label>
        <textarea name="body" class="form-control" rows="3"></textarea>
    </div>
    <button type="submit" class="btn btn-primary">Send Notification</button>
</form>

Testing Our Code

Let’s bring all the code we have done so far together. At this point, your HomeController.php should look like this:

<?php
namespace App\Http\Controllers;

use App\UsersPhoneNumber;
use Illuminate\Http\Request;
use Twilio\Rest\Client;

class HomeController extends Controller
{
    /**
     * Show the forms with users phone number details.
     *
     * @return Response
     */
    public function show()
    {
        $users = UsersPhoneNumber::all();
        return view('welcome', compact("users"));
    }
    /**
     * Store a new user phone number.
     *
     * @param  Request  $request
     * @return Response
     */
    public function storePhoneNumber(Request $request)
    {
        //run validation on data sent in
        $validatedData = $request->validate([
            'phone_number' => 'required|unique:users_phone_number|numeric',
        ]);
        $user_phone_number_model = new UsersPhoneNumber($request->all());
        $user_phone_number_model->save();
        $this->sendMessage('User registration successful!!', $request->phone_number);
        return back()->with(['success' => "{$request->phone_number} registered"]);
    }
    /**
     * Send message to a selected users
     */
    public function sendCustomMessage(Request $request)
    {
        $validatedData = $request->validate([
            'users' => 'required|array',
            'body' => 'required',
        ]);
        $recipients = $validatedData["users"];
        // iterate over the array of recipients and send a twilio request for each
        foreach ($recipients as $recipient) {
            $this->sendMessage($validatedData["body"], $recipient);
        }
        return back()->with(['success' => "Messages on their way!"]);
    }
    /**
     * Sends sms to user using Twilio's programmable sms client
     * @param String $message Body of sms
     * @param Number $recipients Number of recipient
     */
    private function sendMessage($message, $recipients)
    {
        $account_sid = getenv("TWILIO_SID");
        $auth_token = getenv("TWILIO_AUTH_TOKEN");
        $twilio_number = getenv("TWILIO_NUMBER");
        $client = new Client($account_sid, $auth_token);
        $client->messages->create($recipients, ['from' => $twilio_number, 'body' => $message]);
    }
}

and for our view, your welcome.blade.php should look like this:

<!doctype html>
<html lang="{{ str_replace('_', '-', app()->getLocale()) }}">
<head>
    <meta charset="utf-8">
    <meta name="viewport" content="width=device-width, initial-scale=1">
    <title>SMS Portal With Twilio</title>
    <!-- Styles -->
    <link href="https://stackpath.bootstrapcdn.com/bootstrap/4.2.1/css/bootstrap.min.css" rel="stylesheet" integrity="sha384-GJzZqFGwb1QTTN6wy59ffF1BuGJpLSa9DkKMp0DgiMDm4iYMj70gZWKYbI706tWS"
        crossorigin="anonymous">
</head>
<body>
    <div class="container">
        <div class="jumbotron">
            @if (session('success'))
            <div class="alert alert-success">
                {{ session('success') }}
            </div>
            @endif
            @if ($errors->any())
            <div class="alert alert-danger">
                <ul>
                    @foreach ($errors->all() as $error)
                    <li>{{ $error }}</li>
                    @endforeach
                </ul>
            </div>
            @endif
            <div class="row">
                <div class="col">
                    <div class="card">
                        <div class="card-header">
                            Add Phone Number
                        </div>
                        <div class="card-body">
                            <form method="POST">
                                @csrf
                                <div class="form-group">
                                    <label>Enter Phone Number</label>
                                    <input type="tel" class="form-control" name="phone_number" placeholder="Enter Phone Number">
                                </div>
                                <button type="submit" class="btn btn-primary">Register User</button>
                            </form>
                        </div>
                    </div>
                </div>
                <div class="col">
                    <div class="card">
                        <div class="card-header">
                            Send SMS message
                        </div>
                        <div class="card-body">
                            <form method="POST" action="/custom">
                                @csrf
                                <div class="form-group">
                                    <label>Select users to notify</label>
                                    <select name="users[]" multiple class="form-control">
                                        @foreach ($users as $user)
                                        <option>{{$user->phone_number}}</option>
                                        @endforeach
                                    </select>
                                </div>
                                <div class="form-group">
                                    <label>Notification Message</label>
                                    <textarea name="body" class="form-control" rows="3"></textarea>
                                </div>
                                <button type="submit" class="btn btn-primary">Send Notification</button>
                            </form>
                        </div>
                    </div>
                </div>
            </div>
        </div>
    </div>
</body>
</html>

If your code is the same you are ready to proceed. If not, double check your code to find out what’s missing.

Running Our Application

Open up your terminal and navigate to the project directory and run the following command:

$ php artisan serve

This will serve your Laravel application on a localhost port, normally 8000. Open up the localhost link printed out after running the command in your browser and you should be greeted with a page like this:

Laravel app running on localhost

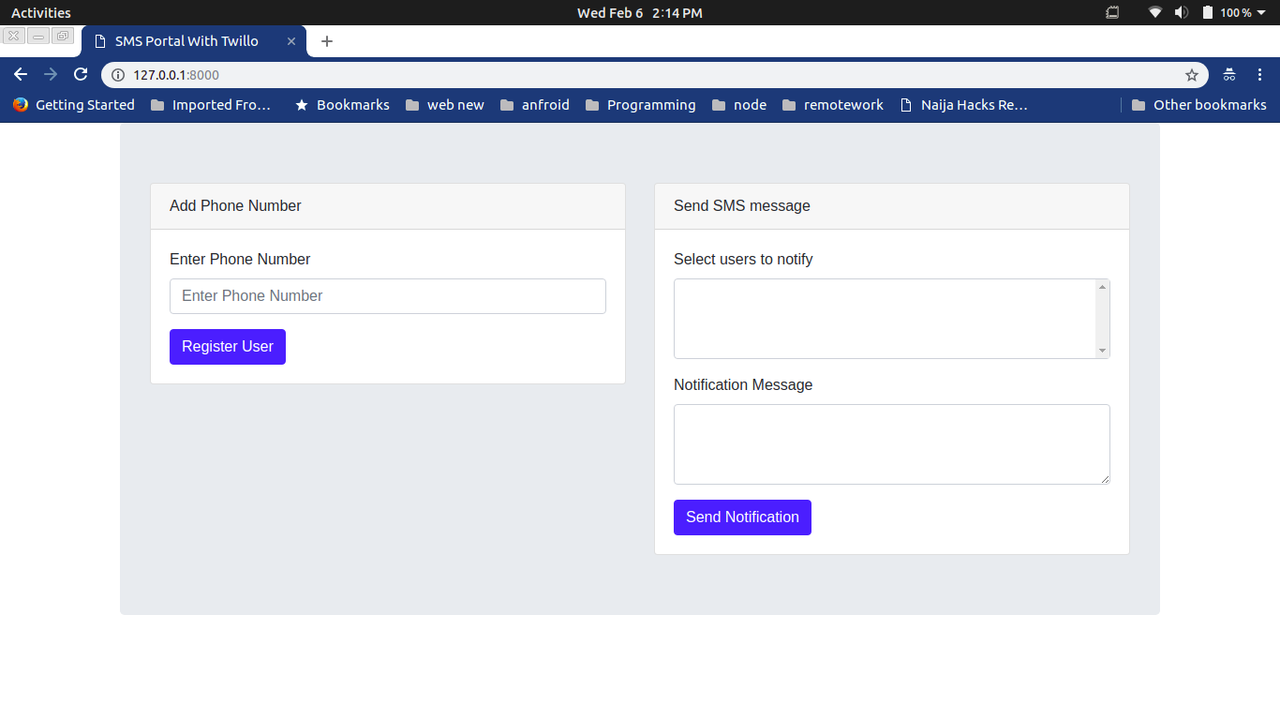
Go ahead and register a new phone number. If everything goes well, you should receive an SMS shortly notifying you about your registration.

Example text message from Twilio trial account

 You can also test out sending custom notifications by selecting a user from the select field and enter the text to be sent to the selected user(s) in the textarea. When done, click on the send notification button and you should receive an SMS with the custom notification message.

Custom notifications

Conclusion

Now that you have completed this tutorial, you should be able to integrate the Twilio programmable SMS into your Laravel application and send notification messages via SMS. If you will like to take a look at the complete source code for this tutorial, you can find it on Github

You can take this further by allowing your users to take actions from SMS notifications sent to them. 

I’d love to answer any question(s) you might have concerning this tutorial. You can reach me via: