Create a Video Conference App using Laravel, PHP, and Vue.js
Time to read: 6 minutes
April 14, 2020
Written by

During times where we can’t be together physically, video conferencing helps reinforce and establish relationships by allowing us to monitor visual cues sometimes lost over the phone. Conference calls are great, but studies show that when we can’t see who’s talking, we’re more likely to get distracted by our favorite apps. Not only is video conferencing an excellent way to increase focus during meetings, but it’s also a great method for keeping in touch with family and friends during the coronavirus pandemic.
In this tutorial you will learn how to create your own video conferencing app in Vue.js, using the Laravel framework and Twilio Programmable Video. There is no software to download, nor tutorials to follow. The final result is a link to a mobile-friendly video chat room, capable of hosting up to 50 participants.
NOTE: This tutorial is written specifically for Laravel 7+ (although it may work for previous versions).
Technical Overview and Prerequisites
When your application loads in the browser, a unique identifier is generated for the user to authenticate their connection to the chat room. Once verified by Twilio’s servers, the user will be added to the existing chat room.
Our project will use Vue.js and Laravel to generate the front and backend respectively.
In order to get started, you will need the following requirements set up and ready to go:
- Composer globally installed
- Laravel installer
- A Twilio account (this link will give you $10 in Twilio spend when you upgrade)
Let’s get started by creating a new Laravel project.
Create a new Laravel project
In order to create the base application, open the folder where you normally store your projects and run the following command:
Add the Twilio PHP SDK to the Project
We’ll need an easy method to connect to the Twilio Video API so that chat rooms and tokens can be created and authenticated for the users. Luckily, this method has already been created for us in the Twilio PHP SDK. Let’s add it as a requirement of our project using Composer.
Create an API Endpoint to Generate Tokens
Creating APIs in Laravel is a pretty seamless process. As a modern web application framework, Laravel provides the necessary scaffolding to create the controller and route needed to generate tokens on the server-side.
Create a New Controller to Generate Access Tokens
A controller, or class that defines application logic, will need to be created to generate all user access tokens via the Twilio Video API. To begin, run the artisan command in your terminal for creating new controllers:
This command created a new file for us at app/Http/Controllers/API/AccessTokenController.php.
Open the newly created controller and take a moment to inspect it. You’ll notice that right now it’s empty. Outside of a couple of namespace declarations, the artisan command has generated an empty class.
We’re now ready to add a couple of namespaces to the controller that will autoload the Twilio SDK for use. Add the following lines of code beneath the use Illuminate\Http\Request; namespace.
The preceding declarations give us the support needed to actually connect to the Twilio Video API and generate an access token. Now, you need to create a method to utilize the classes declared.
Add the following generate_token method below to the AccessTokenController class:
You’ll notice the first three lines of our method search for environment variables to define our Twilio credentials. These lines reference three variables that we haven’t defined in our dotenv .env file yet. Let’s open the Twilio console to access them.
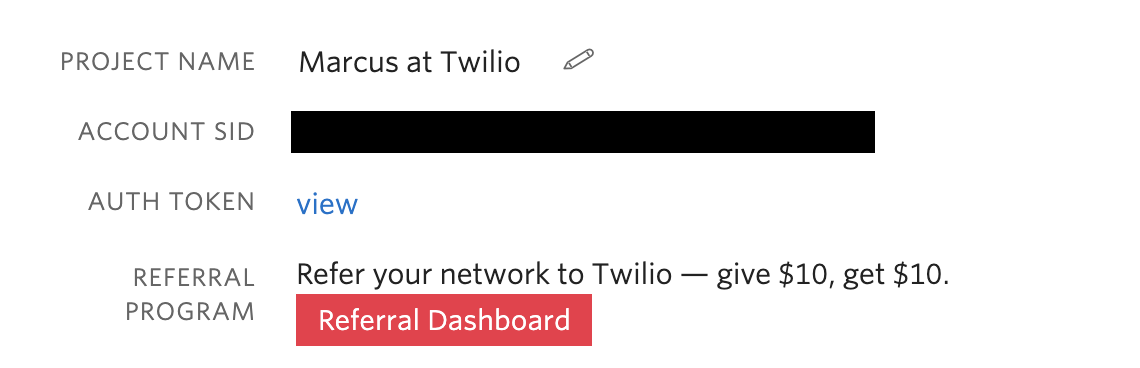
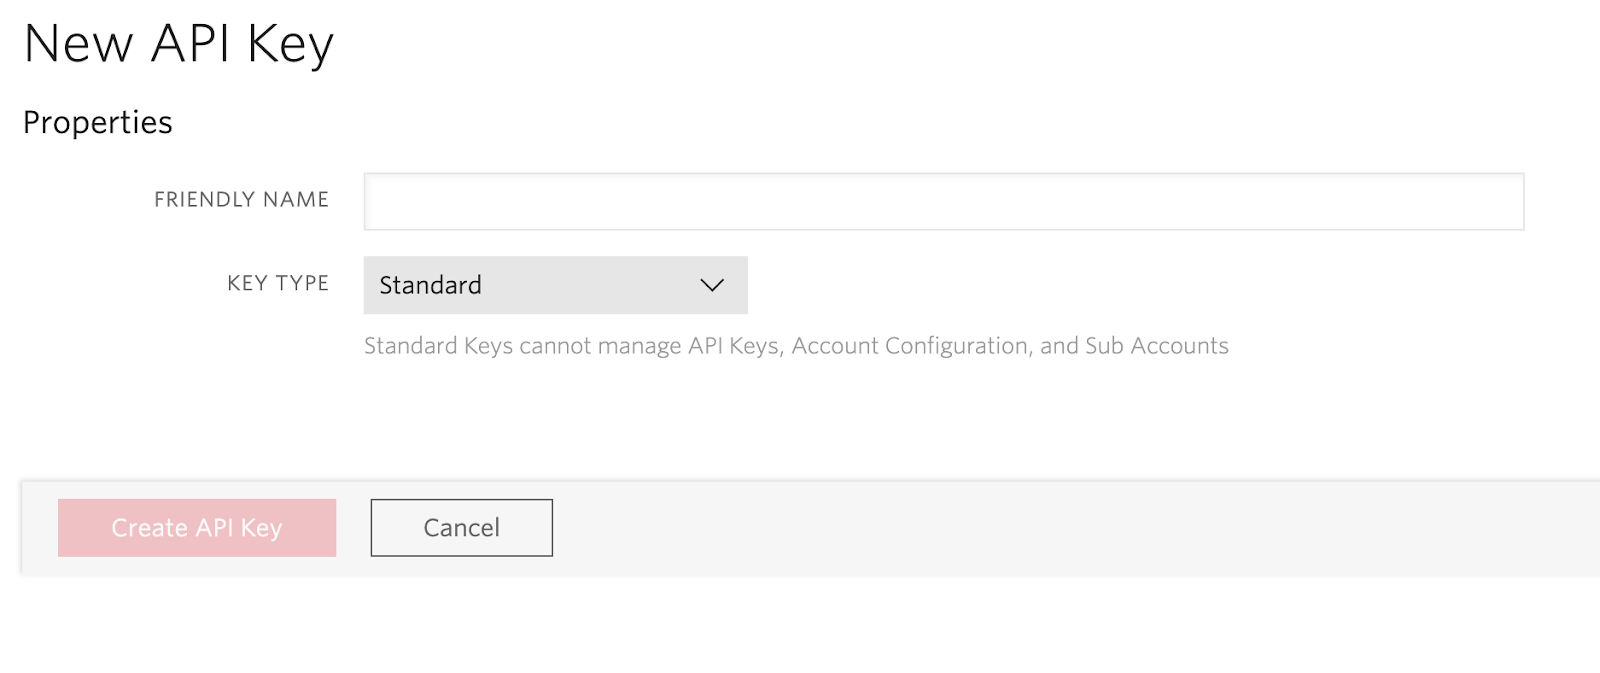
You’ll need to copy the Account SID from your account dashboard. An API Key and API Secret will need to be created from your API Keys list.
All three of these values will need to be copied to the .env file located in the project directory as follows:
The last step in generating an access token is to create a route (or API endpoint) that connects to our AccessTokenController. This route will provide a publicly accessible endpoint to the application logic we previously created.
Open routes/api.php and add the following declaration:
This line of code registers the endpoint http://127.0.0.1:8000/api/access_token and responds to the GET verb.
To test our work thus far, run the following artisan command in your terminal:
The serve command will load the PHP web server and deploy our Laravel application locally.
Install Laravel UI and Vue Packages
Because the back-end functionality is complete for our application, we are ready to scaffold the front end. As of version 6, Laravel has decoupled the JavaScript and CSS scaffolding from the application logic, so we will need to add it back using the new Laravel UI package. Once installed, it will open up our application to easily use any popular styling or scripting framework to modify the user interface and experience.
Run the following command in your terminal:
Now that the base package has been installed, we are ready to install the Vue.js front-end scaffolding. To install, run the following:
Followed by:
In order to see what we’ve done and test that Vue is loaded and working, we need to update the Laravel blade responsible for displaying the homepage at resources/views/welcome.blade.php. Open the file and replace its contents with the following:
NOTE: Because our HTML has been modified, it needs to be compiled in order to see the changes. To see your changes run npm run dev again or npm run watch for live reloading.
This HTML will load the app.js file, which is responsible for transforming the #app div into the stage of our Vue.js UI. By default, the Laravel UI package installs an ExampleComponent which is seen on the line reading <example-component></example-component>. This sample Vue component simply displays some HTML rendered as:
If you see this in your browser, then everything is working as expected!
Create a New Vue.js Component
Let’s create a new Vue component VideoChat.vue in the resources/js/components folder that will house our video chat room logic. This component will be responsible for connecting to the endpoint we created earlier and rendering the chat window.
After the component has been created, add the following code:
This component will just display the title “Laravel Video Chat”. Vue.js doesn’t recognize it yet so we will need to update the welcome.blade.php blade again to display our component.
Replace the <example-component></example-component> line in resources/views/welcome.blade.php with <video-chat></video-chat>.
Lastly, open resources/js/app.js and add the following line of code underneath the ExampleComponent to globally define our new component:
Connect the VideoChat Component to the Route
Before we make an AJAX request to our access token endpoint, the Twilio Programmable Video JavaScript SDK needs to be installed. This SDK, written in JavaScript, is responsible for managing all of the API requests for Twilio Programmable Video.
In your terminal, install the Twilio Programmable Video JavaScript SDK by running the following command:
Now that the SDK is installed, we can add the getAccessToken() method to connect to our endpoint.
Replace the code in VideoChat.vue with the following:
The code above defines an empty variable accessToken and assigns it an empty string. Once the component is mounted, getAccessToken() is called to request a new access token from http://127.0.0.1:8000/api/access_token. Upon a successful response, the data is assigned to accessToken.
We’re now ready to add the code which will connect us to the room we defined in our controller earlier and display a live feed from our local device.
Add the following code to the list of available methods after the getAccessToken method:
The connectToRoom method takes the accessToken we initialized in getAccessToken and creates a local video track upon successful authentication. You’ll notice that there’s also a placeholder for when a participant connects to the chat room. We’ll add that logic shortly.
For now, let’s call this method from the final then promise in getAccessToken as follows:
Finally, we’re ready to add the logic to display the other participants in the video chat. Replace the room.on('participantConnected', participant => { code with the following:
This function will listen for any new connections from remote participants, and upon connection, add them to the gallery of chat windows.
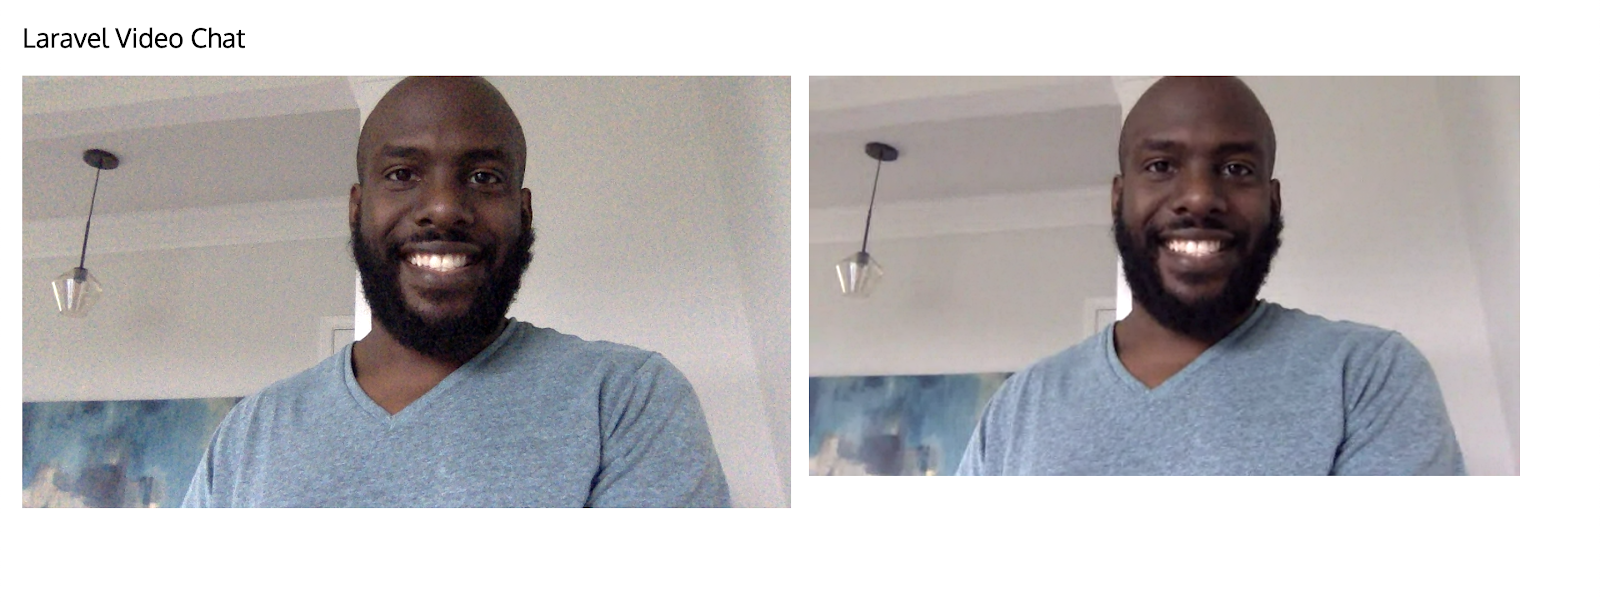
Testing
In case you haven’t done so in a while, you’ll need to re-compile the code for Vue to detect the changes we’ve made. Run npm run dev, make sure you’re running php artisan serve in a separate terminal, and refresh your browser.
Using two windows or browsers, load http://127.0.0.1:8000/ and wait for your participants to connect.
Conclusion
This tutorial has not only taught us how to implement Twilio’s Programmable Video, but it also helped us to develop a starter Video Chat application. If you’re interested in extending this code further, you could:
- Display the number of participants
- Hide the chat room behind a secure portal/wall
- Add a text-chat feature
With all of the world turning towards remote work and video-conferencing, there’s no better time than now to have your own custom implementation. I can’t wait to see what you build!
Marcus Battle is Twilio’s PHP Developer of Technical Content where he prompts and rallies PHP developers to build the future of communications. You can download the full repo from Github or contact him for any questions regarding this tutorial at:
- Email: mbattle@twilio.com
- Twitter: @themarcusbattle
- Github: https://github.com/themarcusbattle

Related Resources
Twilio Docs
From APIs to SDKs to sample apps
API reference documentation, SDKs, helper libraries, quickstarts, and tutorials for your language and platform.
Resource Center
The latest ebooks, industry reports, and webinars
Learn from customer engagement experts to improve your own communication.
Ahoy
Twilio's developer community hub
Best practices, code samples, and inspiration to build communications and digital engagement experiences.