How to Make a Cute Virtual Mirror Using Twilio Video, JavaScript, HTML, and CSS
Time to read:
November 29, 2020
Written by
Reviewed by

I miss using the Purikura machines with my friends in the Japanese inspired arcades because not only were they super fun, but there were a ton of cute and colorful digital stickers that I could throw onto a picture of my friends and I. As someone who loves cute anime characters and pixelated art, I wish all of my selfies or professional video chats could be as cute as the pictures on a Purikura machine.
Then I realized - I know how to code, so making a pretty overlay for a video IS possible!
In this article, we'll use Twilio Video's JavaScript SDK to give us a video that we can "draw" over with HTML and CSS. This is an introduction to an app that you can expand on to empower yourself and your friends from home - kind of like a cute mirror you never had!
Tutorial Requirements
- A free or paid Twilio account. If you are new to Twilio get your free account now! (If you sign up through this link, Twilio will give you $10 credit when you upgrade.)
- Some prior knowledge in JavaScript, HTML, and CSS or a willingness to learn.
- Internet browser with recent versions of Chrome, Firefox, or Safari 11 and above.
Set up Twilio Video JS SDK to the HTML webpage
In this article, we will not be building a whole video chat application so remember that if you want to expand on the project, you'll have to build out a back end so that people can use this publicly over the web. We will only be focusing on making the video window prettier!
Create a project directory called cutemirror. If you are using a Unix or Mac OS system, open a terminal and enter the following commands to do the tasks described above:
For those of you following the tutorial on Windows, enter the following commands in a command prompt window:
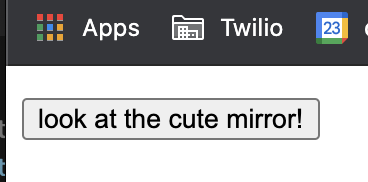
Create a file named index.html so that we can render the Twilio Video JS SDK from a CDN. In this file, we will create a button that a user will click to activate the digital mirror, or camera inside of the video_container to see the cute decorations around them.
Open index.html and paste the following code below:
Open up the project directory and double click on index.html so that the file opens up a sample web page of what the HTML looks like so far. You'll see that it's just a plain button on the top of the web page that doesn't work yet.
Notice that the code mentions a styles.css file as well as a script.js file. We'll need to write code into these files so that we can press a nicer looking button.
Activate the camera for Twilio Video
Create a file named script.js inside of the project directory and paste the following code below. This file is important because not only does it allow the button to be clicked on, but it asks the users for their permission to activate the camera.
JavaScript magic makes the button clickable now. Once the user clicks the "look at the cute mirror!" button, the createLocalVideoTrack gets permission to use the camera and attach a video container to the DOM. The button will disappear as well.
Refresh the index.html page on your web browser and click the button to test out the camera as seen in the gif demo below:
Looking good!! But let's make things cuter!
Get creative with the CSS file
Honestly, here comes the hard part - making everything pretty the way you want it to look! Create a styles.css file and paste the following to change the font and button on our web page:
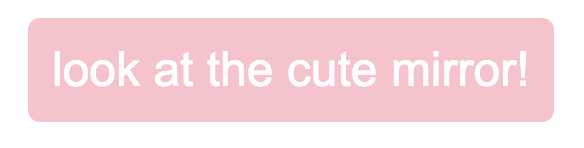
Cute as a button!
Since we want our video to have some kawaii overlay on top of it, we have to alter the element of the video_container and reposition it appropriately. We'll set the element so that it's relative and does not interfere with other contents that might overlap with this element.
To make sure that the kawaii border fits within the video box, we need to apply more styling to restrict the width of the video so that it can respond well to the size of the web page no matter the device it's on and make sure nothing gets cut off. Add these three components to the CSS file:
Build a pretty border for your video
Look for some cute graphics to put on your video and make sure they are transparent and saved in an image format such as .gif, .png, etc. I personally like pixelated graphics that are big and colorful so I found a Tumblr blog that has a bunch of graphics from various sources. Save a few graphics into your working directory. If you can't find something you like, you can download the Hello Kitty gif and cupcake gif that I uploaded to my GitHub repository.
Open up the script.js file to create some elements that will appear on the document web page. Ideally, the graphics will appear after the button is clicked, so we'll declare all the variables inside of the button.addEventListener line. Add the highlighted lines between the line that attaches the video track and before the button is removed:
The elements follow normal document flow and use DOM functions to create paragraph elements with a different class name. These elements are appended to the same container as video_container.
Open the styles.css file to alter the positioning for the bottomleftcute and bottomrightcute classes defined inside the JavaScript file.
Change the background to the file name of the graphic you chose in your project directory. Make sure that the background-size is set to "cover". This property is important because it fills the element with the background image provided and prevents repeats of the image or extremely large images.
I used pixel units in my CSS file to resize the graphics appropriately so that they're not too small but don't get cut off by the video window at the same time. Since I wanted them on the bottom of each corner, I placed them at 0 pixels from the bottom of the screen. The left and right signifies the direction of how far you want to push the graphics towards.
Feel free to play around with these numbers and see what you like the most.
If you closed the index.html web page on your browser, double click on the file name to open it back up. Allow camera access to see your new video overlay!

Mirror mirror on the wall, who's the cutest of them all? It's you!
Conclusion: Building a Twilio Video page with a cute overlay
Now that you know how to add two elements to overlay your video, or shall I say mirror, you can keep adding more! Try putting ribbon at the top border or covering each side of the screen. Make everything super cute and full of your favorite colors! Feel free to reference the full project on my GitHub as well.
I hope this brings a smile to your face and gives you a confidence boost for the rest of the day!
Why don't you look into expanding this project by building out a backend and hosting the project on a server so that you can be cute virtually with your friends! You can even use your own graphics that you created or just make this a solo page for people to go to and cheer themselves up!
Check out some other video content to help you understand more about what Twilio Video has to offer.
- Add text and a watermark to your video for professional projects
- Add text chat to your video calls to talk about cute things while looking cute
- Generate an access token for Twilio Chat, Video, and Voice using Twilio Functions
Let me know about the cute projects you're working on by reaching out to me over email!
Diane Phan is a Developer for technical content on the Twilio Voices team. She loves to help beginner programmers get started on creative projects that involve fun pop culture references. She can be reached at dphan [at] twilio.com or LinkedIn.
Special thanks to Pompompurin for being the star of the article as well as the artists who created the beautiful pixel art.
Related Resources
Twilio Docs
From APIs to SDKs to sample apps
API reference documentation, SDKs, helper libraries, quickstarts, and tutorials for your language and platform.
Resource Center
The latest ebooks, industry reports, and webinars
Learn from customer engagement experts to improve your own communication.
Ahoy
Twilio's developer community hub
Best practices, code samples, and inspiration to build communications and digital engagement experiences.