How to Forward Incoming SMS Messages to WhatsApp with Python
Time to read:
March 30, 2023
Written by
Reviewed by

In this tutorial, you'll look at how to forward incoming SMS messages received on your Twilio phone number to WhatsApp. This is useful in scenarios where you would like to view and receive any messages forwarded to your Twilio number in real-time.
Technical requirements
To follow along, you’ll need the following:
- A free Twilio account
- A Python Development Environment running Python 3.9+
- Ngrok. This will make the development version of your application accessible over the Internet.
Creating a Python environment
Let’s create a directory where your project will reside. From the terminal, run the following command:
Next, cd into the project directory and run the following command to create a virtual environment.
To activate the virtual environment on a Mac or Linux machine, run the following command:
If you are using a Windows computer, then the activation command is different:
Next, install all the dependencies your project will be needing:
- Flask: A Python web framework.
- twilio: A Twilio helper library for interacting with Twilio’s REST API.
- python-dotenv: A library for importing environment variables from a .env file.
Run the following command to install all of the dependencies at once:
Setting up Twilio
After you sign up for an account on Twilio, head over to your Twilio Console and click on Phone Numbers. If you already have one or more phone numbers assigned to your account, select the number you would like to use for this project. If this is a brand new account, buy a new phone number to use for this project.
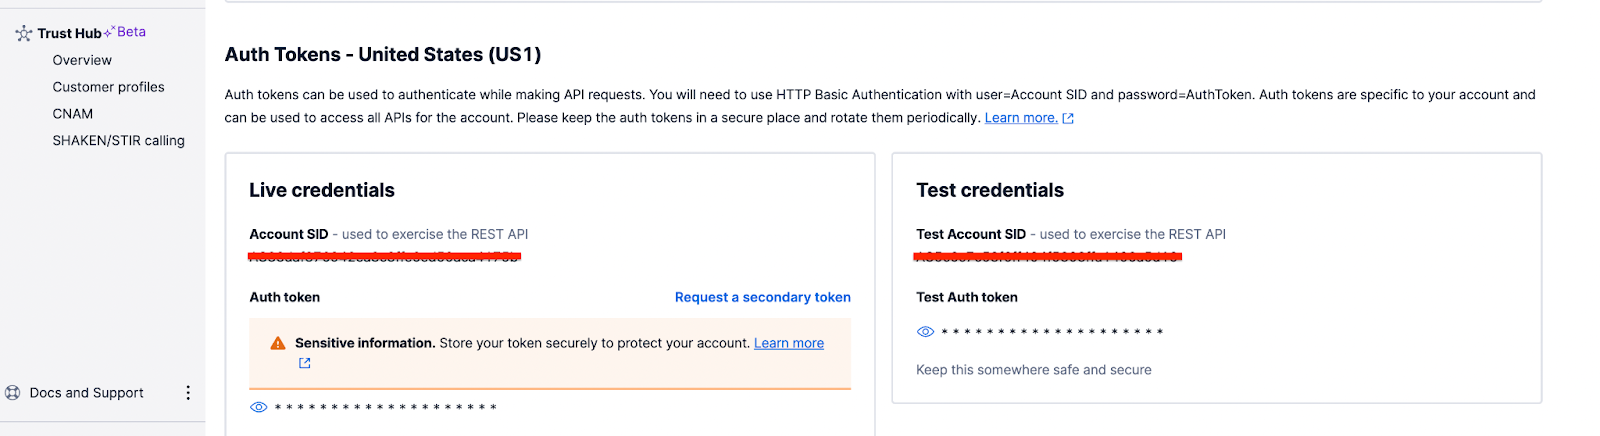
On your Twilio Console, take note of your Account SID and Auth Token. You are going to need these values to authenticate with the Twilio service.
Next, head back to the project’s directory and create a .env file. Edit the file with all the credentials and settings you’ve noted thus far:
The TO_PHONE_NUMBER here refers to the WhatsApp number that will be receiving the message and should be in the canonical E.164 format.
Building the App
Within the twilio_sms_whatsapp directory, create a main.py file and add the following code to the file:
At the top of the file, you’ve imported all the major dependencies your project will be needing:
- The
load_dotenv()function loads your environment variables from the .env file. - The
twilio_clientobject will be used for interacting with the Twilio API to send the WhatsApp message. TheTWILIO_ACCOUNT_SIDandTWILIO_AUTH_TOKENenvironment variables loaded by theload_dotenv()function will be automatically used to authenticate against the Twilio service.
You’ve defined an HTTP POST endpoint at /incoming/sms. This is the endpoint Twilio will make an HTTP POST request to whenever your Twilio number receives an SMS message. When a request is received at this endpoint, the content of the message along with the phone number that sent the message is obtained using Flask’s request object. The message content comes in the payload of the POST request with a key of Body. Next, the message is then forwarded to WhatsApp using Twilio.
Setting up Ngrok
Since you’ll be building and testing your application locally, there is no way for Twilio’s HTTP POST request to reach your application. Thankfully, this is where Ngrok comes in handy, allowing us to set up a temporary public URL so that your app is accessible over the web.
Run the following command on your terminal window to start ngrok:
In this command, 5000 refers to the port your Flask application will eventually be listening on.
You should now be presented with a screen similar to the one below:
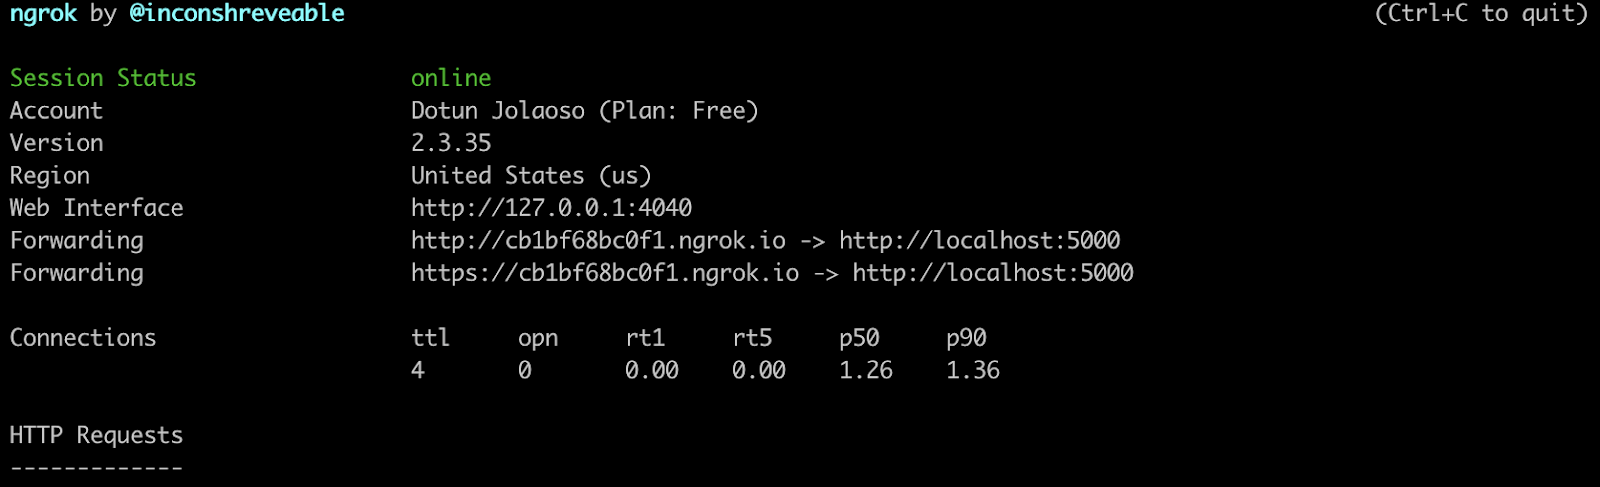
Take note of the https:// “Forwarding” URL as you’ll be making use of it shortly.
Create a Messaging Service
There are different ways you can configure Twilio to invoke a webhook request whenever your Twilio number receives an SMS message. You can find more information about that here.
For this tutorial, you’ll create a Messaging service tied to your Twilio number and then add your Webhook URL to the messaging service. To create a messaging service, head over to your Twilio Console, navigate to Explore Products > Messaging > Services and click Create Messaging Service.

Enter a name for the service in the “Messaging Service friendly name” field, and then click Create Messaging Service.
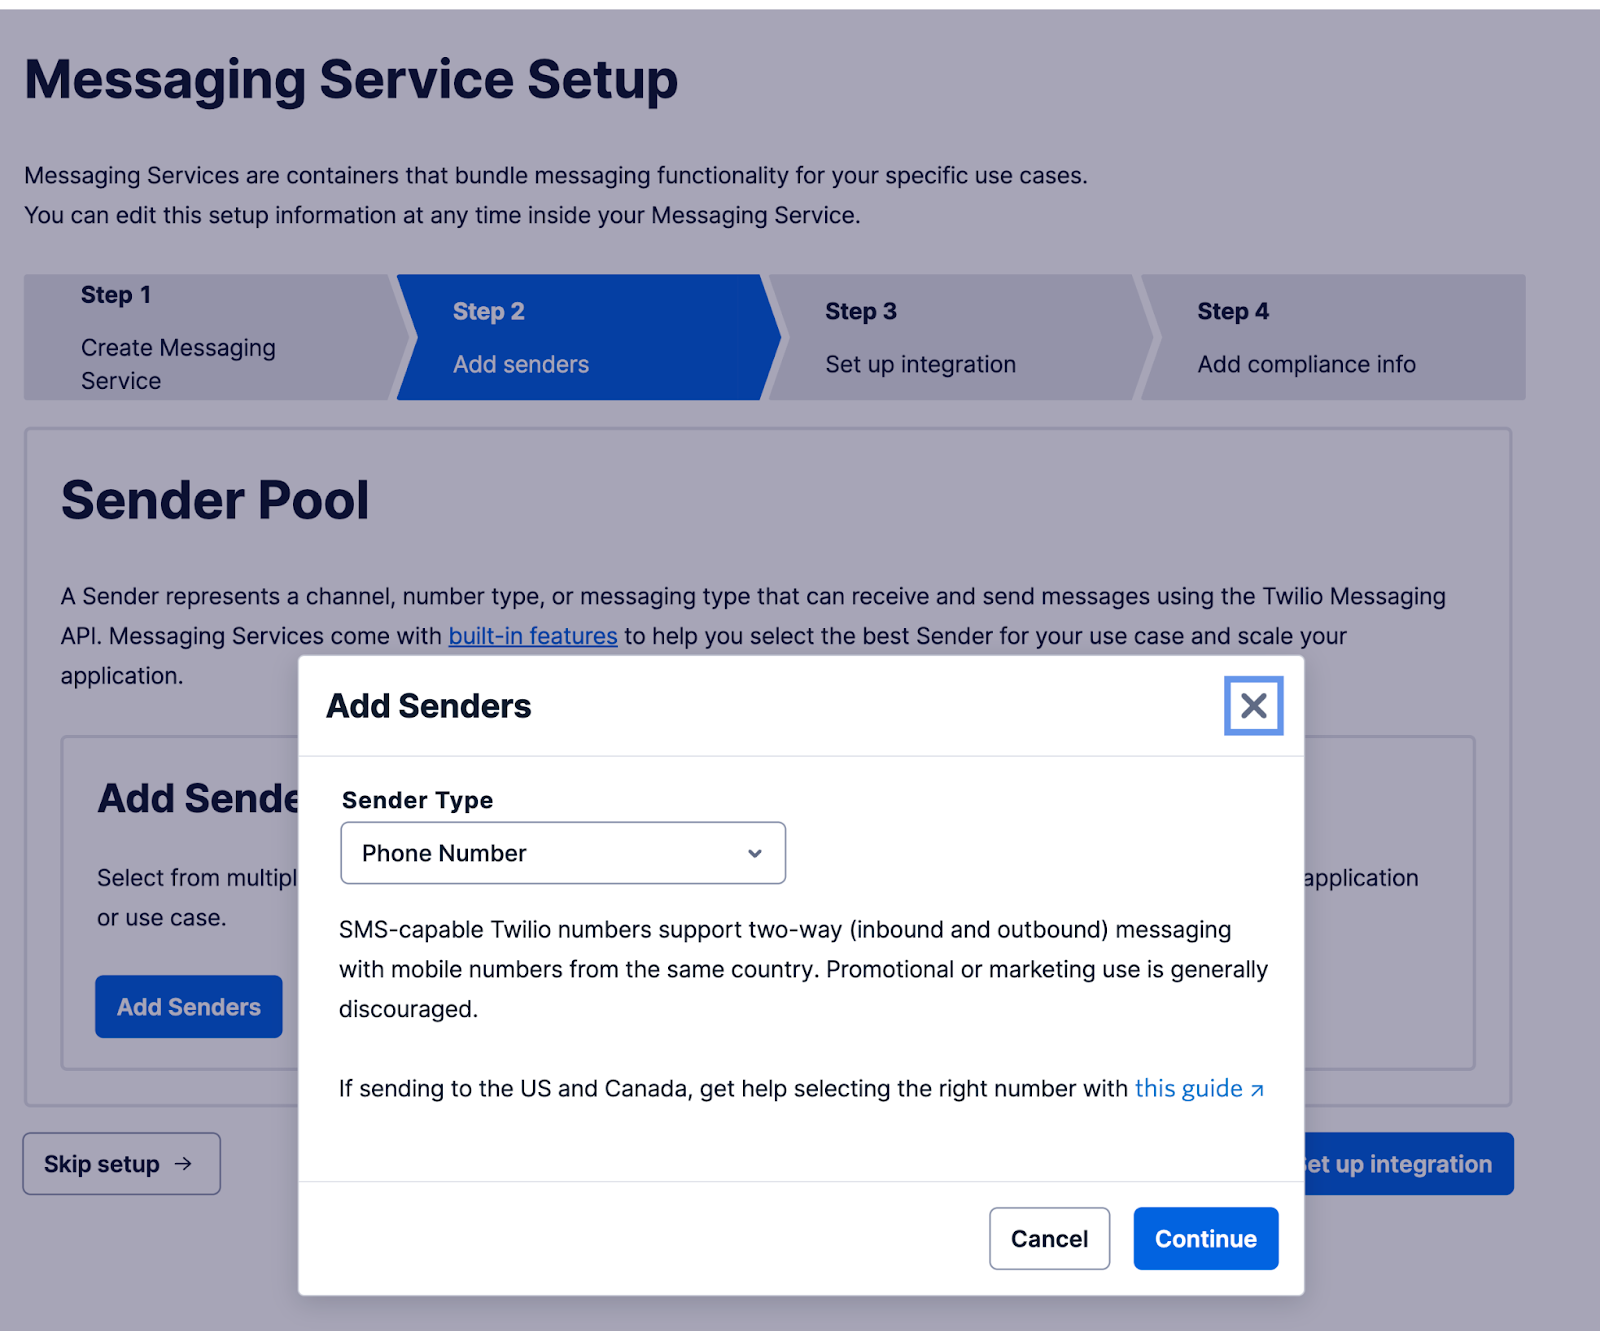
Here, click Add Senders to start adding senders to the service. For the purpose of this tutorial, leave the Sender Type dropdown as “Phone Number” and click Continue.
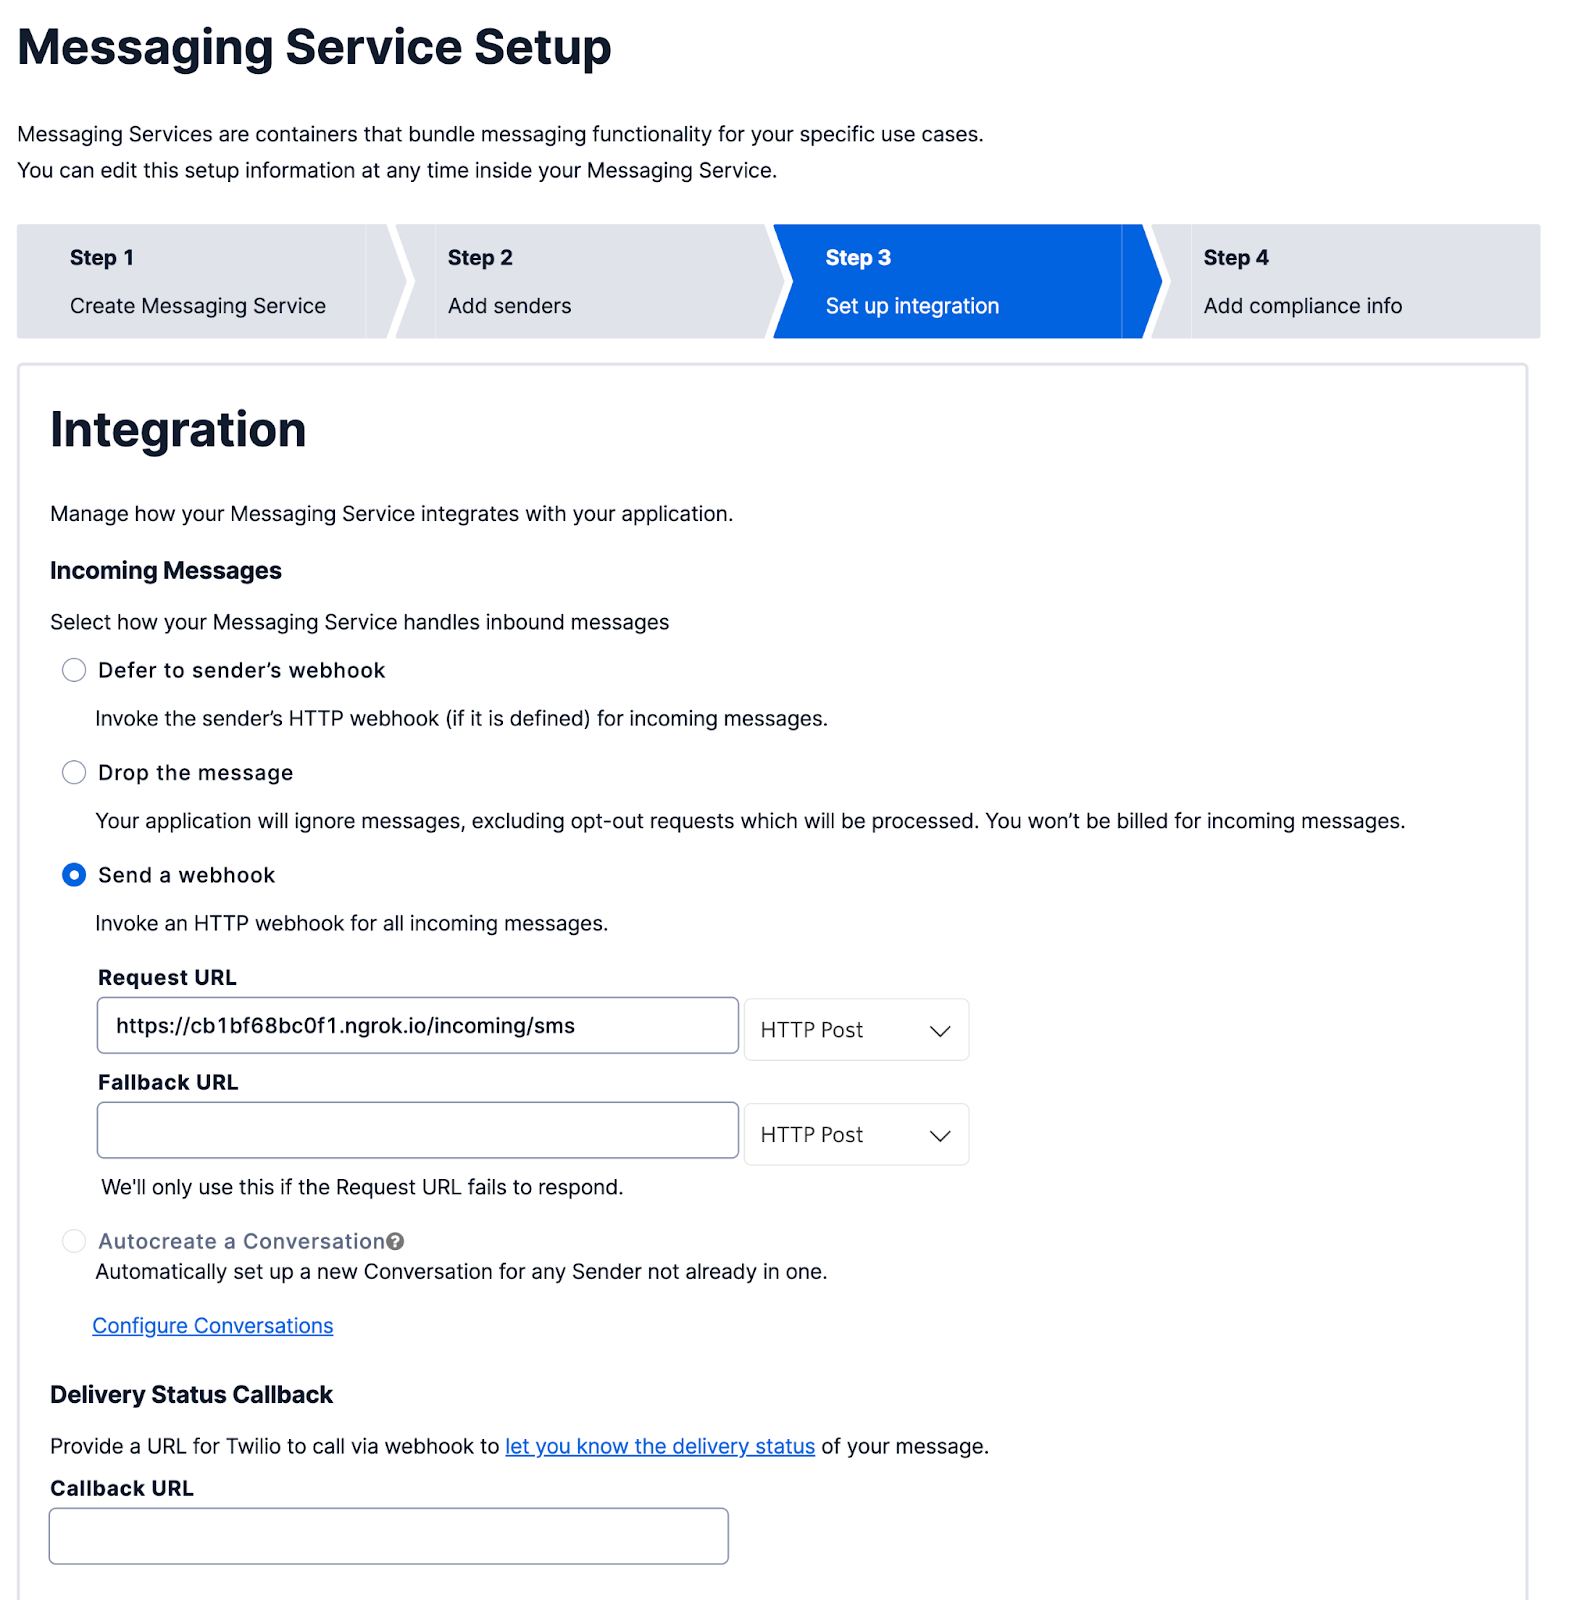
Next, select a Sender from the list with SMS capabilities and click Add Phone Numbers, then click Step 3: Set up integration. In this step, under the “Send a webhook” option, add the Ngrok URL you noted earlier to the Request URL field. Don’t forget to append “/incoming/sms” at the end of the URL.
Next, click Step 4: Add compliance info. In this step, leave the options as they are and click Complete Messaging Service Setup.
Configure Twilio WhatsApp Sandbox
Before you can send and receive messages using the Twilio API for WhatsApp in production, you’ll need to enable your Twilio number for WhatsApp. Since it can take a while before your number is approved, you can use the Sandbox environment Twilio provides for WhatsApp.
To get started, head over to the WhatsApp section on your Twilio dashboard. You can find this section by navigating to Messaging > Try it out > Send a WhatsApp message. You should see the sandbox phone number assigned to your account below:
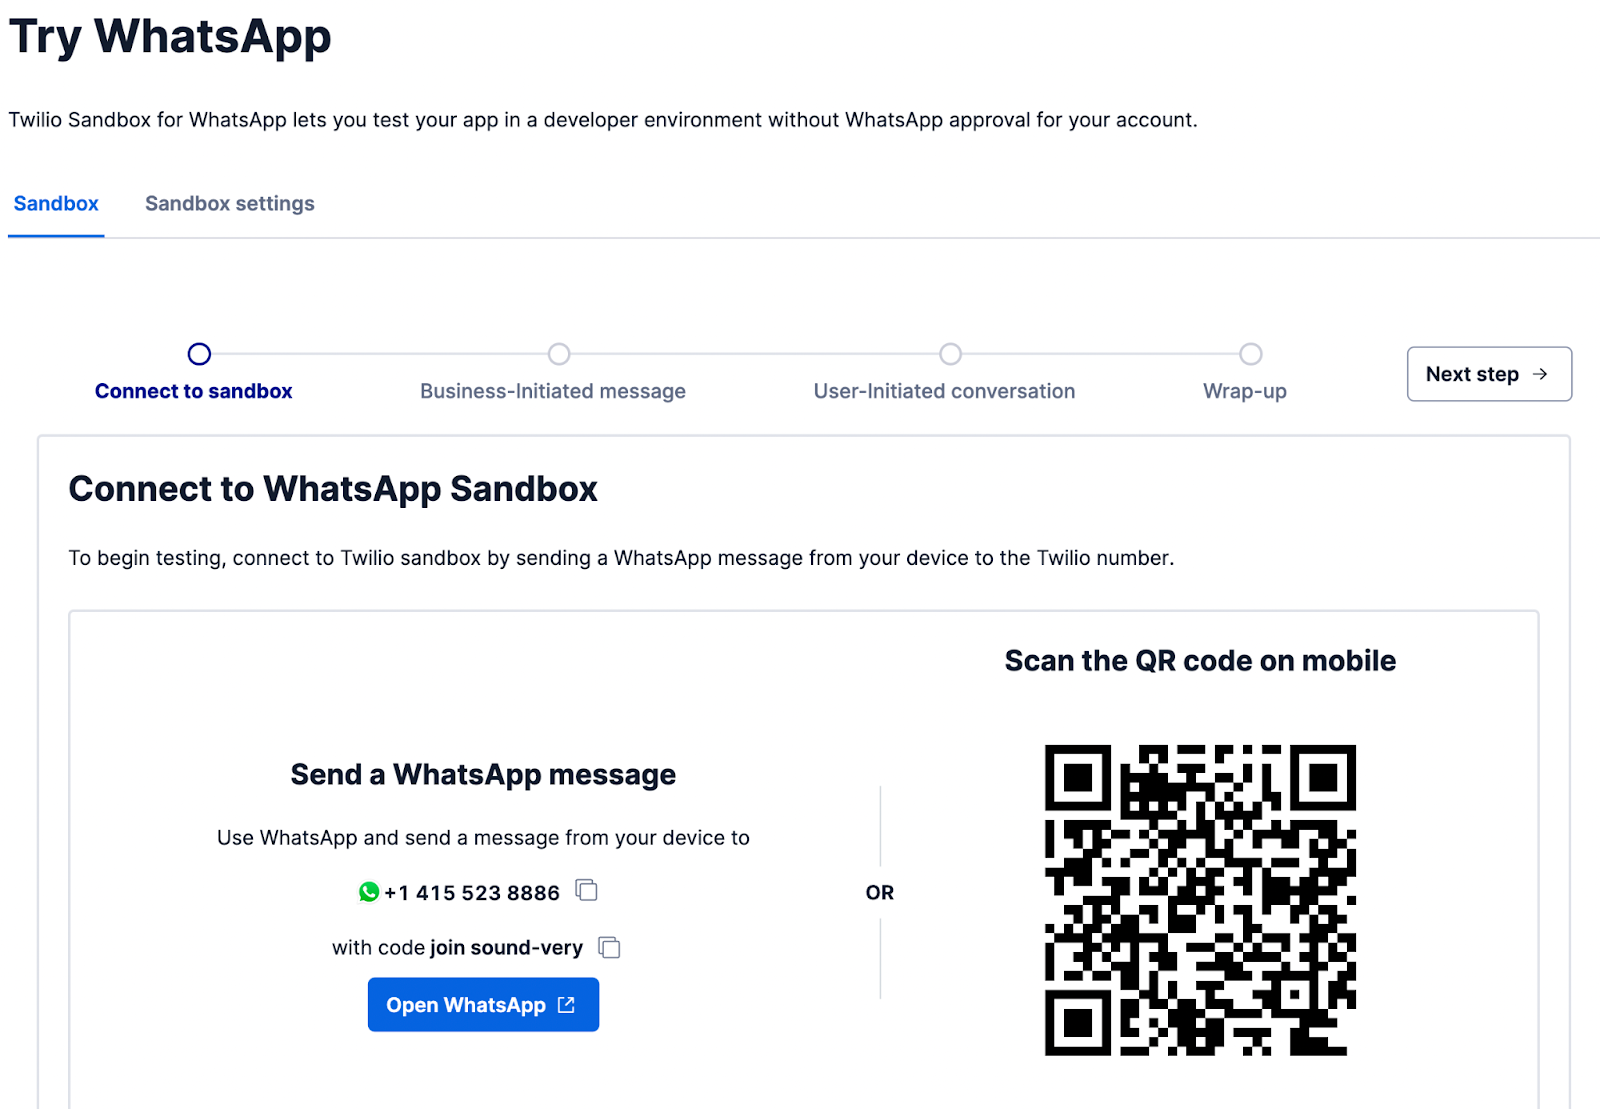
Take note of the phone number as you’ll be adding it as an environment variable shortly. Just below the phone number, you will also see a code that starts with “join” followed by two random words. You can either copy the code or Scan the QR code via WhatsApp.
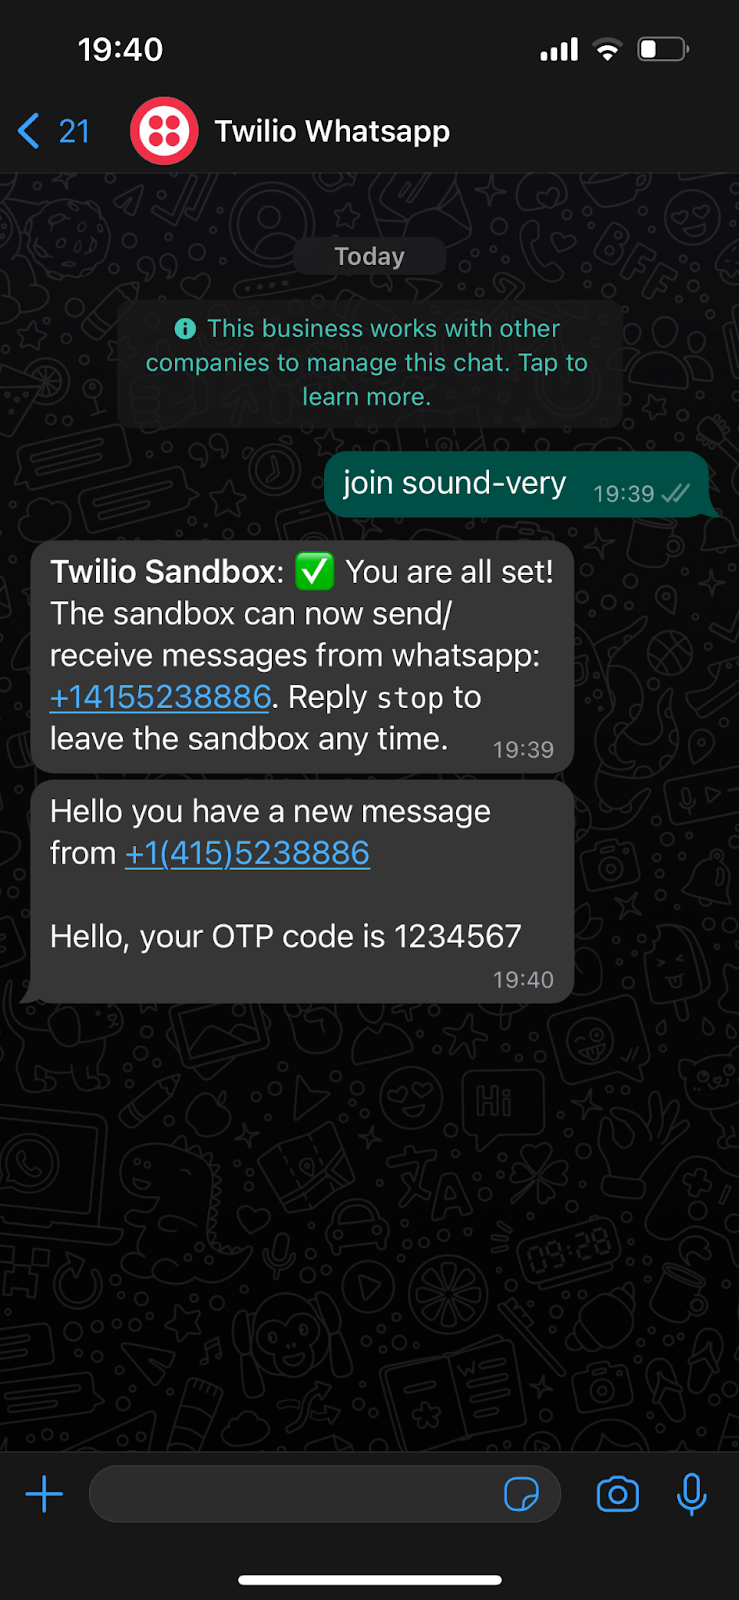
To enable the WhatsApp sandbox, send a WhatsApp message with this code to the number assigned to your account. After a moment, you should receive a reply from Twilio confirming your mobile number is connected. Once this is done, you can start sending and receiving messages.
Next, head over to the .env file within your project’s directory and add the Twilio WhatsApp number as an environment variable.
Testing
To start the application, run the following command from the terminal:
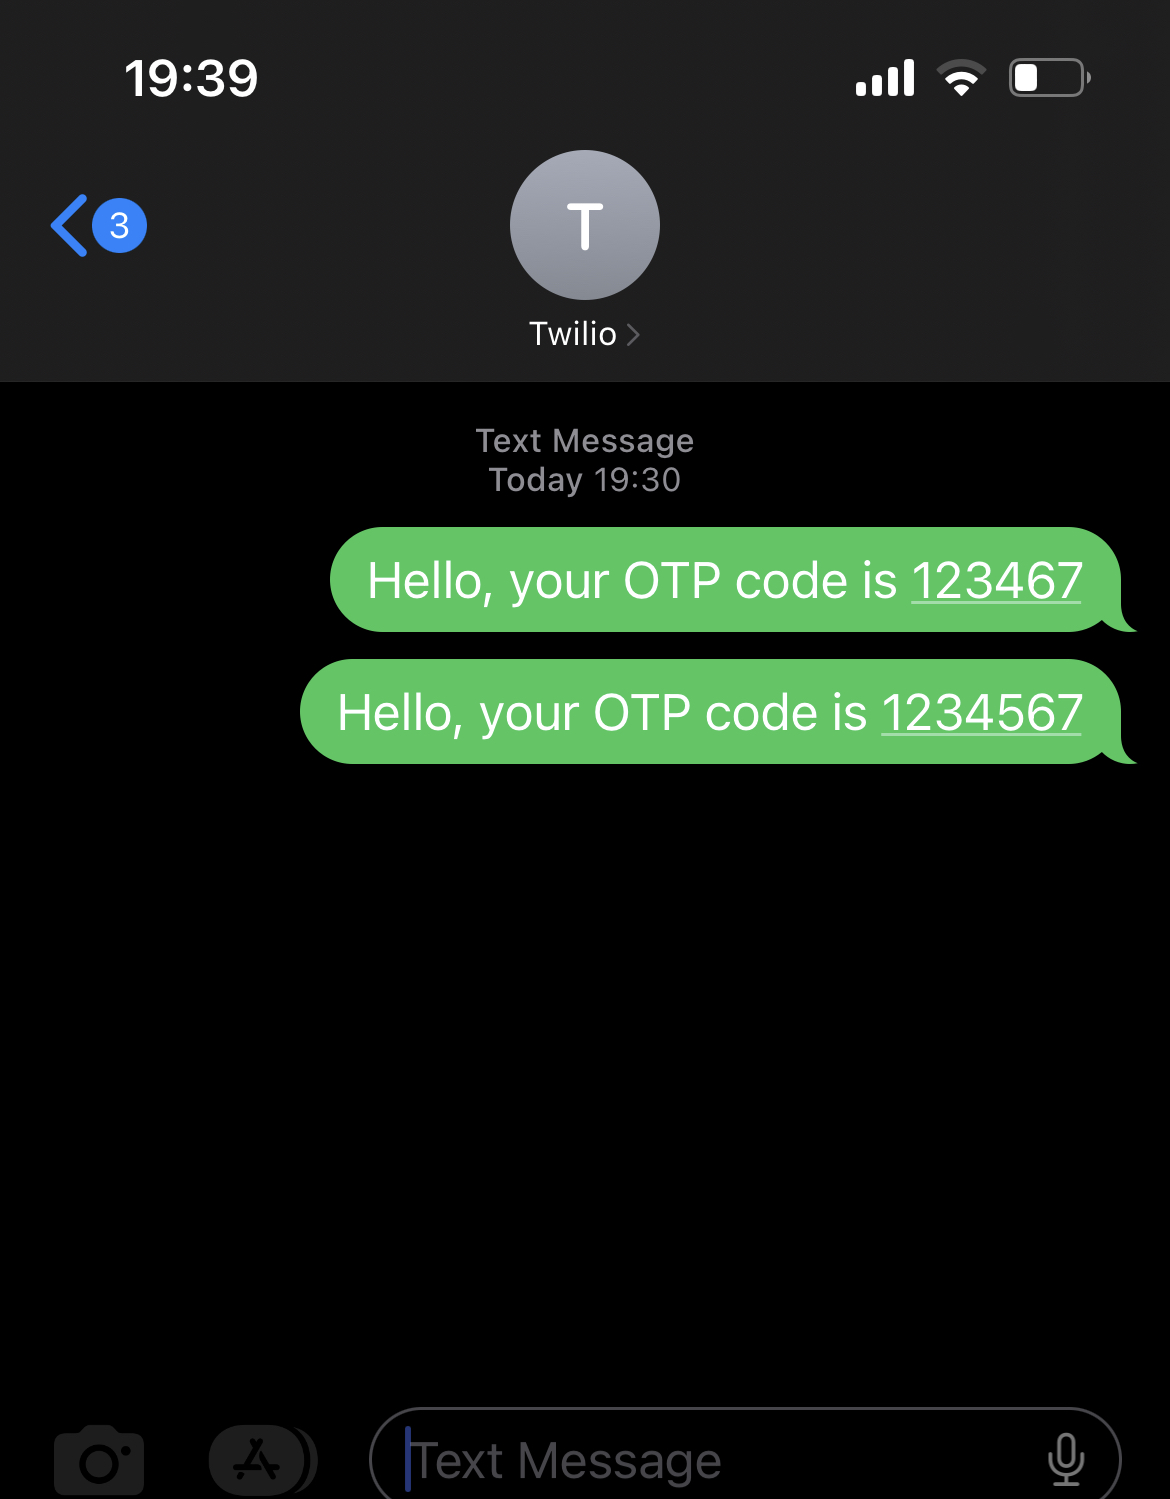
You can now send an SMS message to your Twilio phone number, and you should receive the message via WhatsApp.
Conclusion
In conclusion, forwarding incoming SMS messages to WhatsApp via Twilio is a great way to ensure that you never miss any message sent to your Twilio number. By following the steps outlined in this tutorial, you'll be able to set up this integration and start receiving SMS messages on WhatsApp.
Dotun is a backend software engineer who enjoys building awesome tools and products. He also enjoys technical writing in his spare time. Some of his favorite programming languages and frameworks include Go, PHP, Laravel, NestJS, and Node.
Website: https://dotunj.dev/
Github: https://github.com/Dotunj
Twitter: https://twitter.com/Dotunj_


Related Resources
Twilio Docs
From APIs to SDKs to sample apps
API reference documentation, SDKs, helper libraries, quickstarts, and tutorials for your language and platform.
Resource Center
The latest ebooks, industry reports, and webinars
Learn from customer engagement experts to improve your own communication.
Ahoy
Twilio's developer community hub
Best practices, code samples, and inspiration to build communications and digital engagement experiences.