Generate images with DALL·E 2 and Twilio SMS using ASP.NET Core
Time to read: 6 minutes
January 18, 2023
Written by
Reviewed by

Generate images with DALL·E 2 and Twilio SMS using ASP.NET Core
Recently, there has been a massive boost in AI-generated art. It came to a point that an AI-generated piece of art won a contest a few months ago. There are many art generation programs available such as OpenAI DALL·E 2, Midjourney, Stable Diffusion, etc. In this article, you will use DALL·E 2 to generate images. They recently made their system available to the general public without a waitlist and also opened their API. They also give free credits so you can follow this article for free. You can also get the final source code from my GitHub repository.
Prerequisites
You'll need the following things in this tutorial:
- A free Twilio account
- A Twilio Phone Number with SMS/MMS capabilities.
- An OS that supports .NET (Windows/macOS/Linux)
- .NET 6.0 SDK (newer and older versions may work too)
- A code editor or IDE (Recommended: Visual Studio Code with the C# plugin, Visual Studio, or JetBrains Rider)
- A free OpenAI account
- ngrok (A free ngrok account is sufficient for this tutorial)
OpenAI and DALL·E 2
OpenAI started as a non-profit artificial intelligence research organization founded by Elon Musk and Sam Altman. Elon Musk later quit the company. Currently, it operates under OpenAI LP, a “capped-profit” company (a hybrid of profit and non-profit models).
DALL·E, is a machine learning model that uses GPT-3 to generate realistic images from a description. It was initially announced in January 2021. The latest iteration of the system, DALL·E 2, was announced in April 2022. It initially required joining a waiting list, and after you’ve been accepted, you could only generate images using their web front-end. Those limitations have now been lifted, and you can sign up and start using their API to generate images.
Overview of DALL·E 2 Front-End
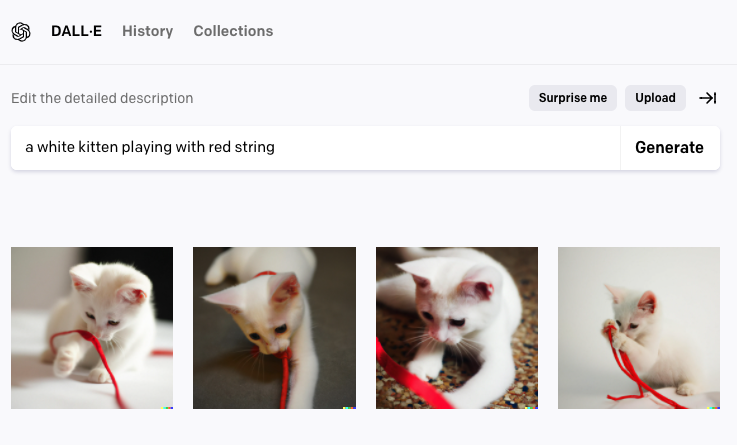
When you go to the DALL·E 2 website and log in, you see an input box and a Generate button.

The simplicity in the design reminds me of the Google homepage. It even has a “Surprise me” option which is similar to the “I’m feeling lucky” button.
Enter your description and press the Generate button. In a matter of seconds, you will see 4 image suggestions generated for you based on your description as shown below.
You get 50 credits upon sign up but they expire after a month. After that, you get 15 free credits every month. 1 image generation costs 1 credit. You can check your credit status by clicking on your profile image on the upper right-hand corner.

If you hover over the images, you see a “…” button appear. Click on it and the “Quick Actions” menu opens.
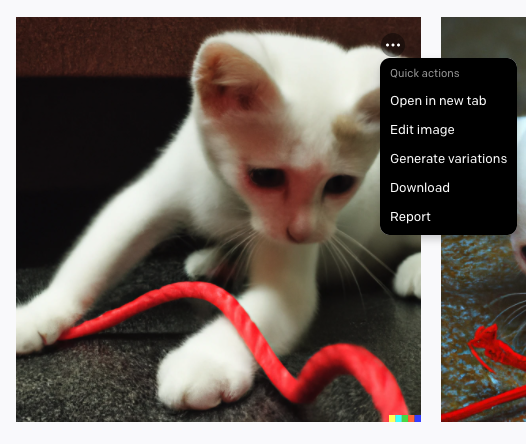
Here you can download the image or generate more variations based on this. The new variations are quite similar to the original one though, as they are all based on the same description.
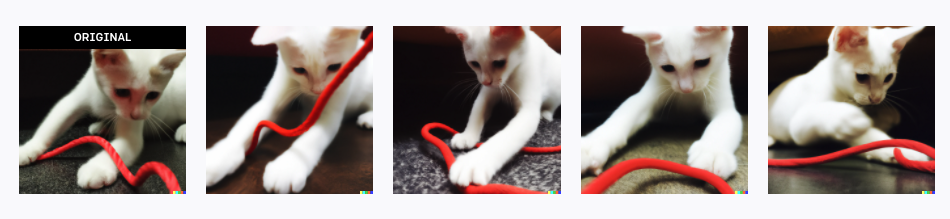
You can keep on generating variations from variations as well. Generating variations also costs 1 credit.
Overview of OpenAI Account
To be able to use the OpenAI API, you will need an API key and some credits. When you sign up, OpenAI gives you free credits. Note that this is different from the 50 credits DALL·E 2 gave.
To check your credit status, go to your account page.
You should see your usage breakdown and your credit status.
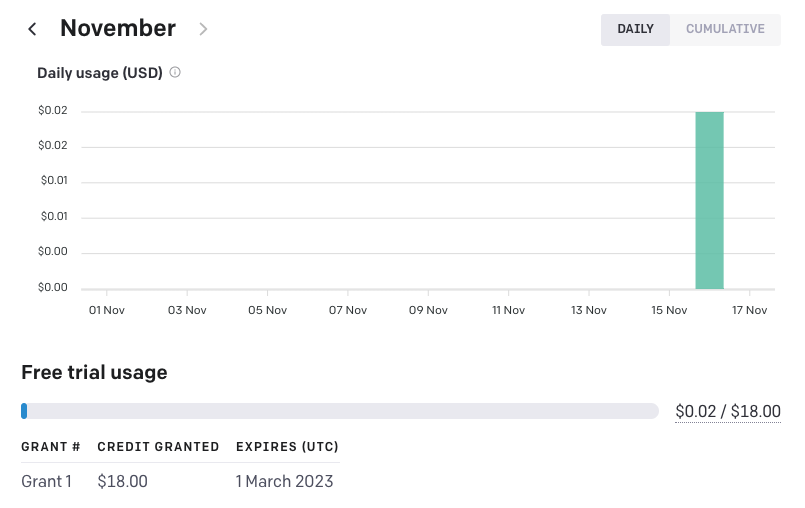
You get quite a lot of credits ($18) considering 1 image generation costs $0.02. There are even cheaper options depending on the image size and generation model.
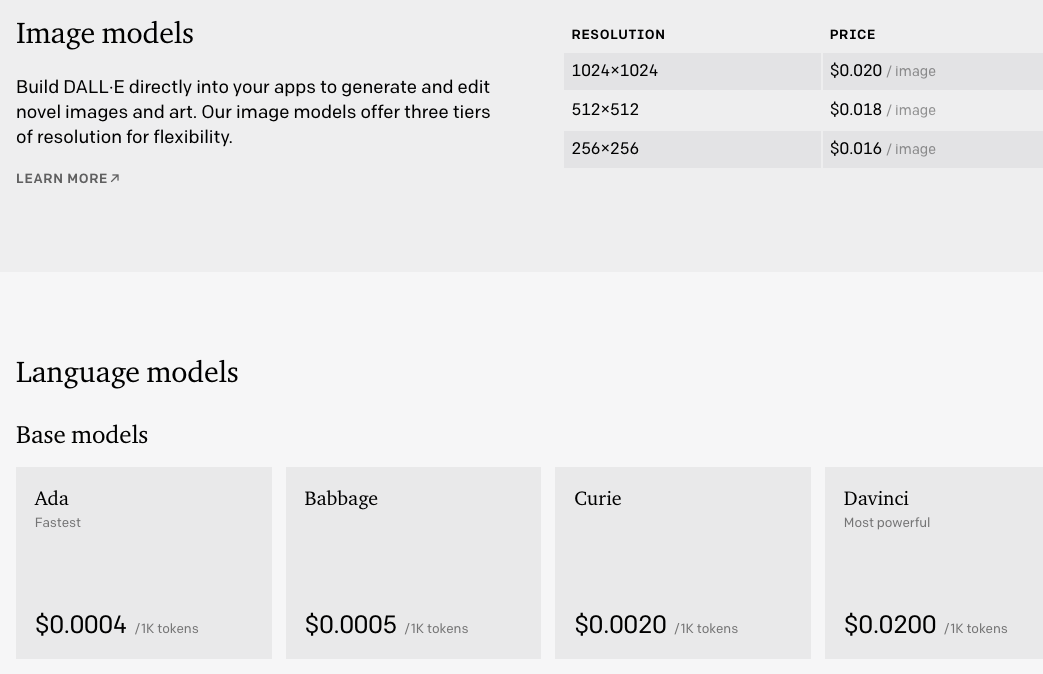
You can check the pricing page for full details.
After you’ve confirmed you have free credits granted, click on API Keys on the left menu.
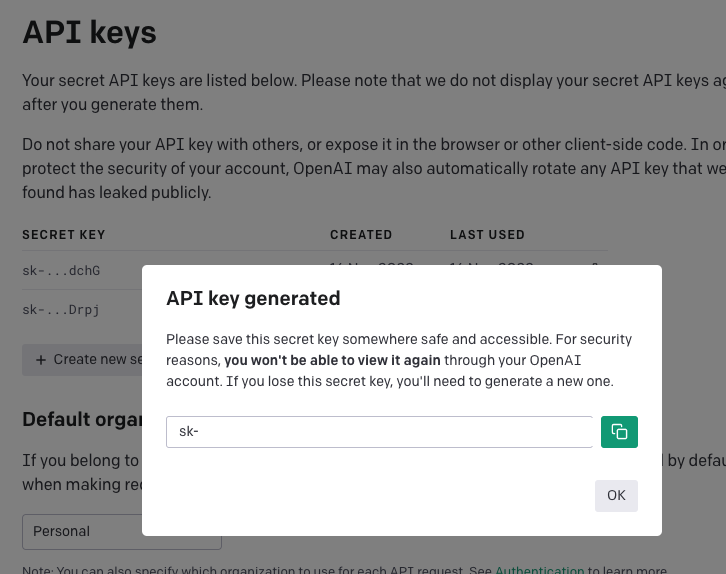
Here, click on the Create new secret key button.
As the prompt says, save your secret key somewhere safe as you’ll not have another chance to see it.
Now that you’ve familiarized yourself with image generation, have your API key and credits available, move on to the next section to implement your own API to send the DALL·E 2-generated images.
Project Implementation
To be able to generate the images, you will need to receive the image description from the user via SMS. To achieve this, you will implement a web API that responds to Twilio SMS webhook requests.
Create the API by running the following commands in a terminal:
Since you’re going to use Twilio, add Twilio .NET SDK and ASP.NET helper library via NuGet:
Open the project with your IDE. Under the Controllers directory, create a new file called IncomingSmsController.cs and update its contents with the code below:
The code above extracts the text message sent by the user (which is sent in the Body paramater field of the form encoded request body.).
This message will be used to generate the image. For now, just for testing purposes, you will ignore this message and return a random photo from an online service called picsum.photos which is a handy service to create random placeholder images. You can use this service to test and format your response messages without wasting your OpenAI credits.
Run the application by running the following command in the terminal window:
You should see your application running on your localhost.

You want Twilio to send webhook requests to your API, but currently Twilio cannot access your localhost. To fix this issue, you will tunnel your localhost to the internet with ngrok.
Copy the localhost URL, open another terminal and run the following command:
Replace { YOUR LOCALHOST URL } with the value you copied from the other terminal (It would be http://localhost:5252 in this example).
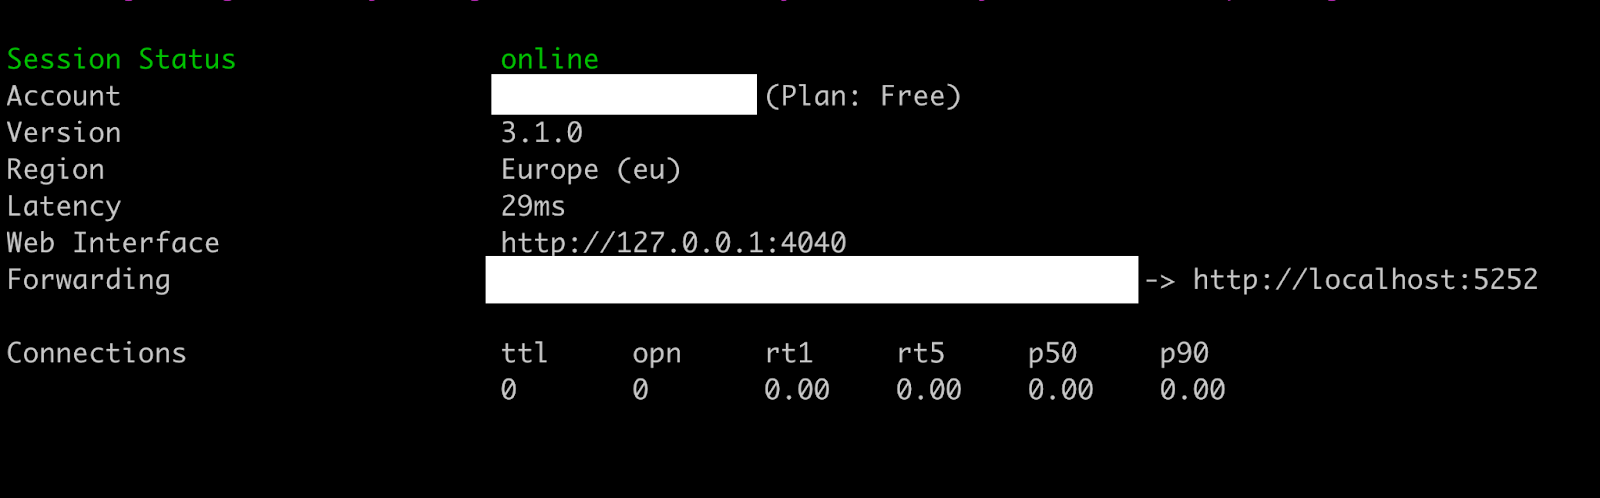
You should see ngrok generate a random Forwarding URL and ngrok will now forward the traffic from this URL to your local API:
Now that you have a publicly accessible URL, you can tell Twilio where to send webhook requests.
Go to Twilio Console. Then go to Phone Numbers → Manage → Active Numbers and click on your number.
Scroll down to the messaging section. Select Webhook in the “A MESSAGE COMES IN” part and enter your ngrok URL followed by /IncomingSms as shown below:
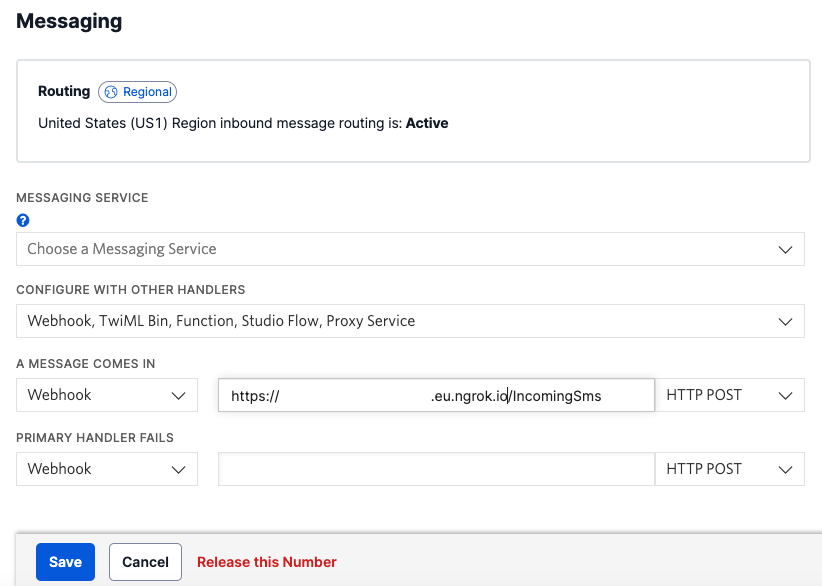
Click Save.
Now that the environment is set up, send an SMS to your Twilio phone and see if you can receive a random image as response. If you can receive the image, it means it’s now time to generate images using the OpenAI API.
Implement OpenAI Client
The image generation API is still in beta as of this writing. Using image generation is quite straightforward. You send the description of the image, size, and the number of images you want to get. In this project, you will use an open-source client library which has recently been updated to support DALL·E.
Stop your application if it’s still running and run the following command in the terminal window:
You will need your OpenAI API key to use the API that you created in the previous section. You will use .NET user secrets to store it. Run the following command to initialize the user secrets:
Then, add the API key to the secrets by running the following command, replacing {YOUR OPENAI API KEY} with the actual API key value:
Update Program.cs and add the highlighted lines:
Now you can inject the service to your IncomingSmsController controller as shown below. The highlighted lines are what’s new and updated.
The action now construct a CreateImageRequest object with size set to 1024x1024, the number of images requested set to 1, and passes in the image description received from the incoming text message. It also sets the response format to url as it will pass Twilio the URL of the image. Valid values for ResponseFormat are url and b64_json.
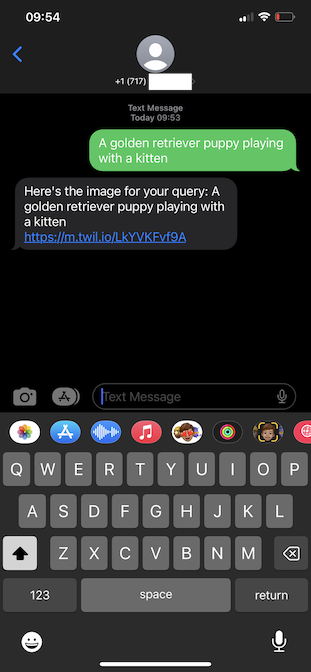
Run the application again. To test the implementation, send an SMS to your Twilio phone again. This time the image returned should match your description.
For example, I sent the following description: “a golden retriever puppy playing with a kitten”:
When I clicked the link, I got the following image:
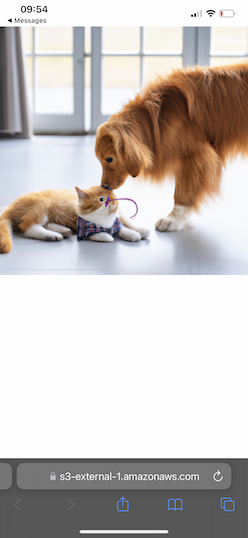
I’m happy with the puppy but the kitten seems a bit odd. Of course, the nice thing about it is, if you don’t like the result, you can always request more.
As an improvement, you can make the image size and the number of images customizable.
Conclusion
In this tutorial, you learned the basics of DALL·E 2 via using the front-end. Then implemented your own service to interact with OpenAI API. The service responds to Twilio SMS webhooks and uses DALL·E 2 to generate images based on the user's description and sends the image back to the user.
The resulting image may or may not be satisfactory based on the description. These are the early days of AI-generated images and I’m sure they will keep on getting better and better.
If you'd like to keep learning, I recommend taking a look at these articles:
- Configure Twilio Webhooks automatically with Visual Studio dev tunnels during ASP.NET Core startup
- Integrate ngrok into ASP.NET Core startup and automatically update your webhook URLs
- Get notified of new magazine issues using web scraping and SMS with C# .NET
Volkan Paksoy is a software developer with more than 15 years of experience, focusing mainly on C# and AWS. He’s a home lab and self-hosting fan who loves to spend his personal time developing hobby projects with Raspberry Pi, Arduino, LEGO and everything in-between. You can follow his personal blogs on software development at devpower.co.uk and cloudinternals.net.
Related Posts
Related Resources
Twilio Docs
From APIs to SDKs to sample apps
API reference documentation, SDKs, helper libraries, quickstarts, and tutorials for your language and platform.
Resource Center
The latest ebooks, industry reports, and webinars
Learn from customer engagement experts to improve your own communication.
Ahoy
Twilio's developer community hub
Best practices, code samples, and inspiration to build communications and digital engagement experiences.