How to Build and Design iOS Video Chat Apps Using Swift
Time to read:
March 04, 2016
Written by
This post is part of Twilio’s archive and may contain outdated information. We’re always building something new, so be sure to check out our latest posts for the most up-to-date insights.

Peer-to-peer video and video conferencing are changing the way people communicate. Voice and text conversations are great but sometimes you really want to see the person on the other end of the conversation. The addition of facial expressions and visual context enhances the ways in which we can communicate. Video chat works best with a clean design that gets out of your way when you don’t need it. Building that design is what we’ll focus on in this post. We’ll start with the Twilio Video for iOS Swift Quickstart and make some design changes to make it function as a great peer-to-peer chat app.
Before we get started you’ll need to get the Twilio Video for iOS Swift Quickstart running since we’ll be using that as our starting point. You’ll need a free Twilio account and then it’ll just take a few minutes to get the quickstart running. Follow the steps on the quickstart page and you’ll do the following:
- Download, extract, configure and start the token generator server
- Download the Swift iOS quickstart and run it in the Simulator
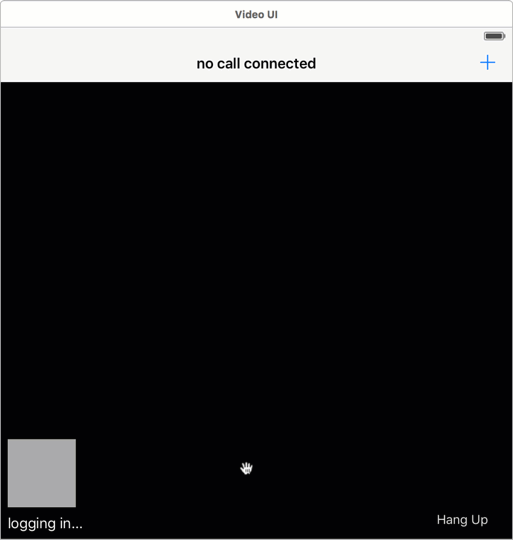
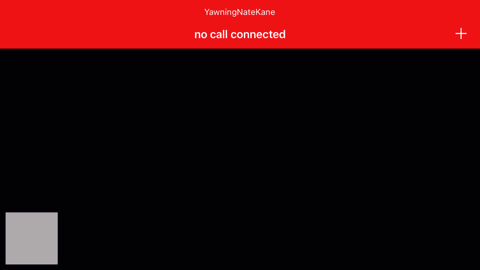
It should look like this if you have everything set up correctly:
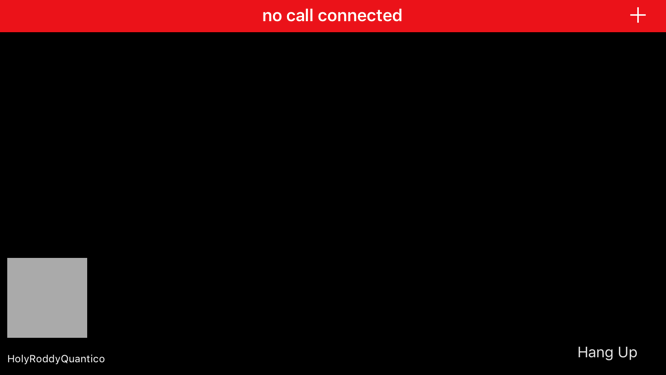
I’ll wait here while you get this set up:
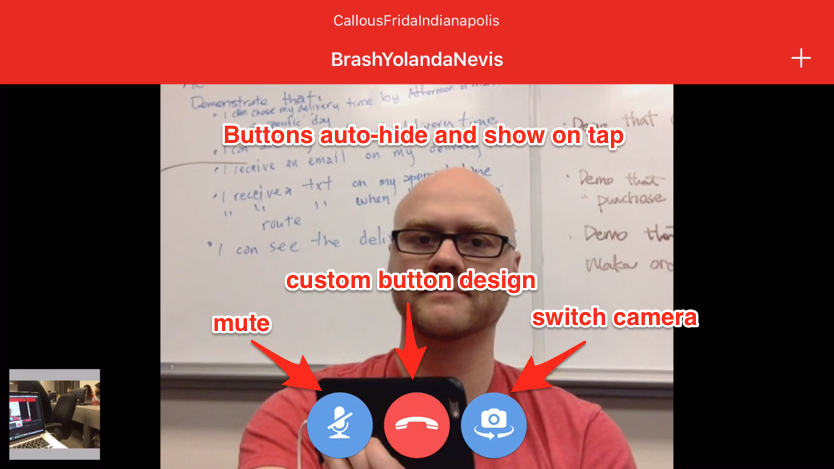
See? That wasn’t so hard. Now that you’re back, here’s a look at what we’re going to build in this post:
Getting Set Up
Now that you’ve gone through the Quickstart let’s take a look at what you have running already:
- Video Configuration Profile set up through Twilio
- Backend application for obtaining access tokens
- Swift iOS application that requests a token from the backend and connects to Twilio Video with a randomly generated username. The app can receive and make invitation requests to start a conversation.
The code in this post was written using:
- Xcode 7.2.1
- Swift 2.1
- iOS 8.1 and up
We’ll be adding UI controls and specifying their positioning in the app via Auto Layout. Since this is easiest to describe in code we’ll use a library called SnapKit that makes it easy to specify Auto Layout constraints from our code to position most of these controls. Since our project already uses CocoaPods to manage its dependencies we’ll use it to add SnapKit. Open up Podfile from the Pods project in the VideoQuickstart workspace in Xcode and add the following highlighted lines to it:
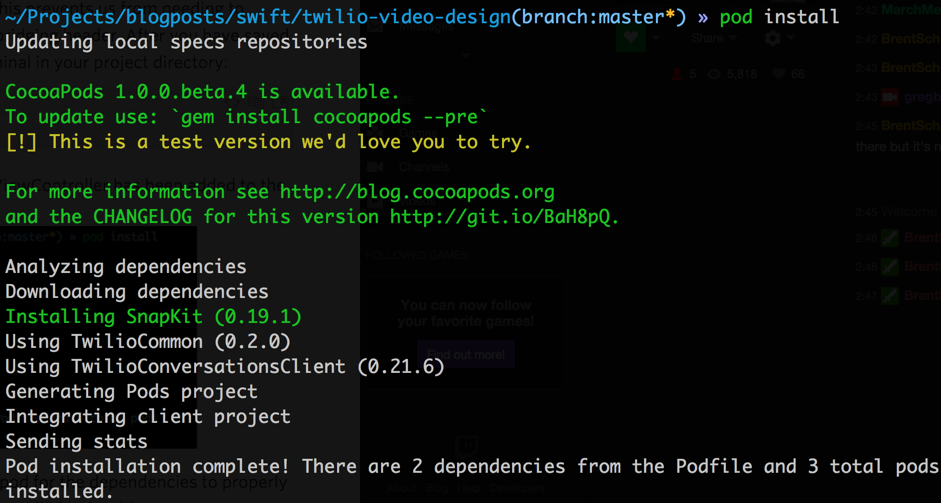
The use_frameworks! line ensures that any Objective-C libraries installed as pods will be exposed as dynamic frameworks in the Swift project. This saves us the trouble of having to create an Objective-C bridging header. After you have saved the Podfile run the following command from the terminal in your project directory:
You should see output in the terminal indicating that SnapKit has been added to the project:
Head back to Xcode and build the project so Xcode sees that the new library has been installed. We’re almost ready to get started with our design but first we need some images.
Can You Make That Button Blue?
We’ll need some images for the buttons in our application. I designed a few button images using icons I found on The Noun Project. You can download them here. We need to add them to the project in order to use them for our buttons. In Xcode navigate the project structure to VideoQuickstart ->VideoQuickstart -> Supporting Files and open Assets.xcassets. This file allows us to create image sets. The process for creating an image set involves the following steps:
- Create the image set in the assets collection
- Rename it to correspond to the image
- Drag the image file(s) to the placeholders in the image set
Here’s what that looks like visually:
Create an image set for the hangup, mute, unmute and switch-camera images by dragging the image to the 3x placeholder. Ideally you’d create a properly sized image for 1x and 2x but for the purposes of this post we’ll just use the one I created for 3x. The only ramification here is extra memory usage on the smaller phones since the larger image will be scaled to fit the smaller size.
With the images in place we’re ready to design our app.
Setting the Foundation
Before we add any new functionality we need to make some changes to how the original design was constructed. Since we will be creating our new buttons from code we’ll delete the existing hangupButton from the storyboard. We’ll also remove the identityLabel (it’s the one that says “logging in…”) since we won’t use it in our design. Open Main.storyboard in Xcode and delete the identityLabel and the Hang Up button from the view controller.
Then in ViewController.swift delete the identityLabel declaration and remove @IBOutlet weak from the hangupButton declaration since it is no longer an outlet:
These two lines of code should now look like this single line:
If you try to build the project right now you’ll get an error because there’s a line of code referencing identityLabel and we just deleted it. Instead of showing the username in the label we’re going to show it in the navigation bar’s prompt field. Change the identityLabel line to use self.navigationItem.prompt instead:
Run the application in the simulator to test that everything is working. It will build and run but if you rotate to landscape you’ll notice that the gray local video box goes off screen. Users likely won’t consider that “working”. What happened is the local video had its vertical Auto Layout constraints set based on the identityLabel we deleted. Let’s use SnapKit to position the local video view. First, import SnapKit at the top of ViewController.swift:
Add the following highlighted code to the bottom of the viewDidLoad function:
This code uses SnapKit’s snp_makeConstrains: function to set the bottom of localMediaView equal to the bottom of remoteMediaView with an offset of -8. This will position localMediaView 8 pixels from the bottom of remoteMediaView. The size and horizontal constraints are already set in the storyboard so we don’t need to set them.
One last thing before we get to the new features. We need to get the hangupButton working again. Since we’ll be working with 3 buttons in the app, let’s add a function to the end of viewDidLoad that will set up our buttons:
Then add the following code to the ViewController under the viewDidLoad function:
The setUpHangupButton function creates a button and adds it to the view controller’s view. It then sets the image for the button to the hangup image we created earlier. Then the TouchUpInside event is set to call the hangup: function that already exists in ViewController.swift. Finally it sets constraints using SnapKit. These constraints do the following:
- Set the height and width to 60 pixels
- Set the bottom of the button to be 8 pixels from the bottom of the screen
- Center the button horizontally
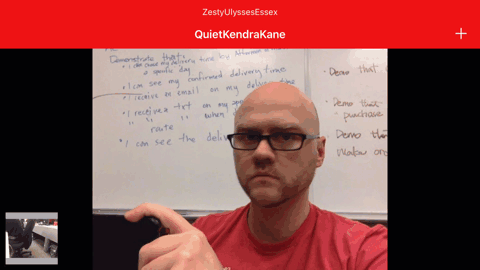
With those changes made we have a great baseline for adding a few more features for our users. Here’s what our app looks like so far:
(Note: The iOS simulator doesn’t provide access to the webcam for use as a local camera. For local video to work you’ll need to test on a device.)
Flip That Camera Around
One of my favorite features of modern phones is that they have both front and back cameras. Let’s give our users the ability to switch which camera their feed is coming from. First let’s declare a switchCameraButton at the top of ViewController.swift under the hangupButton declaration:
Update the setUpButtons() function to add a call to setUpSwitchCameraButton():
Add the following code underneath the setUpHangupButton() function:
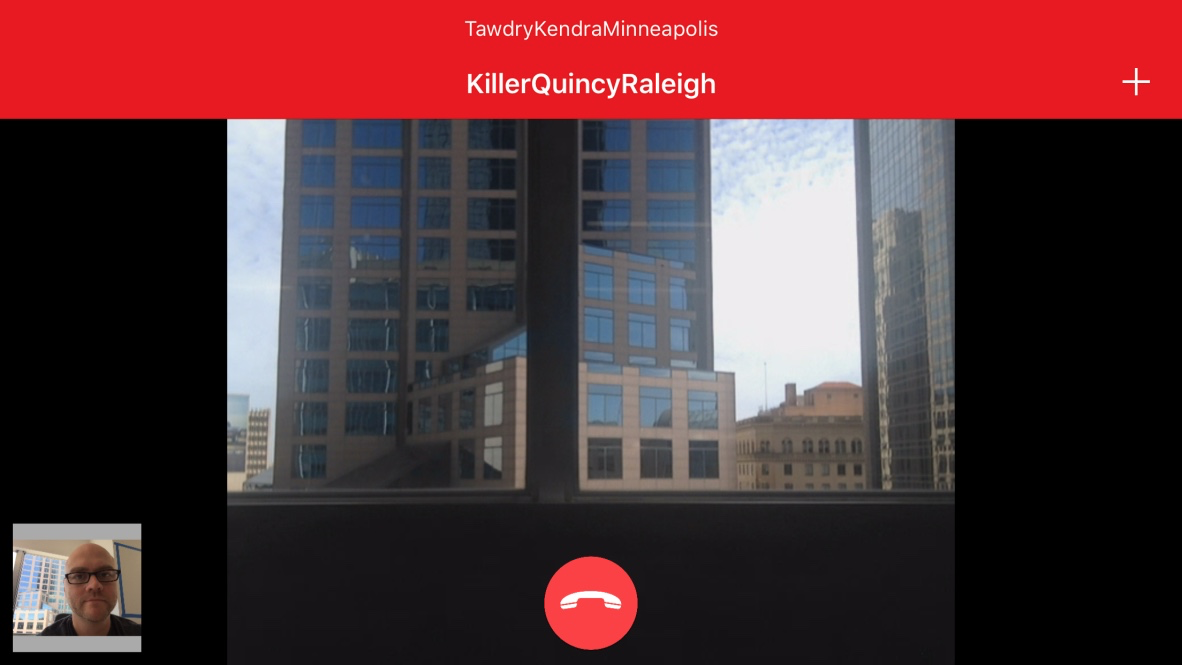
Most of this code should look familiar from the hangup button code. Lines 7-8 set the position of the button to be 8 pixels to the right of hangupButton and 8 pixels from the bottom of the view. The switchCamera() function calls the flipCamera() function of TWCCameraCapturer which toggles between the front and back camera on the device. Run the application and start a conversation with your browser. Tap the switch camera button and you should see your local camera switch from front to back like this:
I noticed when I flipped my camera around that there are a lot of people in here. It sure would be nice if we could mute the audio in our app.
Be Very Quiet
Let’s add another button to our app that allows the user to mute their audio. First we add the button declaration at the top of ViewController.swift with the other buttons:
Update the setUpButtons() function to add a call to setUpMuteButton():
Add the setUpMuteButton() function below the switchCamera() function:
This code should look very similar to the code we wrote for the other buttons. We’re placing the button to the left of the hangupButton and setting its action to a function we’ll write now called toggleMute(). Add that function just below setUpMuteButton():
This function does the following:
- Get access to the localMedia object
- If the microphone is muted, unmute it and set the button image to
mute - If the microphone is not muted, mute it and set the image to
unmute
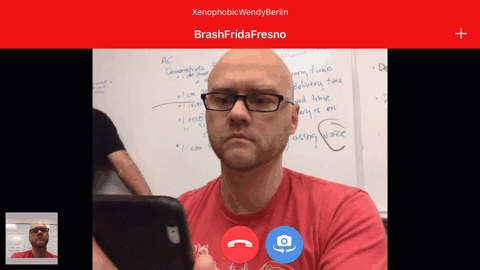
Run the app and start a conversation with the browser again. Tap the mute button and verify that your phone’s audio is muted in the conversation. Here’s what the app looks like at this point:

Ok it’s great that we have all these buttons but they’re getting in the way of our conversation now. We defined above that the best design for video gets out of our way when we don’t need it.
I Can’t See You
When the conversation starts we will show the mute, hangup and switch camera buttons so that the user knows they exist. Then we’ll hide them with a subtle fade out so that they’re not blocking the conversation. When the user taps on the screen we’ll bring them back on screen so that they can be tapped.
The first thing we need to do is modify our button setup functions to hide them and set their alpha to 0.0. We need to hide and set the alpha because the hidden property cannot be animated. Add the following code to the button setup functions:
Next we’ll add a function to show the buttons with a fade in effect:
We’ll also need to hide the buttons so let’s add that as well:
In hideButtons() we use the completion block to set hidden to true after the animation ends.
We want to show the buttons and then after a delay hide them again. To make this easier we’ll use a library called SwiftyTimer that makes NSTimer a breeze to work with. Add the following line to your Podfile:
Then run pod install from your terminal to install the library. Back in ViewController.swift add an import statement at the top underneath the line that imports SnapKit:
Then add the following highlighted code to the conversationsClient:didReceiveInvite: function:
When the video conversation starts the buttons will fade in and then after 4 seconds they will fade out. Run the app and start a conversation with your browser to see this in action. It should look like this:
Awesome, but now the buttons are hidden and the user has no way to get them back. Let’s help our poor user out by letting them tap on the video to display them again. Add the following line of code to the end of viewDidLoad right under the call to setUpButtons:
Then add these functions to take care of the rest:
The setUpVideoTapRecognizer function sets up a gesture recognizer that listens for a tap on the remote video view. When that tap occurs we do the same show buttons and hide buttons dance that we did when the conversation started. We give the user a bit more time before the fade out this time since we expect them to interact with the buttons. You could also make this a toggle. Totally up to you.
There’s one thing left to do. We need to hide the buttons again when the conversation ends. Add this last bit of code to the conversationEnded: function:
Now our design gets out of the user’s way when they are trying to see the lovely face they’re talking to. Here’s what this functionality looks like in action:
What’s Next?
In this post we started with the Twilio Video for iOS Quickstart for Swift and made some great design improvements to it. We started by cleaning up the quickstart UI to provide a solid foundation for our design improvements. We then added camera switching and mute functionality to give our user some flexibility. Finally we moved this functionality offscreen until it is needed.
Even though we accomplished a lot in this post there’s a lot more that can be done in our video chat design. Here are some things to try:
- Support multi-party video chat.
- Add text-based chat to the application
- Add a quality indicator for the video streams
- Add user management with a login page so that users can have self-provided usernames.
I really can’t wait to see what you build with Twilio Video. Let me know what you’re working on on Twitter @brentschooley or via email at brent@twilio.com.


Related Resources
Twilio Docs
From APIs to SDKs to sample apps
API reference documentation, SDKs, helper libraries, quickstarts, and tutorials for your language and platform.
Resource Center
The latest ebooks, industry reports, and webinars
Learn from customer engagement experts to improve your own communication.
Ahoy
Twilio's developer community hub
Best practices, code samples, and inspiration to build communications and digital engagement experiences.