Live transcription with Twilio Media Streams, Azure Cognitive Services and Java
Time to read:

Twilio Media Streams can be used to stream real-time audio data from a phone call to your server using WebSockets. Combined with a Speech-to-Text system this can be used to generate a real-time transcription of a phone call. In this post I’ll show how to set up a Java WebSocket server to handle audio data from Twilio Media Streams and use Azure Cognitive Services Speech for transcription.
Requirements
In order to follow along, you will need to have:
- Java 11 or later. I recommend SDKMAN! for managing Java versions
- A Twilio account and an Azure account.
- Ngrok or the Twilio CLI
If you want to skip ahead, you can find the completed code in my repo on GitHub.
Getting Started
To get a Java web project up and running quickly I recommend using the Spring Initializr. This link will set up all the config you need for this project. Click on “Generate” to download the project, then unzip it and open the project into your IDE.
There will be a single Java source file in src/main/java/com/example/twilio/mediastreamsazuretranscription called MediaStreamsAzureTranscriptionApplication.java. You won’t need to edit that file but it contains a main method that you can use later on to run the code.
Answering a phone call and starting Media Streaming
To start with, let's create code which will instruct Twilio to answer a phone call, say a short message and then start a media stream which we'll use to do the transcription. Twilio will stream binary audio data to a URL we provide, and we will send that on to Azure for transcription.
To start this off we need to create an HTTP endpoint which will serve the following TwiML on /twiml:
Before we start coding let’s dig into this TwiML to see what’s happening:
- The
<Say>verb will use text-to-speech to read the “Hello!” message out loud - Then,
<Start>a<Stream>to a WebSocket URL (we’ll see how to create that URL later on) - Finally,
<Pause>for 30 seconds of transcription time, then hang up, ending the call and the transcription.
First, add the Twilio Helper Library to the project. This is a Gradle project so there is a file called build.gradle in the project root with a dependencies section, to which you should add:
In the same package as the MediaStreamsAzureTranscriptionApplication class create a class called TwimlRestController with the following code:
[this code with import statements on GitHub]
You can see that the WebSocket URL is hard-coded at the moment. That won’t do.
Building the WebSocket URL
The same app that we’re building to handle HTTP requests will also handle WebSocket requests from Twilio. WebSocket URLs look very similar to HTTP URLs, but instead of https://hostname/path we need wss://hostname/path.
To build the WebSocket URL, we need a hostname and a path. For the path we can choose anything we like (let’s use /messages), but the hostname needs a little more work. We could hard-code it but then we’d need to change the code every time we deploy somewhere new. A better approach would be to inspect the HTTP request to /twiml to see what hostname was used there, and indeed we will find it in the Host header. The full HTTP request looks like this
There is a possibility that we will be deploying this app behind a proxy or an API gateway, which may need to sneak in and change the value of the Host header. Ngrok (which I will be using later in this tutorial) is such a proxy, so we need to also check the X-Original-Host header which will be set if Host has been changed. Some proxies will call this X-Forwarded-Host or even something else, but it’s the same thing. An HTTP request in this case might look like:
For a request like this, the hostname in the wss:// URL should be be136ff2eaca.ngrok.io. Now we understand how to build the WebSocket URL, let’s see it in code. Change the TwimlRestController to this:
[this code with imports on GitHub]
A Quick Check
Check that everything is working as expected by running the main method in MediaStreamsAzureTranscriptionApplication through your IDE, or by running ./gradlew clean bootRun on the command line. The app will start up and you can use curl or any other HTTP tool to make a POST request to http://localhost:8080/twiml. My go-to tool for this kind of thing is HTTPie. Notice that the WebSocket URL in the response will be wss://localhost:8080/messages, because your client put Host: localhost:8080 as a header when it made the request. Ideal.
Handling WebSocket connections
Having a wss:// URL in your TwiML is all well and good, but we really need to put some code there to handle WebSocket requests from Twilio, otherwise it’s just another 404 link. In the same package again, create a class called TwilioMediaStreamsHandler with this content:
[this code including imports on GitHub]
Also, we need a configuration class. Call it WebSocketConfig, in the same package again:
[this code including imports on GitHub]
The next thing to implement is connecting this up to Azure.
Adding a dash of Azure
You can get a good overview of the Azure Speech-to-Text service from their documentation. It’s a broad service and there’s a lot of ways you could use it. In any case you will need an Azure account. Sign up here if you don’t have one already. This project will comfortably fit in the free tier of 5 hours per month. Follow the Azure instructions to set up a Speech resource. The important things you will need for your code are:
- The subscription key (a long string of letters and numbers)
- The location or region (eg
westus)
Set these as environment variables called AZURE_SPEECH_SUBSCRIPTION_KEY and AZURE_SERVICE_REGION and let’s see how to use them in code.
Add a dependency for the Azure Speech client SDK next to where you added the Twilio dependency in build.gradle. We will need a JSON parser later so add Jackson here too:
Create a package called azure next to all your classes, and in there a class called AzureSpeechToTextService to encapsulate the connection to Azure:
[this code including imports on GitHub]
This is a fair amount of code so let’s break it down:
- Lines 3 & 4: Reading the environment variables which authenticate you to Azure. I set these with IntelliJ’s EnvFile plugin.
In the constructor:
- Line 10: Create a
PushAudioInputStreamwhich we can use to send binary audio data to Azure. - Lines 12-14: Create and initialize the main Azure client class:
SpeechRecognizer. - Lines 16-19: Add a callback for partial recognitions. This gives real time word-by-word transcriptions.
- Lines 21-24: Add another callback, this time for complete recognitions. These will be complete sentences with correct capitalization and punctuation. They tend to be more accurate than the partial recognitions (we’ll see an example below) but are delivered slightly more slowly.
- Line 26:
speechRecognizer.startContinuousRecognitionAsync();- open the connection to Azure.
The accept method on lines 29-31 takes a byte[] containing binary audio data from Twilio. The encoding that Twilio uses is called μ-law, which is designed for efficient compression of recorded speech. Unfortunately Azure does not accept μ-law-encoded data so we need to transcode it to a format that they do accept - namely PCM. The details of this are beyond the scope of this tutorial, but you can download the MulawToPcm class that’s used on line 30 above from GitHub into the azure package and use it directly.
Connecting the WebSocket handler to Azure
The last bit of code to add is the TwilioMediaStreamsHandler that you created earlier - methods in there are just placeholders at the moment, but they need to use the AzureSpeechToTextService. Replace the content of that class with:
[this code with imports on GitHub]
This code keeps a Map<WebSocketSession, AzureSpeechToTextService> so that multiple calls can be transcribed at once without the audio interfering from one call to another. Each AzureSpeechToTextService is initialized on line 11. The constructor takes a Consumer<String> which is used to handle transcriptions as they come back from Azure. Here I have passed System.out::println as a method reference.
The handleTextMessage method will be called about 50 times a second, as new audio data arrives from Twilio in tiny chunks. The messages are JSON formatted with the μ-law audio data base64-encoded within the JSON so we use Jackson and java.util.Base64 to extract the audio data and pass it along.
🎉🎊 Finally, we are code-complete 🎊🎉
Using this code with a real phone number
Log in to your Twilio account (use this link if you need to create one now - you will get $10 extra credit when you upgrade your account). Buy a phone number and head to the configuration page for your new number. You want to put a URL for when “a call comes in” under “Voice & Fax”. But what URL? Currently the app is only available on a localhost URL, which Twilio can’t reach. You have two options to expose your app to the public internet:
- Run ngrok directly
- Use the Twilio CLI.
Restart the app, either by running the main method from MediaStreamsAzureTranscriptionApplication or with ./gradlew clean bootRun on the command line. Either way, the server will listen on port 8080
Creating a public URL using ngrok
The following command will create a public URL for your localhost:8080 server:
Ngrok’s output will contain a forwarding https URL like https://<RANDOM LETTERS>. This is the URL you need to put for when “a call comes in” in your Twilio console. Don’t forget to add the path of /twiml and save the phone number configuration.
Connect using the Twilio CLI
The Twilio CLI can be used to set up ngrok and configure your phone number in one step:
The Twilio CLI detects the localhost URL and sets up ngrok for you. Neat.
Call me?
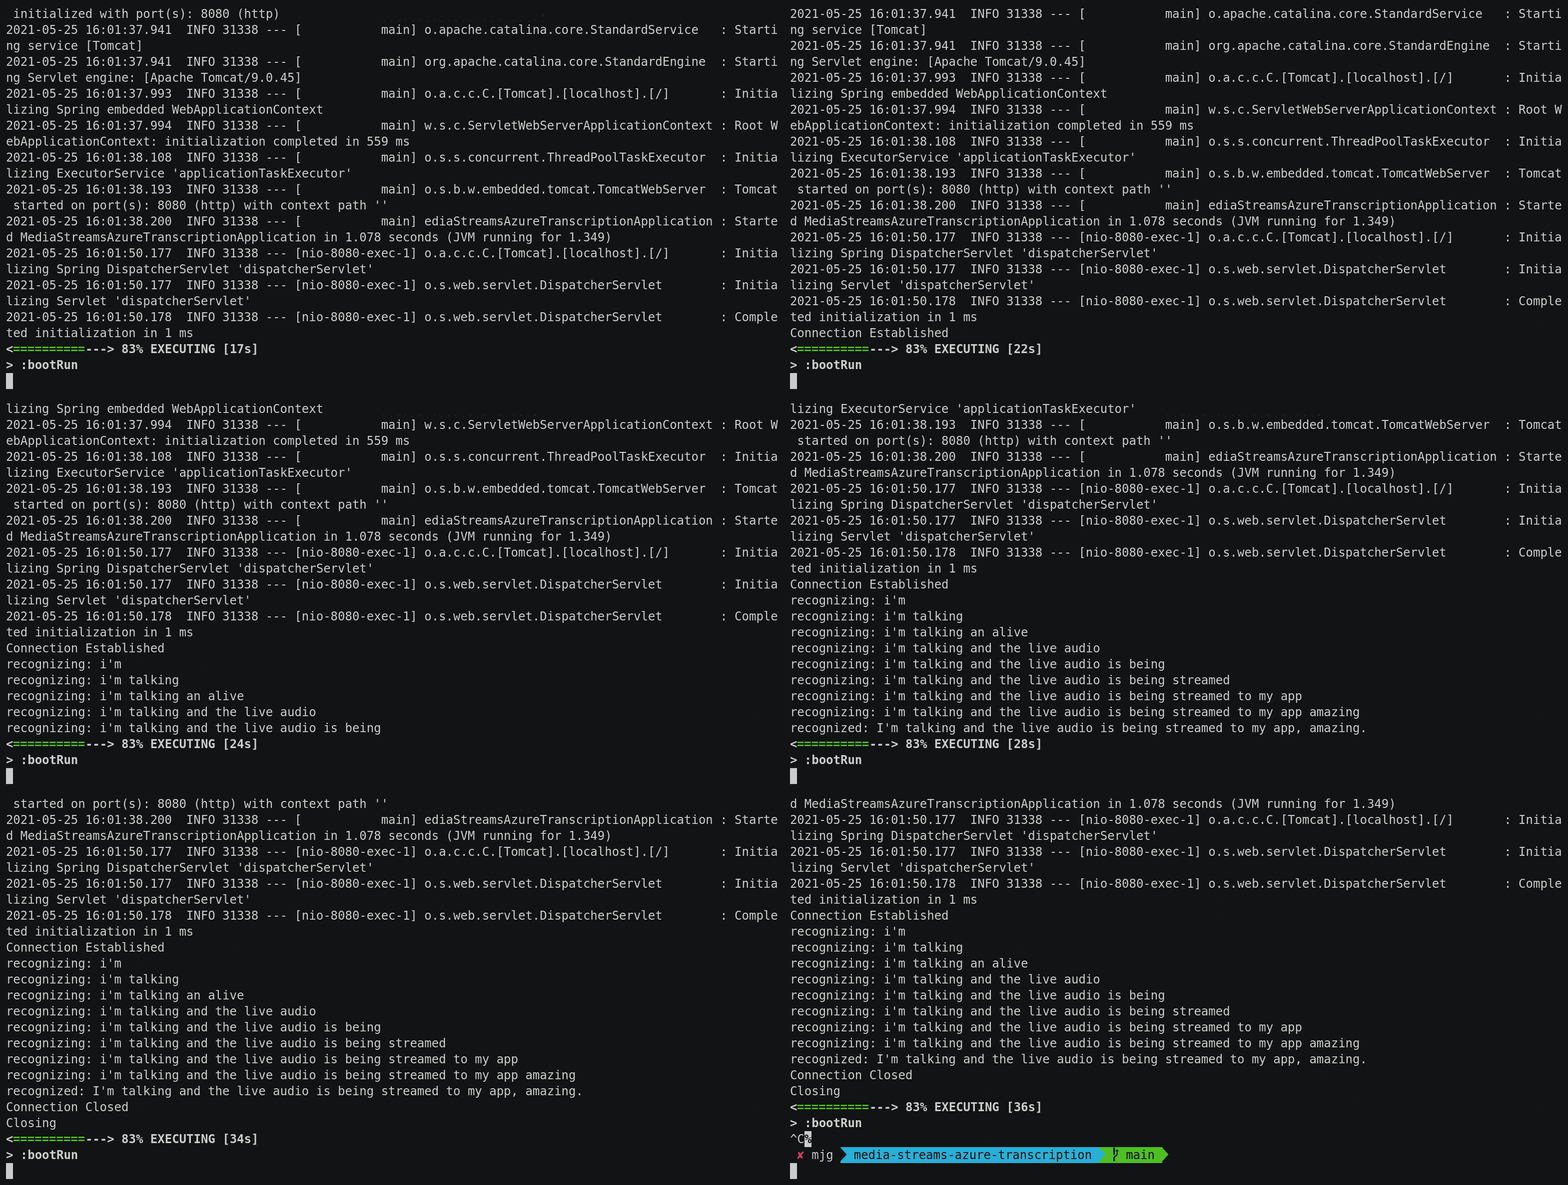
With the app running and ngrok or the Twilio CLI giving you a public URL that’s configured in the Twilio console, it’s time to make a phone call and watch your console for the output:

[see the full session on asciinema]
Wrapping up
Twilio Media Streams and Azure Cognitive Services Speech work well together to produce high-quality real time transcriptions. You could extend this to transcribe each speaker in a conference call separately, combine with other cloud services to create summaries, watch for keywords in a call, build tools to help call agents, or go wherever your imagination takes you. If you have any questions about this or anything else you're building with Twilio, I'd love to hear from you.
- 🐦 @MaximumGilliard
- 📧 mgilliard@twilio.com
I can't wait to see what you build!
Related Posts
Related Resources
Twilio Docs
From APIs to SDKs to sample apps
API reference documentation, SDKs, helper libraries, quickstarts, and tutorials for your language and platform.
Resource Center
The latest ebooks, industry reports, and webinars
Learn from customer engagement experts to improve your own communication.
Ahoy
Twilio's developer community hub
Best practices, code samples, and inspiration to build communications and digital engagement experiences.


