How to Create, Update, and Delete Data in a Notion Database using Node JS
Time to read: 11 minutes
August 24, 2022
Written by
Reviewed by

Notion is a popular productivity tool used widely in both professional and personal settings. As of May 2021, Notion released their very own public beta JavaScript SDK to use with their API. At the time of writing, it is installable via npm and makes the process of working with Notion much more straightforward than it was before.
This tutorial explores the basics of manipulating data in a Notion database using their API and SDK with NodeJS. This tutorial aims to be beginner-friendly and will have explanations of every step. So without further ado, let’s get started!
Prerequisites
Before beginning, ensure you have the following:
- The latest version of NodeJS installed on your computer
- A Notion account – this tutorial assumes a free personal account
- An IDE – I will be using VSCode
Initial setup
There are two things that need to be set up in order to follow along with this tutorial. The first thing is to create a Notion database using Notions UI, and the second part will deal with setting up the local environment and project files.
Create the Notion database
For the purposes of this tutorial, the database will be set up to have four columns to represent a few different types of data for each entry. If this is a brand new account, there will be a number of pages available out of the box, as is shown in the screenshot below. Feel free to delete them or keep them.
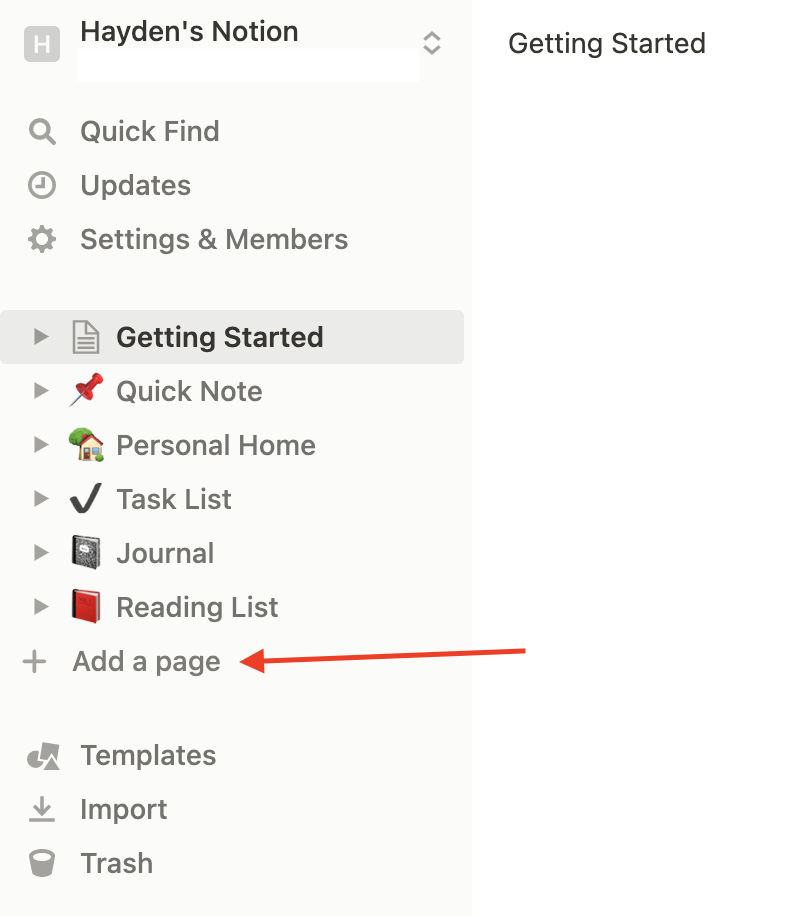
Once logged into Notion, create a new page by clicking the gray + Add a page button at the bottom of the left sidebar.
Once the new page is created, a new blank page will open up in the main editor area. Replace “Untitled” title with “Notion Database” and click Table under the DATABASE option.
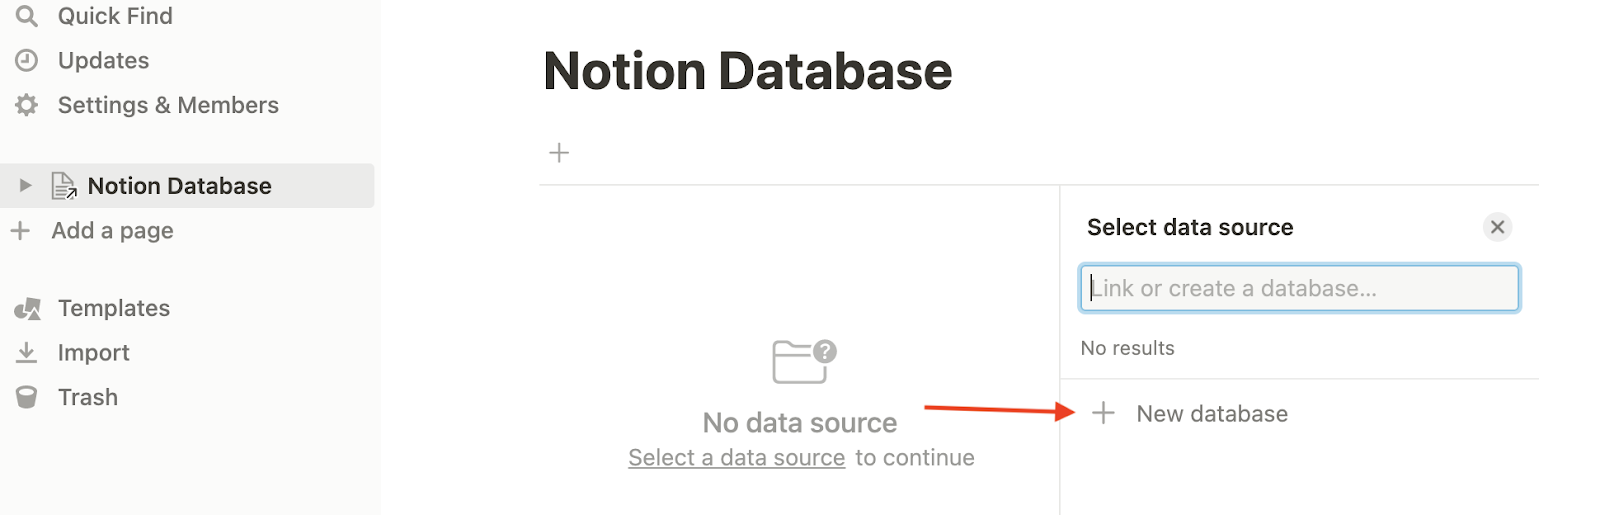
After selecting Table, a new view will appear showing that there is no data source for the database. On this page, go into the right sidebar, and at the very bottom select New Database.
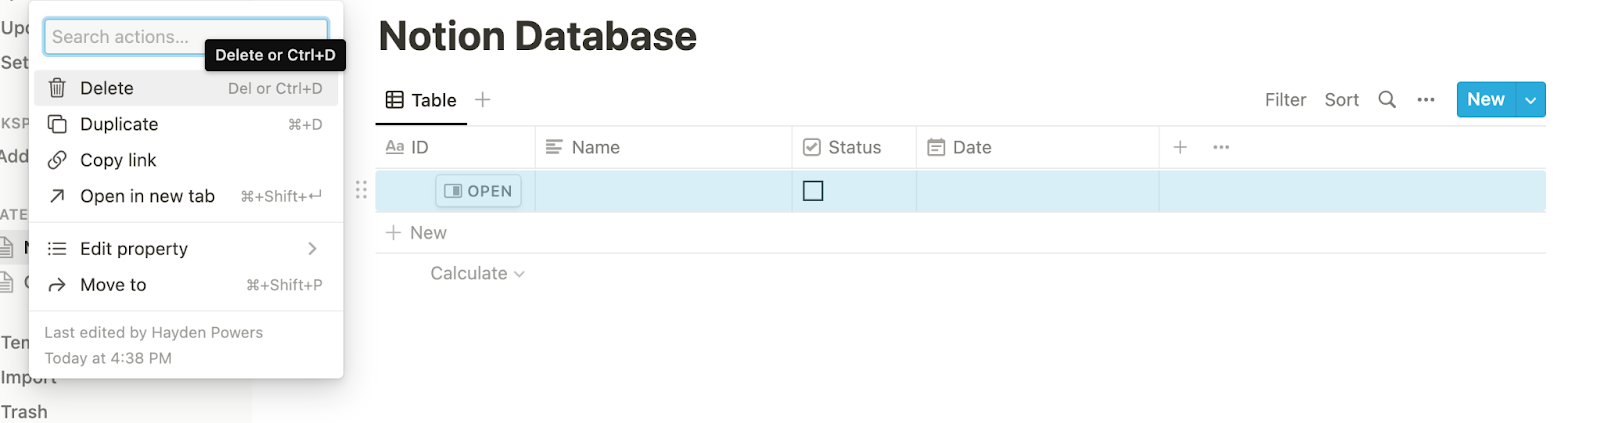
This will create a default database with some columns already filled in. First, delete all the rows by selecting on the six dots on the left side of each row and click Delete.
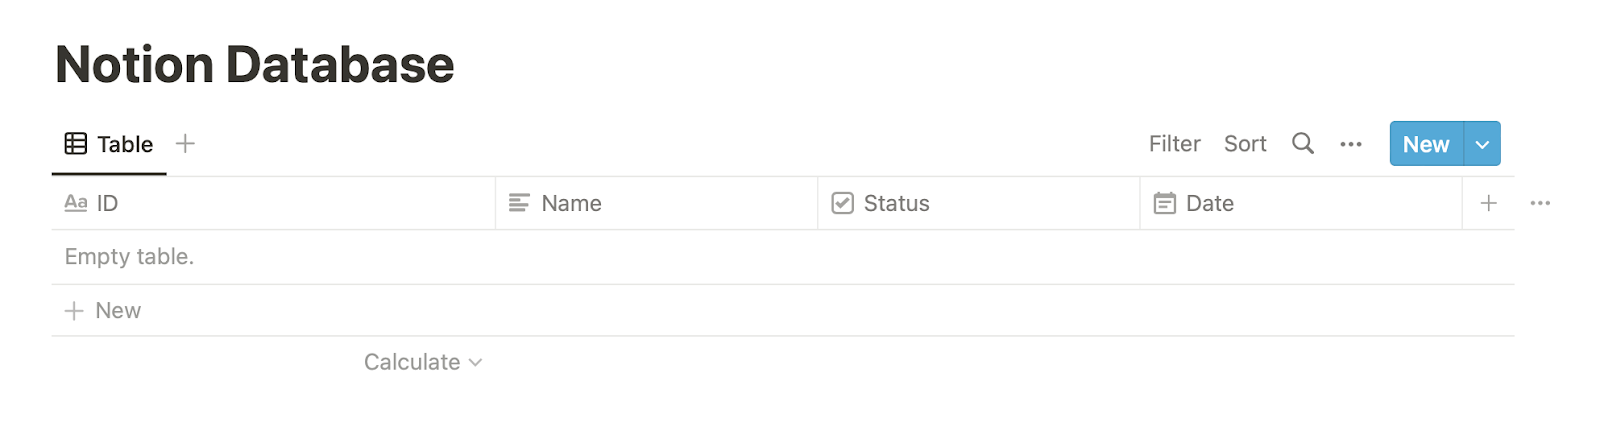
Next, the columns will need to be edited. Change the first column name to ID; the type cannot be changed from text. This column will hold a unique, username-like value that will be used to query the database later on. Change the second column's name to Name and set its type to text as well. Add a third column called Status and set the type to checkbox. Finally, add the fourth and final column called Date with the type date.
Now, the content of the database should just be the labeled columns with the table content being text that says “Empty table.”, as in the screenshot below.
Retrieve the Notion API key
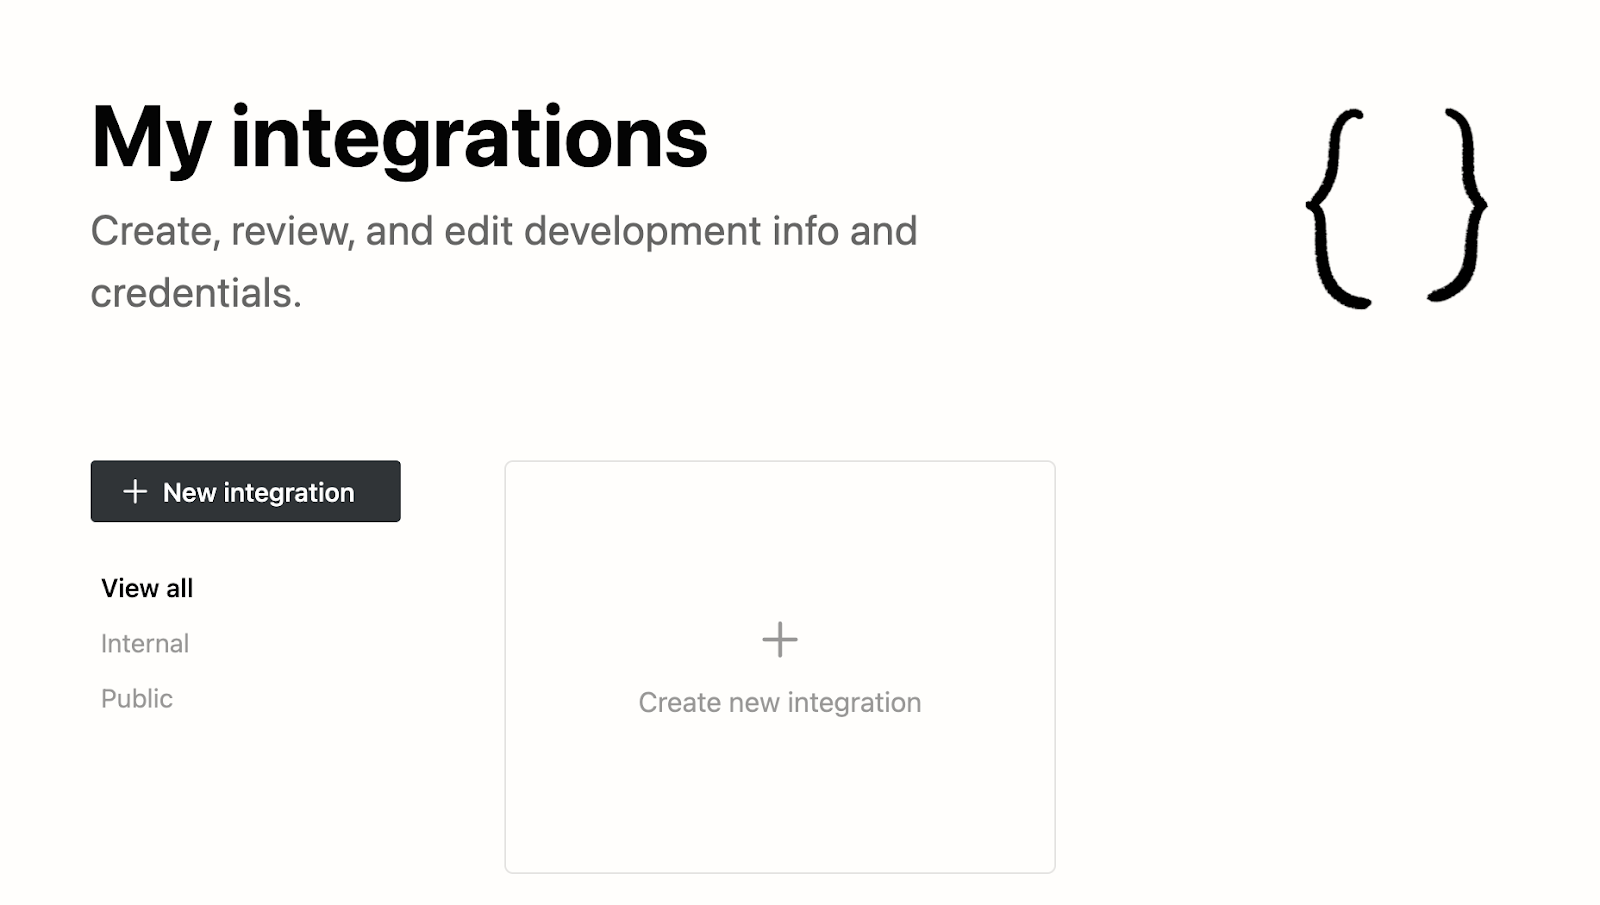
To find your Notion API key, navigate to the Notion API page and in the top right corner, click on the button labeled View my integrations. Once there, create a new integration by clicking the dedicated tile labeled Create new integration or the button in the left sidebar labeled + New integration.
Creating a new integration opens a setup page where it can be named and given certain permissions. In my case:
- I named my integration "Demo".
- My Associated workspace defaulted to my personal account. If you are using a specific workspace be sure to change it to the one that contains your database.
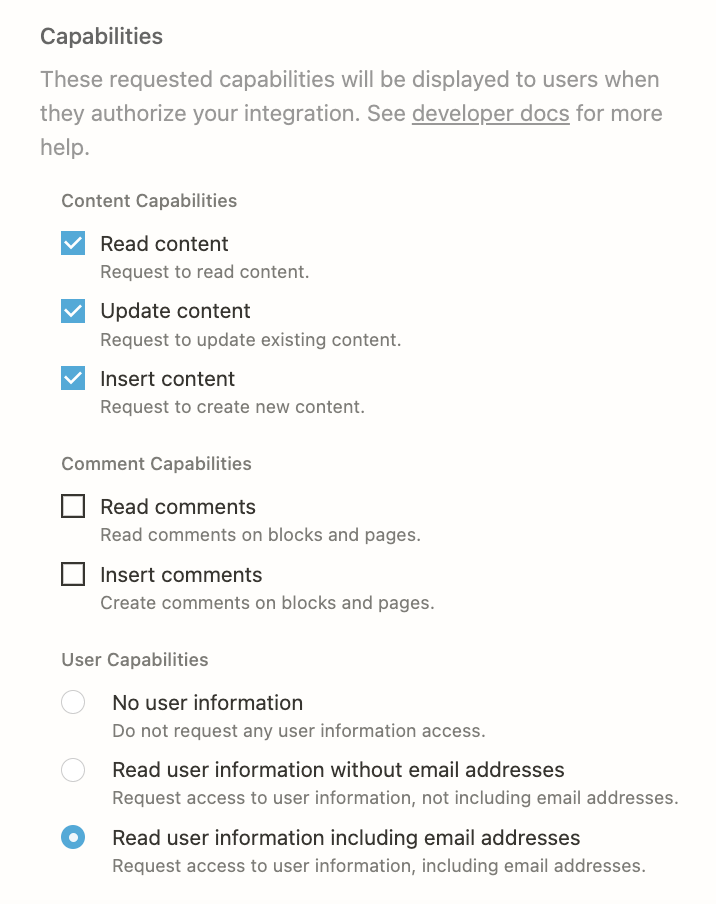
- I checked the three checkboxes under Content Capabilities.
- I left the two checkboxes under Comment Capabilities unchecked.
- Finally, I set User Capabilities to the last option that allows our integration to read user information including email addresses.
Once the settings for the integration have been set, click the button at the bottom labeled Submit.
After submitting, you will be redirected to a new page that contains your Notion API key, also called the Internal Integration Token. Clicking the blue Show button on the right hand side of the API key will expose it so that you can use it later in the tutorial. Copy it and keep it handy.
Connect your integration and retrieve the database ID
Navigate back to your Notion database page. In the top right corner of the page you will see a button made of three black dots. Click on it and it will open a dropdown menu. Towards the bottom, under Connections, hover over the text that says “+ Add connections”. In the text box that opens, type in the name "Demo" (or if you named it differently), and select the integration that was created in the last step; it may take a moment or two to appear. Once clicked, a popup window will show up asking us to confirm our selection. Click the red the Confirm button to finalize the connection.

At this point, all the permissions set for the integration apply to this Notion page and any child pages contained within it. However, one final piece of information is needed from Notion: the database ID. This ID is needed in order for Notion’s API to recognize where to look when accessing the database because multiple databases could be present on a single page.
To find the database ID, take a look at the URL of the page. If you are using the desktop app, right click on the Table tab of your database and click Copy link to view. Alternatively, in the search bar of your browser, the database ID is found between the last backslash and the first question mark.
Save the database ID in the same place as your Notion API key. The next step is to set up the local project environment.
Project file setup and installation of the Notion SDK
First, create a project directory that will store the project files. Navigate to a place on your computer and create a new directory called notion-database. Then, change into the newly created directory.
The same result as above can be achieved with the following terminal commands.
Once inside the empty notion-database directory in the terminal, run the following commands to initialize an npm project and install the Notion SDK. The last command installs dotenv, which is used to access the Notion API key and database ID in the .env file.
Then, in the same directory, create the files index.js and .env with the following commands.
Open the notion-database directory in your IDE. All the functions needed to work with the Notion database will be written in the index.js file, but first there is some necessary housekeeping.

As of now, these are the files in the project directory. The node_modules folder and the *.json files were created when the project was initialized via npm. Their purpose is to allow other Node dependencies to integrate with the project as seamlessly as possible.
Open the .env file and paste the following configuration, replacing <PLACEHOLDER> with your Notion API key and database ID, respectively.
Save this file and then proceed to open the package.json file next. Add only one entry to the ”scripts” element so the program can run with the command npm run start in the IDE’s terminal.
Copy the highlighted line and paste it directly below ”test” in the package.json file and save it.
Then as a final setup step, open up index.js and paste the following in the empty file.
The first two lines import Notion SDK Client and dotenv. The last two lines create a notion Client variable authorized by the API key found in the .env file and accessed using the dotenv library. Finally, a global databaseId variable is created and set to the other value stored in .env. These two variables will be used frequently throughout the code.
At this point, setup is complete and the rest of this tutorial will deal with manipulating data in the Notion database.
Insert data into a Notion database
Recall that the table accepts a title text ID, a rich text Name, a boolean Status, and a date Date which is accepted as a formatted string.
However, there are many other types of data available to use in a Notion database, which are known as properties, each with their own formats for adding, updating, and deleting.
After the imports and variable definitions, in the index.js file, paste the following asynchronous addToDatabase() function.
Test this function by calling it with the following test values. Paste this function call after its definition.
In the terminal in the project directory, or in the terminal session of your IDE, use the following command to run the code.
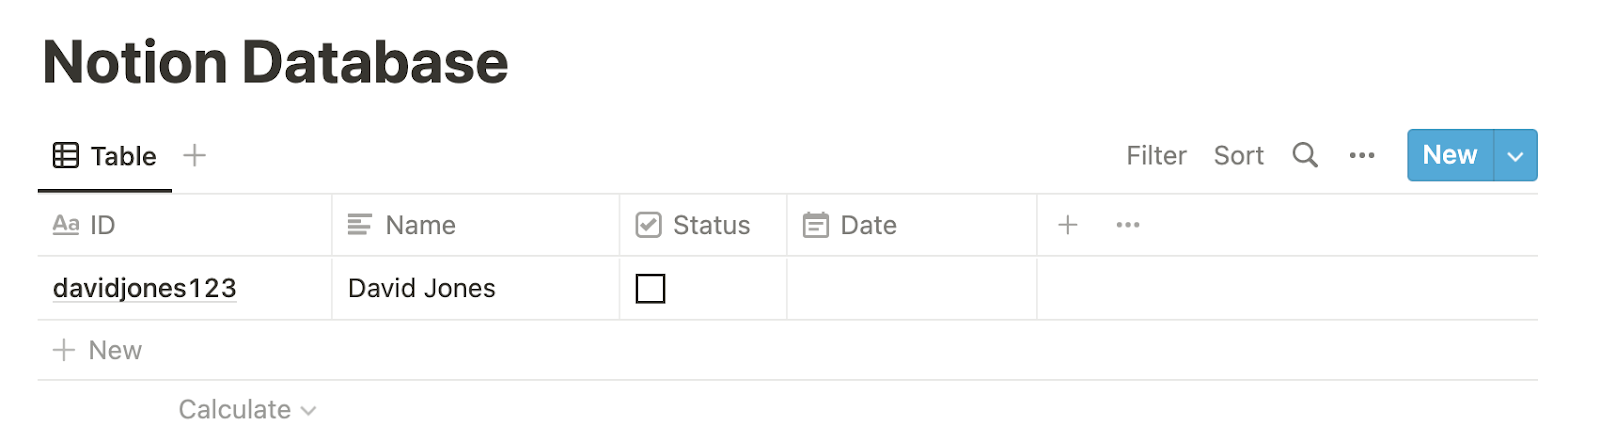
If successful, a response will be printed to the console without errors. Afterward, check the Notion database to see that the entry has been successfully added.
Code explanation for adding data to database
The first thing this function does is wrap everything in a try catch block, which is necessary for debugging since any errors will be printed out to the console.
Next, a Notion page is created. In Notion databases, each row of the database is considered a page and has a unique page ID associated with it. In order for Notion to know that this page belongs in a database, it specifies its parent and sets the value to databaseId. Then, it proceeds with constructing a properties object, which is structured according to the schema of the database.
Each property is labeled the same as each column in the database, and each may have different data structures. For example, notice how the rich_text data type accepts an array of objects. This is due to the fact that Notion allows for a lot of customization of its rich_text object, and the array provides a structured way to define what sort of styles you would like your rich text to adopt.
When this page is created, Notion sends back a response. In this response, Notion will tell you via an HTTP 200 or 400 status code as to whether the action was successful. If it was not, the response will provide clues as to why. Typically the structure of a data type might not be formatted correctly in the object; the process does involve some amount of trial and error.
Query data from a Notion database
Notion provides some advanced filtering features when querying their databases. Any filter or sorting condition that can be used in their UI can also be used with their SDK.
In this tutorial, a unique username ID value will be queried to get the page ID for that specific entry. This page ID will be necessary for updating and deleting items in the database, which is demonstrated in the following sections.
Replace the call to addToDatabase() at the end of index.js with the following function definition.
Test this function with the following code. Paste it directly underneath the queryDatabase() function definition.
Save the file and run it with npm run start.
A code should print to the console composed of five segments of letters and numbers in an 8-4-4-4-12 character length pattern, separated by four dashes. This is the page ID for the davidjones123 database entry.
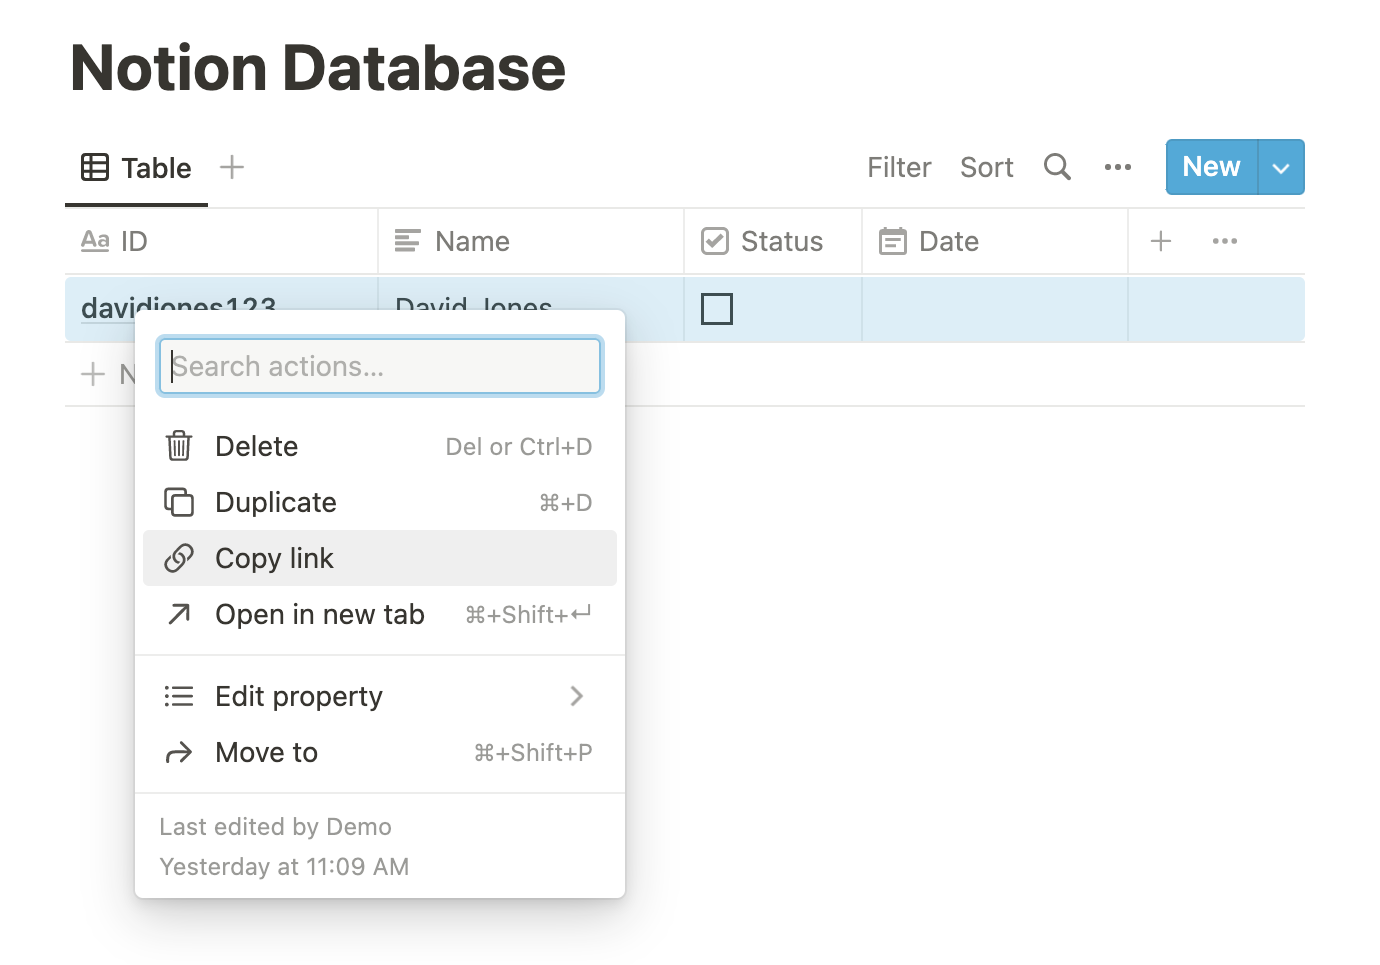
Confirm this page ID by going back to the database in Notion, right clicking the entry, and selecting Copy link.
When pasting this link to view it, it should look something like this: https://www.notion.so/davidjones123-7560067154ba42bebad1dfb548958fc3
Notice the code in the URL after the title davidjones123 and dash. It should be the same code as the one viewed in the terminal, minus the four dashes.
Code explanation for querying data from database
When querying a Notion database, the databases.query method is used and the databaseId is provided. If left as-is without specifying a filter, a response would be received of all the pages that are contained in the database. The number of pages shown in the response object is up to the page_size, which is a condition that may be included in the request, but is not covered in this tutorial.
Since the code does include a filter, it is set to look at the ID title property of the database and filter the results to find a page that contains a specified username, which in this case is davidjones123. The response from this call returns an object that contains, among other things, a nested list of objects called results, which in turn contains our results of the query.
In this case, a filter was specified for one unique entry, so the list that was received had just one item in it - the page that contains the David Jones entry. It is accessed at index 0, and the page ID property is extracted from the object in the list and returned. As long as the property being filtering for is unique, only one item in the results list should be received. Otherwise, the results list will contain multiple page objects to be iterated through.
Lastly, this returned value is printed with a then method because the response from Notion is a Promise. The Promise needs to resolve before the return value, stored in the result variable, can be accessed..
Update data in the Notion database
Now that query functionality is complete for the database, it’s time to explore how to update it. The queryDatabase() function will be used to retrieve the page ID of the entry of interest, and then that page ID will be used in a pages.update API call.
Replace the queryDatabase() call at the end of index.js and the attached .then() method with the following updateItem() function.
The Status and Date properties are updated simultaneously for each entry. Test the function with the following code. Paste it just below the updateItem() definition.
After running the above with npm run start, navigate back to the Notion database to view the changes.
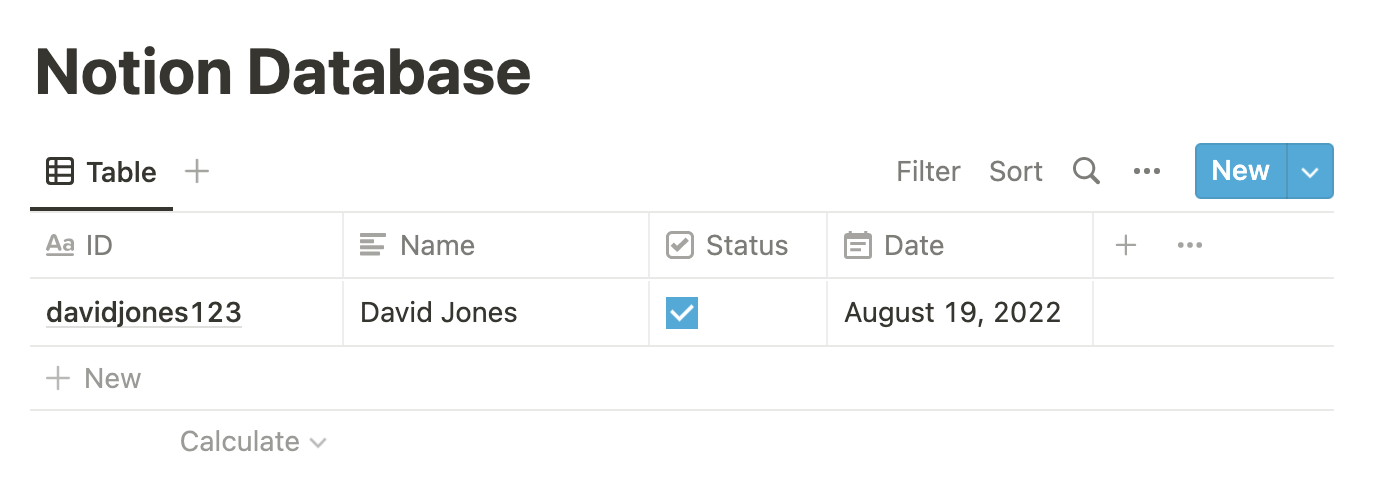
The table has been successfully updated, with the checking the previously unchecked box and adding a date to our empty date cell!
Code explanation for updating data in database
Notice how similar the function call to queryDatabase() is to how it was called when it was tested, with the exception of the added async keyword included in the arrow function. async is used here because the API call is asynchronous, and since the query Promise needs to resolve in order to obtain the pageId, the pages.update() is put in the .then method.
This pageId returned from queryDatabase() is provided to the pages.update() API call instead of the databaseId that we used previously. The properties is updated by setting the Status checkbox to true and the Date to a start date of the inputDate argument. The response from the API call is then logged to the screen to indicate success or failure.
Delete data from our Notion database
The basic functionality required to use a Notion database is almost complete! The last step is to learn how to delete an entry. Luckily, this process is almost exactly the same as updating, but the code is even simpler.
Replace the call to updateItem() at the end of index.js with the following deleteItem() definition.
Test this code by pasting the following function call right below the deleteItem() definition.
Run this with npm run start and navigate back to your database, which should now display Empty table instead of the davidjones123 entry.
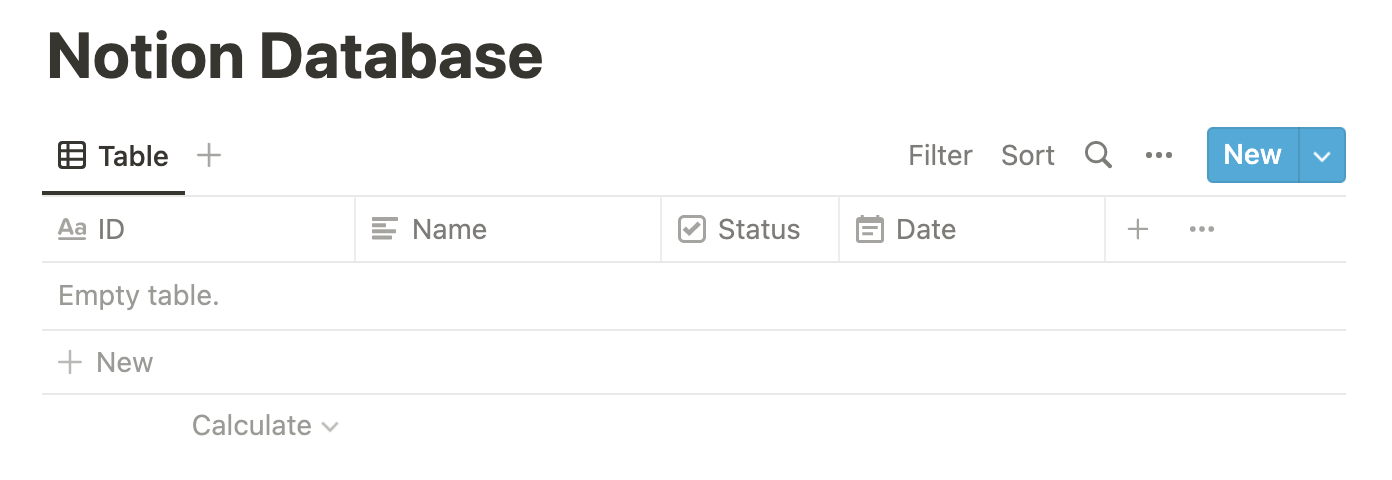
As seen in the above screenshot, the entry was successfully deleted!
Code explanation for deleting data from database
The deleteItem() function works in a very similar way to updateItem(). The difference is that it is only necessary to provide the pageId to the blocks.delete call instead of providing a complete set of data that is used in updating.
Actually, there is one subtle difference, and that is using blocks instead of pages, and providing the pageId where it asks for a blockId. Thankfully, these two different IDs can be used interchangeably in most cases since a Page is a type of Block.
Blocks are a broad category of content in Notion, and deleting them will archive them. In the event of an accidental deletion, the Block can be restored by updating them similar to how we updated a Page earlier.
After deleting the Block, the response is printed to ensure our action was a success.
Now you know how to manipulate data in a Notion database!
With the knowledge you have gained thus far, you can now harness the power of Notion databases for all manner of small scale web development projects or prototypical applications. You can effectively keep state in serverless environments and manipulate all kinds of data simply through API calls. With it, you are confined only to the limits of your imagination!
Be sure to view this companion repository for a complete view of the code used throughout this tutorial, including the ordered function calls at the bottom, just in case you came across any bottlenecks and would like to see it all put together.
Hayden Powers is a Developer Voices intern on Twilio’s Developer Network team. She enjoys enthusing over creative ideas and endeavors, and hopes you will reach out to her with yours at hpowers[at]twilio.com or on LinkedIn.

Related Resources
Twilio Docs
From APIs to SDKs to sample apps
API reference documentation, SDKs, helper libraries, quickstarts, and tutorials for your language and platform.
Resource Center
The latest ebooks, industry reports, and webinars
Learn from customer engagement experts to improve your own communication.
Ahoy
Twilio's developer community hub
Best practices, code samples, and inspiration to build communications and digital engagement experiences.