Create a NASA Astronomy Picture of the Day Scheduled SMS with Python, Twilio and Azure Functions
Time to read: 15 minutes
March 04, 2020
Written by

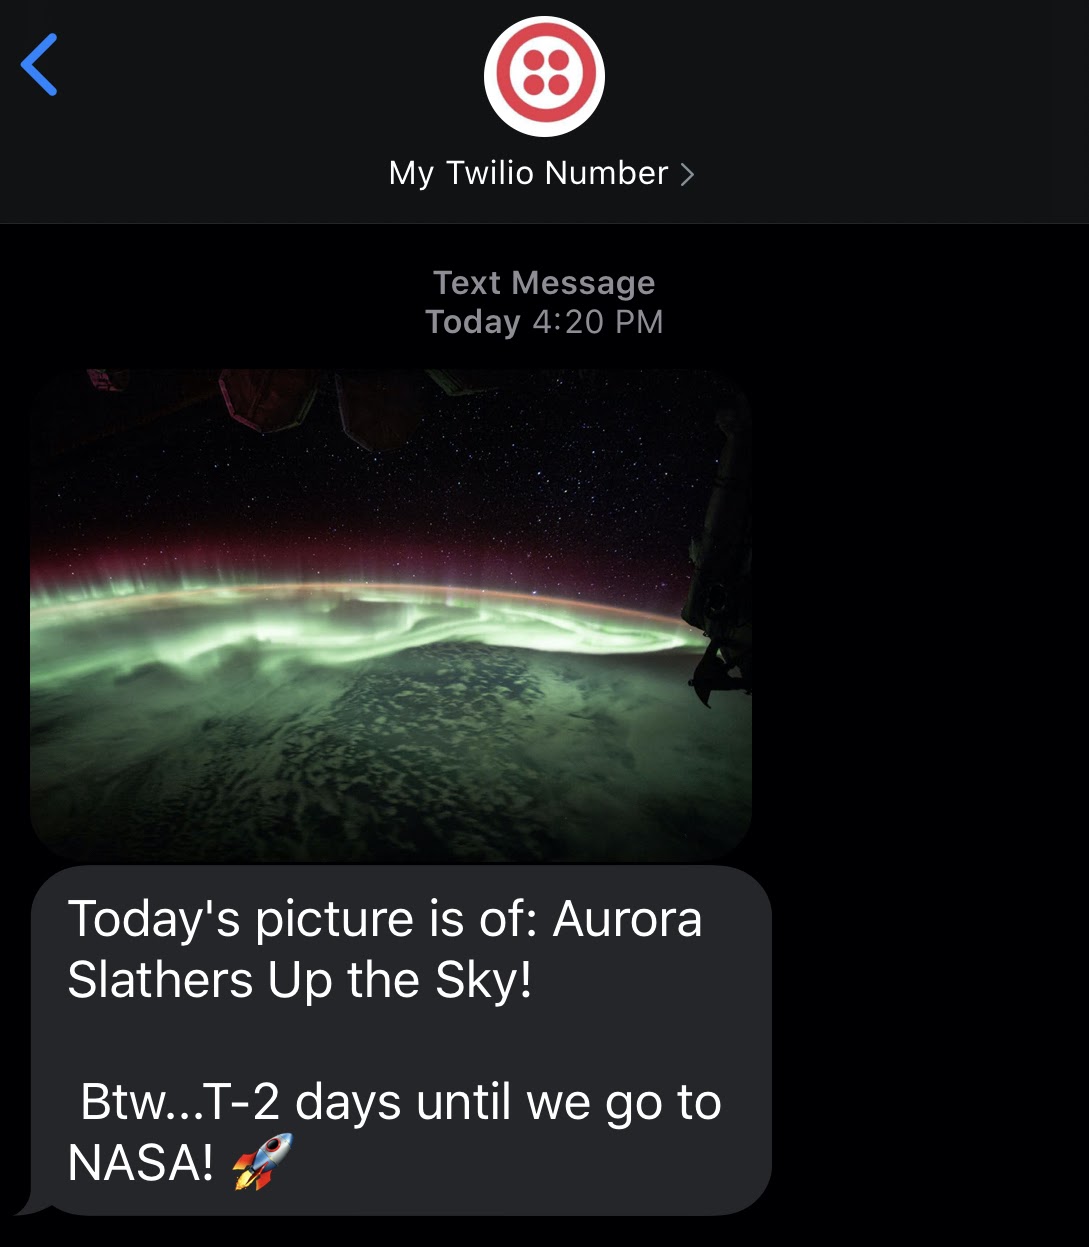
Recently, my friends and I were invited to NASA to take part in a behind-the-scenes tour and briefing on five new research campaigns that will take to the field in 2020 to explore questions critical to understanding our home planet!
With so much to look forward to, I decided to create a countdown for the days leading up to our road trip! Rather than execute the group chat countdown manually, I decided to get a little help from my friends at Twilio, Azure Functions and NASA's astronomy picture of the day API. My goal was to accomplish the following:
- Countdown the number of days remaining until the trip to NASA
- Include NASA's astronomy picture of the day
- Schedule a message to be sent every morning at 9AM
Here's an example of a message:
In this tutorial I’m going to show you how to create a countdown SMS that sends a scheduled text message daily using Twilio SMS, Azure Functions Timer Trigger and the NASA Astronomy Picture of the Day API.
Tutorial Requirements
To follow this tutorial you need the following components:
- Python 3.6x or 3.7x. If your operating system does not provide a Python interpreter, you can go to python.org to download an installer.
- NASA API Key. You will need an API Key to use the NASA Astronomy Picture of the Day API. It's free and includes 1000 requests per minute.
- An Azure Subscription. You will need an Azure Subscription to setup your Azure Function. The free trial will provide you with 12 months of free services.
- Visual Studio Code. The Azure Function will be created using the Azure Functions extension in Visual Studio Code. Once you’ve downloaded and installed Visual Studio Code, install the Azure Functions and Python extensions.
- A smartphone with an active phone number.
- A Twilio account. If you are new to Twilio create a free account now. If you register with this link you will earn $10 credit once you upgrade to a paid account.
Get a Twilio Phone Number
To send and receive messages with Twilio, you will need to do 2 things:
- Get a Twilio phone number
- Register the receiver’s phone number (only required if you are using a free Twilio account)
You can view and/or get a Twilio number in the Twilio Console by navigating to the “Phone Numbers” tab. If you haven’t yet purchased a number, then no numbers will appear within your Active Numbers. If you need to purchase a phone number, click “CLICK + TO BUY NEW NUMBER”.

If you are using a free Twilio account, you can only send a Twilio SMS or MMS to a verified phone number. If you haven’t verified a phone number yet within the Twilio Console, you could do so in the console by navigating to “Phone Numbers” > “Verified Caller IDs”.

Create project folder
Since we'll be creating an Azure Function using the Azure Functions Extension in Visual Studio Code, I'd suggest first creating a folder for the entire project. Azure will create some files that are necessary to get the function to work so it's better to get things organized now rather than have to move files around later.
Open project folder in Visual Studio Code
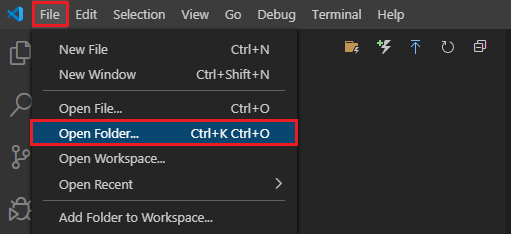
Now, let’s open the folder location in Visual Studio Code. In the Visual Studio Code menu, click “File” > “Open Folder...”.
In the file explorer, select the folder you just created and click “Select Folder”.
Sign in to Azure in Visual Studio Code
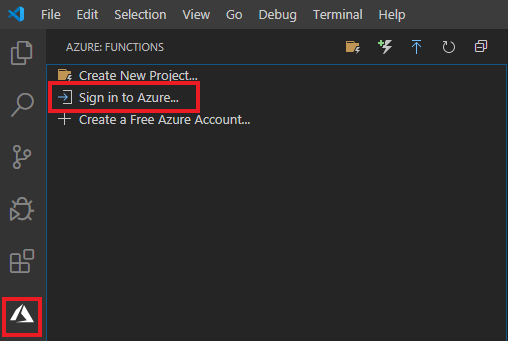
In Visual Studio Code, click the Azure logo then click “Sign in to Azure”.
A window in your browser will open and request you to sign in to Azure. Enter the credentials for your Azure account. After you’ve signed in successfully, the webpage will prompt you to close the window.
In Visual Studio Code, verify that the email address of your Azure account appears in the Status Bar. The Status Bar is located at the bottom of Visual Studio Code.

Install Azure Functions Core Tools
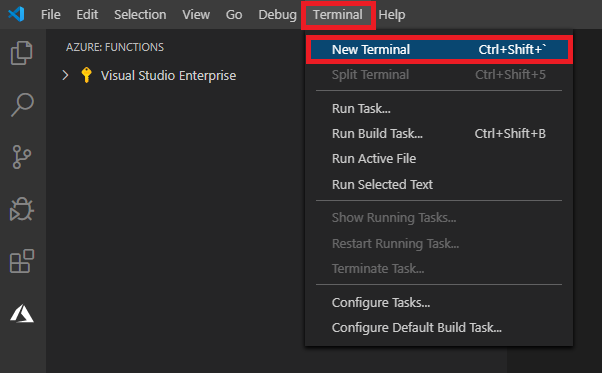
Azure Functions Core Tools lets you develop and test your functions on your local computer from the command prompt or terminal. Your local functions can connect to live Azure services, and you can debug your functions on your local computer using the full Functions runtime. This tool will also enable you to deploy a function app to your Azure subscription. Since we’ll need this to create the function, install Azure Functions Core Tools based on the instructions for your operating system. To start a new integrated terminal, in the Visual Studio Code menu, click “Terminal” > “New Terminal” to open a new terminal.
Linux
You can use APT to install Core Tools on your Ubuntu/Debian Linux distribution. For other Linux distributions, see the Core Tools readme.
- Install the Microsoft package repository GPG key, to validate package integrity:
- Setup the .NET development source list before doing an APT update.
To set up the APT source list for Ubuntu, run this command:
To set up the APT source list for Debian, run this command:
- Check the
/etc/apt/sources.list.d/dotnetdev.listfile for one of the appropriate Linux strings listed below:
|
Linux Distribution |
Version |
|
Debian 9 |
|
|
Debian 8 |
|
|
Ubuntu 18.10 |
|
|
Ubuntu 18.04 |
|
|
Ubuntu 17.04 |
|
|
Ubuntu 16.04/Linux Mint 18 |
|
- Start the APT source update:
- Install the Core Tools package:
Verify Azure Functions Core Tools is installed
Now, let’s verify that all the Azure Functions Core Tools are installed! In the terminal, run the command func.

If the terminal returns the Azure Functions logo, then you’re all set and ready to go! You may need to scroll the output upwards to view the logo.
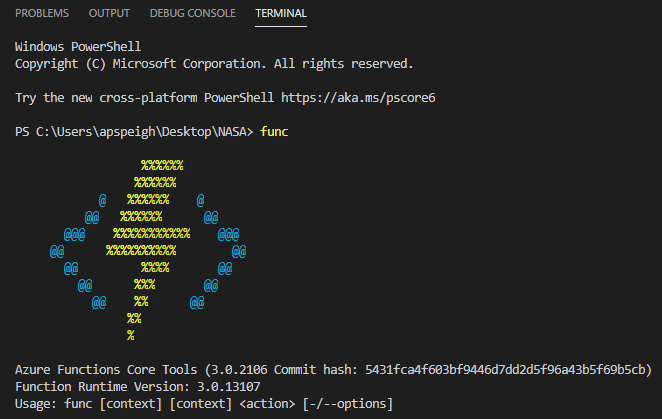
If the func command isn’t recognized, then run npm install -g azure-functions-core-tools again and verify that the install succeeds.
Create a new project
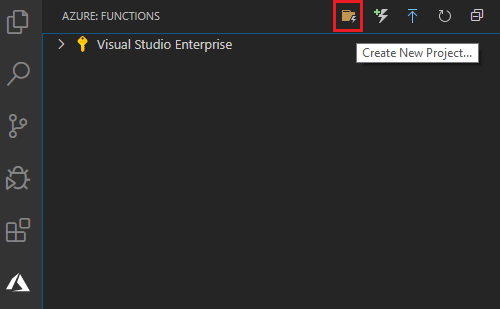
Now that you’ve verified that you’re signed in to your Azure account, create a new project in Visual Studio Code. In the Azure menu, click “Create New Project”.
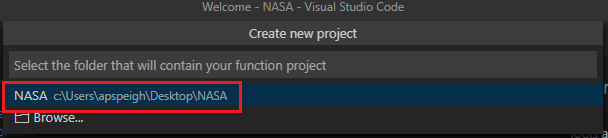
In the Visual Studio Code command palette, select the folder that you created earlier at the start of this tutorial. This folder is where the Azure Function files will be created. If the folder is not listed, click “Browse” to open the file explorer.
Visual Studio Code will guide you through the instructions for creating a new function, however, I'll walk you through the steps as well!
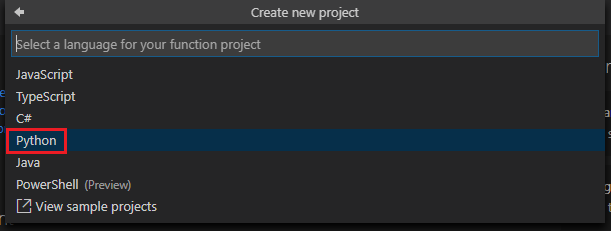
First, select “Python” as the language.
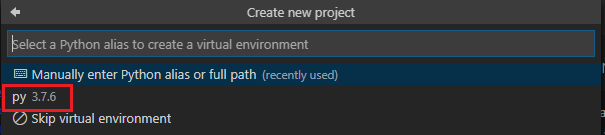
Next, select the Python alias to create a virtual environment. As a reminder, only Python 3.6x and 3.7x are supported.
Next, select “Timer trigger” as the template.

You will then be asked to provide a name for your function. Replace “TimerTrigger” with your function’s name.

Keep the CRON expression as-is - we'll update that later!

Azure will begin to work it's magic to create the function - you can check the progress in the status bar at the bottom of Visual Studio Code.

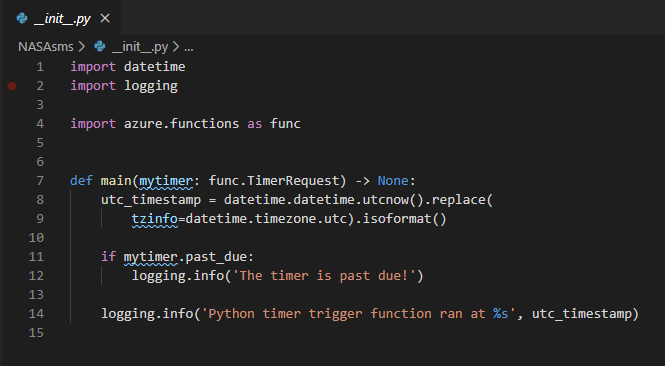
Once Azure is done, the __init__.py file will open. The __init__.py file contains a template for a TimerTrigger.
Activate virtual environment
A virtual environment is created alongside the project. If the virtual environment isn’t activated after the __init.py__ file opens, you can activate it by entering the command .venv\Scripts\activate (for Windows) or source .venv/bin/activate (for Mac and Linux) into the terminal.
Create environment variables
Before we dive into coding in Visual Studio Code, let’s get something very important squared away - environment variables! There are 3 that we’ll need to create and use later when we begin to write the logic for our function.
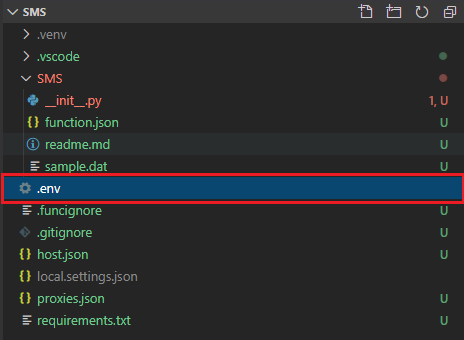
In the root of your project folder, create a .env file.
Inside the .env file, add your environment variables for your Twilio TWILIO_ACCOUNT_SID, TWILIO_AUTH_TOKEN, NASA_API_KEY, MY_TWILIO_NUMBER and RECEIVER_NUMBER. Be sure to save the file!
You can find the Twilio Account SID and Auth Token for your account in your Twilio Console.For the Twilio numbers, be sure to start the number with the country code using E.164 standard. Also, if you are using a free Twilio account make sure that the RECEIVER_NUMBER phone number is a verified phone number within the Twilio console.
Now that your environment variables are created, switch back over to the __init.py__ file.
Install modules
There are a few modules which need to be imported so that we can create the logic for the function:
Python-dotenv
To use the environment variables that we set earlier, you’ll need to install python-dotenv. You can install the module using pip install python-dotenv in the terminal within Visual Studio Code.
Requests
Since we're working with GET requests, you'll need to import the requests module so that we can get data from the NASA API.
You can install the module using pip install requests in the terminal within Visual Studio Code.
Twilio
The Twilio Python Helper Library makes it easy to interact with the Twilio API from the Python app.
You can install the Twilio Python Helper Library using pip install twilio in the terminal within Visual Studio Code.
Emoji
To include emojis in your message, you’ll need to import the emoji module which will enable you to use emojis in strings. I'll cover this later in the tutorial, however, this Emoji Cheat Sheet is really helpful for figuring out the emoji code for whatever emojis you want to include in the text message.
You can install the module using pip install emoji in the terminal within Visual Studio Code.
Datetime
Since the text message counts down the number of days until heading to NASA, there needs to be logic that takes the current date and subtracts the number of days until some targeted date. The datetime module not only gives you the current date but also includes a timedelta object that can be used to determine the difference between two dates!
This module comes with Python so there's nothing to install for use.
Pytz
The datetime object can either be naive or aware. If the object is naive, then the datetime object contains no timezone information. We'll want to make the datetime object aware by instantiating a timezone object and using that timezone object to get the correct remaining number of days.
You can install the module by using pip install pytz in the terminal within Visual Studio Code.
Access environment variables
Now that the proper modules have been installed, let’s first access the environment variables in __init__.py.
First, we import load_dotenv from dotenv. We will then call the load_dotenv() function into the script. Next, import os. And finally, use os.getenv to get the environment variables.
Import modules
In the __init__.py file, import the remaining modules. For the Twilio Python Helper Library, import Client. For datetime, import date.
Setup date countdown variables
We can now start adding the logic for our SMS message inside the main function. Make sure to maintain your indents - otherwise the main function will get wonky. The logic that we’re adding starts after the line logging.info('Python timer trigger function ran at %s', utc_timestamp). Remove everything after def main(mytimer: func.TimerRequest) -> None: The function should now be empty.
Let’s first start with the countdown variables! There's a few variables that need to be created so that you can get the difference between two dates. These variables will also come in handy later when you create the text message.
However, let’s first find your timezone so that you can use it with pytz. In a separate window, run the block of code below in a Python shell to find your timezone:
Scroll through the list until you find your timezone. Mine happens to be America/Los_Angeles! Once you have your timezone, head back to the __init__.py file so that you can use it to create a proper datetime object for your location.
First, use pytz.timezone to create a variable for your timezone. Next, create a variable for both the current date and the target date. The current variable gets the current date with the help of the timezone variable you previously created. Convert this date to a string and provide the proper formatting. The target variable is assigned to the date we are counting down to, in my case the day I’m heading to NASA. Create this variable as a string as well.
Next, we need to convert both the current and target dates into datetime objects so that we can get the difference in days between the two dates. Create a variable for each converted date and use datetime.strptime to convert to a datetime object. Don’t forget to set the proper format as well - these should be identical for each date so that the calculation works properly!
Finally, create a variable diff which subtracts the target_converted date from the current_converted date. Later in the code, we’ll use diff.days to print the difference in days in the text message.
Setup NASA API GET request
Let's get some data from NASA! The NASA Astronomy Picture of the Day API returns quite a bit of information alongside the actual photo. We'll just need the title and the photo for the text message that'll be generated daily.
We first create a response variable that stores the GET request for the API. Be sure to get the JSON response as well! You can store that in the variable response_json.
The json outputs the photo as a URL - you can store this in the variable picture. And finally, store the title of the photo in the variable title.
Oh, before I forget, create a variable rocket for the rocket emoji! Who doesn't think of rockets when they hear the name NASA? The emoji module will be helpful here. You can use the .emojize() method with emoji and insert the emoji code inside the method.
Create Twilio message
Now it's time for some Twilio fun! Twilio provides a template that you can use - which is a huge time saver. Let's walk through the template
The client variable class contains your looks for your Twilio credentials by default in TWILIO_ACCOUNT_SID and TWILIO_AUTH_TOKEN environment variables.
Next, the message is created. Since the NASA Astronomy Picture of the Day API sometimes uses YouTube videos, we’ll need to create two functions that will differentiate which message should be sent to the receiver. The differences between the two functions are the body and the use of the media_url parameter. The body contains a string which is the message that is being sent. The media_url parameter enables you to send a MMS. A text message that contains a link to a YouTube video should be sent as a SMS whereas a text message that contains a photo should be sent as a MMS. While you can send text-only SMS messages almost anywhere on the planet with Twilio, sending media is currently only available in the US and Canada.
The first function youtube() sends a SMS which includes a link to a YouTube video. The second function image() sends a MMS which includes a photo. We can decide which function to use by providing an if/else statement. If the string youtube is in the variable picture that we created earlier from the NASA API, then the youtube() function is called. However, if the string youtube is not in the picture variable, then the function image() is called.
Circling back to the media_url parameter, you can set it to the picture variable from the NASA GET request. Be sure to use string formatting with f-syntax so that the URL can be passed into the brackets. As a reminder, the media_url parameter should only be used if the message contains a photo rather than a YouTube video.
Finally, the from_ and to parameters each access the Twilio phone number environment variables that were created in the .env file.
Add requirements to requirements.txt
Open the requirements.txt file. We'll need to add the modules that we imported into the code. Add the modules and save the file.
Update CRON expression
Right now, the code defaults to generating a text every 5 minutes. However, if that's too long of a wait, you can adjust the CRON expression in the function.json file. You can locate the function.json file inside the folder created for your function. I would suggest changing the 5 to a 1 if you want the trigger to send the text every minute while you debug in the next step!
If you choose to update the CRON expression, be sure to save the file and return to __init__.py.
Run in the debugger
Before you deploy the function to Azure, test everything by running the debugger. Your code in
__init__.py should reflect the following:
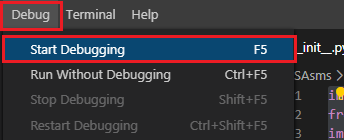
Make sure that you’re looking at the __init__.py file. In the Visual Studio Code menu, click “Debug” > “Start Debugging”.
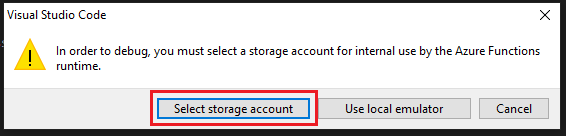
Visual Studio Code will first prompt you to select a “Storage Account”. Click “Select storage account”.
Next, either select an existing Storage Account or click “+ Create new storage account”.

Provide a name for the storage account.

Next, either select an existing “Resource Group” or click “+ Create new resource group”.

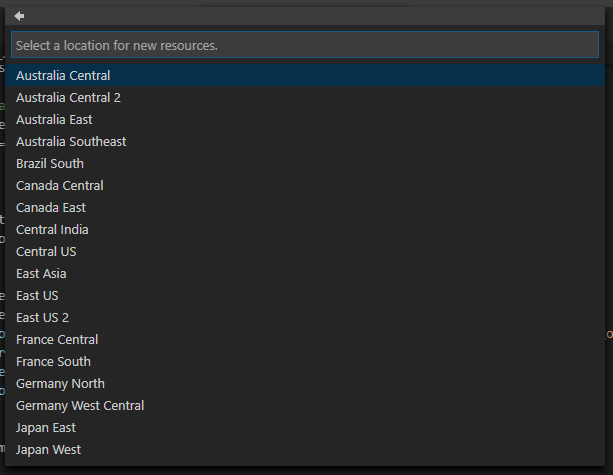
Provide a name for the new resource group if you’re creating a new resource group. After you create or select an existing resource group, select a location for the resources. Additional information regarding locations is available at Azure Locations.
After the resource location is selected, Visual Studio Code will work it’s magic to create the storage account. You can check the status at the bottom right of the Visual Studio Code window.

Once the storage account is created, you're ready to test the function! If the process fails the first time you debug, press “Ctrl” + “C” on your keyboard to shut down the debugger. Once everything is shut down, head to the terminal and enter the command func host start. This command is an alternative way to start the debugger. If you’re still receiving errors, review the the code to ensure that everything is accurate and that all the files reflect the updates that were made throughout this tutorial.
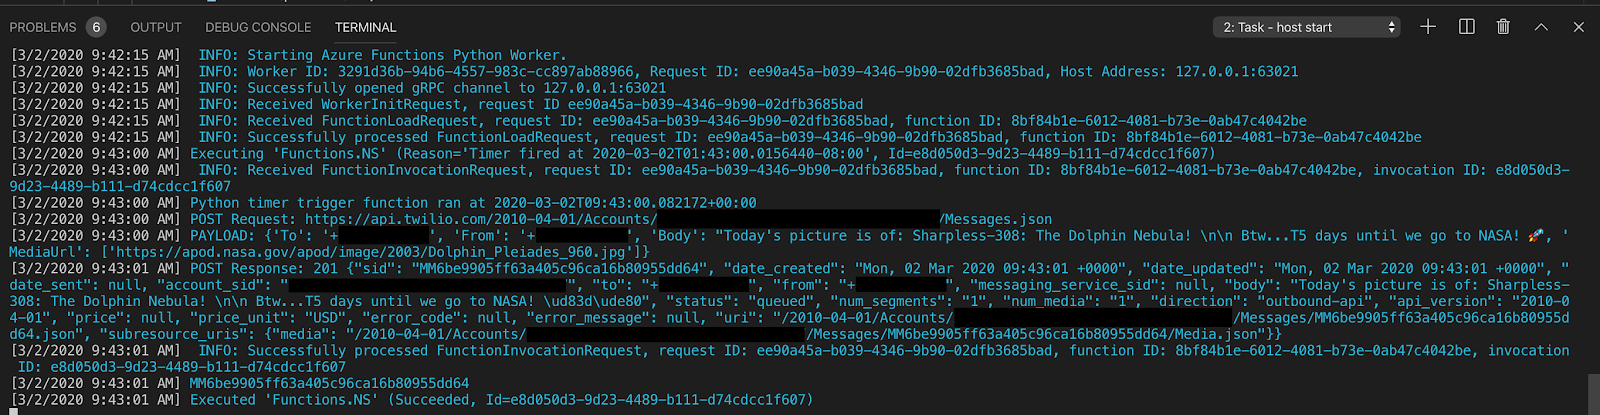
Depending on the CRON expression you chose, the text will be sent after the first event triggers.
Update CRON expression for a daily trigger
Before you deploy to Azure, adjust the CRON expression in the function.json file. By default, the Azure function uses the UTC timezone. Therefore, you need to set a time in that timezone that equates to 9AM in your specific timezone. Since I'm in California, I follow Pacific Standard Time. Therefore, my CRON expression for everyday at 9AM would be: 0 * 17 * * *. For those of you on the East Coast, the CRON expression would be: 0 * 14 * * *.
If you fall outside either of those timezones, you can use this converter to figure out the equivalent to 9AM for UTC in your time zone.
Update the CRON expression and save the function.json file.
Deploy to Azure
You can now deploy the function to Azure! It’s worth noting that you will not be able to edit the files directly in the Azure Portal. Therefore, if you need to make any changes to the function files, you’ll have to deploy again.
Confirm the changes to the .env, requirements.txt, function.json and __init__.py files.
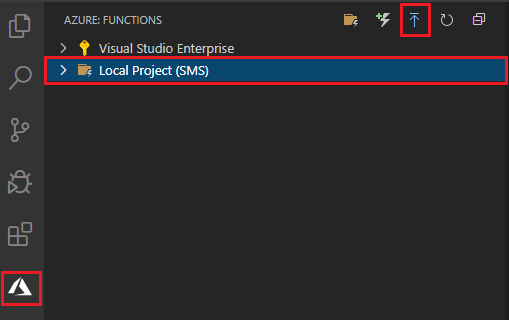
After you’ve confirmed and saved all files, click on the “Azure” tab in Visual Studio Code. Select the project and click the “Deploy” icon.
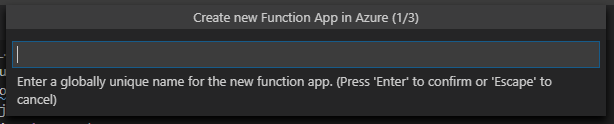
You will be prompted to + Create new Function App in Azure… Make sure not to select the option labeled with Advanced.

You will then be prompted to provide a globally unique name for the app - essentially, no other function that exists on Azure should have this name.
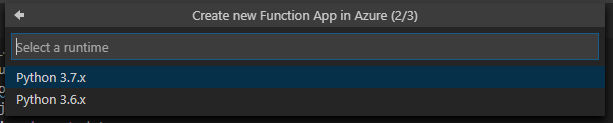
Next, select the version of Python that you selected earlier when you first created the Azure Function. As a reminder, only Python 3.6.x and Python 3.7.x are supported.
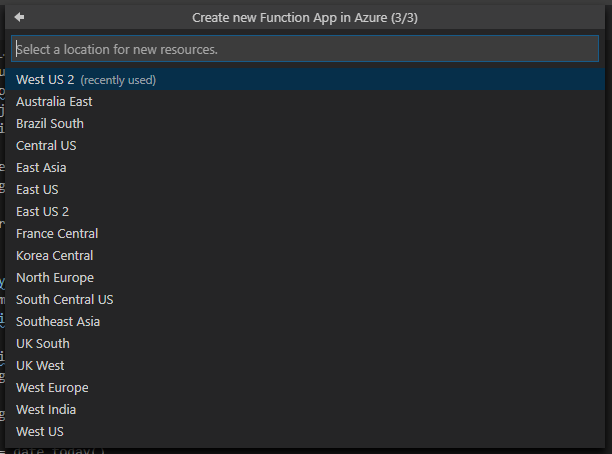
You will now need to select a location for the new resources. Select a location based on where the function will be used. Additional information regarding locations is available at Azure Locations
Azure will begin the process to deploy the function. You can follow the progress in the status bar at the bottom right of the screen as well as the Output console. It takes a few minutes for your first deployment to complete, however, your subsequent deployments for the function will happen faster.

After the deployment is complete, the function can be viewed in the Azure portal. As a reminder, if you ever need to make adjustments to the files, you can do so locally in Visual Studio Code and deploy the app again. When prompted, overwrite the previous deployment.
Once you're done with everything, you can type deactivate in the terminal to quit the virtual environment for the project.
If you're not going to continue to use the function, you can clean up the resources in the Azure portal - otherwise, the app will continue to run and you'll incur a minimal cost.
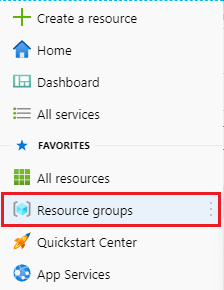
In the Azure portal, select “Resource groups” from the left-side navigation pane.
Next, click the resource group that was created in the process of this tutorial. Finally, click “Delete resource group” in the top menu.

The Azure Portal will ask you to confirm that you want to delete the resource. Follow the instructions to confirm and click “Delete”.
Conclusion
Awesome! You just created an Azure Function that uses the TimerTrigger! The setup you created today generates a daily text message which includes data from the NASA Astronomy Picture of the Day. Try using other APIs such as the Metropolitan Museum of Art Collection API. For a challenge, try sending a random selection of an art print daily. The possibilities are endless when it comes to generating automated daily text messages!
If you want to learn more about Azure Functions, check out the Azure Functions documentation. Also, consider completing the Microsoft Learn Execute an Azure Function with triggers module.
Happy Coding!
April Speight is a Cloud Advocate with the Spatial Computing technology team at Microsoft. Initially a lover of building AI assistants, she has since fallen for creating XR experiences. She creates tutorials and blog posts to help those who are new to coding. Whenever she’s not creating content, you can find her roaming the streets of Beverly Hills.
GitHub: https://www.github.com/aprilspeight
Twitter: @VogueandCode
YouTube: https://www.youtube.com/c/vogueandcode
Website: https://www.joincomputerclub.com

Related Resources
Twilio Docs
From APIs to SDKs to sample apps
API reference documentation, SDKs, helper libraries, quickstarts, and tutorials for your language and platform.
Resource Center
The latest ebooks, industry reports, and webinars
Learn from customer engagement experts to improve your own communication.
Ahoy
Twilio's developer community hub
Best practices, code samples, and inspiration to build communications and digital engagement experiences.