How to do Phone Verification in iOS Apps with Twilio Verify and Swift
Time to read: 6 minutes
July 06, 2018
Written by

Security is at the top of everyone’s mind and phone verification is a simple way to secure your application and help prevent bot accounts. Phone verification is a common security tool used when people sign up for a product or give you their phone number for the first time.
Confidence in your users’ phone numbers decreases fraud and increases reliability of notifications. Let’s take a look at how to verify phone numbers from an iOS application using Swift and the Twilio Verify API.

This tutorial will walk you through the process of SMS phone verification step by step. You can check out the final project on my GitHub.
What you’ll need
To code along with this post, you’ll need:
- A Twilio account
- A Verify Service which you can create in the Twilio console
- A Heroku account
- Xcode version 9 or higher
Setting up
Navigate to the Twilio Console and grab your Verify Service SID.
We don't want to store our environment variables directly in our iOS application, so we'll need a backend server that will talk to the Verify API. Head over to the sample backend on my GitHub and click the "Deploy to Heroku" button. This is a small application written in Python, your backend can be in whatever language you'd like (here are other examples using Twilio Functions, Node.js, and Golang). The important thing is that it manages the sensitive environment variables instead of the iOS application. You'll be redirected to Heroku; give your app a name and "Deploy app". Next, hit "Manage App" and navigate to Settings.

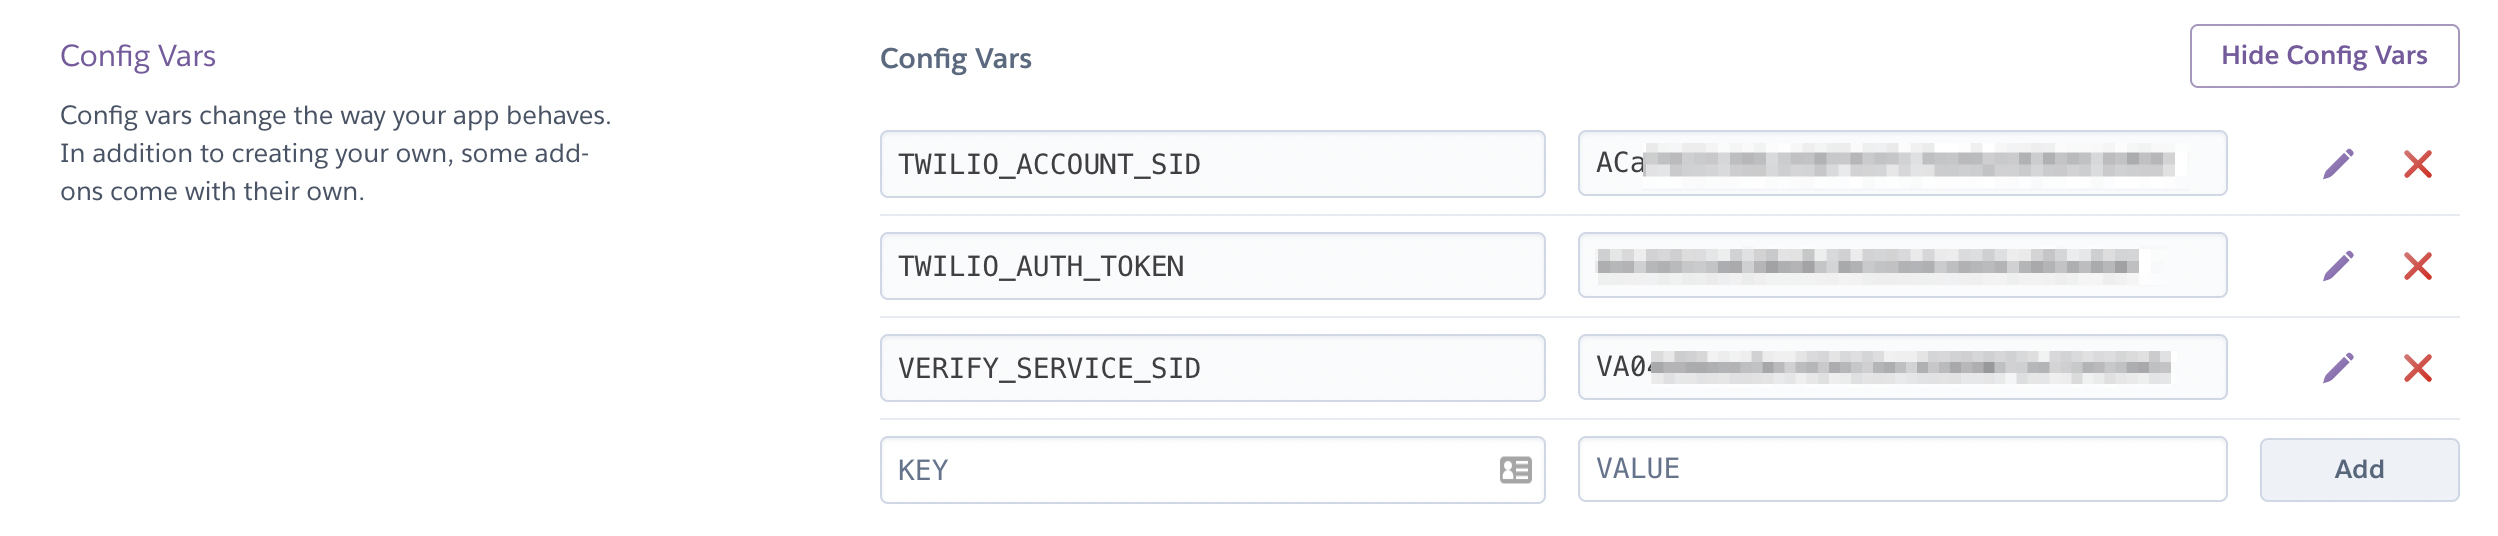
In Settings, add your TWILIO_ACCOUNT_SID, TWILIO_AUTH_TOKEN, and VERIFY_SERVICE_SID as Heroku config variables. Copy your Heroku Domain URL, we'll need this soon.
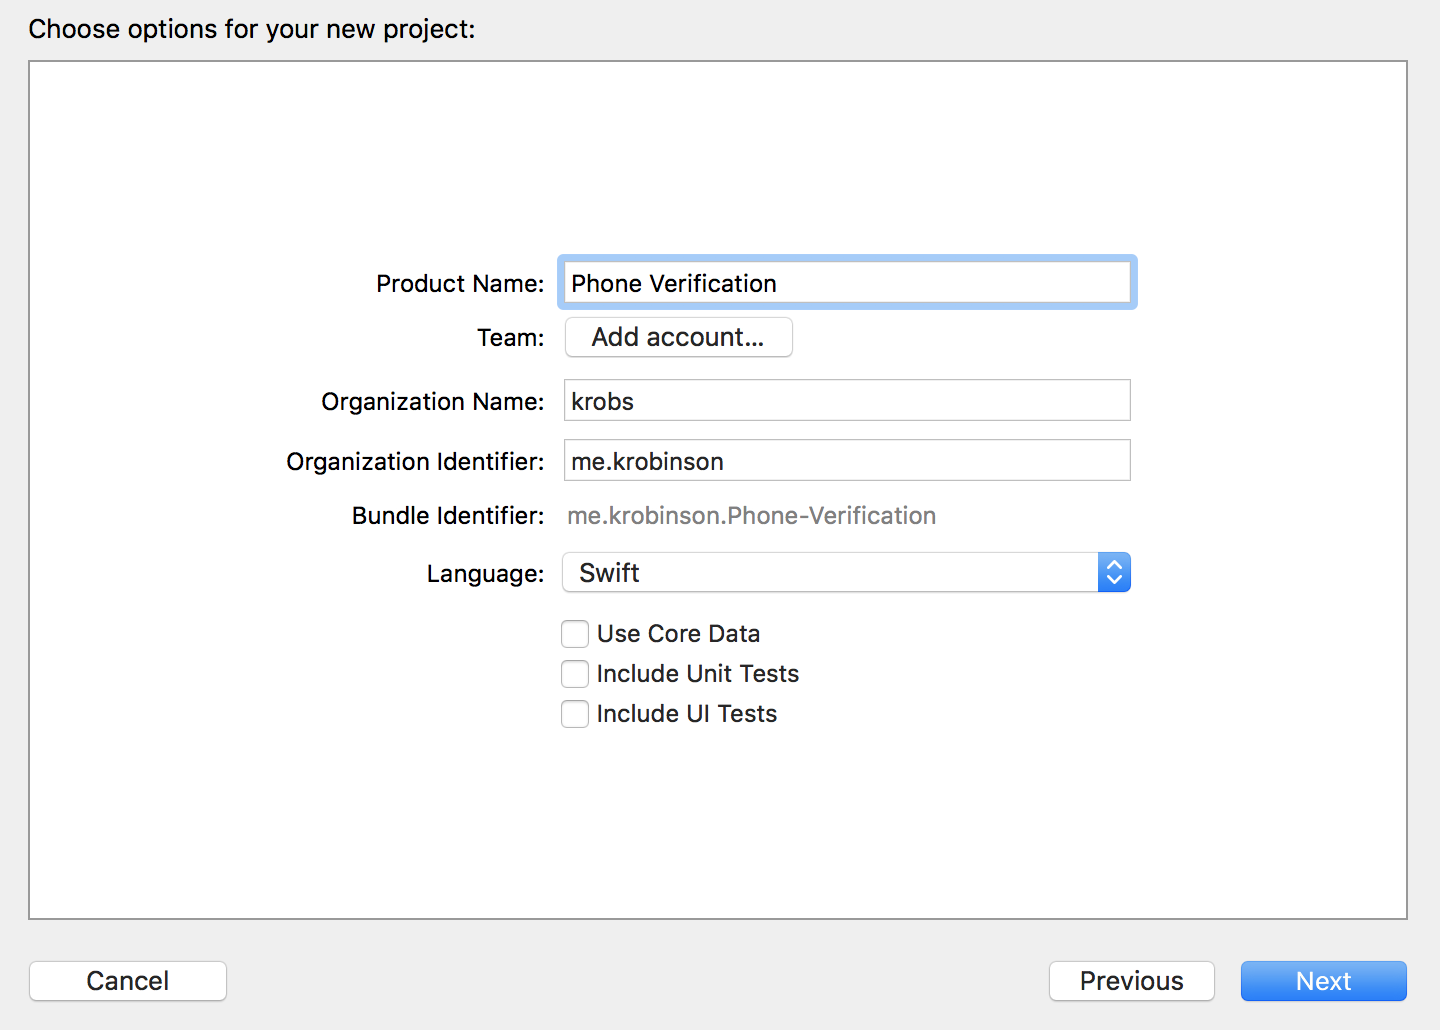
Open up Xcode and create a new Project. Choose “Single View App”, give your product a name like Phone Verification, and hit Create.
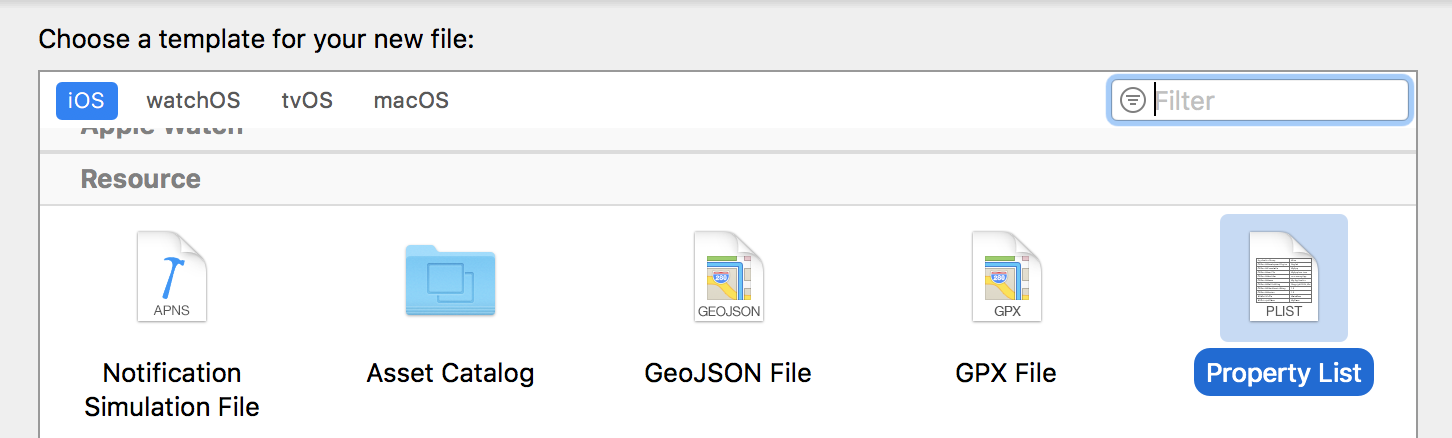
Next, create a new file (shortcut: ⌘N), choose the Property List template, and name the file Config.plist. This will store your Heroku URL.
Add your Heroku Domain URL under the Root with the key of
serverUrl and value of your URL.
If you’re tracking your project using Git, make sure to add
Config.plist to your .gitignore file. This is all the setup we should need to get our app started.
Phone Verification made easy with Twilio Verify
In order to do phone verification, our app will follow this workflow:
- The user enters two pieces of information to our application:
- Phone number
- Country code
- Our application makes a request to the Verify API to initiate the verification
- The user receives a text message with a 6 digit code
- The user then enters that code into a form in the application
- The application sends the code off to the Verify API, with the user’s phone number and country code, to check the verification
- If it is correct then the user has verified their number
- With only two API calls and three views, you’ll be able to verify your users’ phone numbers.
Phone Verification in Swift
Let’s test out our setup in Swift. We’ll be using URLSession to make our HTTP requests, but my coworker Sam has a full overview of the other ways to make HTTP requests in Swift 3.
Add the following code to your ViewController.swift file:
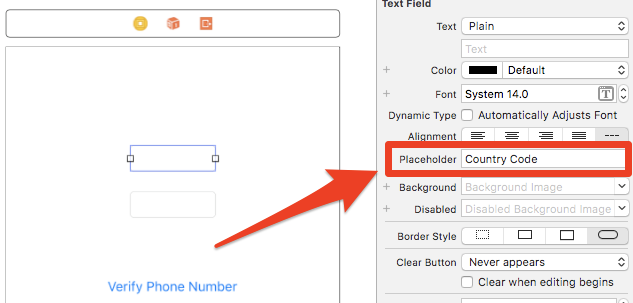
Navigate to Main.storyboard and drag two Text Fields and one Button from the Object library onto the canvas. If you're using XCode 10 you can bring up the Object Library with Shift+⌘+L. In the Attributes Inspector add placeholder text for the two Text Fields: one should read “Country Code” and the other should read “Phone Number”. Change the Button text to “Verify Phone Number”.

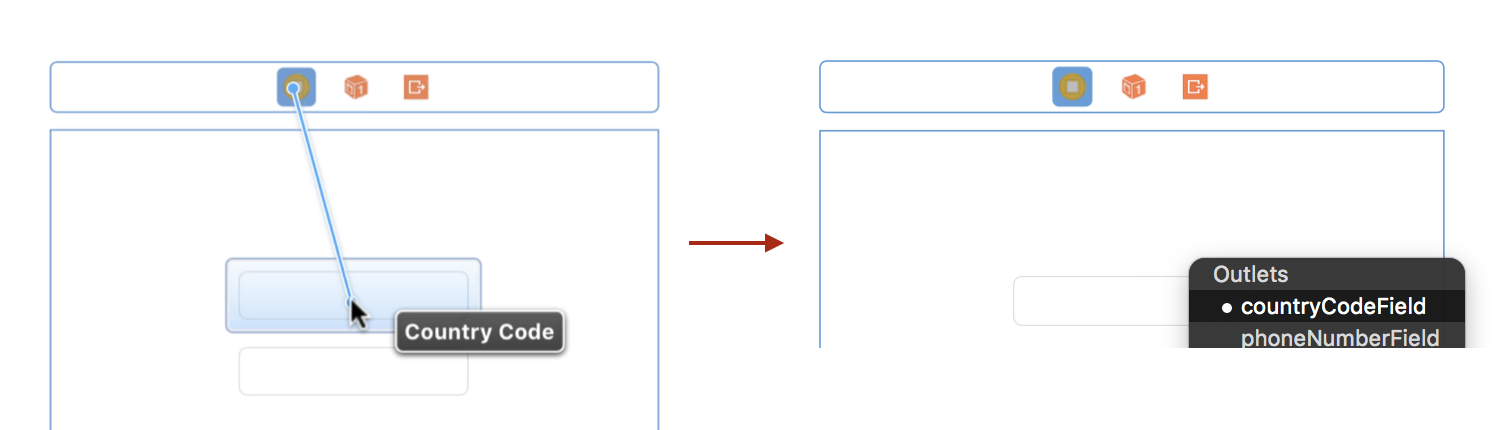
Control-click on the View Controller icon and drag to the Country Code text box then select
countryCodeField as the outlet. Repeat that for the Phone Number text box by selecting phoneNumberField.
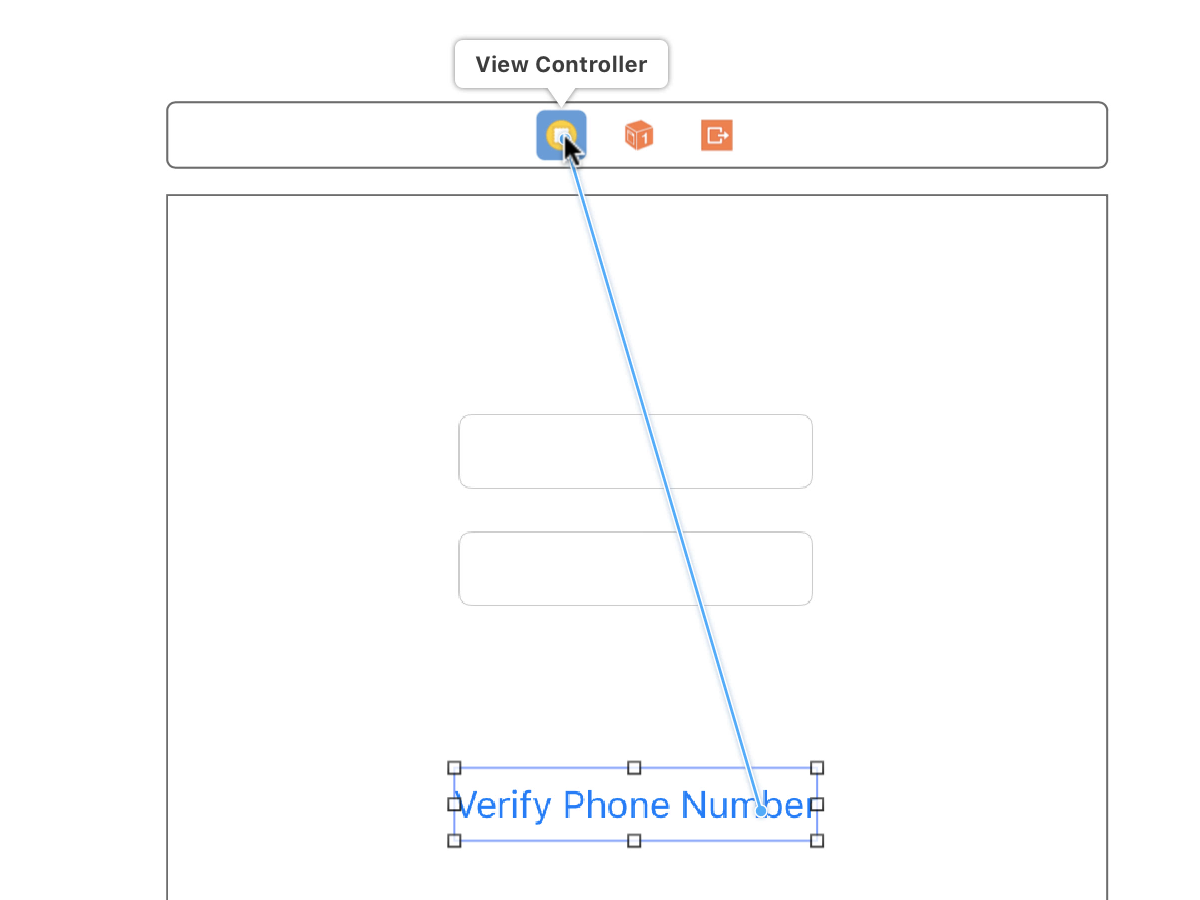
Next control-click on the Verify Phone Number button, drag to the View Controller icon, and select the sendVerification event.
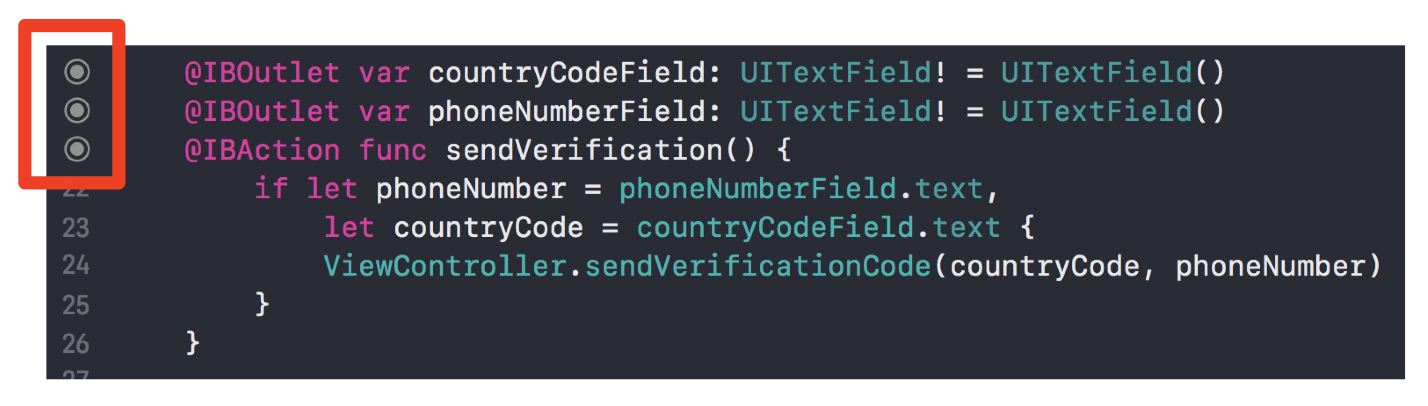
Back in ViewController.swift you’ll know that the fields are connected if the IBOutlets and IBAction have the circles filled in on the left like this:
Build and Run the project with Command-R (⌘R).
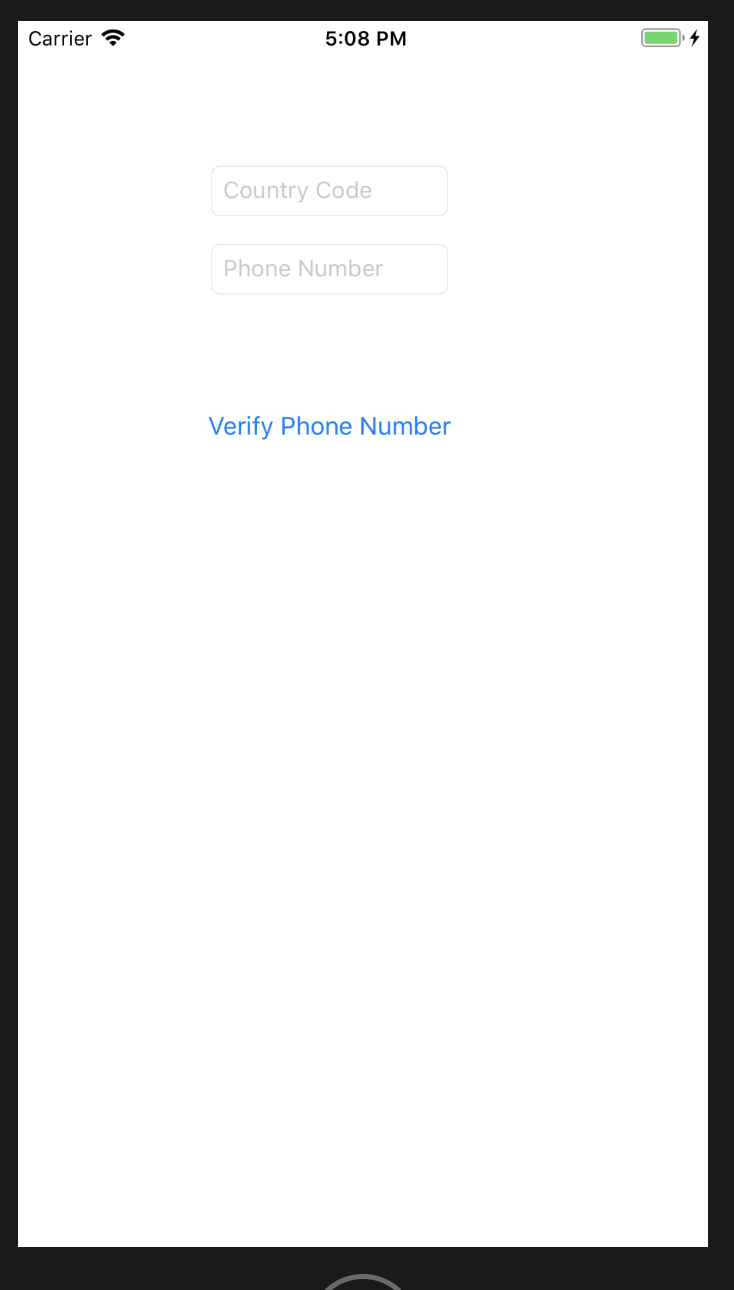
Type in your country code and phone number and click Verify Phone Number. You should get an SMS message with a 6 digit code:
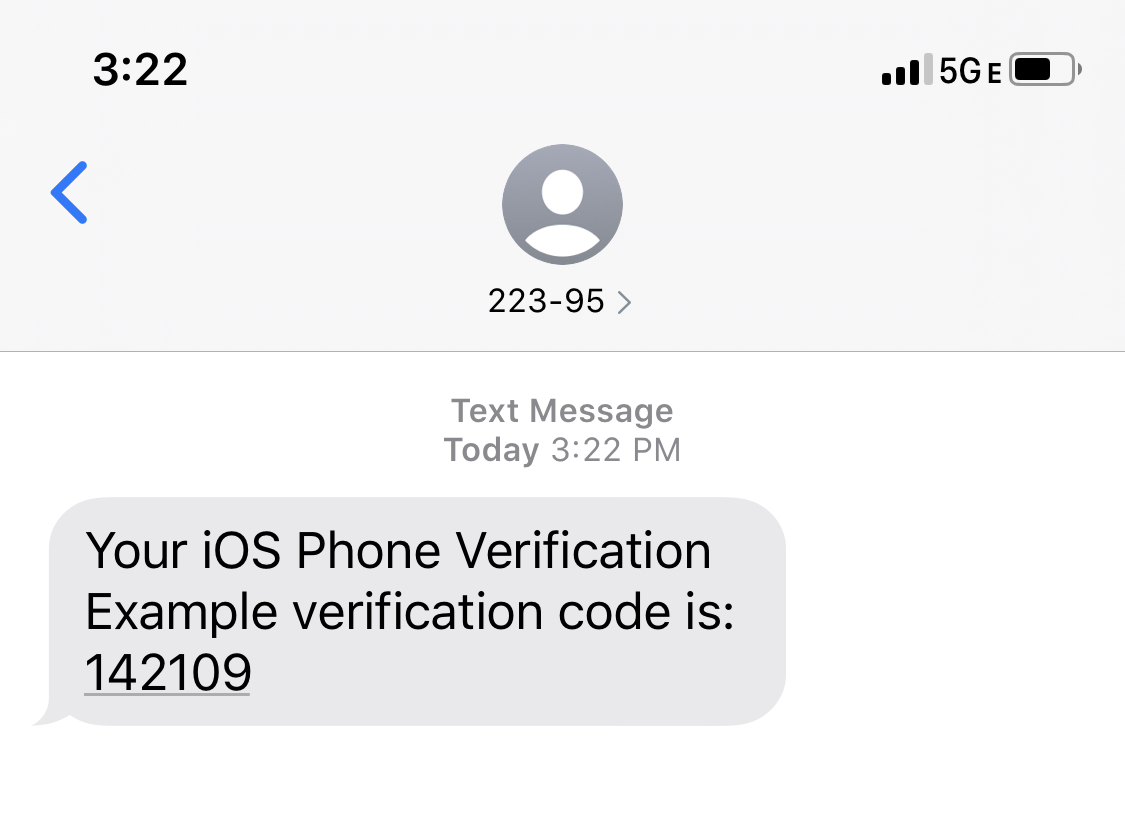
Hooray! We’re making progress. We haven’t configured the app to display any feedback in the interface yet, so check the Xcode console for any issues if you do not receive an SMS. A successful verification start should log a message like this:

Building a Verification Workflow
We’ll want to separate out our ViewController logic because we will need multiple views:
- Start a verification (what we already did)
- Check a verification
- Display verification results
Create three new Swift files to accompany these views:
StartVerificationViewController.swiftCheckVerificationViewController.swiftVerificationResultViewController.swift
Also create a file to hold the API definition and code for making the API request:
VerifyAPI.swift
Open up VerifyAPI.swift and add the following code. This is similar to what we already added in ViewController.swift, but adds the function for checking verification codes and some helper definitions for parsing results and errors.
Display Verification Result
Now we can call these functions from our view controllers. Let’s work our way backwards and start by updating the VerificationResultViewController file. This view controller will let us know if we entered the correct verification code by displaying a message that lets us know what happened. Replace the existing code with the following:
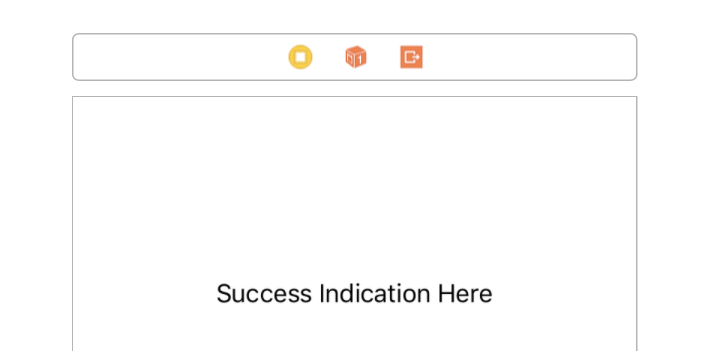
In Main.storyboard drag a new View Controller onto the canvas and add a Label. I made the default text Success Indication Here but our ViewController code will be updating that programmatically.
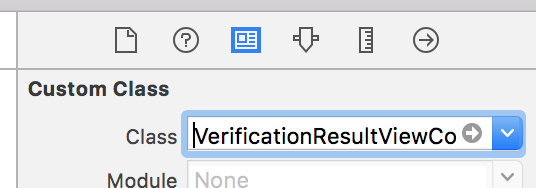
In the Identity Inspector, update the Custom Class to be VerificationResultViewController.
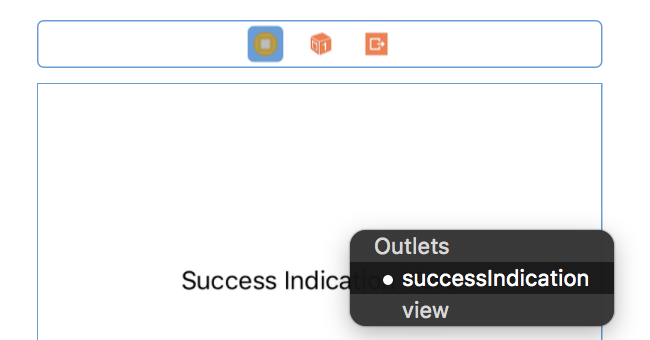
Next, control-click the View Controller icon on the Result View Controller and drag to the Label. Choose successIndication as your Outlet.
Check Verifications
Next, we’ll do something similar with our CheckVerificationViewController. This View Controller will validate that the code the user enters is the one we’re expecting. We don’t have to track the code we sent anywhere, the Twilio Verify API does that for us!
In that file add the following code:
Back in Main.storyboard add another View Controller between Start View and Result View. We’ll add the transitions between those soon but first drag a Text Field, Label, and Button onto the canvas. Update the Label text to be red—this will be for any errors—and change the button text to be Validate.
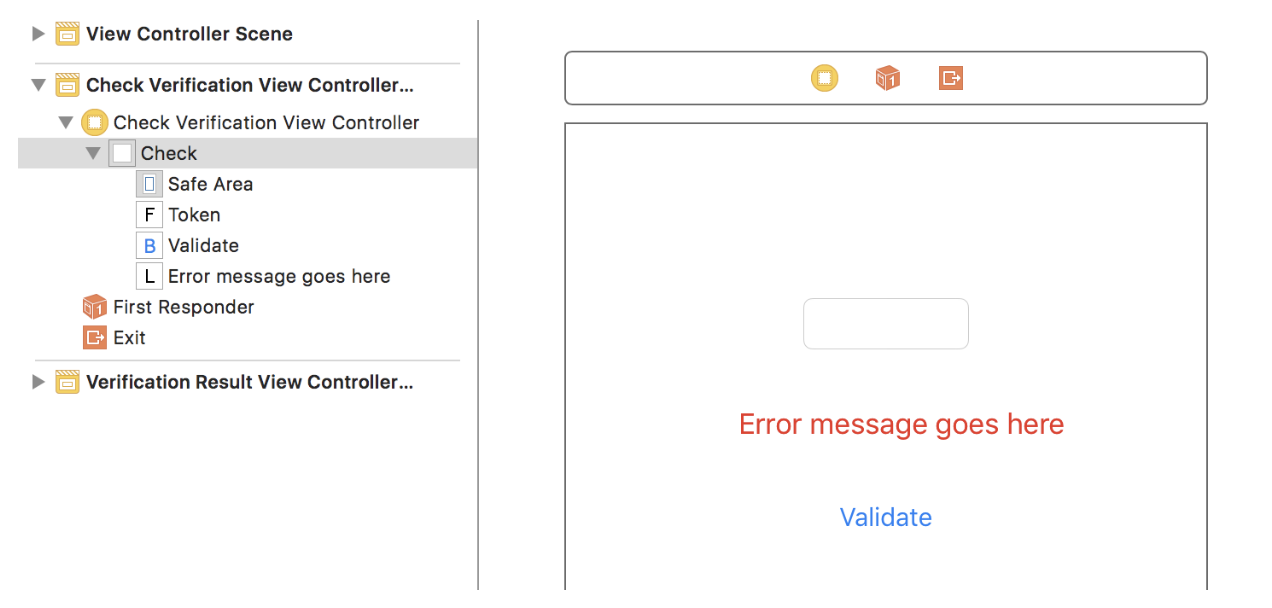
Then update the Custom Class to be CheckVerificationViewController. Drag from the View Controller icon to the Text Field and select codeField. Now control-click the Validate button and drag to the View Controller icon and select validateCode under “Sent Events”.
Start Verification
We can use our existing View Controller for the Start Verification. Add the following code to the StartVerificationViewController.swift file. It’s some of the code from the original ViewController file.
Navigate back to Main.storyboard and update the Custom Class for the existing sending a verification view to be StartVerificationViewController. Make sure the references for outlets are still in place. You can now delete the original ViewController.swift file.
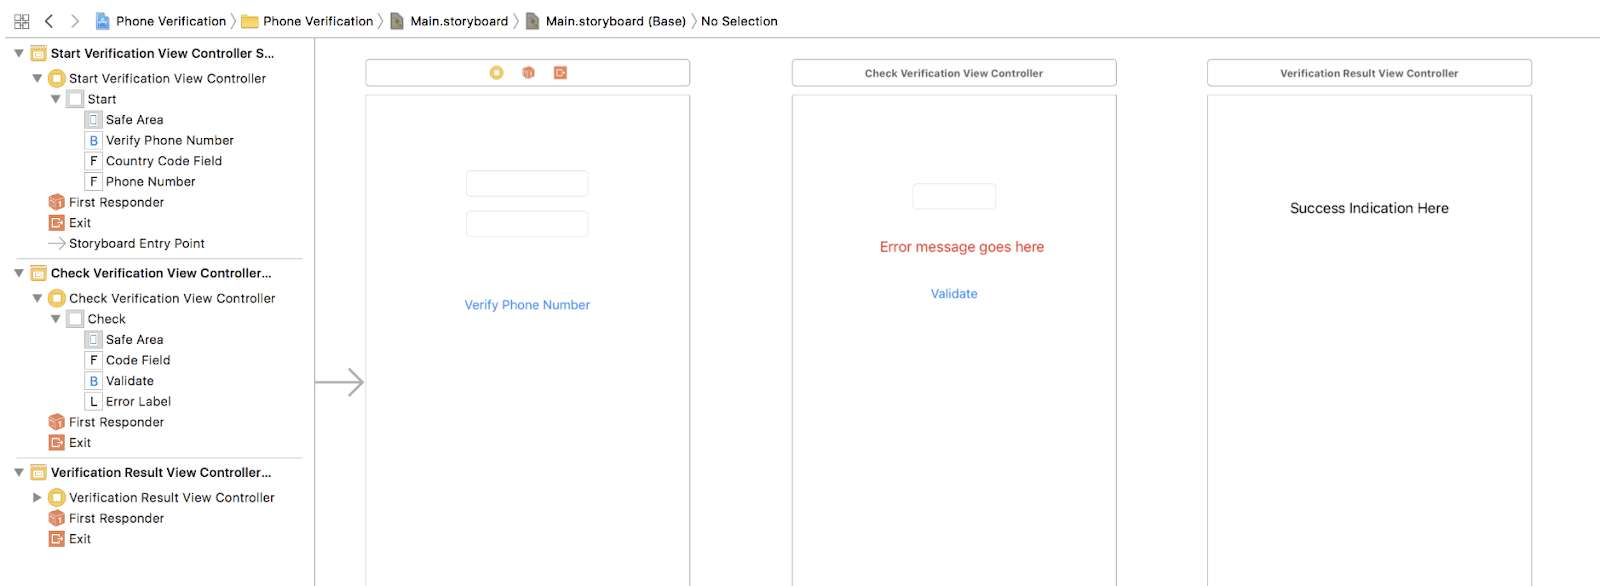
Your canvas should look like this:
Wiring it Together
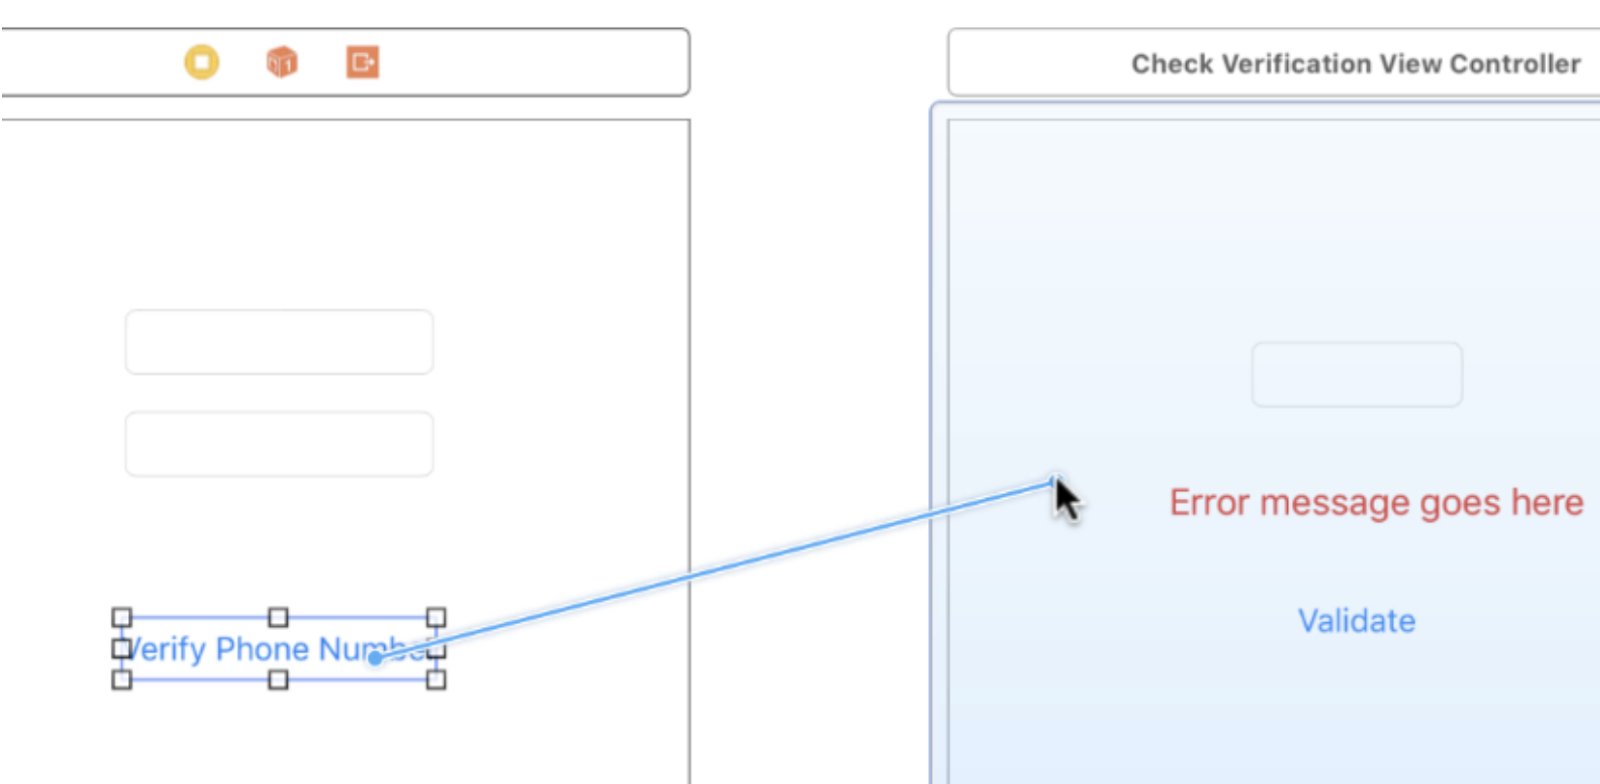
We need to create the segues between our views. First, control-click the Verify Phone Number button and drag it to the Check Verification View Controller. Select ‘Show’ as the segue type.
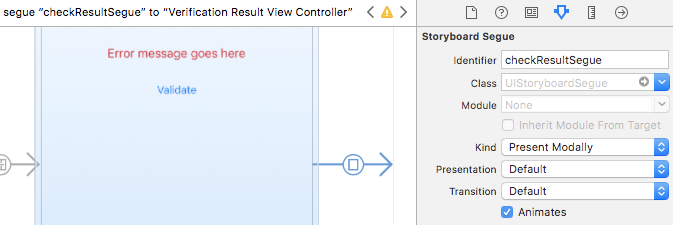
The next segue will be a bit different. With the Verification Result View Controller selected, head to the Connections Inspector and select and drag from the Present Modally segue to the Check Verification View Controller and select “manual”.
Then select the segue arrow and, in the Attributes Inspector, update the identifier to be checkResultSegue.

Now that all of the views are linked together, build the project again (⌘R) and try out the entire workflow. You should be able to receive a verification code and validate it using your new iOS application! Try entering a bad token to see the error message.
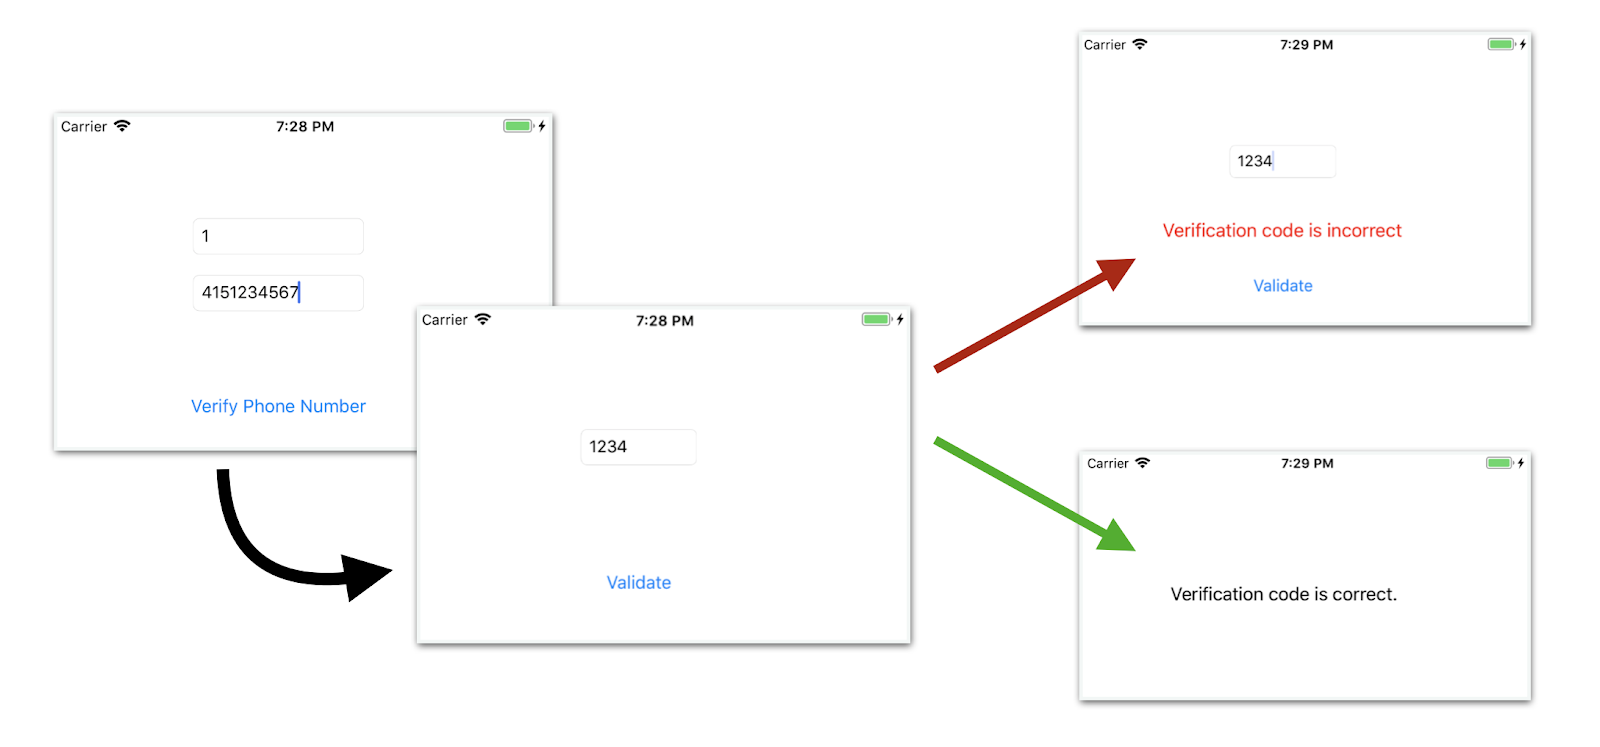
Flow chart of our application
Next Steps
There are a few more ways you can customize your verification flow. The default verification code we used is 4 digits, but you can support custom code lengths up to 10. You can also customize the message based on the user’s locale, which you can infer based on their country code. Check out these customizations and more in the documentation.
Our tutorial assumed all verifications would occur via SMS but the API also supports Voice. You can add radio buttons on the StartVerificationViewController for your user to decide how they want to receive their verification. You can also add a nicer country code picker with one of the many libraries out there.
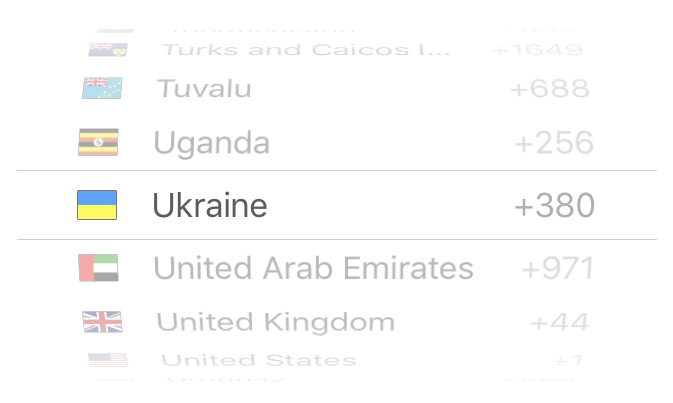
Image courtesy of https://github.com/4taras4/CountryCode
For details on how to do phone verification on your desktop site, check out one of our Verify quick starts or learn how to build SMS verification in React Native.

Related Resources
Twilio Docs
From APIs to SDKs to sample apps
API reference documentation, SDKs, helper libraries, quickstarts, and tutorials for your language and platform.
Resource Center
The latest ebooks, industry reports, and webinars
Learn from customer engagement experts to improve your own communication.
Ahoy
Twilio's developer community hub
Best practices, code samples, and inspiration to build communications and digital engagement experiences.