Post Task Surveys with Flex Insights
Time to read:
May 15, 2020
Written by
Reviewed by

As a Solutions Architect at Twilio I have the pleasure of speaking with many companies focused on building a better customer experience. Flex, the world’s most flexible contact center, provides the ability to build this perfect customer experience. Oftentimes my conversations are centered around creating that perfect agent UI. Customers are able to create and manage interactions seamlessly using a single interface, leading to lowered average handle time, better agent experience and higher CSAT scores.
In this article we will walk through using Flex Insights to log customer customer survey results and create Flex Insights reports. This article references the API needed for taking the unique identifier for the Task and creating a virtual Task to capture the customer survey segment. In this example, we will create a second Task with the type of Survey, set the Conversation ID for the Survey task to the original Task SID, and set customer survey results using conversation attributes.
Initial Task
To link the survey results to the initial Task (call or message) we will set the initial Task SID as the unique identifier. To set this unique identifier we will use the Flex Insights Conversations.conversation_id attribute for all the Tasks involved. By default, Flex Insights will generate a value for the conversation_id. Our first step is to set conversation_id to the Task SID. We will also need to use this initial Task SID when we go to record the survey results. In this example Twilio Functions and Twilio Studio will be used to set the conversation_id on the initial task.
To start, create a new Twilio Function. This function will add the Task SID to the conversation attributes and will be called after the Send to Flex widget in Studio. Open up Twilio Console and navigate to Functions. Create a new function from a blank template.
- Name: Flex Insights Set Conversation ID
- Path:
/set-conversation-id - Access Control: enable Check for valid Twilio signature
Once the function is deployed it can now be called from Studio.
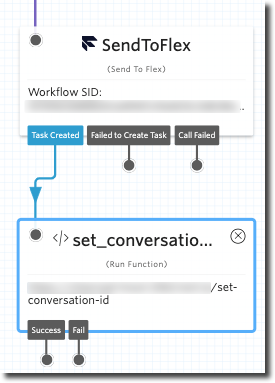
In Twilio Console navigate to Studio and open the Studio flow that will be routing our incoming call or message. Find the Send To Flex widget and add a new Run Function widget to the canvas (below the Send To Flex widget).
Connect the Task Created path on the Send To Flex widget to the new Run Function widget. Select the Run Function widget and select Flex Insights Set Conversation Id from the Function URL drop down list. Add a new Function Parameter with the name of taskSid set value to equal the sid return from the Sent To Flex widget (Example: {{widgets.SendToFlex.sid}})

TaskRouter Setup
TaskRouter is required to insert the survey results into Flex Insights. The next step is to configure a Task Queue, Workflow, and Task Type.
TaskQueue
Docs: Task Queue Resources
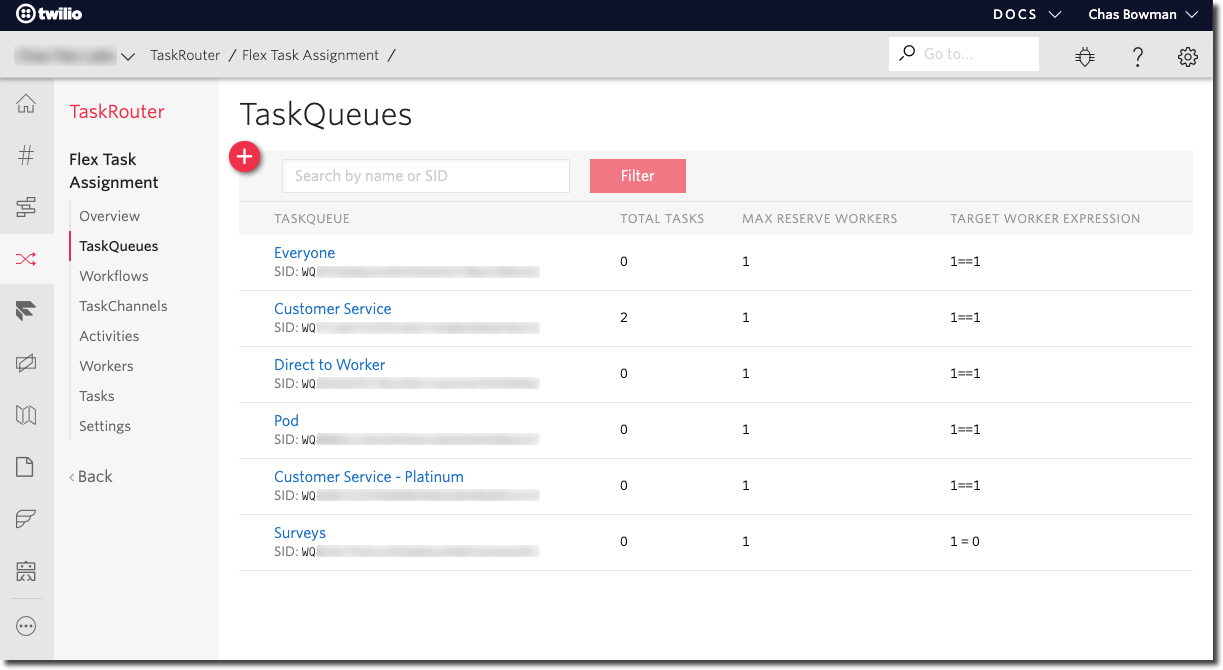
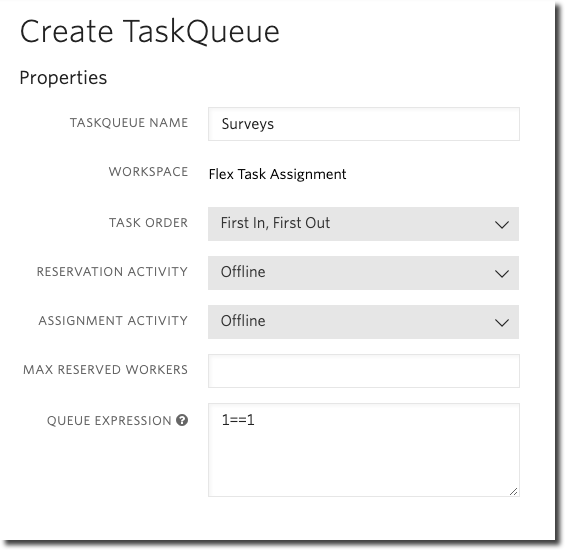
In Twilio Console navigate to TaskRouter, open the Flex Workspace and select TaskQueue. Create a new TaskQueue named “Survey” and set the expression to 1 == 0. This will create a queue with no members. This queue will not route live tasks, it will only be used to insert the survey results into Flex Insights.
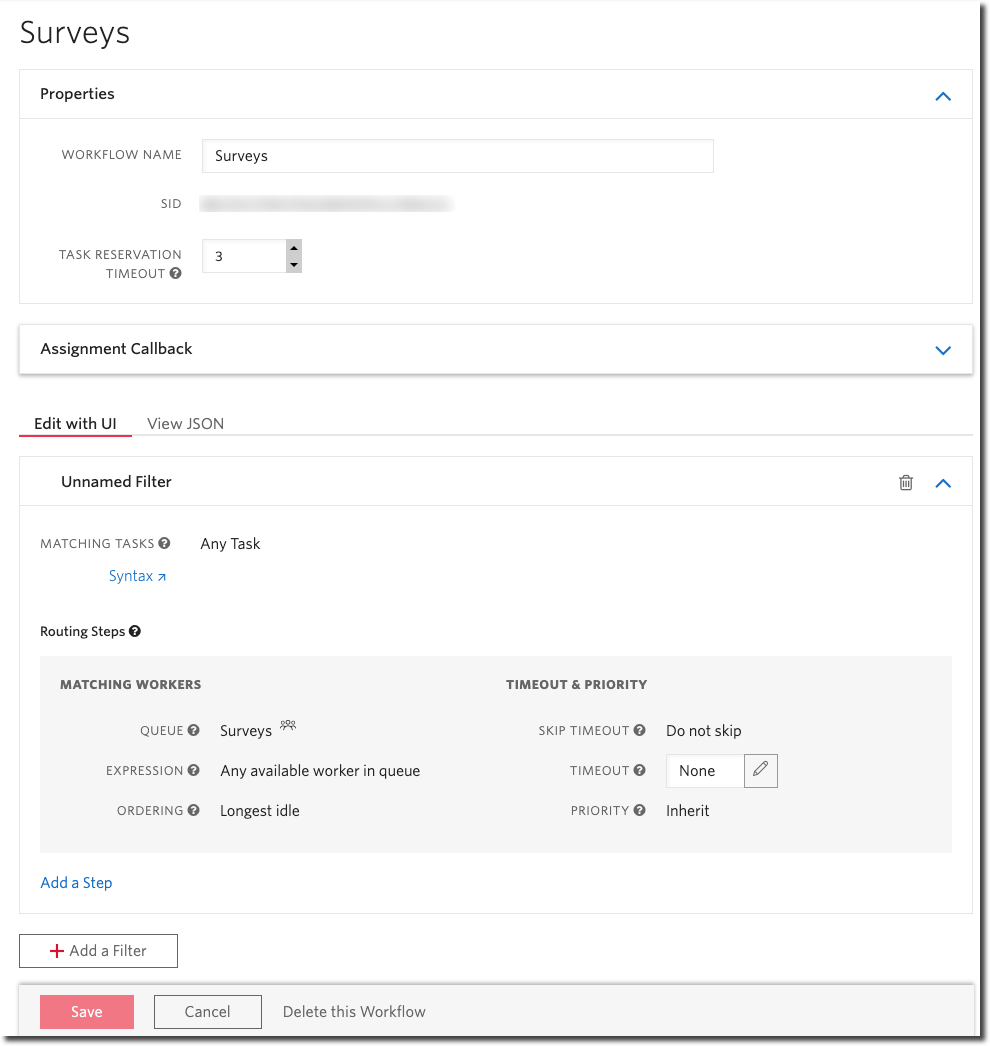
Workflow
Docs: Workflow Resources
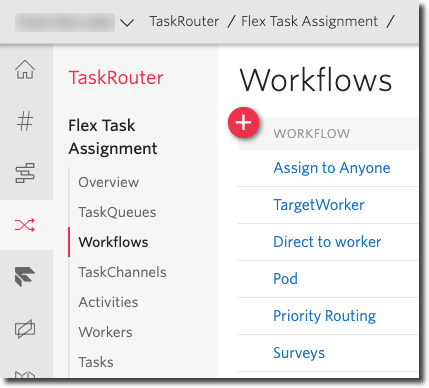
Once the TaskQueue has been created select Workflows to create a new workflow. Name the new workflow “Survey”, set the timeout to 3 seconds, and create an expression that routes to the new “Survey” queue.
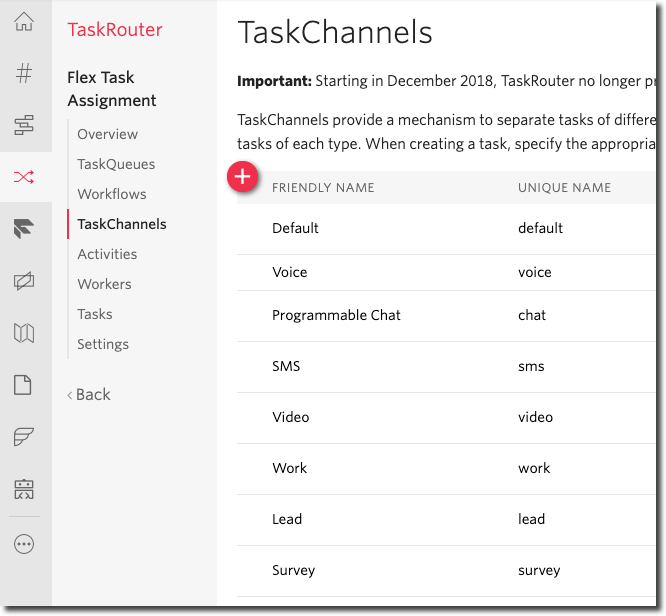
Create a TaskChannel
Docs: Task Channel Resource
The last step under TaskRouter is to create a new Task Channel. Select the TaskChannel section and create a new channel with the name “Survey”.
Create the Survey Task
After the initial task has been ended you will need to present a survey to the customer. There are multiple ways to present a survey to your customer. You should consider the original channel and the customers preferences. Once the customer has completed the survey, follow these steps to log the data to Flex Insights. Use the TaskRouter API or SDK to create the survey Task. These steps will ensure the data is set and the survey Task is linked to the initial Task.
Docs: Create a Task
Parameters used to create the task
Workspace-sid- SId of the Flex Task Assignment TaskRoute WorkspaceAttributes- Task Attributes used for creating the Survey task
Conversation_id- the Task Sid of the initial taskConversation_measure_1- Numberc value for the survey score
Workflow-sid- SID of the TaskRouter WorkflowTimeout- set to 1 seconds to clear the TaskTaskChannel- Set to the Survey TaskChannel, either the unique name or Sid
REST API Example:
Flex Insights Analyze Reports
With the data now in Flex Insights we will create a new report to display the survey results. This section provides a basic report example to show survey results.
Create Custom Metrics
The new survey reports will use the data that was set in the survey Task. We will create Flex Insights custom metrics to map the Conversation Measure values to friendly names. This will also build the mapping specifically for survey Task, allowing the customer measures and attributes to be available to use for other task types and use cases.
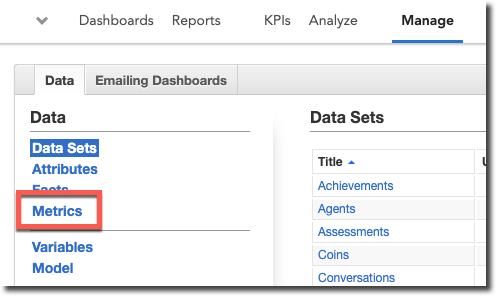
To create the custom metrics and report we will need to launch the analytics porta. Login to Flex and open Flex Insights. This step will authenticate the Flex user to Flex Insights. Open the Dashboards view and at the bottom of the page click the Analytics Portal link, this will open the portal in a new browser tab. You can also launch the portal at https://analytics.ytica.com.
From the navigation bar at the top of the page, select Manage and then click Metrics.
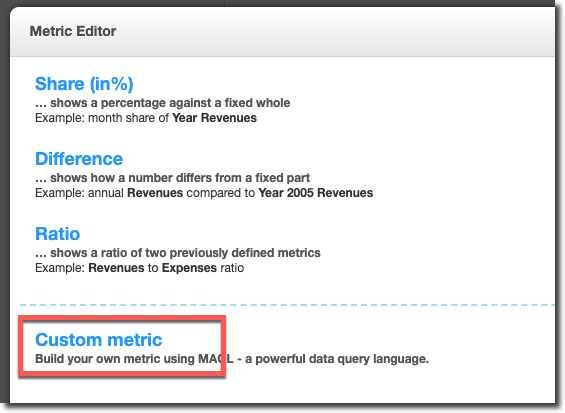
Click the Create Metric button in the upper right corner to create our new metric. From the Metric Editor window select Custom metric.
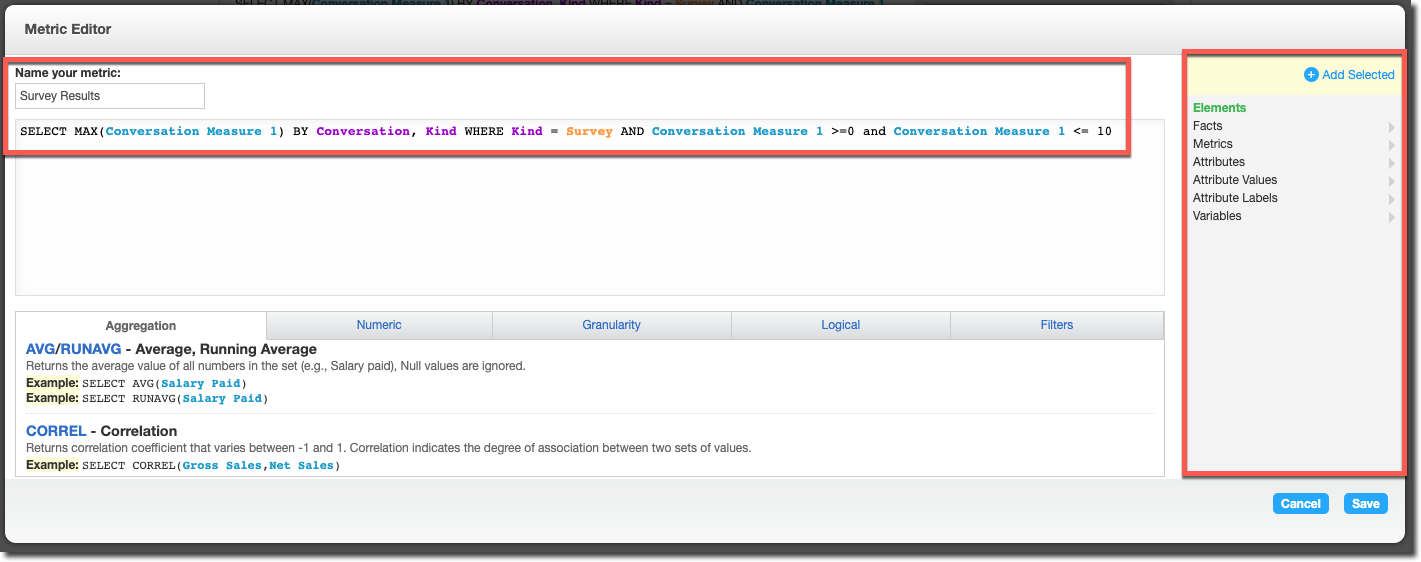
Using the Metric Editor enter a name for the metric, Survey Results, and enter the desired SELECT statement.
Survey Results:
After creating the metric press the Sharing & Permissions button and select Visible to all users.
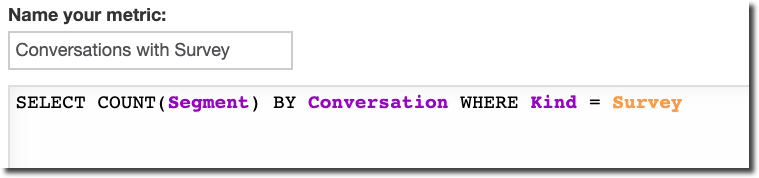
The second metric that we will be Conversations with surveys. Repeat the previous step to create another custom metric.
Conversations with Survey:
After creating the metric press the Sharing & Permissions button and select Visible to all users.
Create Custom Reports
Our last step is to create a new report to view the survey results. We will walk through the steps for creating two new reports; Survey Buble Chart - Results by Talk Time and Survey Table by Date. These reports will also be created in the Analytics Portal.
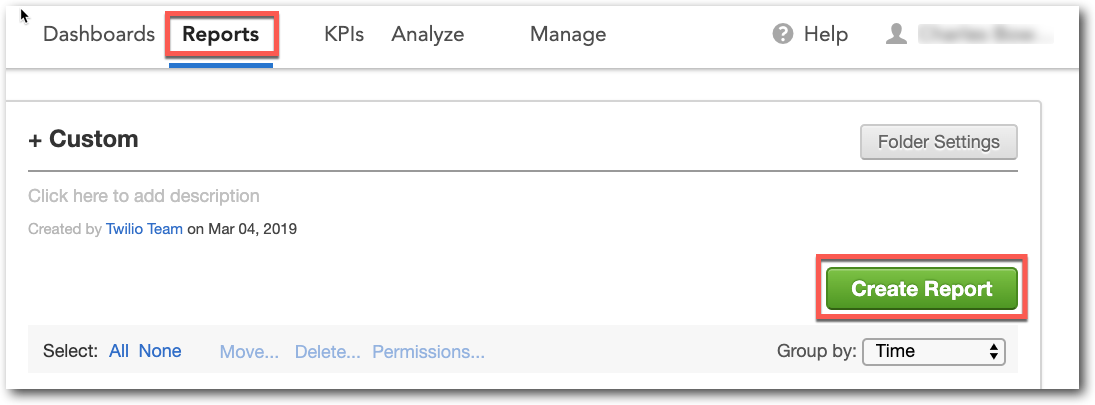
From the Flex Analytics site (https://analytics.ytica.com), select Reports from the navigation bar and click Create Report.
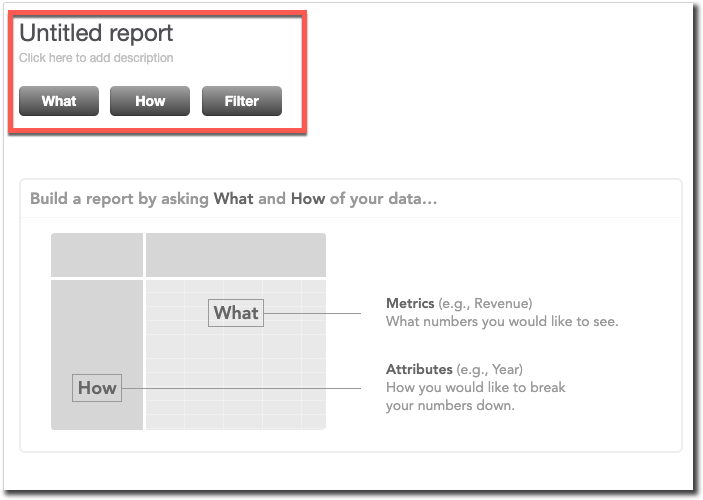
Provide a name for the report and build out the What, How and Filter for the report.
Survey Bubble Chart - Results by Queue Time - This custom report will create a table of all the survey results.
- What: Survey Results, Total Talk Time, Total Queue Time
- How: Segment
- Filter (arange in the following order):
- Date: Specify the desired date range
- Conversation where Conversations with Survey is greater than or equal to 1
- Kind is Conversation
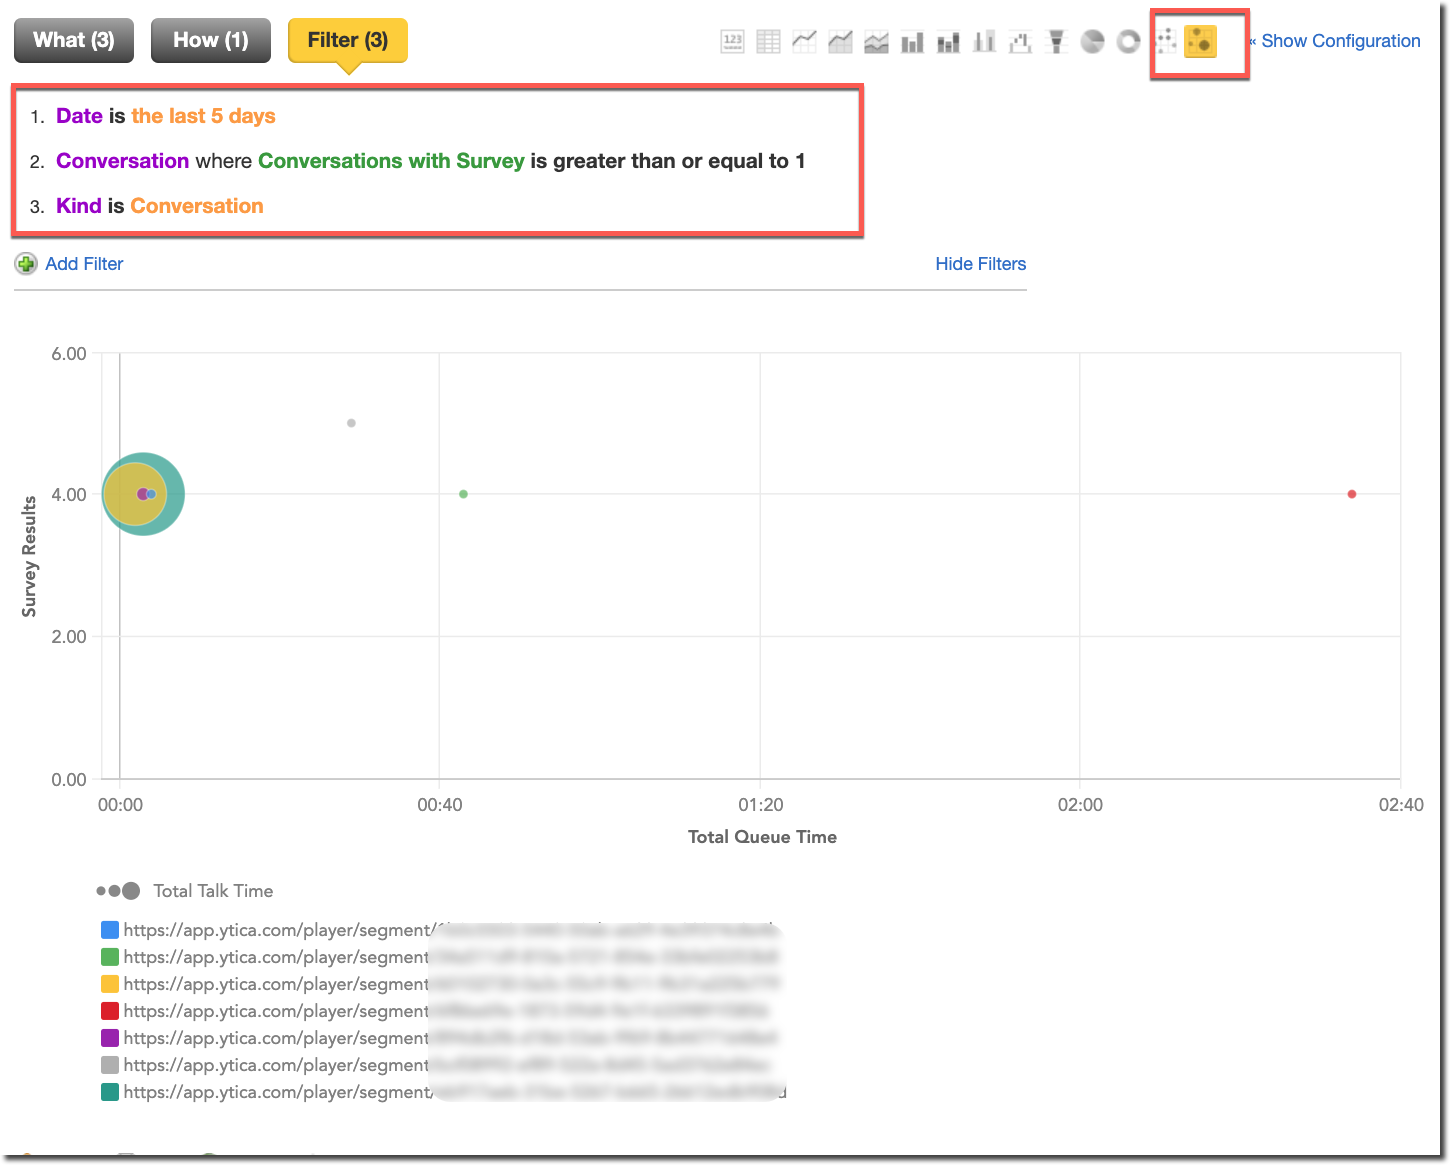
- Save the Report and set the visibility to all users by clicking the eye icon.

Survey Table by Date - This custom report will create a table of all the survey results by date.
- What: Survey Results, Total Queue Time, Total Talk Time
- How: Communication Channel, Customer, Date, Segment, Time
- Filter (arange in the following order):
- Date: Specify the desired date range
- Conversation where Conversations with Survey is greater than or equal to 1
- Kind is Conversation

- Save the Report and set the visibility to all users by clicking the eye icon.

Conclusion: Logging customer services with Flex Insights
In this blog post we have explored using Flex Insights to log customer surveys. It started off with setting the Task SID as the unique identifier for the original Task and the survey results. We then configured the TaskRouter components to ensure that the data gets inserted into Flex Insights. Finally, we walked though using Flex Insights to add custom metrics and reports. Customer surveys are an important part of tracking performance, and only one example of attaching additional data to a call or message. I encourage you to play with these samples and continue to build. We can’t wait to see what you build!
You can learn more about Flex Insights by visiting our documentation here.
Chas Bowman is a Contact Center Solution Architect at Twilo. In this role, Chas works on a Contact Center Specialist team designed to support the Twilio contact center market and evangelize Twilio Flex. Prior to working at Twilio, Chas was a Technical Sales Evangelist where he was responsible for creating and delivering product demonstrations for sales, marketing, and keynote presentations. Before moving into a sales focused role, Chas designed and managed cloud contact center solutions. Outside of work, Chas enjoys spending time with his wife and four kids.

Related Resources
Twilio Docs
From APIs to SDKs to sample apps
API reference documentation, SDKs, helper libraries, quickstarts, and tutorials for your language and platform.
Resource Center
The latest ebooks, industry reports, and webinars
Learn from customer engagement experts to improve your own communication.
Ahoy
Twilio's developer community hub
Best practices, code samples, and inspiration to build communications and digital engagement experiences.