Offline-First with Node.js and Hoodie: A Practical Introduction to Progressive Web Apps
Time to read: 10 minutes
March 28, 2018
Written by

Progressive Web Apps (or PWAs for short) aim to deliver a better and engaging user experience by applying progressive enhancements using modern web standards and best practices. These include among others service workers, push APIs, background sync and serving your page over HTTPS.
If the app is loaded in browsers that doesn’t support a web standard, it should work just like a normal website. In modern browsers, however, the experience should be improved by ensuring the app:
- works reliably irrespective of the user network condition (4G, 3G, 2G or offline)
- is installable and feels natural on the user’s device
We’re going to walk through building a shopping tracker PWA which will introduce you to working with Service Workers, the Cache API, and Hoodie. To follow along, you’ll need to have Node.js and npm installed.
Development Setup
To set up your environment, clone the files on https://github.com/pmbanugo/shopping-list-starter. Clone and install the project dependencies by running the following commands in your command-line:
The dependencies installed are Babel and related plug-ins which we’ll use later for transpiling. Babel allows us to write the latest standard in JavaScript and then convert it down to older standards such as ES5 so that our code will run in any of today’s browsers. We’re going to use some of ES2015 features such as let, const, arrow functions and ES modules. The files contained in the public directory are the pages and CSS files needed to render a nice looking UI.
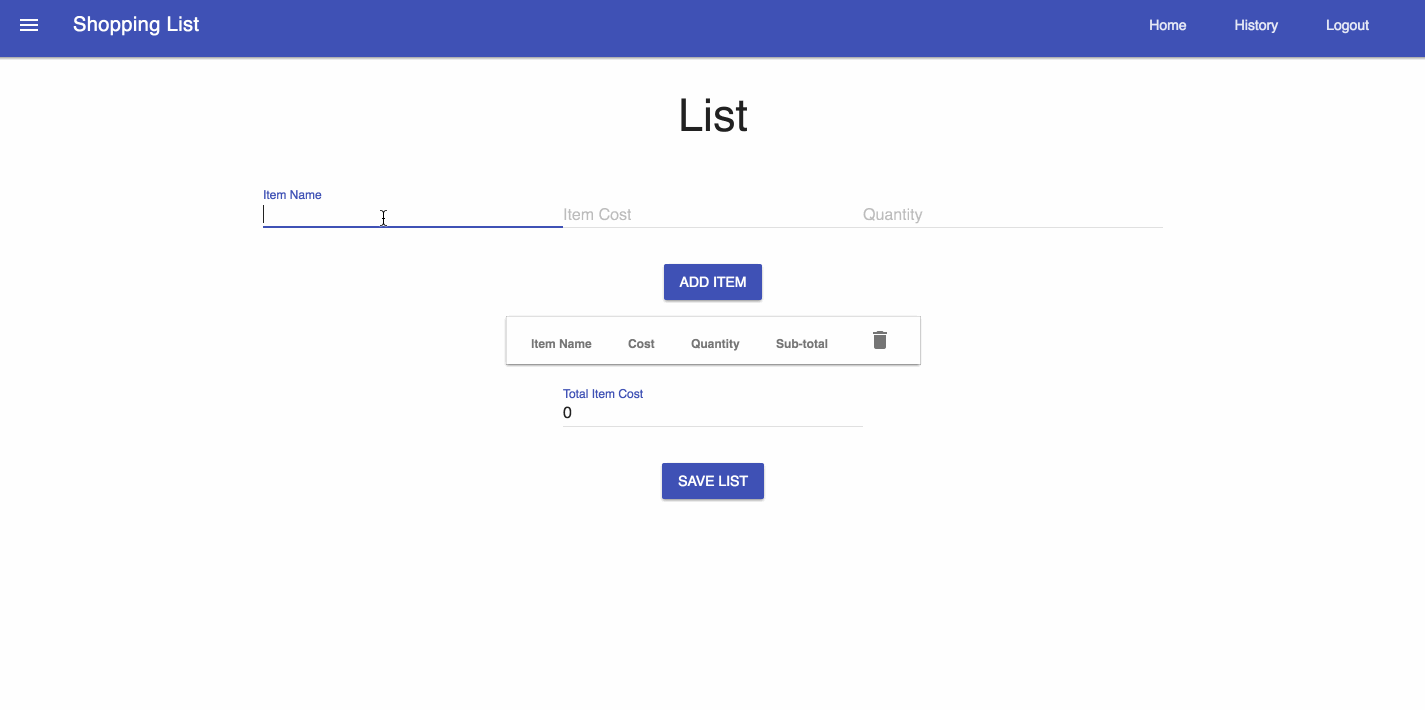
Here’s what you’ll be building towards:
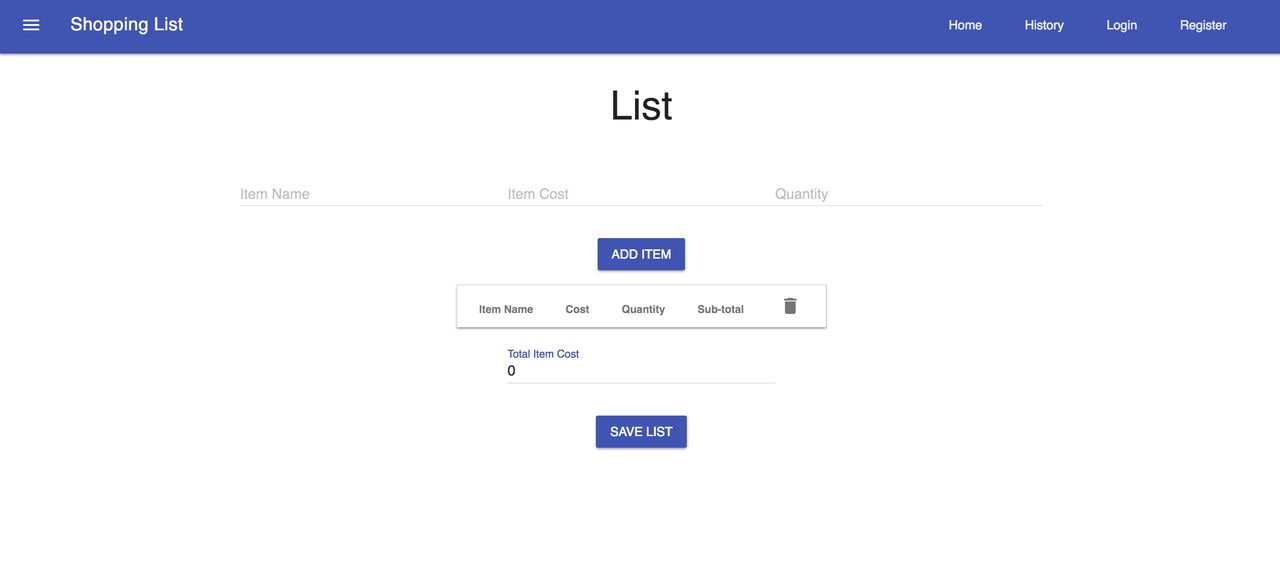
The app allows adding items with their prices to the list, save it, and see a summary displayed on a separate page.
Saving Data
To add functionality for saving and removing shopping items, we’ll be adding an npm package named Hoodie to the project. Run the following command to install it (as at the time of this writing, I’m using version 28.2.2 of hoodie).
Quick Intro to Hoodie and Offline-First
One of the main features of a PWA is the ability to work offline as well as online, hence, we need to apply the concept of offline-first to the application.
Offline-First is an approach to software development where lack of network connection is not treated as an error. You start by developing it to work in areas with no internet connection. Then as users enter areas with network connection or as their connection speed improves, the application is progressively enhanced to make more functionality available in the app. For this tutorial, we want to be able to add and delete data when users are either offline or online. This is where Hoodie will help out.
Hoodie is a JavaScript Backend for offline-first web applications. It provides a frontend API to allow you to store and manage data and add user authentication. It stores data locally on the device, and when there’s a network connection, syncs data to the server and resolves any data conflicts. It uses PouchDB on the client, and CouchDB and hapi for the server. We’ll use it both for user authentication as well as storing the shopping items.
Adding Items
The first functionality we’ll be adding allows users to add new items. There’s a file named index.js in public/js/src.. It contains functions for displaying items saved to Hoodie in the page.
Edit the index.html by adding references to index.js and the hoodie client script before the tag on line 197.
The Hoodie client script can be accessed from /hoodie/client.js when you run the app. By convention, it also serves files within the public folder. Open index.js and add the following content in it.
When this script is loaded in the browser, it calls init which fetches all items saved locally by calling hoodie.store.withIdPrefix("item") and renders them on the page by calling addItemToPage(item) for each item retrieved from the local store.
We subscribe to the add event on the item store using hoodie.store.withIdPrefix("item").on("add", addItemToPage). With every new item added to the store, it calls the addItemToPage function. When the Add Item button is clicked on the page, it calls saveNewItem to save the data.
Removing Items
To remove items from the store, you call hoodie.store.withIdPrefix("item").remove(itemId) with the ID of the item to remove.
Modify index.js adding the following content before the init() call.
Alter the init() function to include the following lines:
We subscribed to the remove event which calls a method to remove the item from the list in the page. Additionally we exposed a deleteItem function to the page which will be called when the item is removed from the page. On line 189 in index.html you’ll find the statement that connects the onclick event of the delete button to this method.
Now that we’ve got code to add and delete items, let’s run the app to see if it works. Add in the “scripts” section of your package.json the following to create a start command:
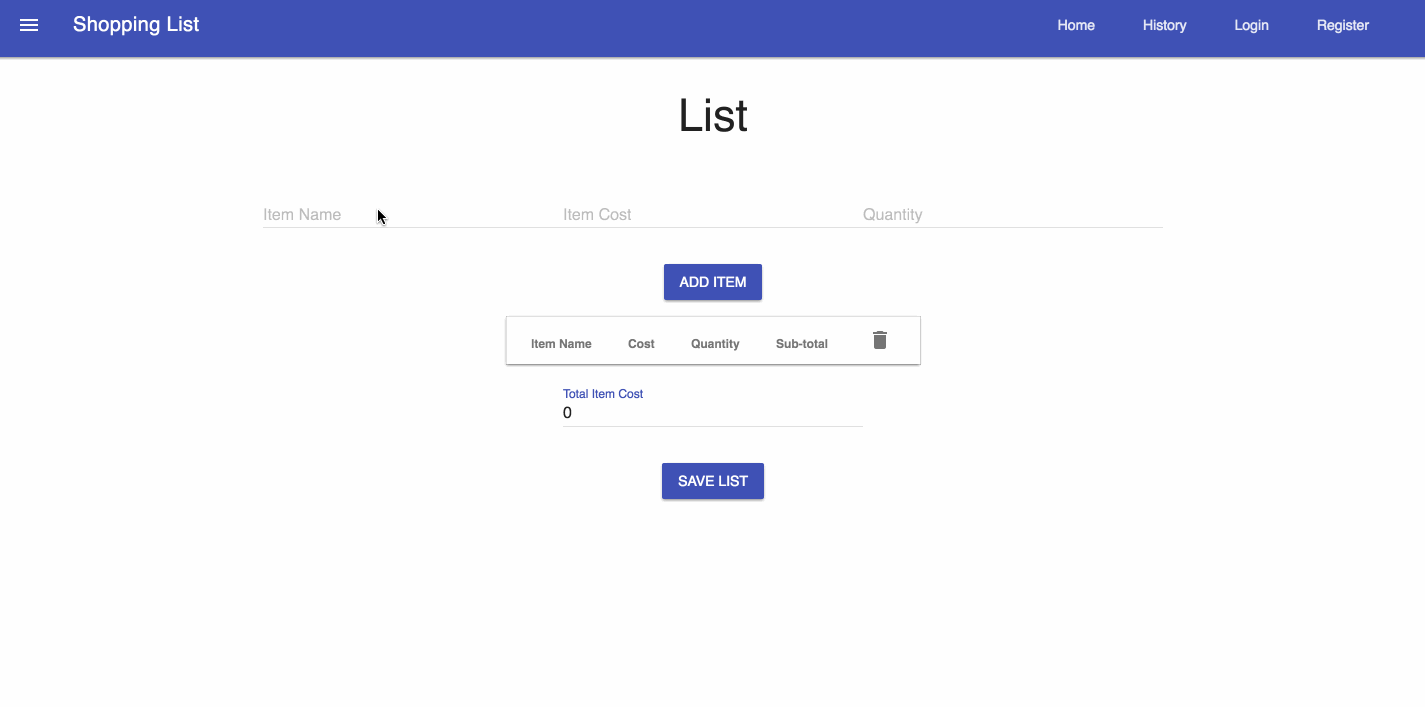
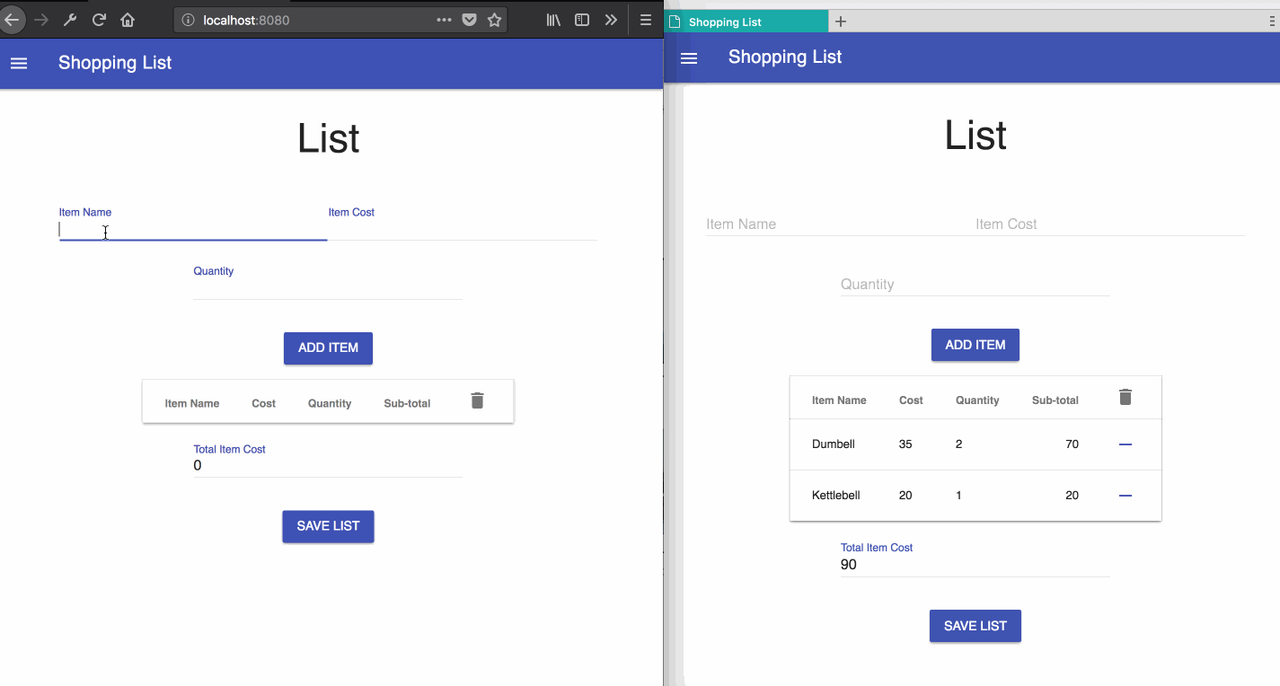
Run in your command line the command npm start to start the server. Open http://localhost:8080 in a browser and you should see the page loaded ready to use. Give it a test by adding and removing a few items:
We can see that our list works and data is saved. But this data is only stored locally and not persisted to the server. How do we make it push data to the server?
With Hoodie, data is only persisted when the user has been authenticated. When users are authenticated, data is saved locally first, then pushed to the server and synchronised across other devices the user is logged onto. Let’s add this needed authentication.
Login and Register Functionality with Hoodie
We already have markup for login, logout, and register as part of the content for index.html which you cloned. Check it out if you want to take look at the markup.
Open the file named shared.js in public/js/src . This file will hold the code for authenticating users using Hoodie. I placed it in a separate file because it’ll be shared with another page we’ll add later. Edit login and register functions with the following code:
Add the following functions to handle signout in shared.js:
Update the export statement to include the two newly added functions:
We defined a register function which calls hoodie.account.signUp() with a username and password. When it’s successful, it calls hoodie.account.signIn() to log the user in. Also we added login and signOut methods to sign in and sign out, respectively. These APIs for authentication live in hoodie.account. The method updateDOMWithLoginStatus() updates the navigation bar to display different links based on if the user is authenticated or not.
Update index.js to make use of this file. First add an import statement at the top of the file:
Modify the init function to call shared.updateDOMWithLoginStatus() when the page is loaded in order to update the navigation bar. Then, map the login and signOut functions to the pageEvents object (adding a comma after the deleteItem function):
We’ve used ES modules here. We’ve been using ES2015 modules in our code, however, not all browsers support this yet, so we need a way to make this work for all. We’ll use Babel to transpile the code to work with SystemJS, a module loader enabling dynamic ES module workflows in browsers and Node.js. (We already have the needed files to do this.)
Transpiling Our Code for Increased Browser Support
The GitHub repo you cloned already has a system.js file in public/resources/system.js. We also installed Babel as part of the dependencies (see package.json), and a Babel configuration file (see .babelrc).
This tells Babel to transpile our JavaScript code to ES5 compatible code, and convert any ES2015 module into SystemJS module.
To trigger the transpiling, we are going to add a build script in package.json as follows:
Edit index.html to include a reference to SystemJS and the transpiled index.js below our include for hoodie:
Now, run the following command to transpile the code
Relaunch the server if necessary (npm start), refresh the page, then try to register, signin, and signout
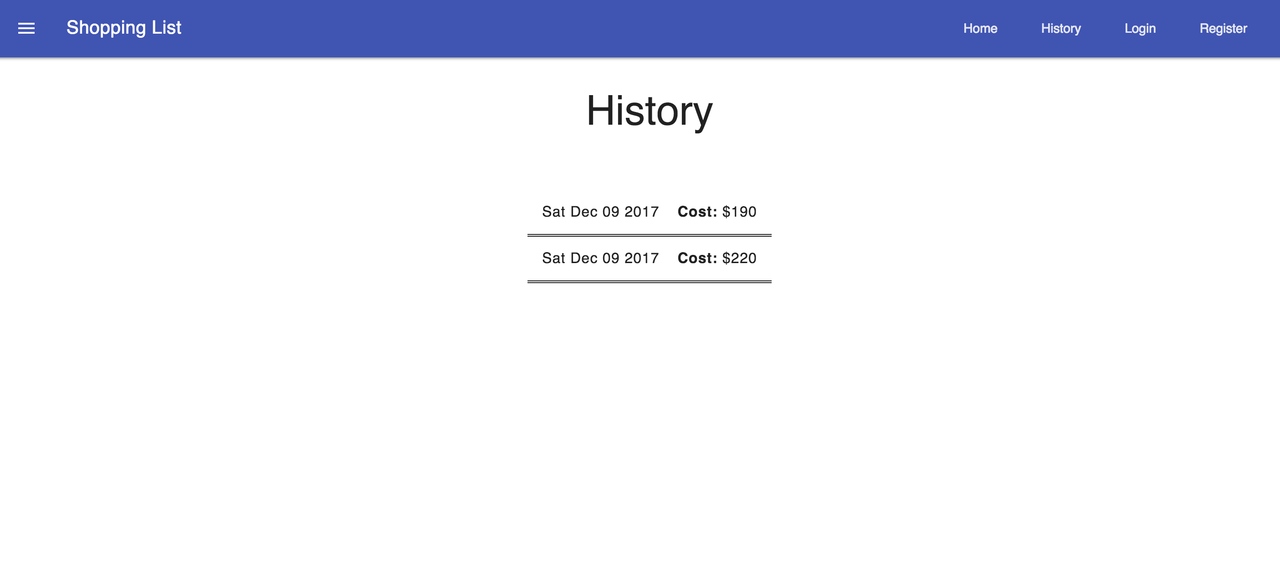
Saving the Shopping List and Viewing History
After adding and removing items as you like, you’ll probably want to save the list of items and get a summary of the totals on a separate page. In the completed GitHub repo, I have a function saveList() in index.js. This method:
- Gets all the saved items from the item store by calling hoodie.store.withIdPrefix(“item”).findAll(),
- Calculates the total of all the items
- Saves the total cost of the items together with the items in the list store (hoodie.store.withIdPrefix(“list”).add({cost, items}) )
- Removes all items from the item store so new ones can be added.
We’ll summarize lists with the price and the date it was added on a different page, history.html. The script to handle this is in the file history.js in public/js/src/ of the completed code on GitHub. I have omitted showing this code here for the sake of brevity. The code is similar to what we’ve written up until this point.
If you copied over the code from those sources onto your working directory, run the build script again (npm run build) and refresh the page. If that worked, add a few items and save the list. When you go to the history page, you should see the saved list there:
Nice work, it’s really coming together! Now let’s discuss adapting our application for seamless offline usage.
Offline Page Loading
So far we’ve been able to save and view data. This works when the user is offline and even when the server is down, then it’ll sync to the server when there’s a connection.
However, at the moment we’re going to see an error when we try to load the page while being offline. Let’s fix that by utilizing Service Workers and the Cache API.
A Quick Intro to Service Workers and the Cache API
A Service Worker is a programmable network proxy, which runs on a separate browser thread and allows you to intercept network requests and process them as you so choose. You can intercept and cache a response from the server and the next time the app makes a request for that resource, you can send the cached version. It runs regardless of whether the page is currently open or not.
We’re going to add a Service Worker script which will intercept all network request and respond with a cached version if the resource refers to our page and its related assets. This resources will be cached using the Cache API.
The Cache API, which is part of the Service Worker specification, enables Service Workers to cache network requests so that they can provide appropriate responses even while offline.
Create a Service Worker Script
Add a new file named sw.js in the public folder at public/sw.js. To tell the browser that we want this script to be our service worker script, open shared.js and add this code to the top of your file:
This code will first check if the browser supports service workers, and then register the file sw.js as the service worker script.
Run the build script again (npm run build) and refresh the page.
If you haven’t yet, open your browser JavaScript console (here is how to do it in Chrome, Firefox and Edge); you should see something printed to the console regarding service workers. Navigate to the Application tab (or similar if you are not in Chrome) in your dev tools and click on “Service Workers” from the side menu, you should see something similar to this screen:
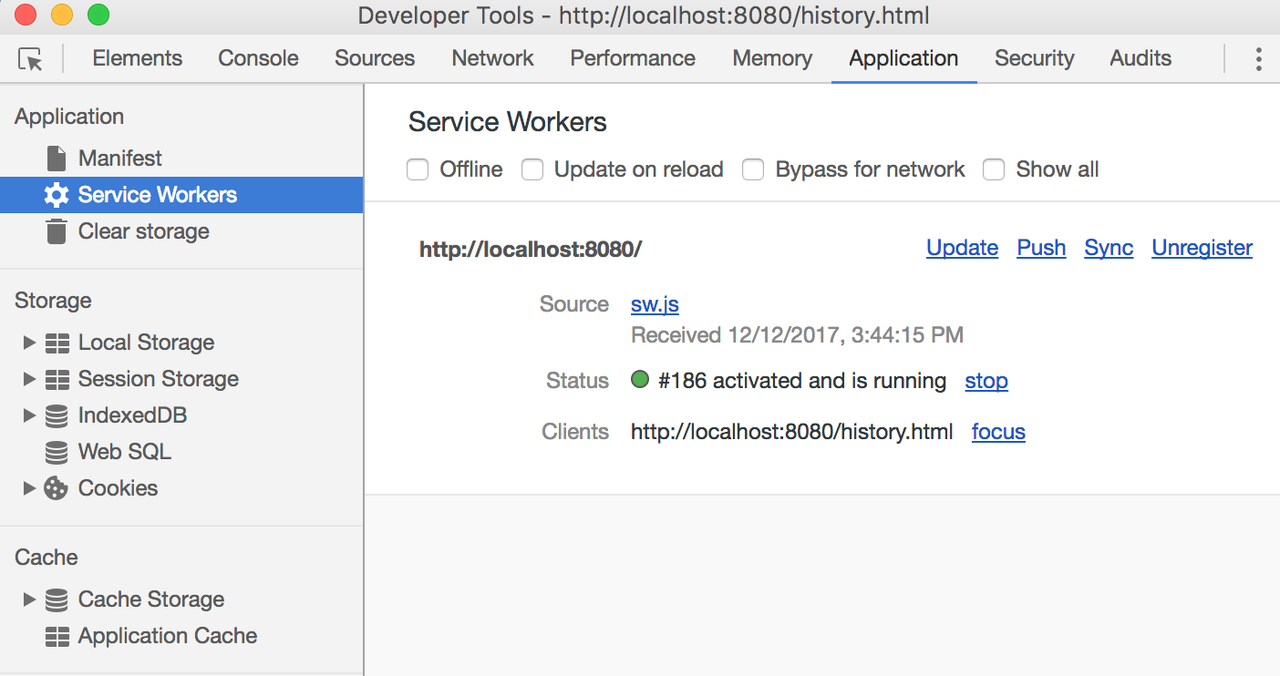
Registering a service worker will cause the browser to start the service worker
install step in the background. It is at this install step that we want to fetch and cache our asset.
If the asset is successfully cached, then it is installed and move to the activate step. If it failed, the service worker will not be installed. The activate step is where we need to delete old caches of our assets so our service worker can serve updated resources.
After the activation step, the service worker will control all pages that fall under its scope. The page that originally registered the service worker for the first time won’t be controlled until it’s loaded again.
All these steps (install and activate) that happen after registration are part of the life cycle of a service worker. You can read more about these concepts here.
Modifying Our Service Worker
Our Service Worker script is currently empty. For us to listen for the install step and cache all our assets using the Cache API, add the following code in sw.js:
We call caches.open(CACHE_NAME) which opens or creates a cache and returns a Promise with cache object. Once we have that object, we call cache.addAll() with an array of all the things we want to cache to make the app load while being offline.
The call is wrapped in events.waitUntil which tells the browser not to terminate the service worker until the Promise passed to it is either resolved or rejected. A Service Worker can be terminated by the browser after a while of being idle and we need to prevent that from occuring before we are done with our caching.
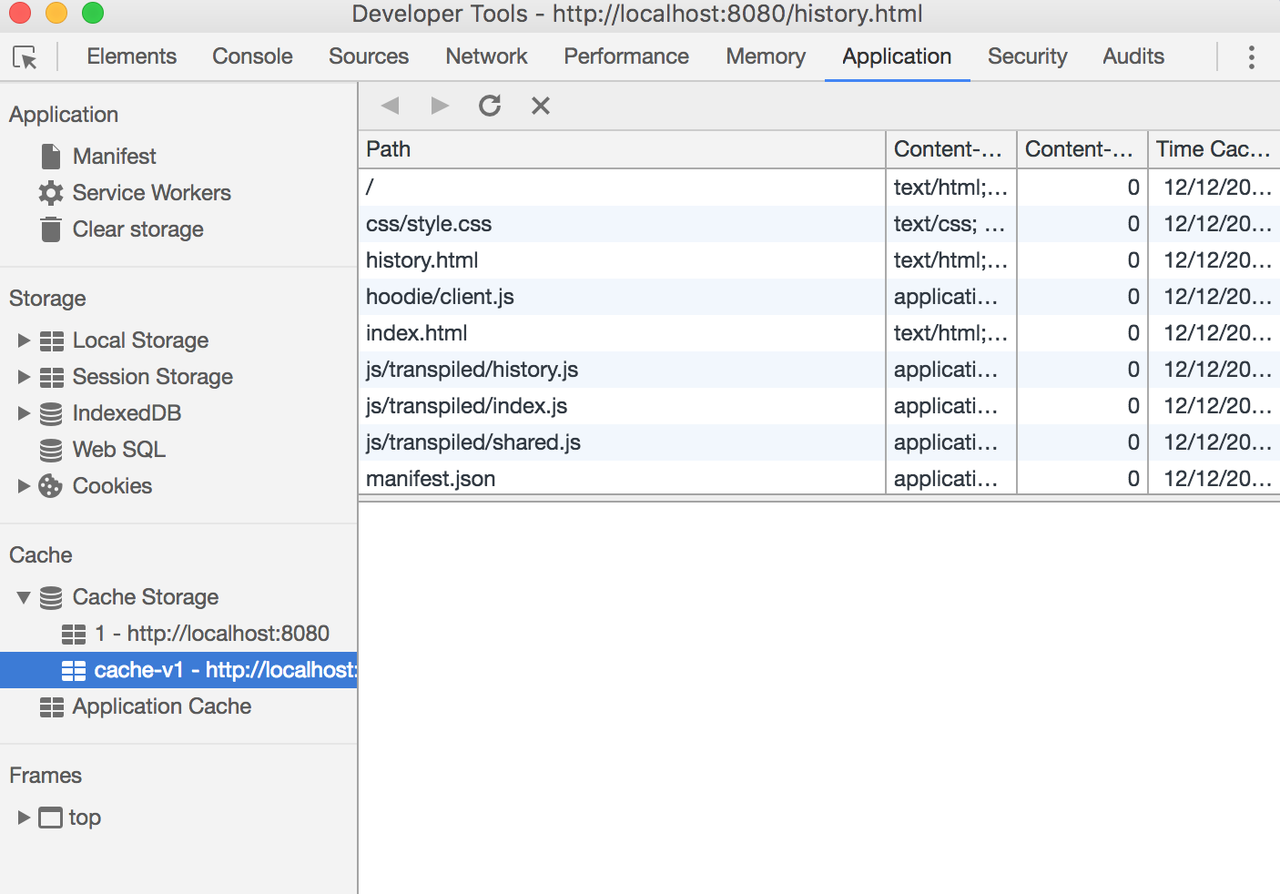
Refresh the page and it will trigger the registration of the Service Worker. Open the Applications tab in DevTools if you use Chrome (or the developer tool in your preferred development browser), click to open the ‘Cache’ menu and you should find a cache with the name we used. Click on it and you’ll see the files listed there
We’ve added our assets to the cache, but we need to serve the browser our cached asset each time it makes a request for one. To do this, we listen to the fetch event which is called each time the browser is about to make a request.
Add the following code in sw.js to intercept all network request and respond with a cached response if it’s a request for any of our cached assets:
We’ve used event.respondWith(), a method of FetchEvent. It prevents the browsers default handling of the request and returns a promise of a Response object. Our implementation either returns the response from the cache if it’s available, or makes a formal request using the Fetch API and returns whatever we get from that response.
Save sw.js,open and refresh the page once again to re-install the service worker. You’ll probably notice that the service worker stops at the activate step.:
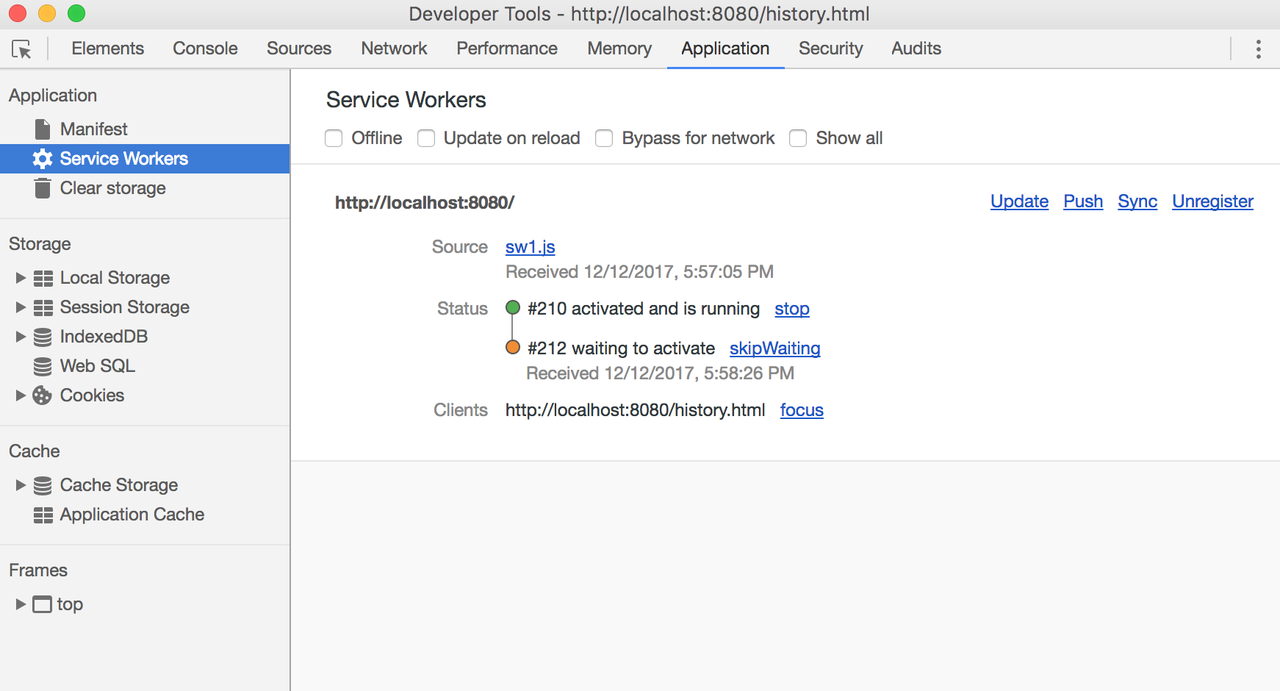
Click the skip waiting link to immediately activate it.
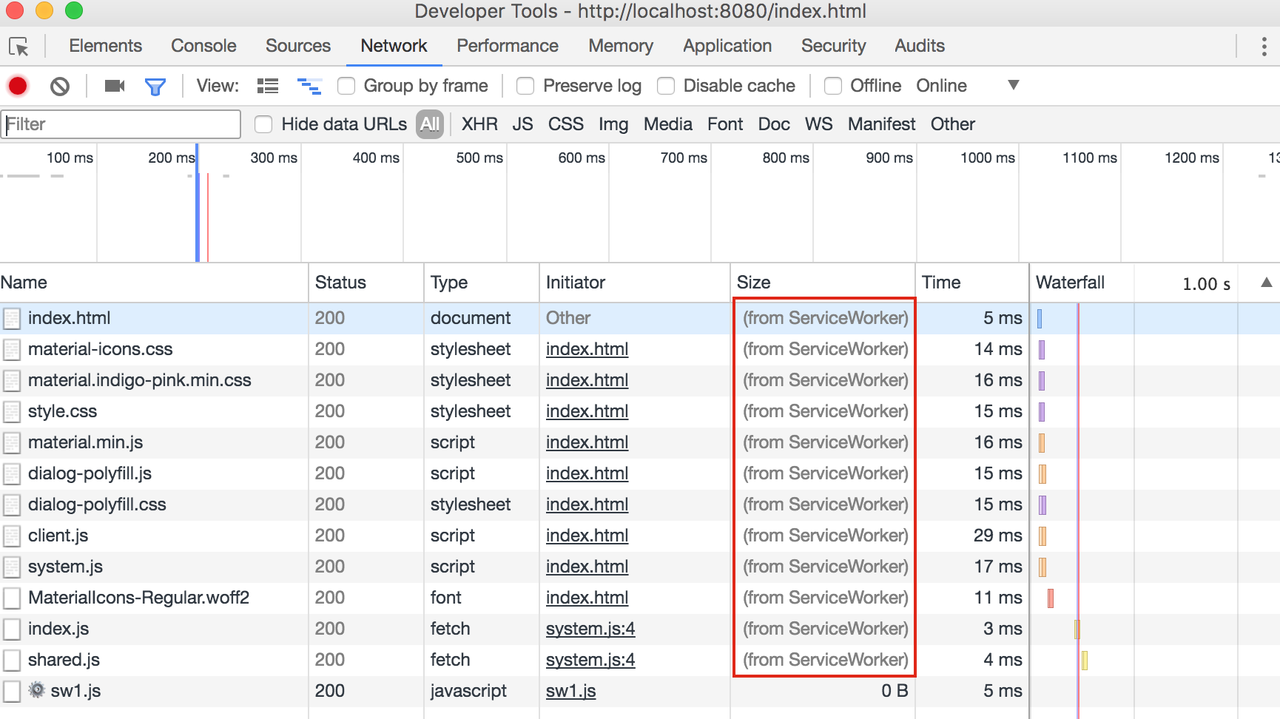
Refresh the page to see that the assets are loaded from the service worker
in the ‘Network’ tab:
You can then select the offline network throttling option in dev tools, refresh the page and navigate around to see that it works:

That’s a Wrap!
We built a basic shopping tracker application that works offline. Offline First is a core part of progressive web applications and we’ve tackled that with Hoodie and Service Workers. Hoodie provides the backend to easily build an offline-first app that synchronises the data among the server and all connected devices. Service Workers allow us intercept requests and respond with cached results. For browsers that do not support service workers we will gracefully fall back to working like a normal website.
We don’t quite have a complete PWA yet, however, we’ve just laid the foundation. In another post, we’ll look at some other bits you need to make it a PWA and some helpful tools to generate what you need (including using workbox to generate a service worker script). Stay tuned!
You can find complete source code of the final application on GitHub. If you’re confused about any of the things I talked about in this post, please leave a comment and feel free to reach out to me on Twitter (I’m happy to connect and see what you build next🚀).
Peter Mbanugo is interested in offline-first and constantly seeking to learn better ways to build fast, light and performant web apps. His current side project is a Javascript Chat SDK. You can invite him to come speak at your event, write for you, craft software, or discuss Offline-First, Software Architecture, Language Learning, and many more topics. Reach him anytime at @p_mbanugo on twitter
Reference

Related Resources
Twilio Docs
From APIs to SDKs to sample apps
API reference documentation, SDKs, helper libraries, quickstarts, and tutorials for your language and platform.
Resource Center
The latest ebooks, industry reports, and webinars
Learn from customer engagement experts to improve your own communication.
Ahoy
Twilio's developer community hub
Best practices, code samples, and inspiration to build communications and digital engagement experiences.