Secret Gifts with Twilio Verify for Gift of Code
Time to read:
December 21, 2020
Written by
Reviewed by

It’s December and in typical fashion I have left Christmas shopping too late. But as a developer, I can always use my coding powers to build a gift. Using Twilio Verify, I will code a small application that gifts a secret message to a holder of a specific phone number. This secret content could take the form of a message, picture etc. Watch out friends and family, I am going to be using it to gift my favourite holiday GIFs!
Technical requirements
- A free Twilio account. If you use this link to register, you will receive $10 credit when you upgrade to a paid account
- Node.js and npm installed
User flow
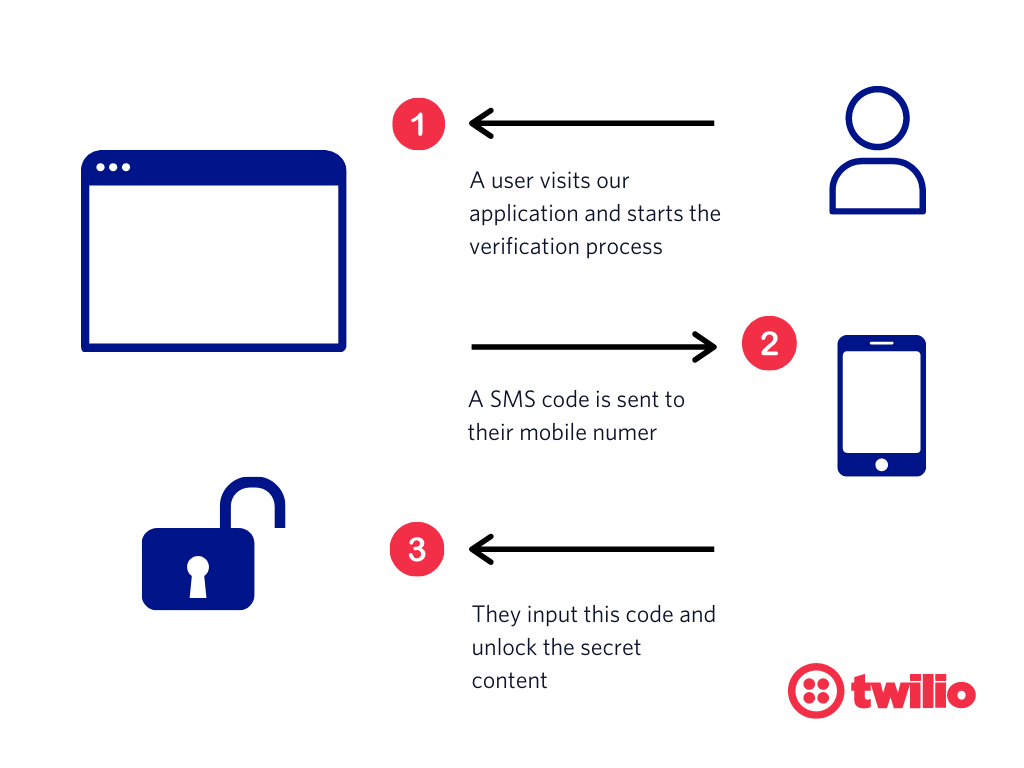
Our application will be coded with a specific person in mind. This user will be identified by their telephone number. This user will be able to visit our application, start the verification process and receive a SMS code. On submitting the correct code our application will show them the secret content.
Getting started
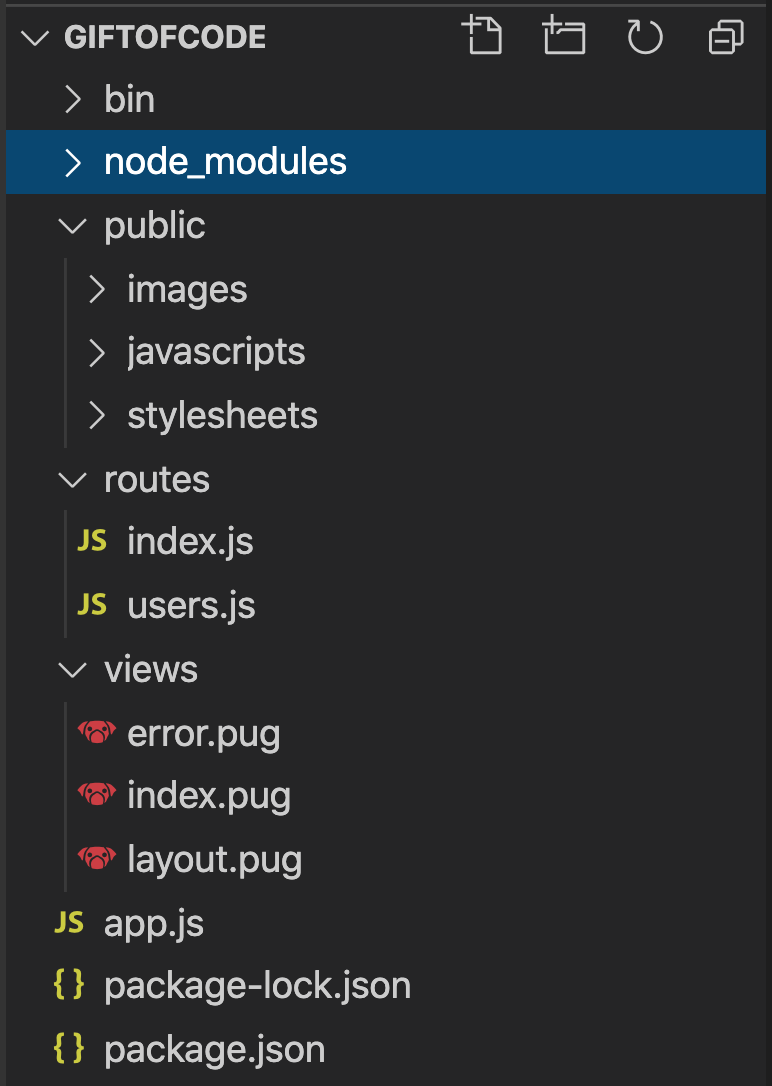
We will use Express generator to create the boilerplate for our application. Install with:
Opening the directory in your code editor, you should see the following template:
To this we will add a .gitignore and .env file:
touch .gitignore .env
Open the .gitignore and add the following:
We do not want to commit either our node modules, or the .env file, which will contain our authentication keys to source.
Pug.js Frontend
We generated our application with Pugs.js as the view engine. Pug.js a HTML templating engine which offers us a straightforward way to build out our frontend. Unlike HTML you can pass in conditionals, loops, includes and mixins.
We can update or add the following Pug.js files to our /views directory:
Update views/index.pug
Here in views/error.pug we will render a button to start the verify process, and a form to input the Verify code that will be sent over.
An error layout which returns us to the home page.
Finally our secret content in views/secret.pug.
Once the application is working, you can replace it with your own secret content.
Verifying our recipients number
The secret content in this application should only be accessible to the recipient. If we know their telephone number, we can use Twilio Verify’s REST API to send a code to their phone, which they can input to our application. Therefore to gain access to the secret content, you will need to have access to the phone number we specify.
We will work through the following steps:
- Create a verification service
- Start a verification
- Input the verification code (verification check)
- Handle a successful and failed verification
Creating a verification service
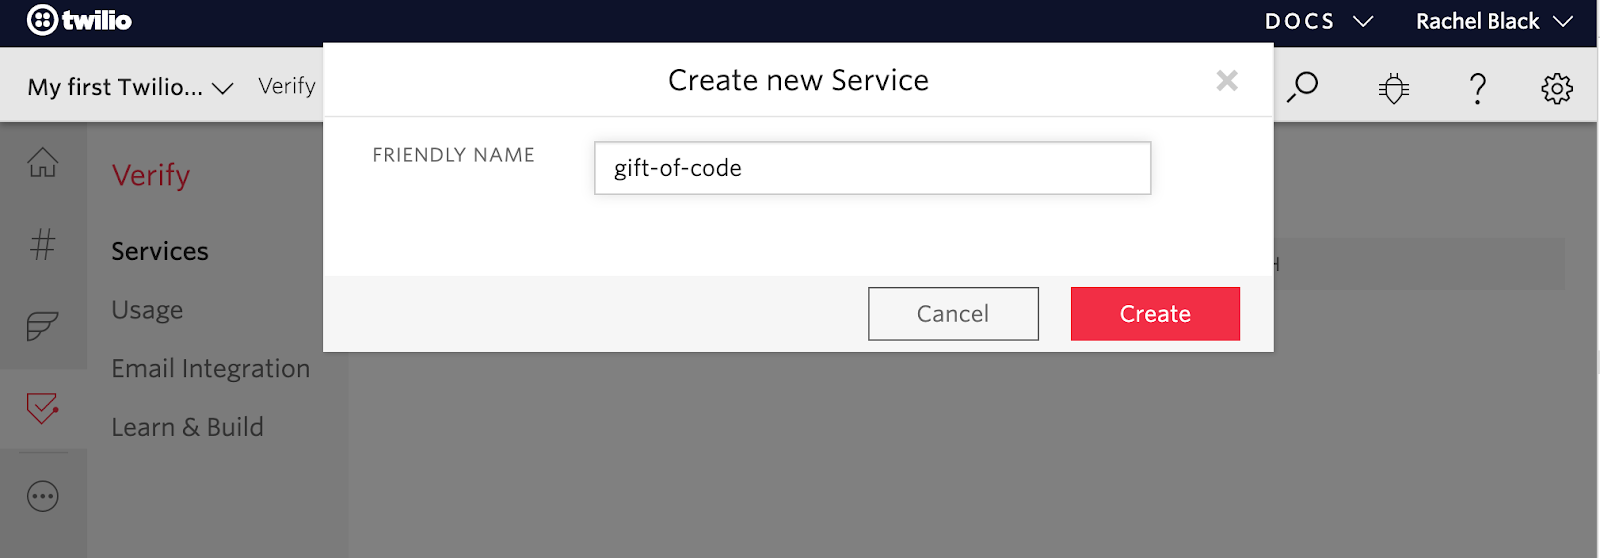
Before we can start verifying the numbers of our users. We need to create a verification service. The documentation explains how to do this via the API, but for this tutorial, let’s create one in Twilio Console. Select the ‘Create new service’ button, and name your service, this will be used in the verification message template, but you can always change it later.
Once you have created the service, you will be taken to an overview page. Here you can change the length of code sent out (we recommend at least 6). Copy the SERVICE SID and store in your .env file as:
SERVICE_ID=VAxxxxxxxxxxxxxxxxxxxxxxxxxxxx
Whilst we are in the Twilio Console, we can also grab the other required Twilio credentials. Navigate to the Console dashboard (home icon) and copy your account SID and auth token. Add them to your .env file:
We want to keep the recipient’s number private as well, so add the recipient's number in E.164 format to your .env file. This can be your own number while you're testing:
Now we have created the service, and have our Twilio credentials, we can start coding the verification process.
Starting a verification
Install the following modules:
Along with Twilio, we are installing the env2 to handle our environment variables.
Open up routes/index.js file and require both at the top of the file.
Once we have required env2 with the correct path to our .env file, we can access any of our defined environment variables via process.env. We make use of environment variables to avoid committing API keys and other sensitive information like phone numbers.
Next, let’s replace the index route with:
When we first navigate to our page, we will render index.pug, with the variable showCodeInput of false. According to our template, this conditional will hide the verify code input, and show the button to trigger the verify process.
Referring back to our index.pug file, we can see that when we hit the button to start the verification process, we do a GET request to /create-verify. Returning back to routes/index.js, we add the following code to process this get request:
This triggers a verification, and the recipient will receive an sms with a code. In addition this request returns the index.pug, but this time with the showCodeInput conditional. In the UI this will render a simple form input, where the user can submit their code.
Processing the verification code
Now we need to write the /verify-check POST endpoint. Checking in our index.pug file, we can see that this request is the action on the input form, meaning it will be triggered when the user submits their code.
We can add the following to routes/index.js:
Here we use the Verify API again, this time to check the code is correct. We do this using the verification check method. This method takes the number we are verifying and the code we have sent from the frontend. It returns the verification_check, which allows us to ensure the status is “approved” before rendering our secret content. If the verification check method returns something other than approved, we will render our error UI.
Run the application from the terminal with npm start and navigate to http://localhost:3000/
Test this out with your own number, and to see the secret content, you will have to verify that your number matches the one in the .env file. Now it’s working, swap out the super dull secret template with your own message or content If deploying your site, make sure to use HTTPS rather than unencrypted HTTP, to prevent hackers doing a man in the middle attack.
Happy coding and a merry new year!


Related Resources
Twilio Docs
From APIs to SDKs to sample apps
API reference documentation, SDKs, helper libraries, quickstarts, and tutorials for your language and platform.
Resource Center
The latest ebooks, industry reports, and webinars
Learn from customer engagement experts to improve your own communication.
Ahoy
Twilio's developer community hub
Best practices, code samples, and inspiration to build communications and digital engagement experiences.