How to Send an Email with Notion, SendGrid, and Python
Time to read:
August 11, 2022
Written by
Reviewed by

Notion is a useful tool for project management and note taking. Users can easily create new pages and databases for managing their projects. For example, you could create pages for email templates and then add a database for a mailing list. Why shouldn't you also be able to send an email with Notion?
In this post, you will learn how to use Notion to create email templates and an email mailing list. Using Python and SendGrid, you will make a console program, complete with argument parsing, so you can effectively send your emails.
Prerequisites
To continue with this tutorial, you will need:
- Python 3.6 or higher installed on your machine.
- A SendGrid account. If you haven’t yet, sign up for a free SendGrid account.
- A Notion account. If you haven't yet, sign up for Notion for free.
- Two or more email addresses to test this project.
After you complete the prerequisites, you are ready to proceed to the tutorial!
Set up your project environment
Before you can dive into the code, you will need to set up the project environment on your computer.
First, you’ll need to create a parent directory that holds the project. Open the terminal on your computer, navigate to a suitable directory for your project, type in the following command, and hit enter.
As a part of good practices for Python, you'll also want to create a virtual environment. If you are working on UNIX or macOS, run the following commands to create and activate a virtual environment. The first command creates the virtual environment, and the second command activates it.
However, if you are working on Windows, run these commands instead:
After activating your virtual environment, you’ll need to install the following Python packages:
- python-dotenv to manage your environmental variables.
- sendgrid to interact with the Twilio SendGrid Web API.
- requests to send HTTP requests.
To install these packages, run this command:
As a part of good programming practices, you’ll want to store sensitive information inside a secure location. To do this, you will store values in a .env file as environmental variables. In the notion-sendgrid-project directory, open a new file named .env (notice the leading dot) and paste the following lines into the file:
Your project environment is now set up, but you must first configure your environmental variables in the .env file. "XXXXXXXXXXXXXXXX" are simply placeholder values for their corresponding variables. The next sections will cover how to get the actual values.
Obtain a SendGrid API Key
From the SendGrid dashboard, click Settings > API Keys to navigate to the SendGrid API Keys page. Then, click on Create API Key.
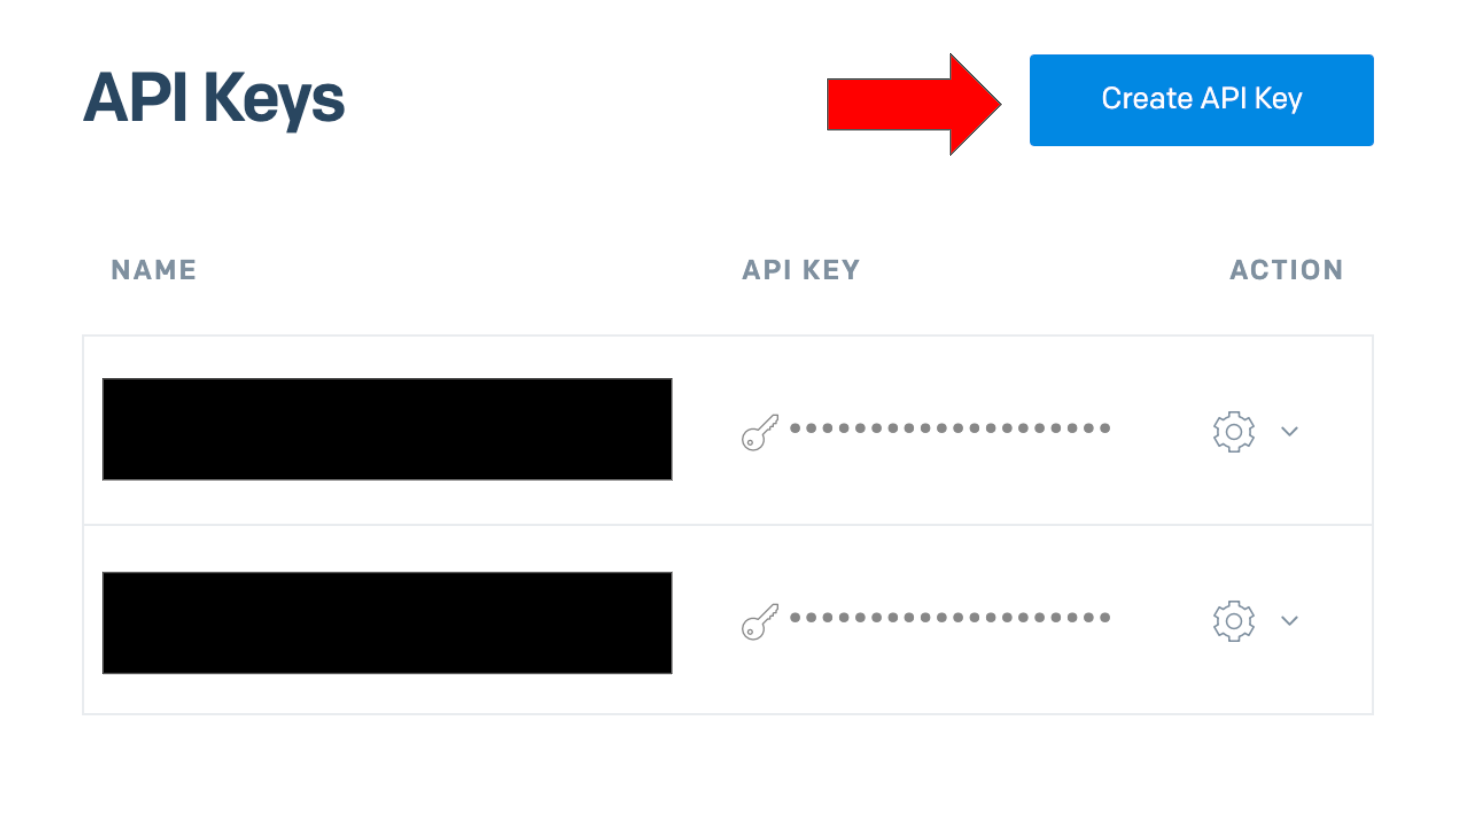
Next, enter the name (I named mine "Notion") for the API Key. Then, under API Key Permissions, select Full Access. Finally, click Create & View to create the API Key.

Afterwards, your API Key should pop up on the screen. Copy the key, and in the .env file you created earlier, replace the "XXXXXXXXXXXXXXXX" placeholder for SENDGRID_API_KEY with the value you copied.
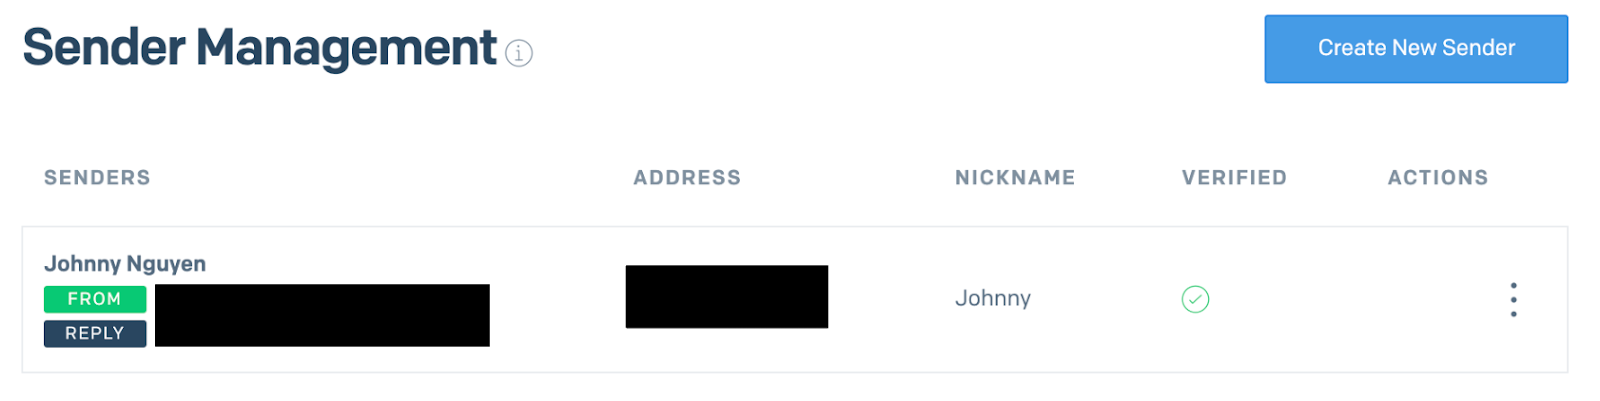
Next, you need to create a verified sender to send emails from. On the left-hand side of the dashboard, navigate to Marketing > Senders to get to the Sender Management page. Click the Create New Sender button in the top right, fill out the necessary fields, and click Save. In the .env file you created earlier, replace the "XXXXXXXXXXXXXXXX" placeholder for EMAIL_SENDER with the email address you used for the sender. Then, verify the sender by checking for an email from SendGrid in the sender's email inbox.
Set up Notion
Let's go through the steps on how to set up your Notion to integrate it with Python. First, you'll need to format the pages. Then, you'll create the database for the mailing list and an email template. Afterwards, you'll create a Notion integration and share your pages to the integration.
Format the Notion pages
After logging in to Notion, navigate to your desired workspace. On the column featured on the left-hand side of the web page, click + Add a page to add a page to your workspace. Name this page "Email".
A web page named Email should be created. Next, find the page ID from the URL of the Email page. This ID is an alphanumeric code after the last dash. The page ID for my page is highlighted in the image shown below:

Your code will be different from the code shown above. Copy the page ID, and in the .env file you created earlier, replace the "XXXXXXXXXXXXXXXX" placeholder for NOTION_PAGE_ID with the value you copied.
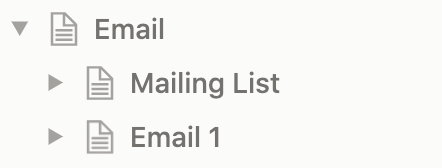
Now, add a page for the mailing list database by hovering your cursor over the "Email" page in the left column. A plus sign + should appear. Click the plus sign + to quickly add a page inside. Name this page "Mailing List", and then select Table under DATABASE as its page type.
Next, add a page for the email template. The steps are similar to the steps before. Hover your cursor over the "Email" page in the left column. A plus sign + should appear. Click the plus sign + to quickly add a page inside. Name this page "Email 1", and then click out of the window.
Your page organization should look like this:
You'll format these pages in the next section.
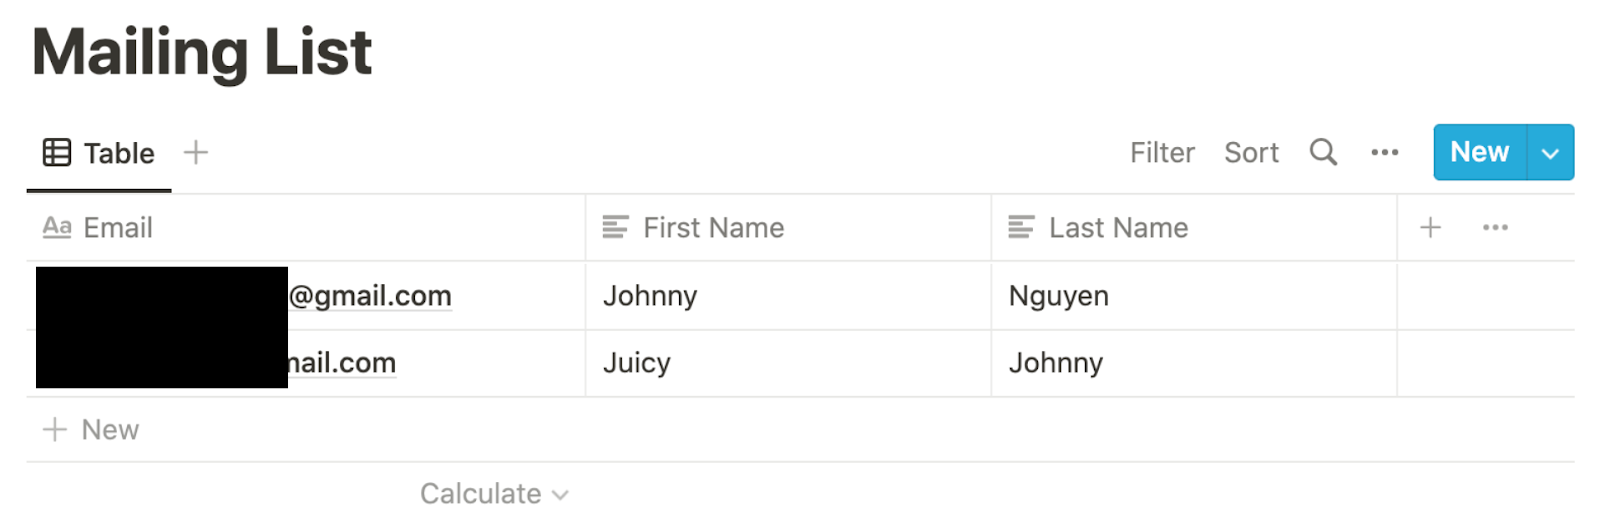
Set up the mailing list database
Click on Mailing List to display the page. On the right-hand side of the page, there should be a menu. Select + New Database. An empty table will appear on the page.
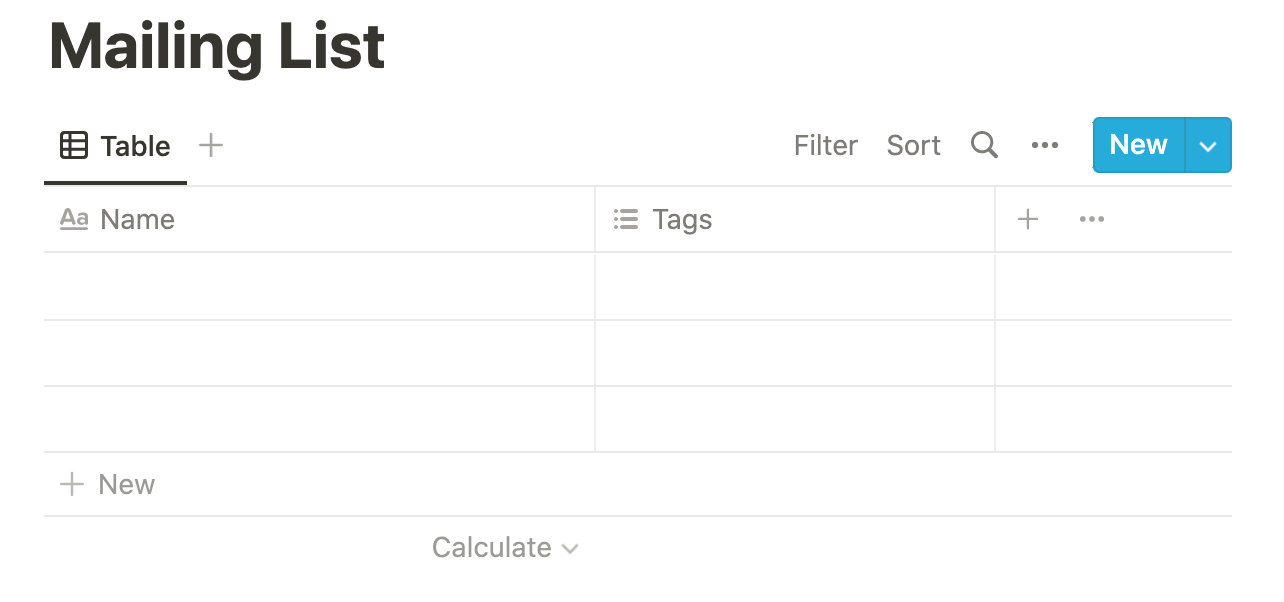
Follow these steps to format the table:
- Right-click on Name in the column header, and rename it to "Email".
- Then, right-click on Tags in the column header, and click Delete property to delete the column.
- Click on the plus sign + in the column header twice to add two new columns.
- Right-click on one of the new columns, and rename it "First Name".
- Then, right-click on the second new column, and rename it "Last Name".
After adding some values to your table, your table should something look like this:
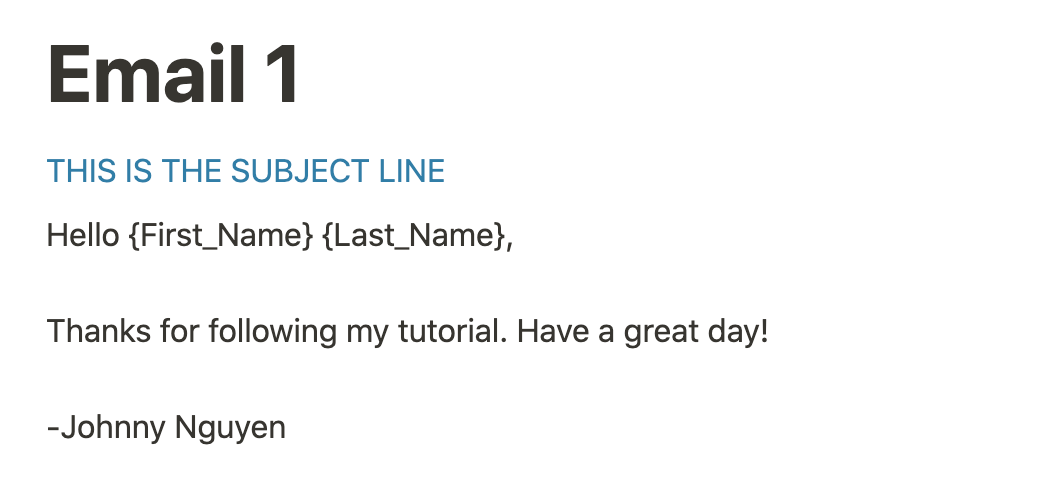
Create an email template
Now that your database is set up, it’s time to create a simple email template. Click on Email 1 to display the page. Then, click on the page, click right below the title, and type a subject line. I uncreatively used "THIS IS THE SUBJECT LINE" as my subject line. You can also change the color of the font and line by clicking the dots that appear when you hover to the left of the line.

Next, you need to create body text for the email. Press ENTER to add a new block (Notion's basic unit of organization) to the page. Then, type in your message. To add in variables from the columns, define it as {Variable_Name}. Note that there are no spaces between the curly brackets. Another thing to note is that since pressing ENTER creates a new block, to add a new line, you would have to press SHIFT + ENTER.
Here is an example of my email template below:
Set up the Notion integration
Next, you need to set up a Notion integration so that you can access the Notion pages from Python. Click on this link to go to Notion's "My Integrations" page.
Click on the plus sign + tile to add an integration. Provide it with a name and an optional image. I named mine "SendGrid Email" and used this picture for it:

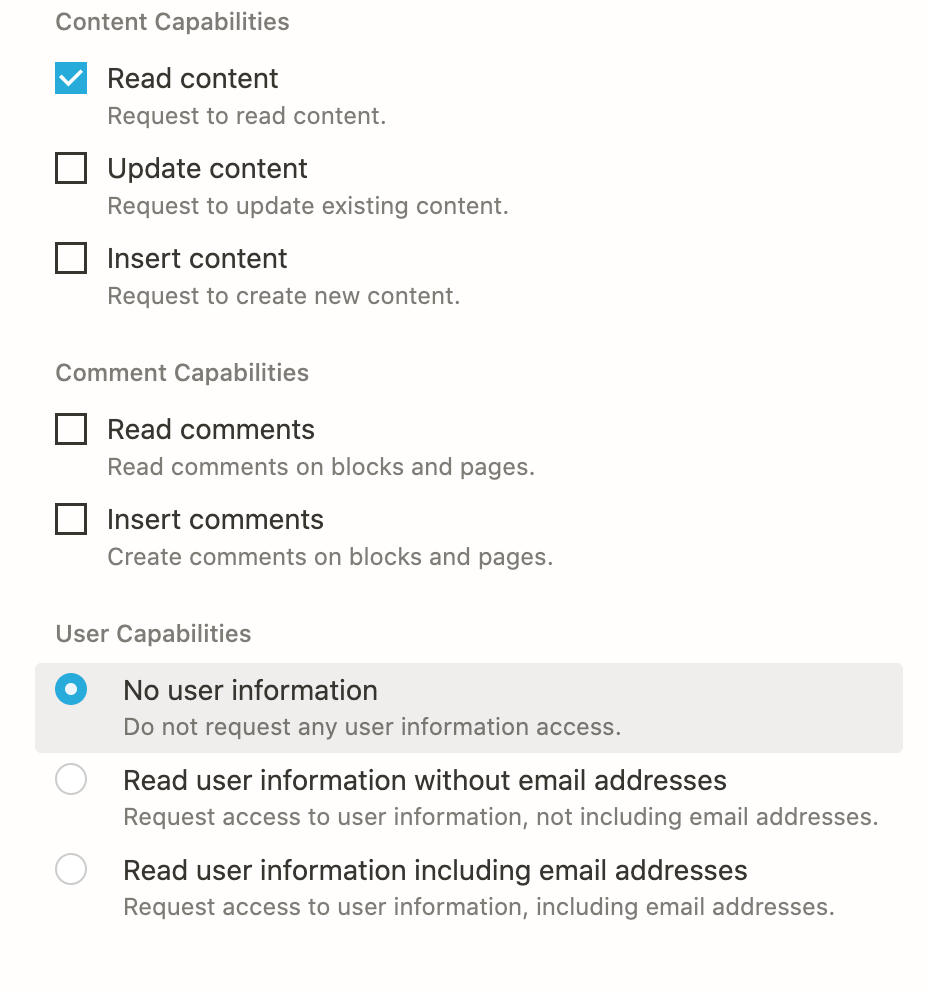
Next, under Content Capabilities, uncheck Update content and Insert content. Under User Capabilities, select No user information. Your permissions should look like this:
Click Submit to create the integration. Afterwards, the Internal Integration Token is displayed on the screen.
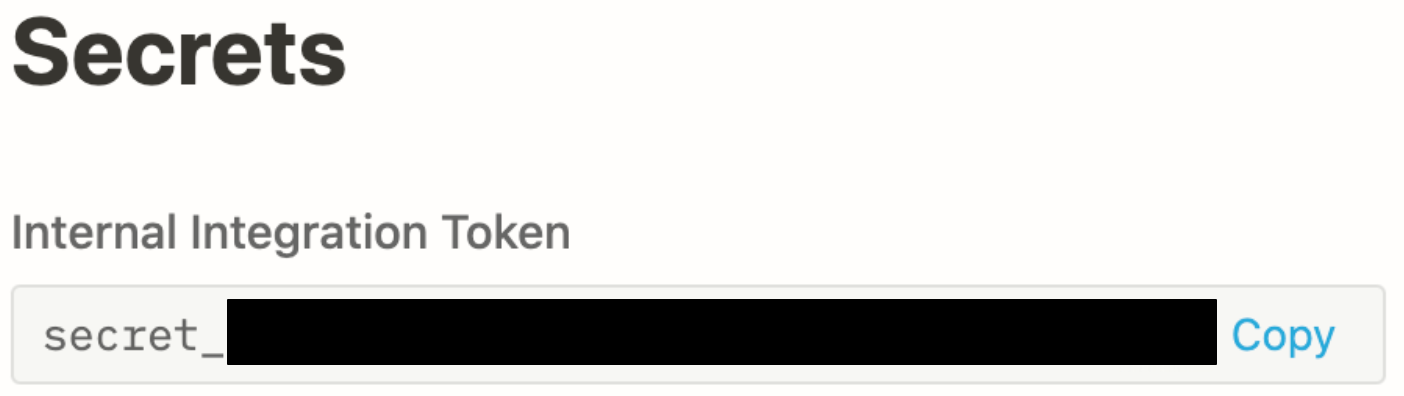
Copy this, and in the .env file you created earlier, replace the "XXXXXXXXXXXXXXXX" placeholder for NOTION_API_TOKEN with the value you copied.
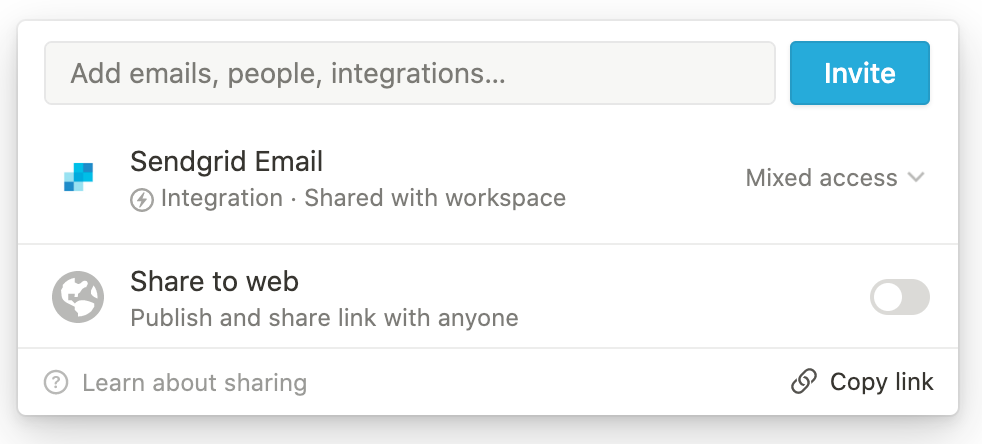
Notion integrations aren't automatically shared to the pages. On the main Email page, click Share in the upper right corner. Search the integration, and click Invite.
You are now ready to begin coding the application!
Create the Application
Here are the expected requirements of the application:
- The user runs the application in the command prompt.
- The user is required to specify which email template to use.
- The user can optionally specify which database to use.
- The application sends out the email to the intended recipients.
In the notion-sendgrid-project directory, create a new file named main.py. To follow the expected requirements, copy and paste the following code into main.py:
This code serves as an outline of the application. The necessary modules are imported at the top, and the rest of the code will be covered step by step below. However, if you want to skip ahead to the completed code, go to the end of this section.
Define variables and initialize argument parser
Replace """ Define variables and initialize argument parser here """ in main.py with the following code below:
In the code snippet above, the environmental variables are loaded into the variables. Additionally, this application uses an argument parser to specify which email template and database to use. This would be useful if the user had multiple templates or databases to choose from. In the highlighted lines, the argument parser is used to add the arguments template and mailTo. template requires an argument, while the default to mailTo is set to "Mailing List". To see how it works, check out the section titled Run the Application.
Define sendEmail
Copy and replace the code for the sendEmail function in main.py with the code below:
This code is used to create and send a message with SendGrid. First, a Mail object is initialized with the arguments. Then, the key is assigned to the variable sg using the SendGridAPIClient() method from the SendGrid helper library, passing the key to the v3 API in an Authorization header using Bearer token authentication. The message is then sent, and information about the response is printed out.
Get the IDs for the email template and database
Before you can get the IDs for the email template and database, you need to first make a request to the main page, Email. Replace """ get main notion page here """ in main.py with the code below:
In the code snippet above, the application connects to the Email Notion page by first defining the url and header. Then, a post request is made to get the response from the Notion API, and the json() method is used to format and read the response.
After you receive the response from the Email page, you can search for the IDs for the email template and database. Replace """ get email and database IDs here """ with the code below:
Using list comprehension, you are able to use the arguments from the argument parser to search for the IDs in response_json. As shown in the highlighted lines, the condition set in the list comprehension checks if the title matches the corresponding arguments.
Get the email template's subject and text
After you get the page ID for the email template, you can use the page ID to access the email template's content. You use the page ID to format the URL for the API request. If the request is successful, you can access the contents of the email template using the response. Replace """ get email subject and text here """ in main.py with the code below:
Access database content and send emails
Next, you'll use the database ID to access the contents for the Mailing List page and send out the emails. Replace """ access database content here """ in main.py with the code below:
A POST request is made to access the contents of the Mailing List database. If you have a good eye, you would notice the "Notion-Version" in headers is respecified to an older version of Notion. I did this because it's easier to access and format the database contents using the "2021-08-16" version of the Notion API.
Now that you can access the database contents, you can use a for-loop to send out the emails with the sendEmail function. Python's format method is used to interpolate the variables defined in the email template. To do this, replace """ send out emails here """ in main.py with the code below:
Completed Code
That's it! Your completed code should look like the following code below:
Continue to the next section to see how you can run the application.
Run the Application
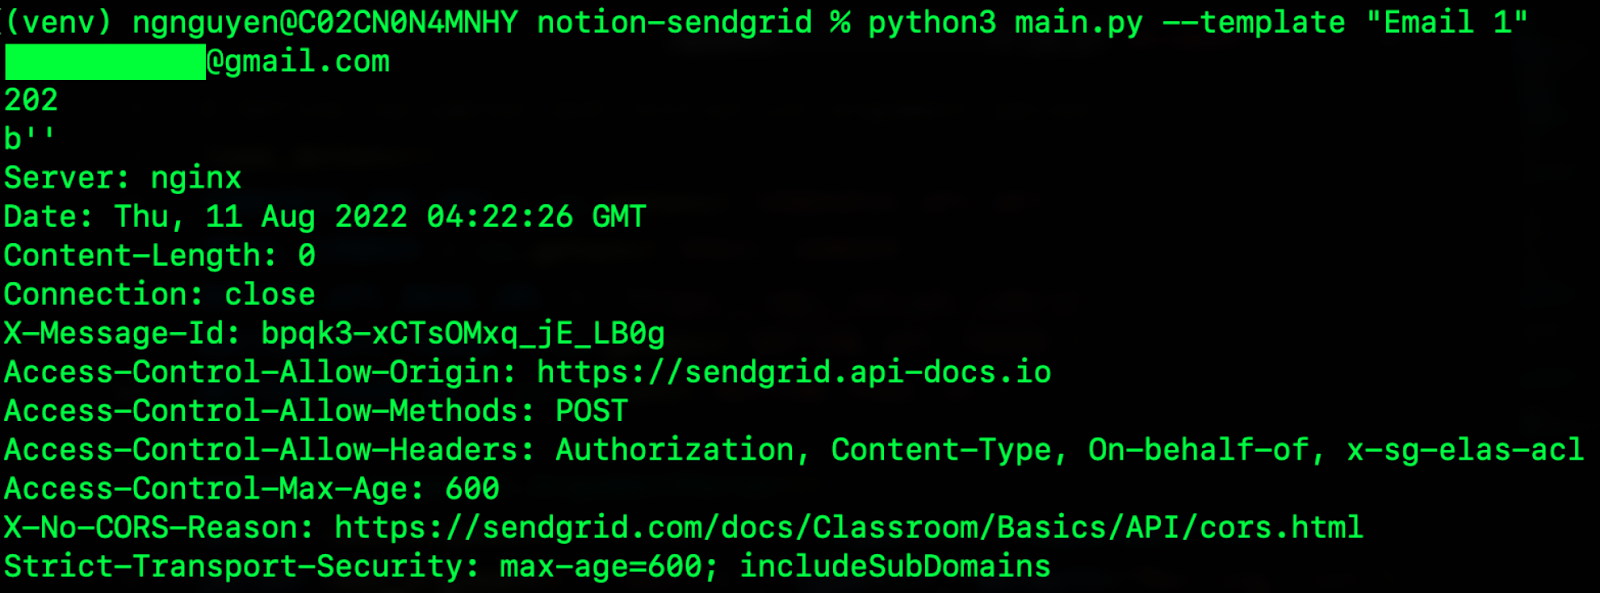
An argument parser is used to add more functionality to the application. You can specify the values for the arguments by adding a string after the --template and --mailTo flags. To run the code, type the following command in a command prompt with the venv virtual environment activated.
You can also specify a different template or mailing list database as long as it's under the Email page. An example is shown below:
Below is a screenshot of my command prompt after running the application:
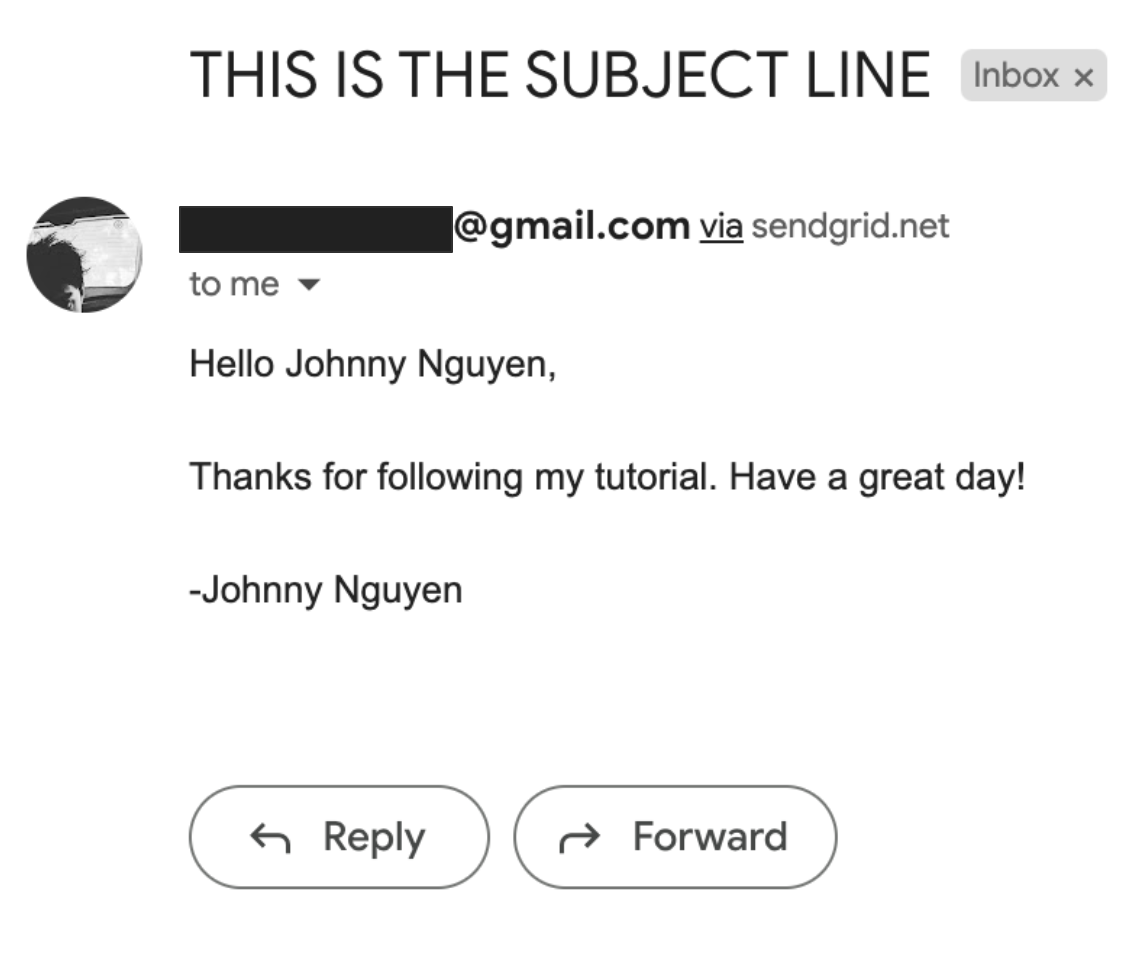
You should have also received the formatted emails if you check the inboxes for the emails in the mailing:
Conclusion
Congratulations on building your application. First, you created a Notion page with an email template and mailing list database. Then, using SendGrid and Python, you sent out emails to the mailing list from the comfort of your command prompt. Feel free to customize your application as much as you like. For example, you could create/code more complex templates, or maybe you could add more customization with the database.
Excited to learn more about what you could do with Notion, SendGrid, and Python? Check out this article on using Notion to send client payment reminders via SMS. Or perhaps you could learn how to send recurring emails with SendGrid. For more information on how to get started with SendGrid and Python, you can check out the SendGrid Email API Quickstart for Python. I can't wait to see what you build!

Johnny Nguyen is an intern developer on Twilio’s Developer Voices Team. He enjoys creating fun coding projects for others to learn and enjoy. When he’s not napping or watching TikTok, he can be reached at ngnguyen [at] twilio.com or his LinkedIn.


Related Resources
Twilio Docs
From APIs to SDKs to sample apps
API reference documentation, SDKs, helper libraries, quickstarts, and tutorials for your language and platform.
Resource Center
The latest ebooks, industry reports, and webinars
Learn from customer engagement experts to improve your own communication.
Ahoy
Twilio's developer community hub
Best practices, code samples, and inspiration to build communications and digital engagement experiences.