Send wishes using Twilio Voice and SMS with C# and ASP.NET Core
Time to read: 4 minutes
December 12, 2022
Written by
Reviewed by

In the light of the season of giving, you will build an app where users can send in their wishes to your Twilio Phone Number for a special someone, and when that special person dials the number, they can listen to a random wish out of all the wishes that are saved. For example, family members can send in wishes to your Twilio Phone Number and when the kids dial the number, they get to listen to a different wish every time.
In this tutorial, you will build a Web API that serves two webhooks. The first is an SMS webhook that saves the message that is sent to your Twilio Phone Number while the second webhook is a voice webhook that responds to incoming calls and reads out a wish.
Prerequisites
You will need the following things to follow along:
- A Twilio account. Sign up for a Twilio account here and get $20 trial credit to spend on Twilio Products.
- A Twilio Phone Number
- .NET 6.0 SDK or newer
- A code editor or IDE (Recommended: Visual Studio Code with the C# plugin, Visual Studio, or JetBrains Rider)
- ngrok CLI, to expose your local development environment over the internet.
- EF Core Tools
- Some knowledge of .NET, ASP.NET Core, and Entity Framework Core.
Here is the link to the complete code on GitHub.
Create the Web API
To begin this tutorial, create the Web API project using the following commands:
Then proceed to open it with your code editor.
In the code editor, add an API Controller named WebhookController in the Controllers folder, then add two actions that will serve the webhooks like the code below:
The IncomingMessage action will respond to the SMS webhook and save every wish that is sent to your Twilio number while the WishPlayer action will respond to the incoming call by playing a random wish.
Create the Webhooks
Configure the database
Install the EF Core packages to save the messages that are received into a database and to retrieve them later:
Next, you will create a data model and database context to store the messages that are received.Create WishItem.cs and AppDbContext.cs to define the data model and database context respectively. Update WishItem.cs with the following code:
Update the AppDbContext.cs with the following code:
Then run the database migrations command to create the data WishesApp.db database and the WishItems table:
Finally, register the AppDbContext in the Program.cs file:
Update the SMS webhook
When your Twilio Phone Number receives a message, Twilio will send an HTTP request to a webhook URL that you have configured on the Twilio console. The webhook URL is expected to receive the request from Twilio and respond with instructions written using the Twilio Markup Language (TwiML).
Here is an example of a TwiML that sends an ‘Ahoy!’ message back to a user.
Update the IncomingMessage method with the code below
The IncomingMessage action retrieves the Body and From component from the request that is sent by Twilio and saves it to the database. Thereafter a ‘Thank you’ message is sent to acknowledge the wish.
Implement the Voice Webhook.
Just like the TwiML for SMS, there's also TwiML for Voice applications.
You will create the voice webhook that will select a random wish from the database and respond to an incoming call by reading out this wish.
Update the WishPlayer action with the following code:
The WishPlayer action retrieves a random wish from the database and replies to the call with a voice prompt that reads the wish. In the event that no wish is present, a welcoming message is used instead.
Configure the Webhooks
To test the webhooks, you need to expose them over the internet and configure the public URLs to your APIs on your Twilio Phone Number.
First, start the app using the following command:
Then expose your local development environment using the ngrok tool. Ngrok is a tool that exposes your local development environment over the internet using a secure tunnel. Run the ngrok command pointing to the same http port that your project is running on.
Log on to the Twilio console and select your Account. Click on the Explore Products and select Phone Numbers. Then in the left-side navigation, click on Phone Numbers > Manage > Active Numbers.
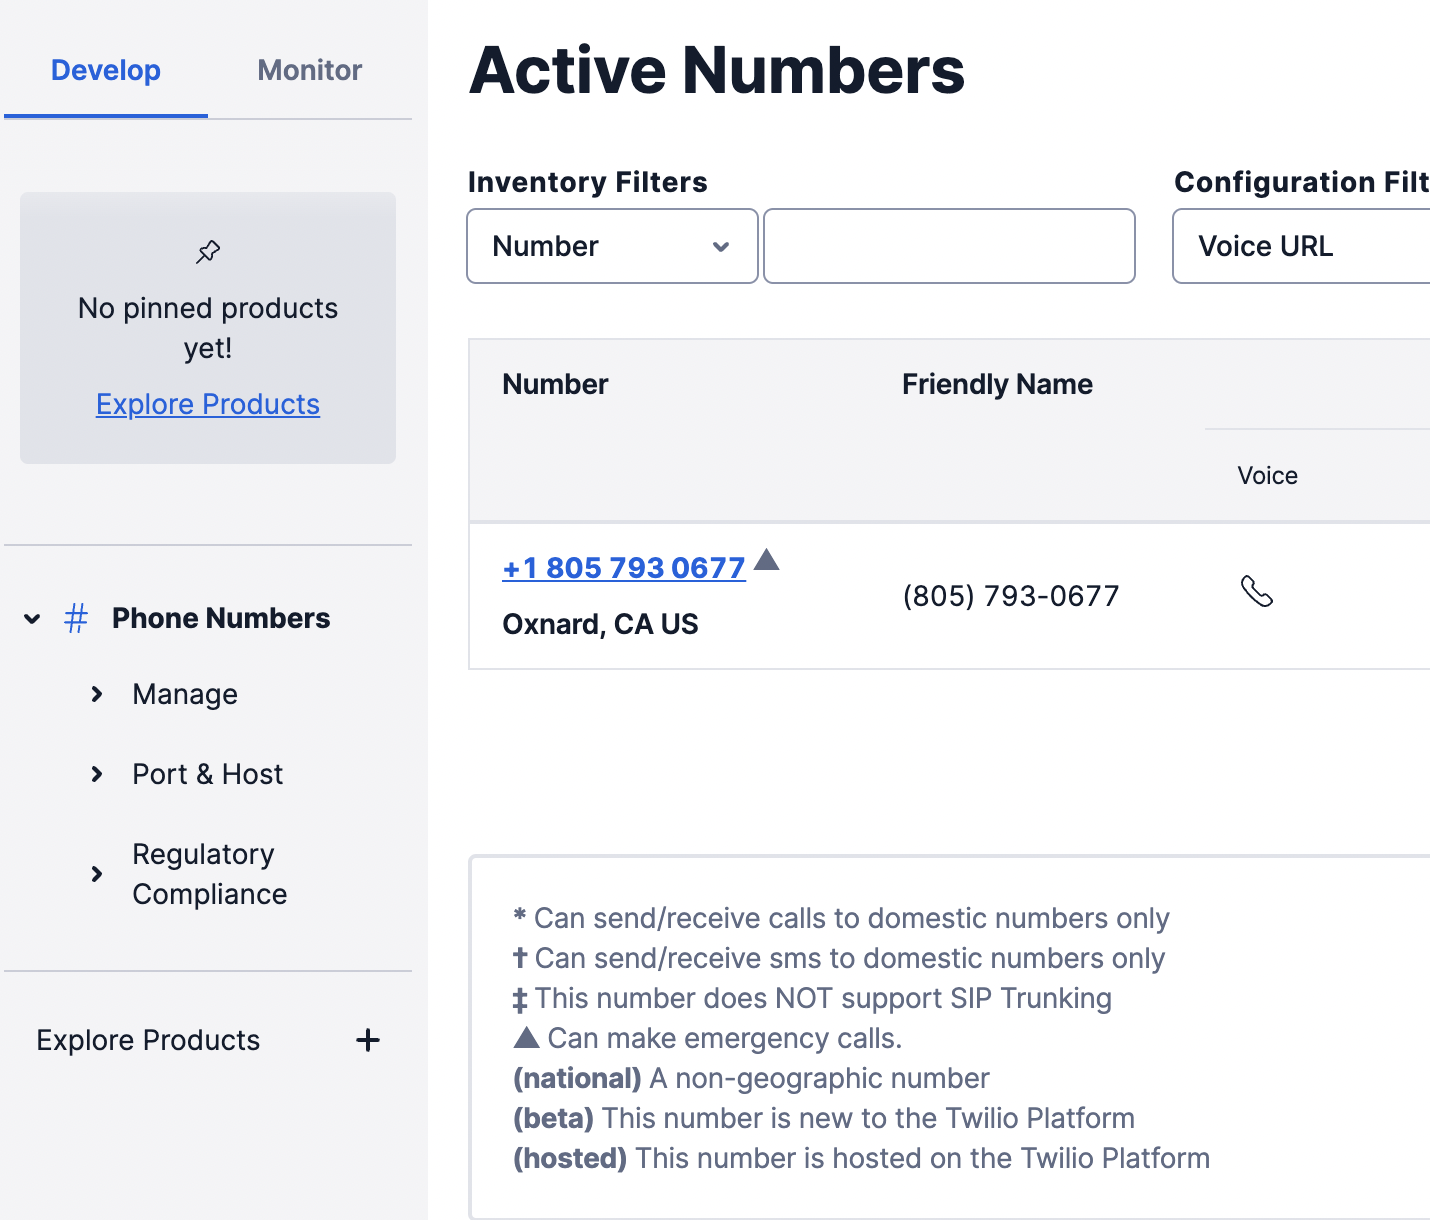
Click the active number you'd like to use which will take you to the configuration page for the phone number.
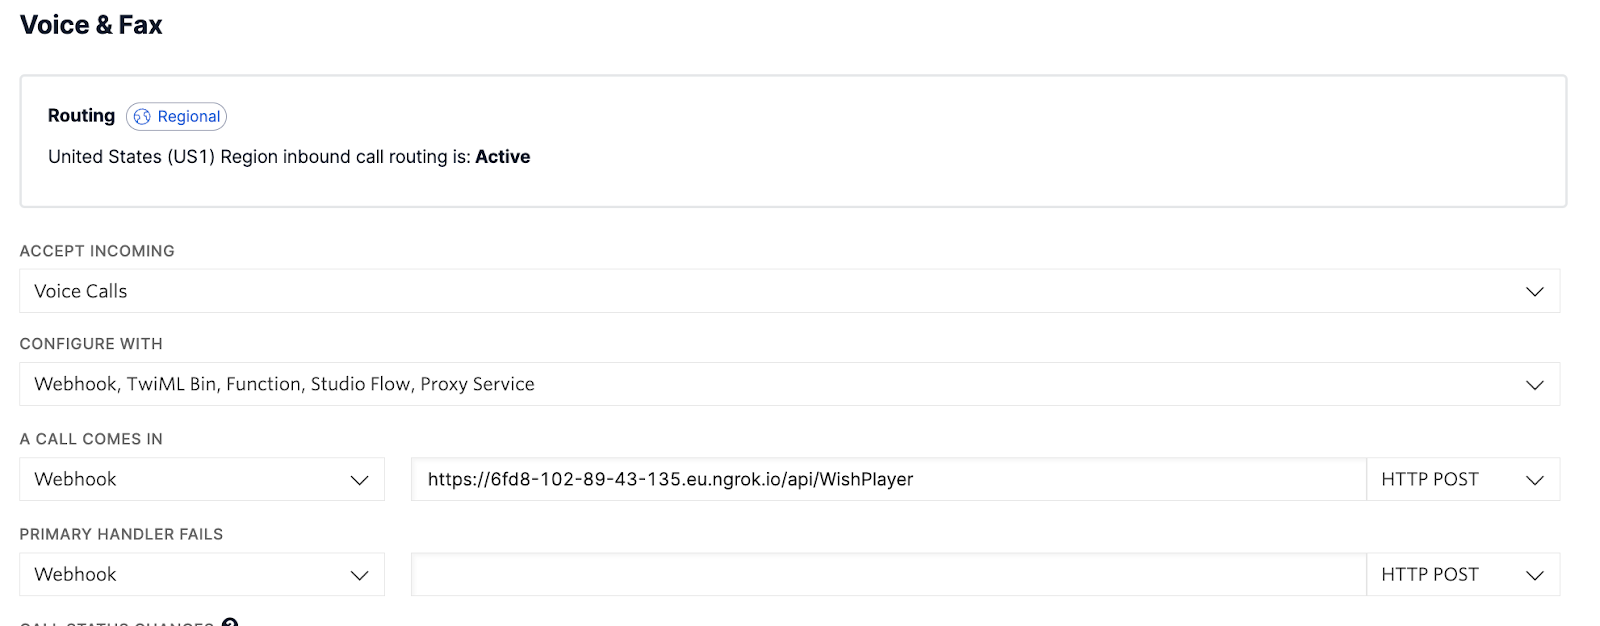
On the configuration page, scroll to the Voice & Fax Section. The Voice & Fax section will take the WishPlayer webhook which reads out a random wish from the database.
Under ‘A CALL COMES IN’ set the first dropdown to a Webhook, then into the text box, enter the ngrok Forwarding URL with /api/WishPlayer as the path, and lastly, set the second dropdown to HTTP POST.
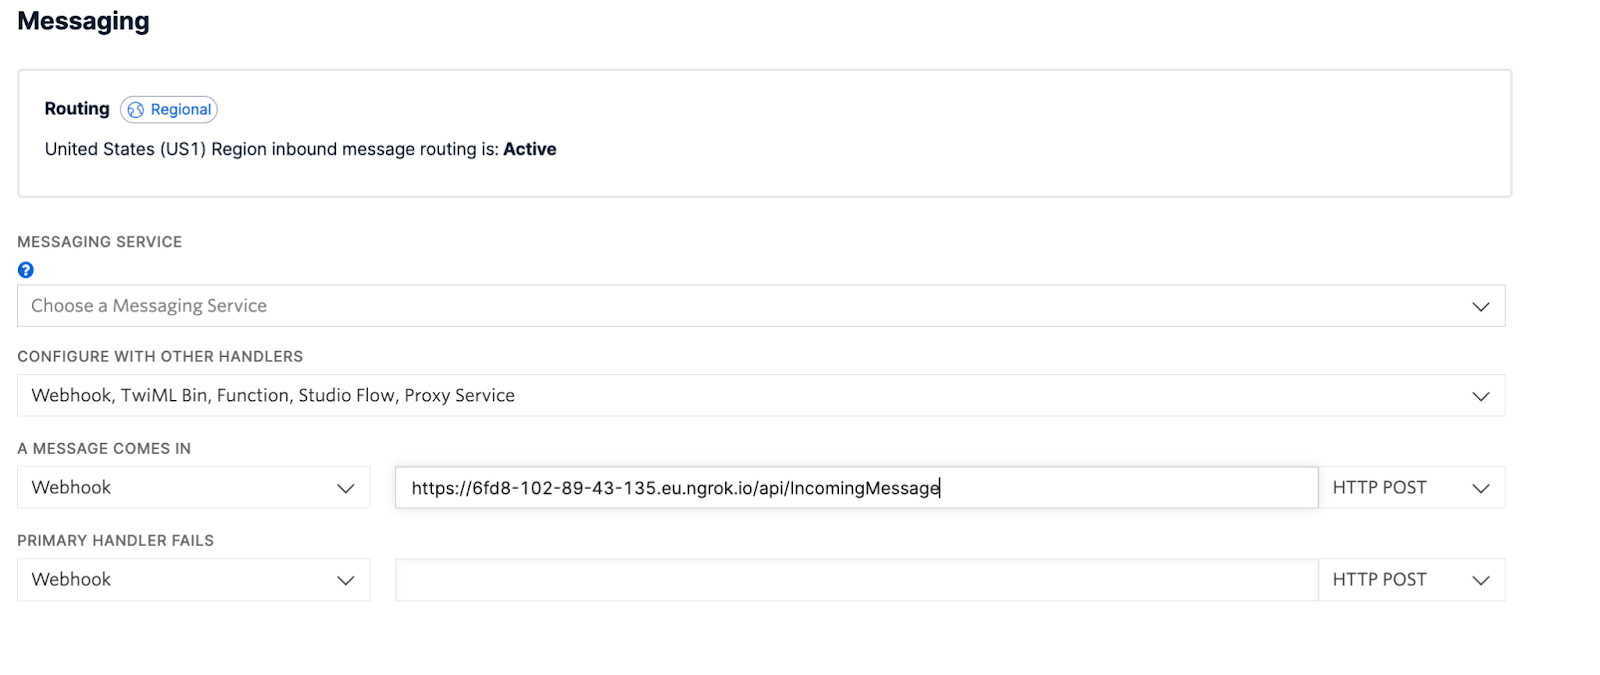
Next, set up the Messaging Webhook by scrolling down to the Messaging Section. The Messaging section takes the IncomingMessage webhook to save users' wish to a database.
Under ‘A MESSAGE COMES IN’, set the first dropdown to Webhook, then into the text box, enter the ngrok Forwarding URL with /api/IncomingMessage as the path, and lastly, set the second dropdown to HTTP POST.
Click Save to complete the process.
Now, you can proceed to test. Send a text message and thereafter make a call to your Twilio Phone Number to hear the wishes.
Conclusion
In this tutorial, you built an app where well-wishers can send in their wishes to your Twilio Phone Number and the special person(s) who the wish is for can make a call to the phone number to listen to the wish.
You can go on to deploy this app on a cloud service like Azure and share the phone number with other family members so they can send in their wishes. Then you can tell that special someone to dial this Twilio Phone Number and the wishes would play to their ears.
You could improve this application further as a fun exercise by letting the users text a wish for a specific phone number of the loved one, and when the loved one calls, only wishes directed at them will play.
Check out the complete code on GitHub.
Happy holidays!
Similoluwa Adegoke is a software engineer and currently works in the banking industry. When Simi is not coding or writing about it, he is watching tv shows. Simi can be reached at adegokesimi[at]gmail.com
Related Resources
Twilio Docs
From APIs to SDKs to sample apps
API reference documentation, SDKs, helper libraries, quickstarts, and tutorials for your language and platform.
Resource Center
The latest ebooks, industry reports, and webinars
Learn from customer engagement experts to improve your own communication.
Ahoy
Twilio's developer community hub
Best practices, code samples, and inspiration to build communications and digital engagement experiences.