How to Build a Studio IVR Flow with No Coding Experience
Time to read: 5 minutes
April 11, 2022
Written by
Reviewed by

Do you have call routing needs? Don’t want your personal phone number on your website but also don’t want to carry two phones? Need low code and fast deployment?
Well, you’ve come to the right place! This blog post will walk you through how to leverage Twilio Studio to create an IVR (phone tree) with a pre-built UI, no development expertise needed!
What is IVR?
Interactive Voice Response (IVR) is an automated phone system technology business use to allow callers to access different information or multiple people via one phone number. The system interacts with callers, gathers information from them, and then routes their call based on said information. IVRs can be as simple as “press 1 for technical assistance, press 2 for sales, press 0 to speak to the operator” or can be more complicated like flight lookups and changes when you call an airline.
IVRs are a fantastic tool to leverage to ensure your customers are connected with the right person for their needs all from one phone number. Many IVR systems have to be installed on a computer and have a telephony card to work. At Twilio, IVR implementation is as easy as setting up a Studio flow, buying a Twilio phone number, and connecting the flow to your number!
How do I set up IVR with Twilio with No Coding Experience?
Prerequisites: For this project you will need:
- A Twilio Account. Sign up for free here
- A Twilio Phone Number. Click here to learn how to buy a phone number
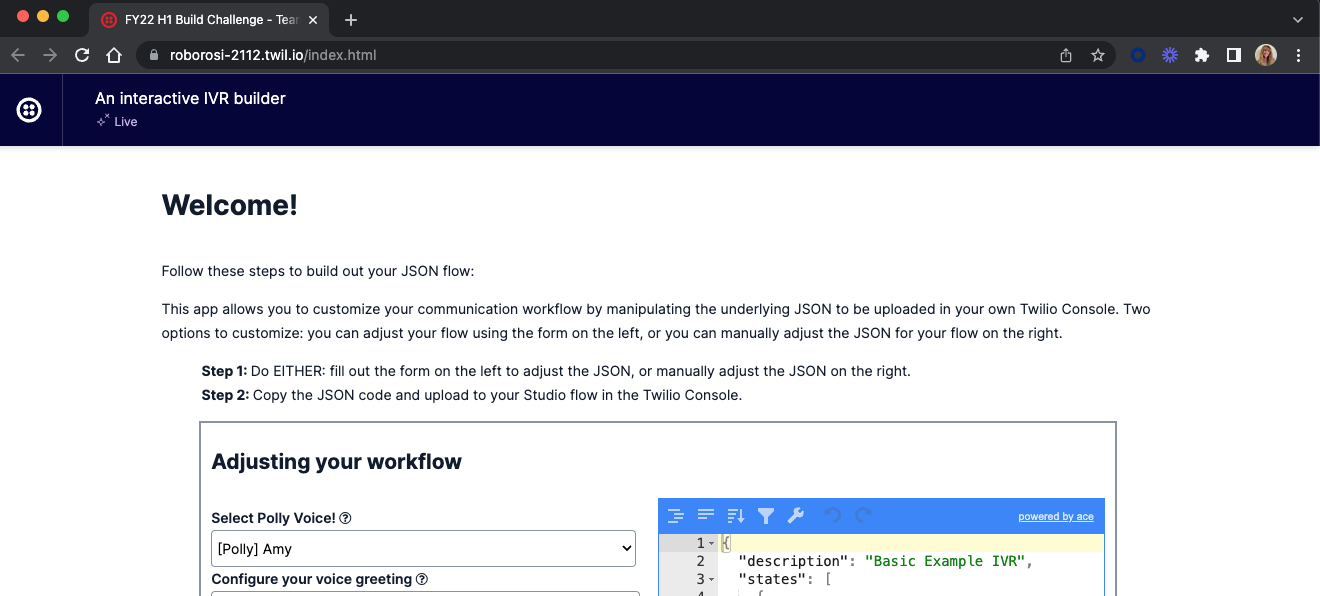
Step 1: Access the Pre-Built UI
Go to: http://studio-ivr-builder.twil.io/ and you will be able to access the Pre-Built, Configurable UI hosted with Twilio Functions which will allow you to create your own IVR.
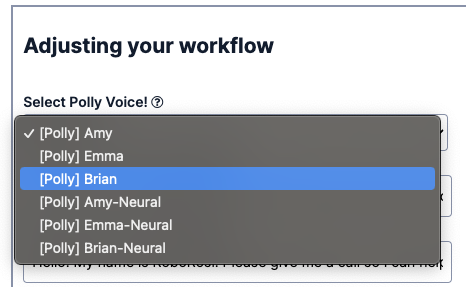
Step 2: Select the Polly Voice you would like to use for your IVR Flow
You can choose from a variety of voices powered by Amazon Polly.
Step 3: Configure your voice greeting
This is the first thing people will hear when they call your Twilio phone number. When thinking about how you would like to customize this message, we recommend including your company name, who your IVR can connect the caller to, and a transition before your IVR system will list out the different “branches” you will configure during Step 6. The default message is:
Hello! You've reached RoboRosi. I am happy to help connect you to the correct department at your co-working space today. Please let me know who you need to speak with.

Step 4: Configure your SMS greeting
This will be the SMS people receive if they try to send your Twilio phone number a text message. When thinking about how you would like to customize this message, we recommend including your company name and stating that texts to this number are not monitored. We also recommend you instruct texters to call the number to connect with the company. If you would like to configure your Twilio number for SMS, please see this tutorial in our Studio docs (this will require some development experience). The default text message response is:
Hello! My name is RoboRosi! Please give me a call so I can help you navigate to the right department: {{flow.channel.address}}
You may look at {{flow.channel.address}} and be confused. Don’t worry! This will automatically populate the phone number you connect your Studio flow to later on in Step 9. No need to enter that number here.

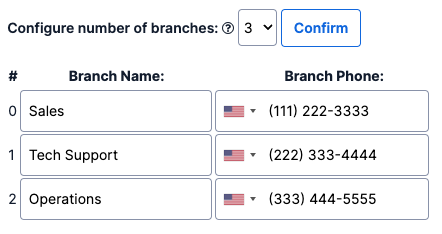
Step 5: Configure the number of branches the caller can choose from
When deciding how many branches you want to configure, you can think of this as departments, employees, or business functions you all have. Some examples could be three branches for Sales, Tech Support, and Operations, or five branches for Steve, Amy, Cali, John, and Joe, or four branches for R&D, Purchasing, HR, and Accounting. There is a maximum limit of 10 branches.

Step 6: Configure branch information
Once you have selected and confirmed the number of branches you want to set up, you can define the branches. For each branch, you will input a “Branch Name” and a “Branch Phone”. The “Branch Name” is the name of the branch your IVR voice will say (i.e., HR, John, R&D). The “Branch Phone” is the phone number the IVR system will connect the caller to if they select that branch.
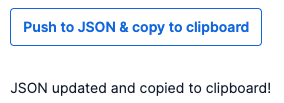
Step 7: Push to JSON & copy to clipboard!
Once you have all the branch names and numbers input, push to JSON and copy to clipboard. You will know you have successfully done this once you see “JSON updated and copied to clipboard!” on your screen.
Step 8: Import your Studio Flow to your Twilio Account
1. Log into your Twilio Console
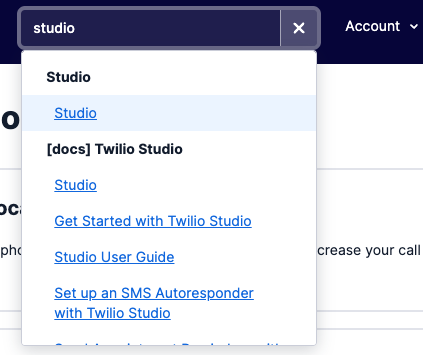
2. In the “Jump To” section at the top right corner, search “Studio”
3. Select “Create a flow”
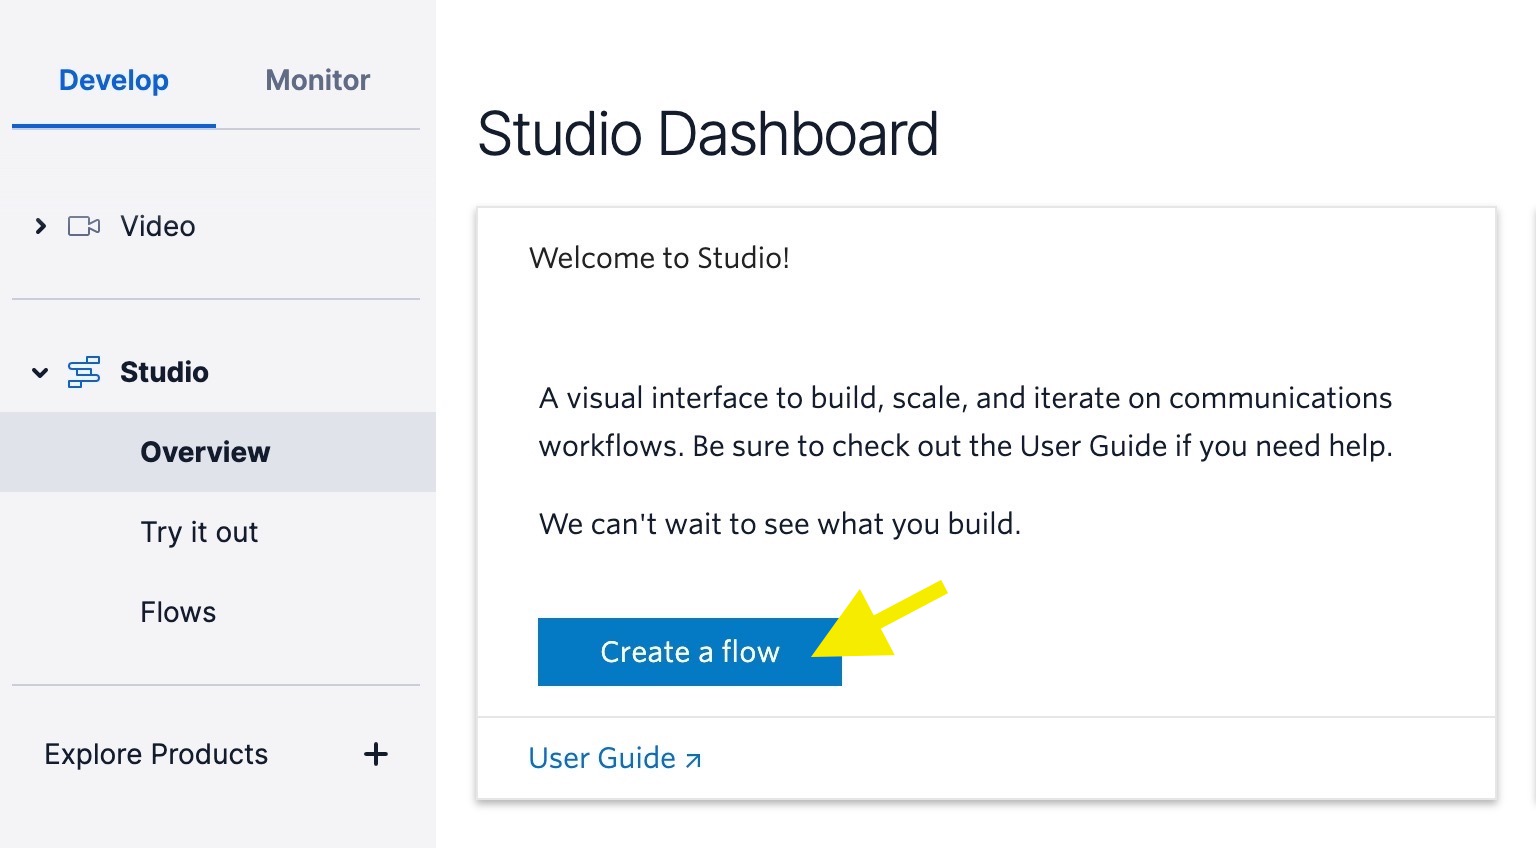
4. Name your flow

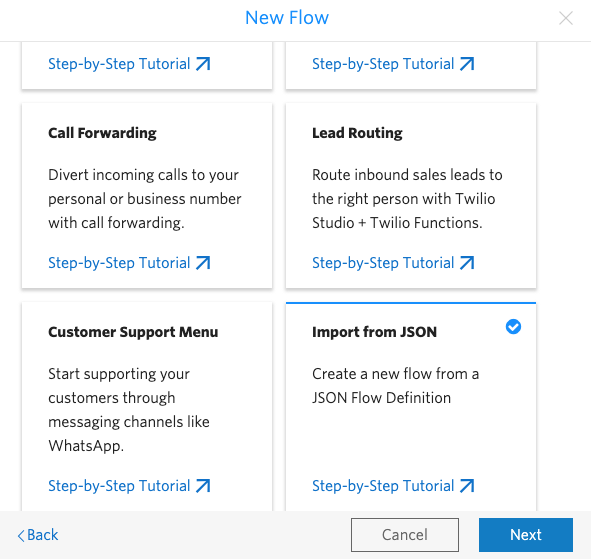
5. In the “New Flow” box, scroll down to the bottom and click on the box “Import from JSON” and click “Next”
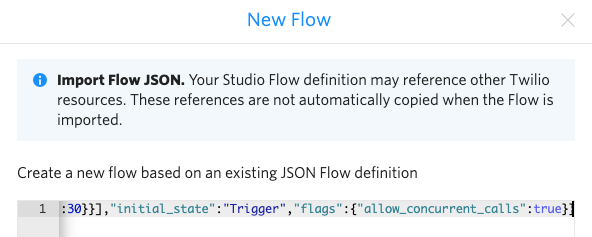
6. Paste the JSON you copied from your work in the UI. It will all show as one, long line. Then click “Next”
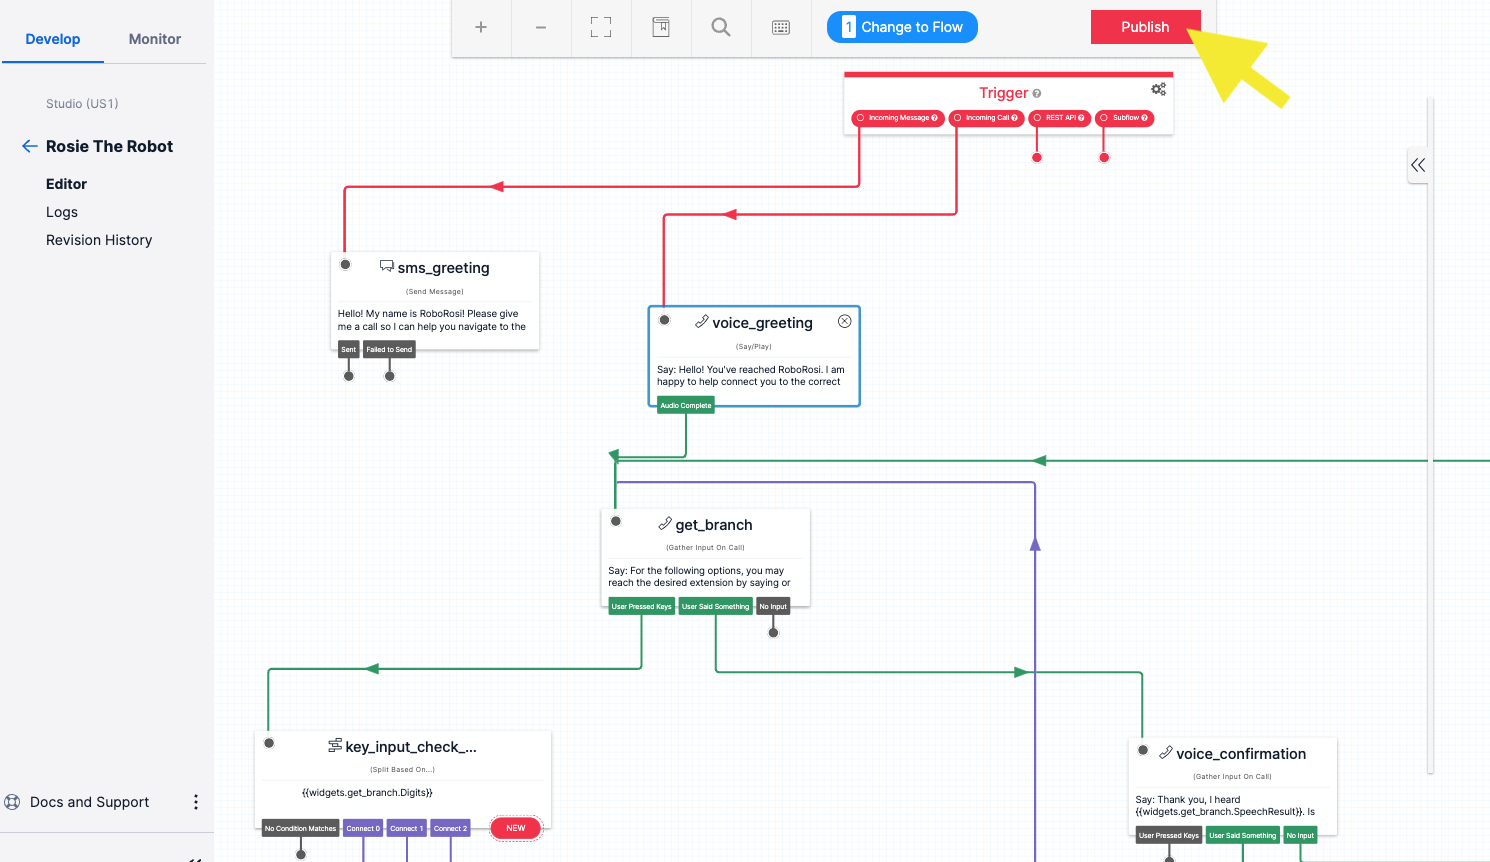
7. Voilà! You have your first studio flow! Click the "Publish" button if it is not grayed out. Your screen should look something like this:
Step 9: Link your Twilio number to your Studio Flow
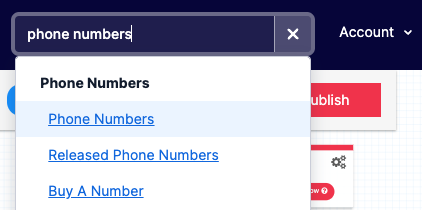
1. In the “Jump To” section at the top right corner, search “Phone Numbers”
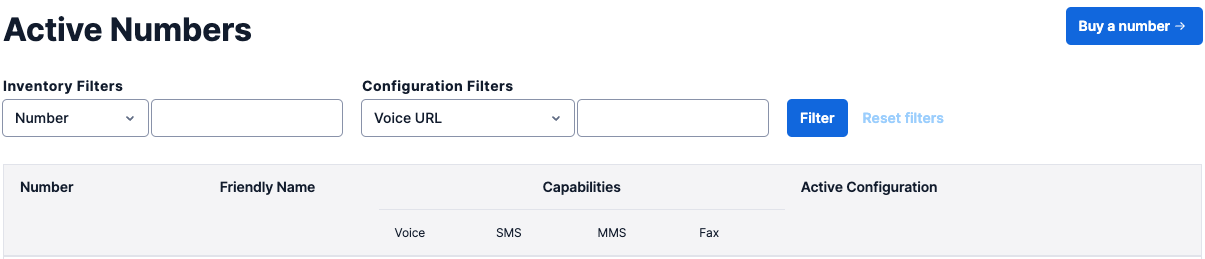
2. Click on the number you want to link your Studio Flow to from the numbers listed under “Active Numbers”. If you have no numbers listed here, select “Buy a number”
3. Once you have clicked the number you want to link to your Studio Flow, scroll down to “Voice and Fax”. Look for “A Call Comes In” and change “Webhook” to “Studio Flow”, and then select your new flow from the drop down to the left.
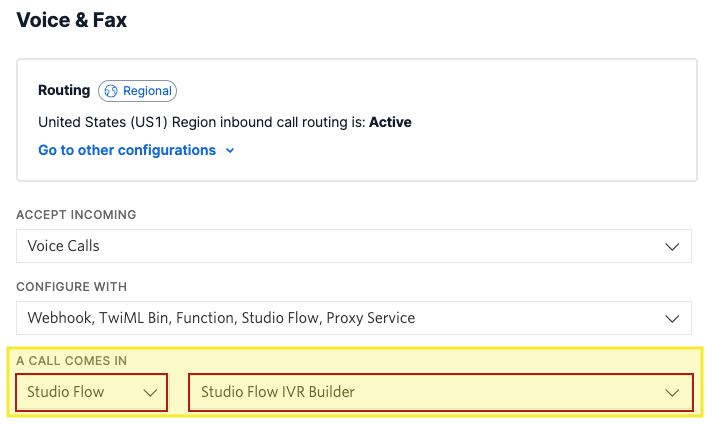
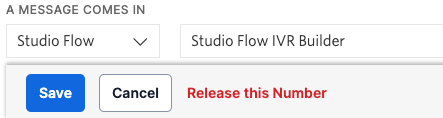
4. Once you’ve customized the behavior for when a call comes in, scroll down to “Messaging”. Look for “A Message Comes In” and change “Webhook” to “Studio Flow”, and then select your new flow from the drop down to the left.

5. Then select “Save”
Step 10: Now test your work
Send an SMS to the number you just configured and see if your configured SMS greeting. Give a call to the number and navigate through your IVR flow.
If you have a bit more technical knowledge, you can take this a step further and utilize the optional Studio Flow REST API
Check out our Github for instructions on how to take it a step further by utilizing the optional Studio Flow REST API v2 to push your custom flow to the Twilio Console. This demo video will walk you through how to build your IVR and push it to your account via the Studio Flow REST API.
This project was brought to you and reviewed by a group of Central Growth Solutions Engineers: Sarah Biffle, Grady Bernard, Adam Saulnier, and Caitlin Murphy.
Sarah Biffle is a Senior Solutions Engineer at Twilio based in Denver, CO. A startup junkie at heart, she loves empowering to solve their unique challenges and bring exciting ideas into the world leveraging Twilio solutions. She can be reached at sbiffle [at] twilio.com.
Grady Bernard is a Solutions Engineer at Twilio on the Growth Team.
Adam Saulnier is a Solutions Engineer at Twilio based in Denver, CO. He enjoys the challenge of solving problems and encourages clients to join his journey as their technical digital Serpa, solving solutions with Twilio products.
Caitlin Murphy is a Solutions Engineer at Twilio based in Louisville, CO. A "helper" all her life with a diverse digital background, she relishes the opportunity to guide people through creatively solving their toughest technical challenges.
.png)

Related Resources
Twilio Docs
From APIs to SDKs to sample apps
API reference documentation, SDKs, helper libraries, quickstarts, and tutorials for your language and platform.
Resource Center
The latest ebooks, industry reports, and webinars
Learn from customer engagement experts to improve your own communication.
Ahoy
Twilio's developer community hub
Best practices, code samples, and inspiration to build communications and digital engagement experiences.