Build an SMS Microservice using Python, Twilio and Redis Pub/Sub
Time to read:
December 04, 2020
Written by

A few weeks ago I needed to build a solution to send alert messages to clients of my company. The core service had access to the database, but this service had many responsibilities already and adding a new feature to send a large number of messages could overload it. So I decided to use a different approach: the core service gets the users that should receive the message from the database and builds the message content, but then sends everything to a separate service that actually sends the messages.
This new service that sends SMS messages could be used for many other applications: an alert service to notify clients of promotions, or maybe a reminder service of scheduled appointments. Since it is completely generic, it is easy to reuse it.
For this tutorial we are going to build a simple example of two Python services communicating using Redis Pub/Sub. The main service is going to send SMS messages using Twilio Programmable SMS. We will then build a second application that sends an SMS through it.
Tutorial Requirements
To follow this tutorial you need the following components:
- Python 3.7 or newer. If your operating system does not provide a Python interpreter, you can go to python.org to download an installer.
- Redis, an open source, in-memory, NoSQL data store that we are going to use to store de messages.
- A smartphone with an active phone number and WhatsApp installed.
- A Twilio account. If you are new to Twilio create a free account now. If you use this link to open your account you will receive $10 in credit once you upgrade it.
Setting up your Twilio account
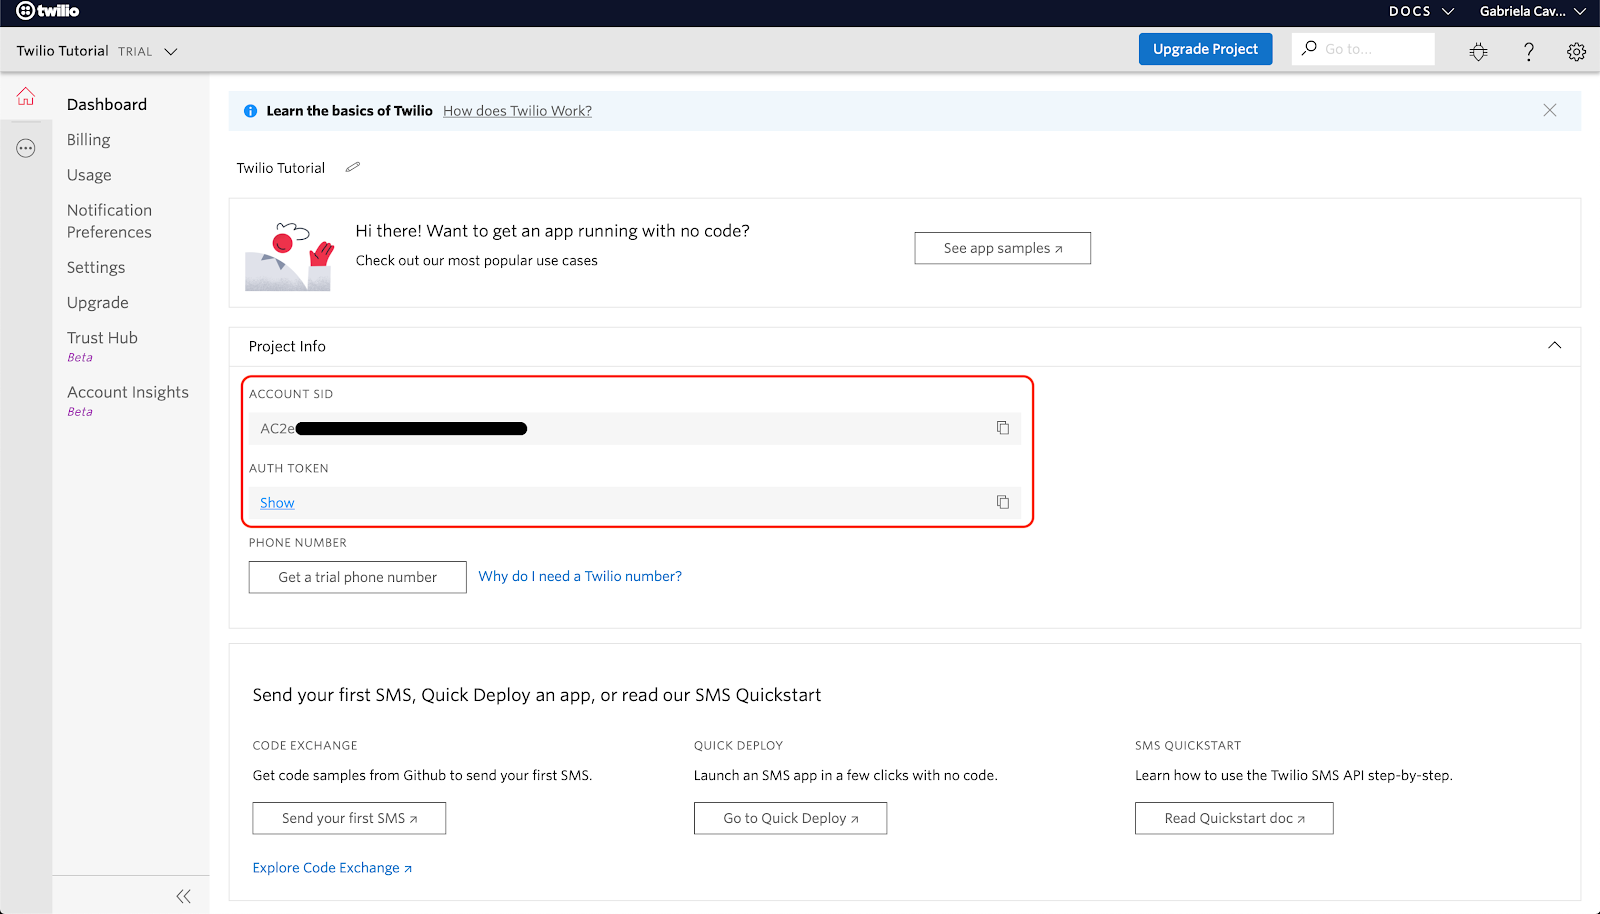
To follow this tutorial, you need your Twilio Account SID, Auth Token and Twilio phone number. When you log in to your Twilio Console, you’ll see the Account SID and Auth Token. The Account SID is a unique identifier for your account and the Auth Token is a secret key (never share this token!). These are your Twilio credentials, which will allow the Python code to access our Twilio account and use the API.
Now grab your Account SID and Auth Token from your Twilio account Console and set these in your environment variables by entering this in your terminal:
Note that if you are following this tutorial on a Windows computer you have to use set instead of export.
If you don't have a Twilio phone number with SMS functionality, you need to purchase one. Click on “Get a trial phone number” button below your credentials in the Twilio Console, or use the Buy a Number page.
Once you have your phone number, copy it and add it to another environment variable as shown below:
As in the previous example, use set instead of export if you are using a Windows computer.
If you have trouble setting your environment variables, check out this blog post.
Setting up the environment
Now that you have the Twilio phone number and the Account SID and Auth Token configured, let’s create a separate directory for our Python project and inside it create a virtual environment to install the Python packages that we need. You don’t need to create a virtual environment, but it is a recommended practice while developing Python applications. This allows you to create an isolated environment for each project, and switch between them without worry about breaking another project.
Open the terminal and create a new directory for the project called pubsub. Inside it we are going to create a virtual environment using the module venv from the Python standard library. To perform these tasks enter the following commands:
This will create the pubsub directory, and install the packages that we going to use in this project, which are:
- redis-py, the Python interface to the Redis key-value store.
- The Twilio Python Helper library, to work with the Twilio APIs
Next you'll need to install the Redis service on your machine. That can be done in a number of ways. If you use a Unix or Mac OS computer, you can install it directly from source code. In a new terminal window use the following commands to download and build Redis:
Once the build completes, you can start Redis with the command:
If you prefer to not have to deal with source code, there is a Docker image, and also binaries for Microsoft Windows.
Make sure you have Redis running before continuing.
Building the SMS microservice
The first application that we're going to build is the SMS sending service, which acts as the “subscriber” of the Pub/Sub solution. This service will listen on a Redis channel, so when a message arrives on that channel it will get a notification. For this tutorial, the message will include all the details necessary to send an SMS message using the Twilio Python Helper Library.
Create a file called sub.py in the directory pubsub, and add the following code to it:
Let's review our script. After we import a few libraries, we create a Redis connection, passing decode_responses as True, so the client will decode text data to a string:
Now we need to instantiate a pub/sub object and subscribe to a channel.
Redis also supports subscriptions using a pattern. For example, if we had multiple channels like channel-broadcast, channel-alert, channel-reminder, we can subscribe to all the channels that start with channel- using the pattern channel-*, e.g. pubsub.subscribe("channel-*").
Next we need to continuously listen to subscribed channels. We can do this using the method listen() of the pubsub object. This method returns a generator that blocks execution and waits for a new message to arrive on the channel.
We can only publish messages of type string, bytes or float, but when the subscriber gets a message from the channel, it comes as a dictionary object. For example, if we publish hello, the subscribe gets:
There are four keys in each message:
type: the type of message. There are six types:subscribe,unsubscribe,psubscribe,punsubscribe,message,pmessage. We are only interested in themessagetype for this tutorial.pattern: in our example, the pattern isNone, it's the default value. But if we use the pattern subscribe, this field will store the pattern used, e.g.channel-*.channel: the channel name.data: the actual message published on the channel.
In this tutorial we expected the content of data with a json structure. So we need to serialize the object before we publish and deserialize it on the subscriber. We can use json.loads to take the string message and return a json object. An example of message published is:
The message field is the content of the message, the from field is our Twilio phone number, which is going to be the sender of the SMS, and the to field defines the phone number that we are sending a message to. Format this number is E.164, which uses a '+' followed by the country code and then the number, without any dashes or other separators, e.g. +558499999999.
Note that if you are using a trial Twilio account, you must first verify your 'To' phone number, because Twilio needs to know you own it. You can verify your phone number by adding it to your Verified Caller IDs in the console. If you attempt to send an SMS to an unverified number with a trial account, the API will return Error 21219.
Now that we have all the data that we need to send a message, we read the environment variables TWILIO_ACCOUNT_SID and TWILIO_AUTH_TOKEN. Next we create a Twilio Client and send the SMS using the messages.create function.
We run the sub function using Process from multiprocessing. It is a good idea to use Process here because the event loop generated when we call listen() is blocking, meaning that we can't do anything else other than waiting for new messages. For this simple example this blocking is not a problem, but in a real application where you want to work on other things at the same time it could be.
Creating a publisher
Now that we have the subscriber, we can build a small publisher. First we create the Redis connection, as we did with the subscriber script. Next we read the environment variable TWILIO_PHONE_NUMBER and we define the phone number to send the message (replace YOUR_NUMBER with a phone number that you added to your Verified Caller IDs). We set up a message dictionary with the format shown in the previous section, and we publish it on the broadcast channel as a JSON string. Write the following application in a pub.py file:
Testing the messenger service
Are you ready to test the services? Start the subscriber by running python sub.py, making sure you do this while the Python virtual environment is activated and the TWILIO_ACCOUNT_SID and TWILIO_AUTH_TOKEN environment variables are defined.
Our subscriber is up! Now open another terminal, activate the virtual environment and set the TWILIO_PHONE_NUMBER variable in the environment. Then run the publisher script to send a test SMS to yourself:
You should receive the SMS and also see the following output in the subscriber process:
You can find the complete code in my repository on github.
Conclusion
Congratulations! You’ve built a communication channel between microservices using Redis pub/sub! I hope you enjoyed this tutorial and the subject has been useful. Now you can extend this concept and build other projects using the pub/sub pattern.
Good luck!
Gabriela Cavalcante is a Python enthusiast and a Flask fan. You can find some of her projects on GitHub and talk about Python with her on Twitter.
Related Posts
-
March 2026 Fraud Update: AIT Tactics, Weaponized Trust, and a New Fraud Response GuideDan Nieters Alena Eissman
-
Orchestrate an AI-to-Human Agent Handoff with Twilio Agent Connect, Conversations Orchestrator, Studio, and FlexKinshuk Kar Sarang Shah
-
Introducing the Twilio MCP Server and Skills: Give Your Coding Agents Native Access to 1,800+ Twilio APIsSeline Chen Christopher Lintz
Related Resources
Twilio Docs
From APIs to SDKs to sample apps
API reference documentation, SDKs, helper libraries, quickstarts, and tutorials for your language and platform.
Resource Center
The latest ebooks, industry reports, and webinars
Learn from customer engagement experts to improve your own communication.
Ahoy
Twilio's developer community hub
Best practices, code samples, and inspiration to build communications and digital engagement experiences.