Implement a Support Helpline with Queuing using Python and Twilio
Time to read:
October 09, 2020
Written by

It’s never been so easy to set up your own call center and be in touch with your customers. With Twilio you can manage queues, assign agents and even get metrics about how the queues are working. All of it with little amount of code. In this tutorial we will show you how to accept incoming calls, place them into a queue, and then connect live agents to these callers, using Twilio Voice API, and the Flask framework for Python.
Tutorial requirements
To follow this tutorial you need the following components:
- Python 3.6 or newer. If your operating system does not provide a Python interpreter, you can go to python.org to download an installer.
- ngrok. We will use this handy utility to connect the Flask application running on your system to a public URL that Twilio can connect to. This is necessary for the development version of the call queue service because your computer is likely behind a router or firewall, so it isn’t directly reachable on the Internet. If you don’t have ngrok installed, you can download a copy for Windows, MacOS or Linux.
- A Twilio account. If you are new to Twilio create a free account now. If you use this link to sign up, you will receive $10 in credit when you upgrade to a paid account.
Buy a Twilio phone number
Before we dig into code, we need a phone number where customers and agents can call your company. Twilio provides an easy way to buy phone numbers where you can pick numbers from different locations and even choose a phone number based on a phrase. From your Twilio Console, select Phone Numbers and then click on Buy Number. Your new number will be available on Active Numbers.
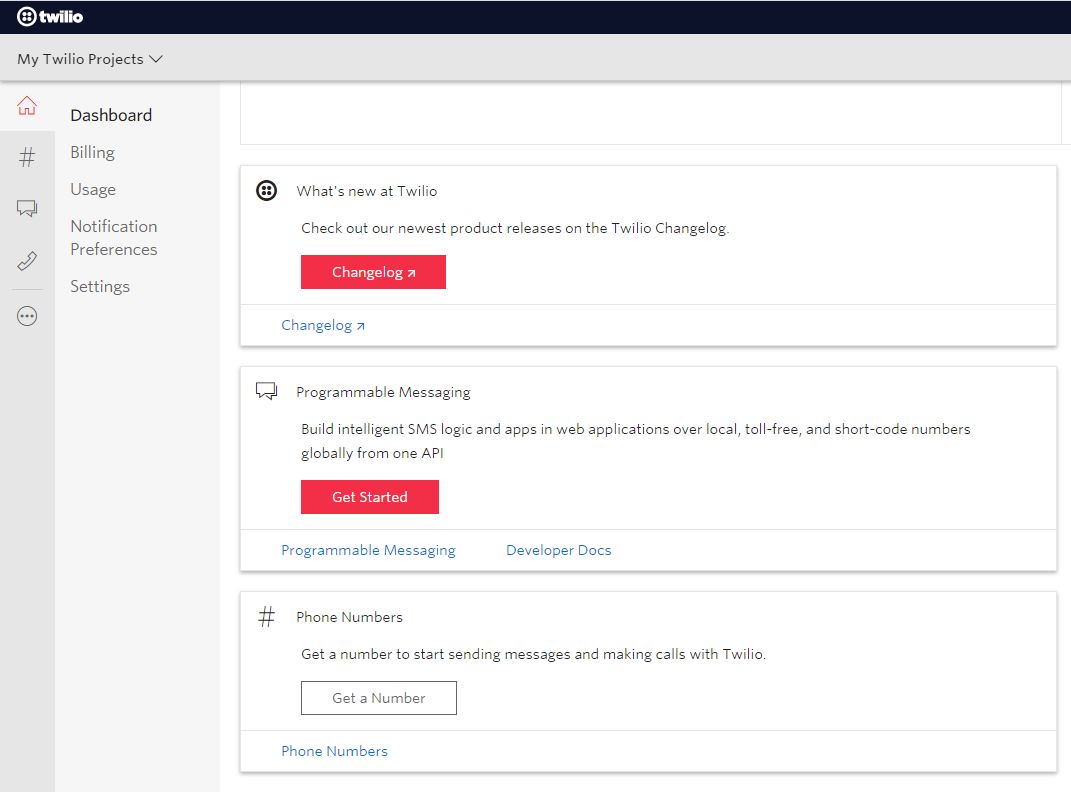
Twilio provides a default voice message by default. You can call your brand new number to listen to it and make sure that everything is working fine. Leave this tab open, we’ll be back to it soon.
Create a Python virtual environment
Following Python best practices, we are going to make a separate directory for our project, and inside it we are going to create a virtual environment. After activating our virtual environment, we’re going to install the Python packages that we need for our web application.
If you are using a Unix or Mac OS system, open a terminal and enter the following commands to do the tasks described above:
For those of you following the tutorial on Windows, enter the following commands in a command prompt window:
The last command uses pip, the Python package installer, to install the three packages that we are going to use in this project, which are:
- The Flask framework, to create the web application
- The Twilio Python Helper library, to work with the Twilio APIs
- Python-dotenv. This library will help us to load our environment variables.
For your reference, at the time this tutorial was released these were the versions of the above packages and their dependencies tested:
Create an incoming calls service
Hello? Time to answer some calls!

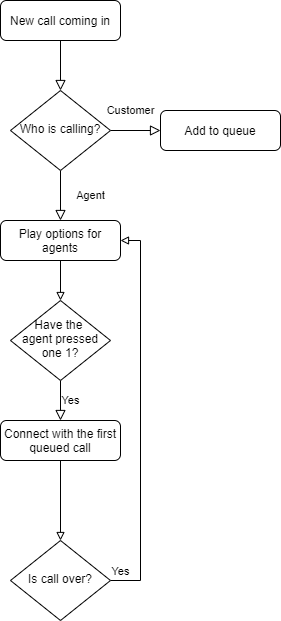
The purpose of this service is creating a queue workflow for customers and agents. Every time a call for the Twilio number you bought comes in, the caller will hear the options; if the caller is a customer, they will be placed in the queue. If the caller is an agent, we will offer an option to connect with the next customer waiting in the queue. See the flow below:
To keep both customers and agents informed about the queue’s size we’ll provide a count of how many people are in the queue already. Time to code! Shall we?
Creating a webhook
Twilio Programmable Voice uses webhooks to connect applications with users. A webhook is a web endpoint that handles the messages sent by our users and reacts to them properly. You will see what the data sent to a webhook looks like in a minute. First, let’s create our endpoint.
Flask is a micro-framework that makes endpoint creation really easy. We can define the application and the endpoint in a single file. Let’s adapt the example from the Flask website to our webhook. Copy the code below into a file called api.py:
This boilerplate is what we need to get it started. We have basically created an endpoint that will respond to a user phone call with the message "Hello, Twilio!".
Explaining it a bit more: the first thing we did was receive a POST request on the /voice endpoint. This endpoint is going to be reachable at the /voice URL. In the function reply, we’re printing values from a request object. Each time the endpoint is invoked by Twilio, this object will hold information about the request. Note that we’re using the module pprint here - it will make the payload look nicer to read.
Also, Twilio expects us to return a TwiML (Twilio Markup Language) response. TwiML is an XML-based language, which can be easily created using the Twilio library for Python. The object VoiceResponse is responsible for transforming our message into a TwiML response acceptable by Twilio’s API.
Cool! We have the first version of our endpoint. Recapping: this endpoint will be our webhook. Every time a new call comes in, this endpoint will receive a POST request. In the current version, for every message received it will reply with a message saying “Hello, Twilio!”.
Testing our endpoint
Now it’s time to check if our code is working fine. Before diving into it, let’s create a file called .env (please note the dot), where the environment variables needed for this project will live. You can add them line by line, following the key-value style:
At the beginning of our module api.py, these environment variables will be loaded by Python-dotenv magically and when spinning our server, Flask will know that our flask app is in the file api.py. The other variables we’ll see in the following sections.
Start your server by doing:
If you’re seeing this output, you’re doing just fine. Now we have to make our brand new endpoint available to the world. Ngrok will help us on this task. Leave the Flask app running and open a second terminal window and run:
This command is connecting your local port 5000 with a temporary external URL.You may see something like:
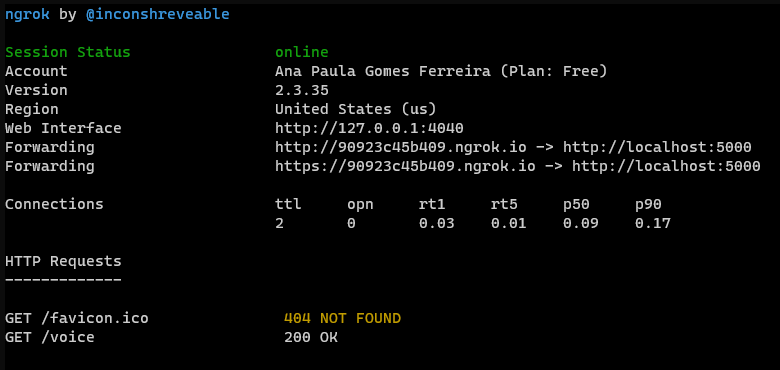
We got a URL. Yay! Copy the https:// address from “Forwarding” (https://90923c45b409.ngrok.io/ in my case, but yours will be different). We’ll need it for the next step.
Note: avoid closing Ngrok’s window. Every time you start it will give you a different URL.
On the Twilio Programmable Voice page (Twilio’s console > Programmable Voice > Phone Numbers > Manage Numbers), you will add this URL followed by your endpoint resource /voice to the phone number you want your call center to be hooked in. After clicking on the desired phone number, you will find the section Voice & Fax and the field “A CALL COMES IN”. Pick the option “Webhook” and “HTTP POST”. Add Ngrok’s URL with the endpoint, like https://90923c45b409.ngrok.io/voice.
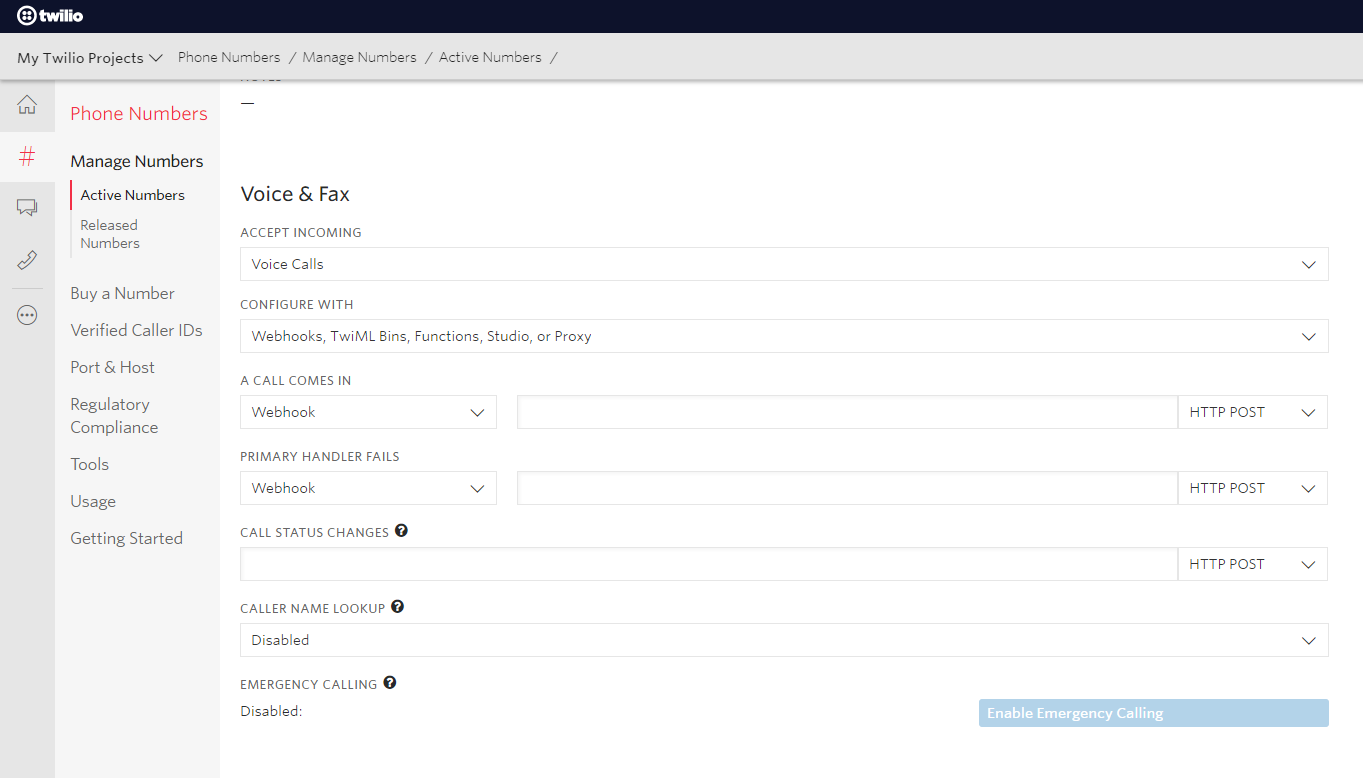
Save it and voilà! You can now call your call center number and the application will respond back.
Checking Twilio’s payload
Twilio’s Voice API offers interesting information on the calls that are coming in. You can access things like the call status (if ringing or completed, for example), who is calling and from where. This set of information opens up many possibilities. You can, for example, create a multilingual support center redirecting callers to specific agents. Isn’t that cool?
At this point our phone number is configured and our server is up and running. Nice! Do you remember that we’ve added a pprint in our endpoint? Let’s call our Twilio’s phone number and observe the payload that is printed in the terminal. The payload should look like this:
An important thing to notice is that every time a call comes in or the status of a call changes (from ringing to in progress, for instance) Twilio will send a new request to your endpoint with the updated information. The payload above is from a call that wasn’t picked up yet. So, the status is ringing (field 'CallStatus').
Our moment to shine: creating our call queue
Do you remember our application’s flow from the beginning of this article? No? I’ll walk you through it. Whenever a phone call comes in, our application will check who is calling: an agent or a customer. If a customer is calling, the application will let them know how many people are in the queue and place their call on a queue, where they will hear music until an agent picks up the call. If an agent is calling, the application will tell them how many callers are in the queue and they will have the option to press 1 to talk to the next caller.
Below is the updated api.py code. Don’t worry about its length, we’ll go through it step by step!
Identifying the caller - Lines 11-14; 22
In our flow we want to differentiate between customers and agents. In order to do this, we have to identify the caller; we want also to know if the caller has pressed a number. Let’s see how we can get this info from the endpoint’s payload. First of all, we want to know who is calling: if it is a customer or an agent. To access the caller we can use the field Caller in Twilio’s payload. We use the request variable from Flask, like in request.values.get("Caller"). We still need to identify whether the caller is a customer or an agent. So, let’s store our agent's numbers in a dictionary, so we can check every time a new call comes in.
Cool! Now we can create our flow according to the caller.
Have the caller pressed a number? Lines 24-34
By the end of the section “Checking Twilio’s payload” we talked a little bit about this: at every change in the call status, our endpoint will get a new payload from Twilio. When a caller presses a number, a new request will be made with the field Digits added to the payload. When a digit is found there, we check if it was pressed by an agent; if so, we check if the number 1 was pressed. If not, we add to the response the message "Sorry, I don't understand that choice".
When the agent presses the number 1, we will let them know that they will get the next call in the queue (line 29). Also, according to our diagram, we should connect the agent to the first person in the queue. Twilio does it automatically when we use the Dial object, from Twilio's Voice Response library (lines 30-32). The only requirement is specifying the queue’s name as the argument. Here we’re using a custom class called CallQueue to represent our queue of customers; we will see more about it later on.
A new call comes in - Lines 36-55
If no digits are found in the payload we know that this call is new. So, here we’ll provide a custom message for customers and agents. In line 36 we retrieve the size of our queue. We’ll inform both agents and customers about it. In the next section we’ll share more details about this object.
If the caller is an agent we have to give them the option to pick a customer call from the queue. Whenever an agent presses 1, they will be connected to a customer. The object Gather will be used to collect the digits once the agent presses one.
Through the parameter num_digits we specify that we’re expecting one digit and using the method say we declare the message to be said to the agent before they press a digit. In this case, we’ll say the agent name (from our dictionary) and the queue size. The object should be added to our response.
But what if our caller is a customer? Well, in this case our service should inform them how many people are ahead of them and also add them to the queue (lines 45-55).
Twilio has already a built-in option for a song to be played while a customer is waiting. Isn’t it cool? You can also do different things here, like play a custom message to your customer before their call is picked up (as shown in line 50-52) or add a custom waiting song to the method enqueue (using the parameter wait_url in line 54 comment).
If the caller doesn't select an option, redirect them into a loop (lines 57-58). We must return Twilio’s TwiML response with the flow we had built (line 60).
How big is this queue?
Wouldn't it be nice to know how many callers are in the queue for every call center we call? This is relevant information for both agents and customers; agents can get to know if there are many customers waiting and customers can know in advance whether it is better waiting or calling another time. Using TwiML it isn't possible to build a voice response that natively says how many people are in the queue. Instead, we use Twilio’s Python library to get this information for us; from there, we will build our response with this information in it.
To keep the code better organized, we’re going to isolate the interactions with a queue in a class called CallQueue. Since this class isn’t part of the API directly, we’ll have it in a module called calls.py. Let’s see how it works:
Creating a new Call Queue
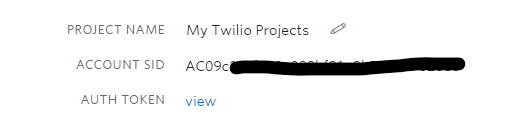
Whenever an object from CallQueue is instantiated, we want it to create a new queue if it doesn’t exist yet. The only argument required is the name of our queue. Internally, to interact with Twilio’s API we will need to instantiate a Client object from it, using our Twilio’s credentials: Account SID and Auth Token (you can find them in the Twilio console).
By default, Twilio’s Python library will look for your Twilio credentials in environment variables. You can set them or pass them directly to the Client object (not recommended due to security reasons).
Our method _create (lines 13-20) will check if there are any queues with the given name; if not, it will create a new queue. After either creating a new queue or finding an existing one, a SID is returned. The SID is important to retrieve information from the queue later on.
What about the size?
After having the queue’s SID, retrieving the queue’s size is pretty easy. In our class we will call the method size (lines 23-24). The method fetch() from Twilio’s API is going to help us out giving us all the information we need about the queue, including its current_size.
Twilio’s API offers interesting info on the queue. You can get useful insight from it using attributes such us average_wait_time and max_size. See more about call queues here.
Using CallQueue in our endpoint
Time to go back to our endpoint in file api.py. As we saw in the previous section, to create a new queue we only need a name for it. Let’s import the class (line 3) and call our queue “support”, adding it to the beginning of our API module (line 8):
After this, we can use our object in any part of our endpoint. To retrieve information about the size of a queue, we only need to use queue_size = call_queue.size(). That’s it! Let’s see how our code looks like altogether in the next section.
Wrapping up!
Now you can run your server again using the flask run command and have fun following the flow you just built as a customer or as an agent! Make sure ngrok continues to run, and if you need to restart it, then update the webhook URL in the Twilio console accordingly.
See the complete code below.
This is api.py:
This is calls.py:
It’s amazing how Twilio’s makes it easy to build powerful features like a call service. :)
With little code you can start to be in contact with your customers like a pro. From this code you can explore a bit more other features such as adding a custom message before adding a customer to a call or getting information regarding how much time your agents are spending on calls with customers.
Ana Paula Gomes is a software engineer, a runner wannabe and crazy open source lady.
Github: https://github.com/anapaulagomes

Related Resources
Twilio Docs
From APIs to SDKs to sample apps
API reference documentation, SDKs, helper libraries, quickstarts, and tutorials for your language and platform.
Resource Center
The latest ebooks, industry reports, and webinars
Learn from customer engagement experts to improve your own communication.
Ahoy
Twilio's developer community hub
Best practices, code samples, and inspiration to build communications and digital engagement experiences.