Using Event Webhooks for Emails with Twilio SendGrid in Node.js
Time to read: 4 minutes
April 14, 2022
Written by

When sending emails with Twilio SendGrid, sometimes you want to be able to keep track of the status of these emails, such as when a recipient opens the message or reports it as spam. This is made possible by the use of Event Webhooks. Let's walk through how to use Node.js and Express to track the status of emails that you send.
Prerequisites and dependencies
Make sure you have the following before moving on:
- Node.js and npm installed (do this first if you haven't already)
- A free SendGrid account
- An email address to test out this project
- A domain on which you will receive emails. For the purposes of this article, I’m going to use yourdomainhere.com. You will need to replace it with your own domain name.
We'll need to install the node modules for SendGrid and Express. To install these npm modules, navigate to the directory where you want this code to live and run the following command in your terminal to create an npm package for this project:
The --yes argument just runs through all of the prompts that you would otherwise have to fill out or skip. Now that we have a package.json for our app, let’s install the necessary libraries with the following shell command:
Sign up for SendGrid and create an API key
When creating a SendGrid account, you can choose the free tier for the purpose of this tutorial. Once you have an account, you need to create an API key as seen in this screenshot. You can name it whatever you want, but once it is created make sure you save it before moving on!
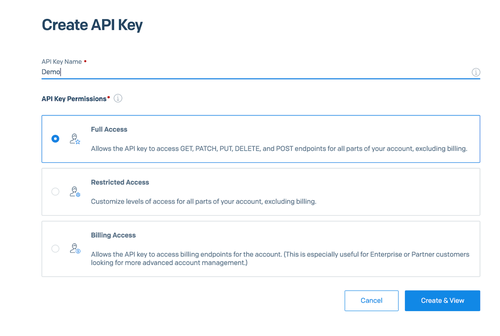
A good way to save this API key is to set it as an environment variable that you can access from your Node.js code in order to avoid writing it directly in your code. Set the value of the SENDGRID_API_KEY environment variable to be the API key from your SendGrid account. It still doesn't hurt to make note of it elsewhere though, because you cannot view it again. Here's a useful tutorial if you need help setting environment variables. We will use this API key later on.
Sending an Email with Node.js
Before being able to track the status of emails, we need to actually send one. Let's write some quick code to send an email containing a picture taken by the Mars Rover. Create a file called mars_email.js and add the following code to it:
This code contains a function for sending an email that contains a picture, and some standalone code at the bottom that calls that function to send the following picture.

Replace from@example.com and to@example.com with the email addresses you want to use. Run this code with the terminal command node mars_email.js, and you should receive an email with that Mars Rover photo.
Creating an Express application for the Event Webhook
The next step is to write some Node.js code to create a web application to receive HTTP requests whenever delivery events or engagement events occur with emails that you sent. Create a file called index.js and add the following code to it:
This code will receive an HTTP request from Twilio SendGrid, and will print a different statement depending on which event has occurred, such as a user clicking on a link that was in the email. Run the code with either node index.js or npm start in the same directory that index.js resides in. This will run an Express server on port 3000 of your machine. Now, we need a publicly accessible URL to provide SendGrid with for the Event Webhook.
Configuring the Event Webhook
We are going to use a tool called ngrok to create a public URL that SendGrid can use to forward requests to our locally running application.
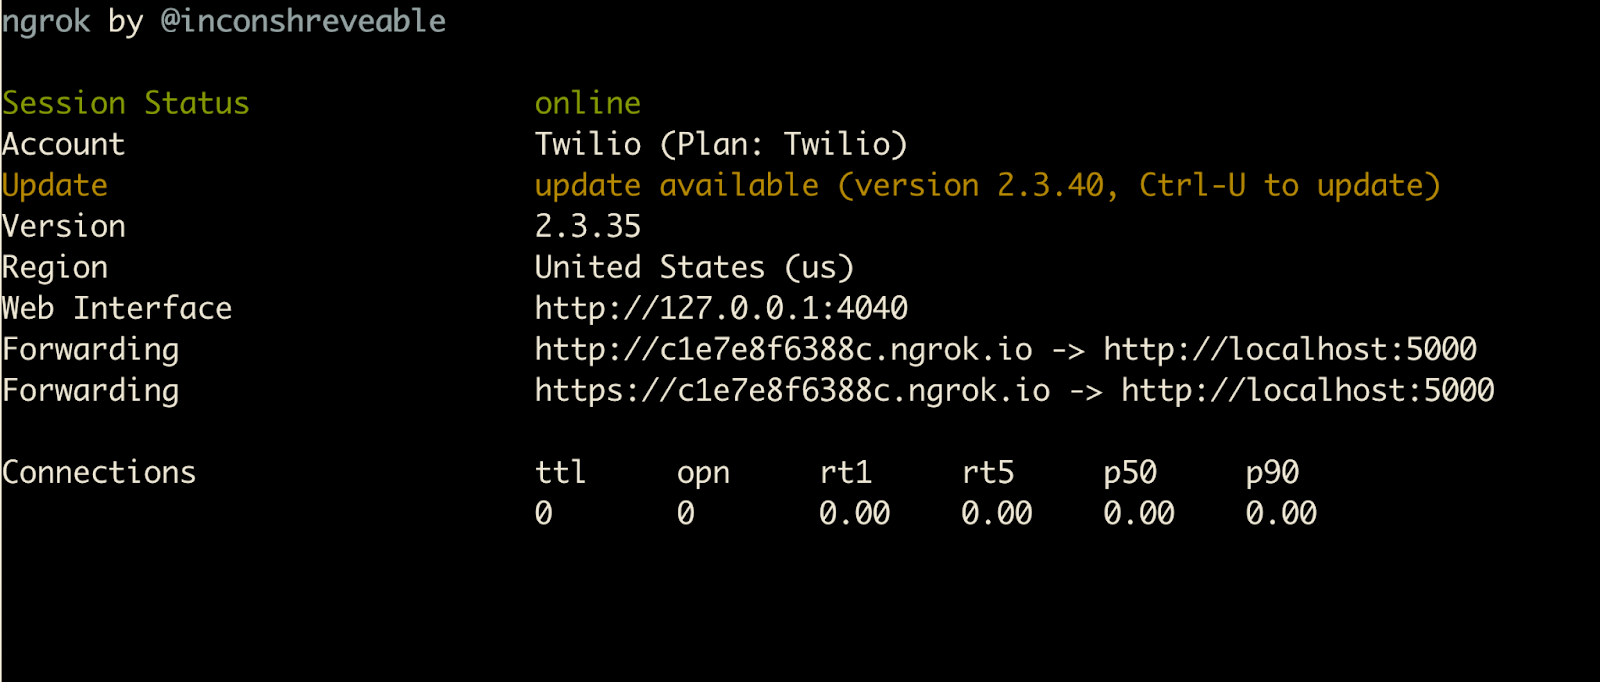
If you haven’t yet, install ngrok on your system. With the Node.js code running, open a second terminal window to start ngrok as follows:
This is telling ngrok to create a “tunnel” from the public Internet into port 3000 in our local machine, where the Express app is listening for requests. The output should look something like this:
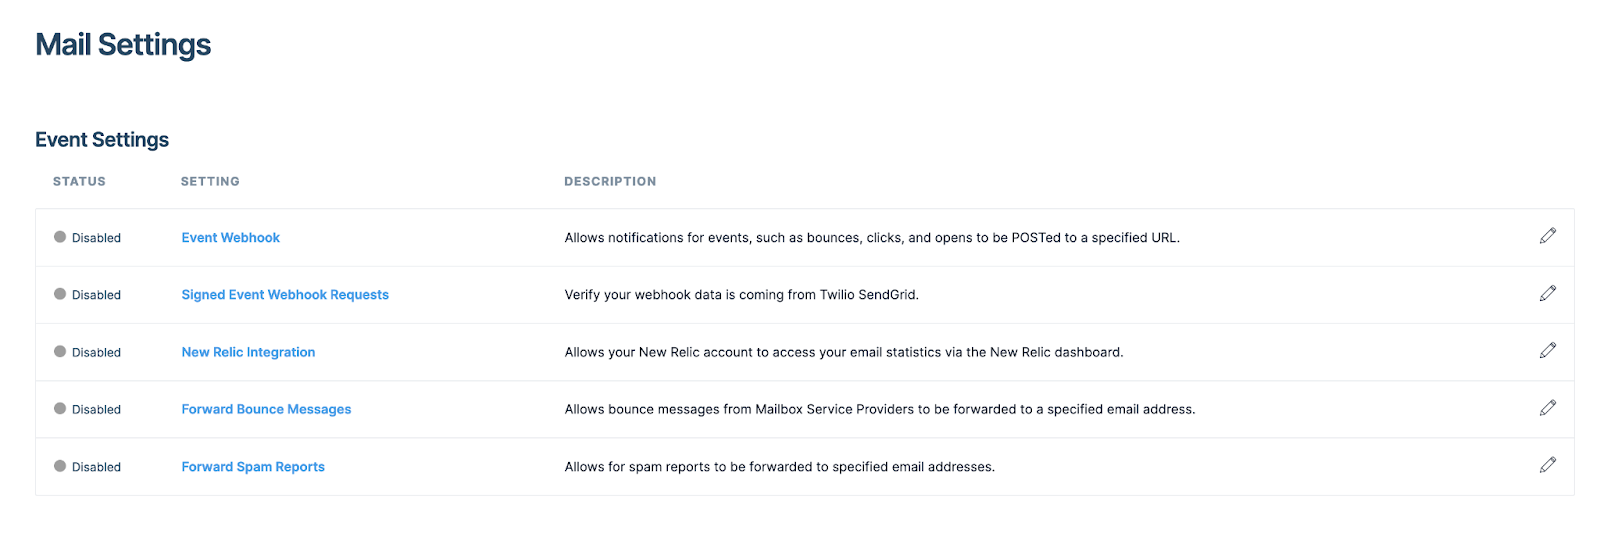
With this URL handy, head to your Mail Settings page in your SendGrid dashboard, and click on "Event Webhook" as seen in the following screenshot.
Configure the Event Webhook by copying and pasting your ngrok URL, and appending /event to it, which is the route on your Express app that you want HTTP requests to be sent to. In this example I am checking off the "Delivered", "Opened", "Clicked", and "Spam Reports" events but you can choose whichever are relevant to you.
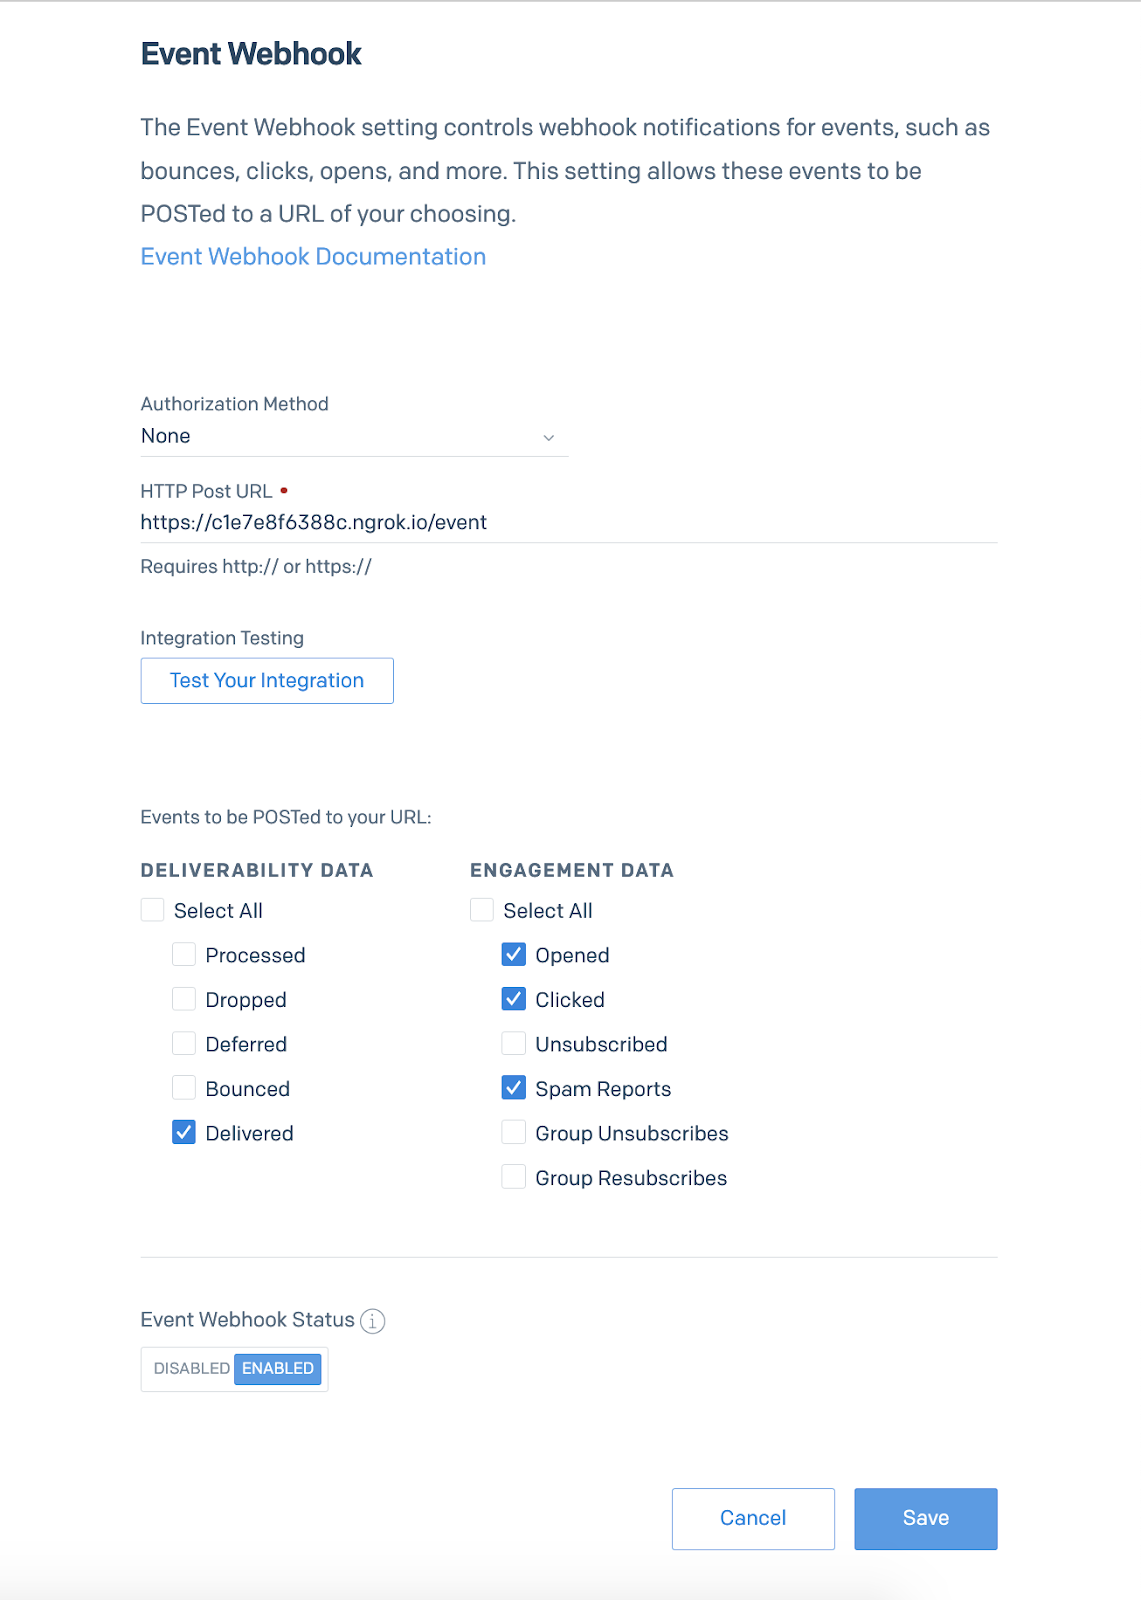
Don't forget to click "ENABLED" for the Event Webhook Status before hitting save!
Testing it out
Now that you have an Express application running behind an ngrok URL, and a SendGrid Event Webhook configured to send requests to that URL, you can run your code in mars_email.js one more time in another terminal window to see your delivery and engagement events logged to the screen.
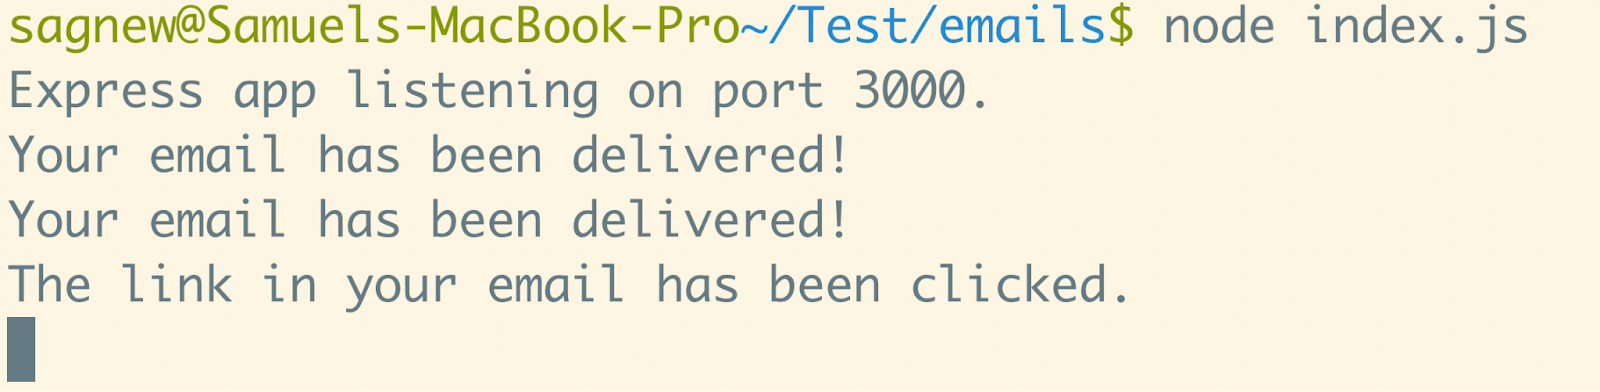
Try different things like clicking the link in the email, or reporting it as spam to see more events logged on your screen. From here you can change the code to fit the needs of your specific use case.
If your web server does not return a 2xx response type, SendGrid will retry a POST request until they receive a 2xx response or the maximum time has expired. All events are retried at increasing intervals for up to 24 hours after the event occurs. Note that this time limit is a rolling 24 hours, which means new failing events will receive their own 24-hour retry period.
I can't wait to see what you build with Twilio SendGrid in the future.
- Email: sagnew@twilio.com
- Twitter: @Sagnewshreds
- Github: Sagnew
- Twitch (streaming live code): Sagnewshreds


Related Resources
Twilio Docs
From APIs to SDKs to sample apps
API reference documentation, SDKs, helper libraries, quickstarts, and tutorials for your language and platform.
Resource Center
The latest ebooks, industry reports, and webinars
Learn from customer engagement experts to improve your own communication.
Ahoy
Twilio's developer community hub
Best practices, code samples, and inspiration to build communications and digital engagement experiences.