Automated Headless Browser scripts in Node.js with Puppeteer
Time to read: 5 minutes
February 27, 2020
Written by
.png")
Sometimes the data you need is available online, but not through a public API. Web scraping can be useful in these situations, but only if this data can be accessed statically on a web page. Fortunately for developers everywhere, most things that you can do manually in the browser can be done using Puppeteer, a Node library which provides a high-level API to control Chrome or Chromium over the DevTools protocol.
Let's walk through how to use Puppeteer to write scripts to interact with web pages programmatically. In this example we'll use the Native Land Digital tool, an awesome project built to help people learn more about their local indigenous history. In this case, an API does exist, but it only takes location data in the form of geo-coordinates rather than a more user-friendly address. We'll write code to programmatically type in an address and figure out which Native land corresponds to that location.
Setting up dependencies
Before moving on, you will need to make sure you have an up to date version of Node.js and npm installed.
Navigate to the directory where you want this code to live and run the following command in your terminal to create a package for this project:
The --yes argument runs through all of the prompts that you would otherwise have to fill out or skip. Now that we have a package.json for our project run the following command in your terminal to install Puppeteer:
Note: When you install Puppeteer, it downloads a recent version of Chromium (~170MB Mac, ~282MB Linux, ~280MB Win) that is guaranteed to work with the API. This download might take a while to install, so hang tight.
There is also a puppeteer-core package, a version of Puppeteer that doesn't download Chromium by default, if you'd prefer more manual setup. Be sure that the version of puppeteer-core you install is compatible with the browser you intend to connect to.
Launching Puppeteer and taking a screenshot of a page
Let's get started by just launching Puppeteer, navigating to a web page, and taking a screenshot of the page.
Here's some "Hello World" Puppeteer code for taking a screenshot of a page. Create a file called index.js and add this code to it:
Run the code with node index.js in your terminal from the same directory that the code is saved in. After a couple of seconds, open the example.png image that it saved. It should look something like this:

Depending on how fast the code runs, your screenshot might look different if the disclaimer modal element didn't have enough time to finish popping up.
You can use the page.waitFor() function to have your headless browser script wait a number of milliseconds before running other commands. This is necessary in some cases to make your scripts interact with pages in a way that is more "human", especially on pages that have animations which could take time to finish. You want to be sure that you're not going to try interacting with things on the page that don't exist yet. For that purpose, there's also a page.waitForSelector() function that takes a specific CSS selector and waits for an element fitting that description to appear. We will use this later.
Before moving on, we're going to have to get rid of this modal element to work with the rest of the page to get useful information. Let's take a closer look to come up with a good CSS selector to access the modal button directly in code. If you left-click on an element in your browser of choice, you should see an option that says something along the lines of "Inspect Element".
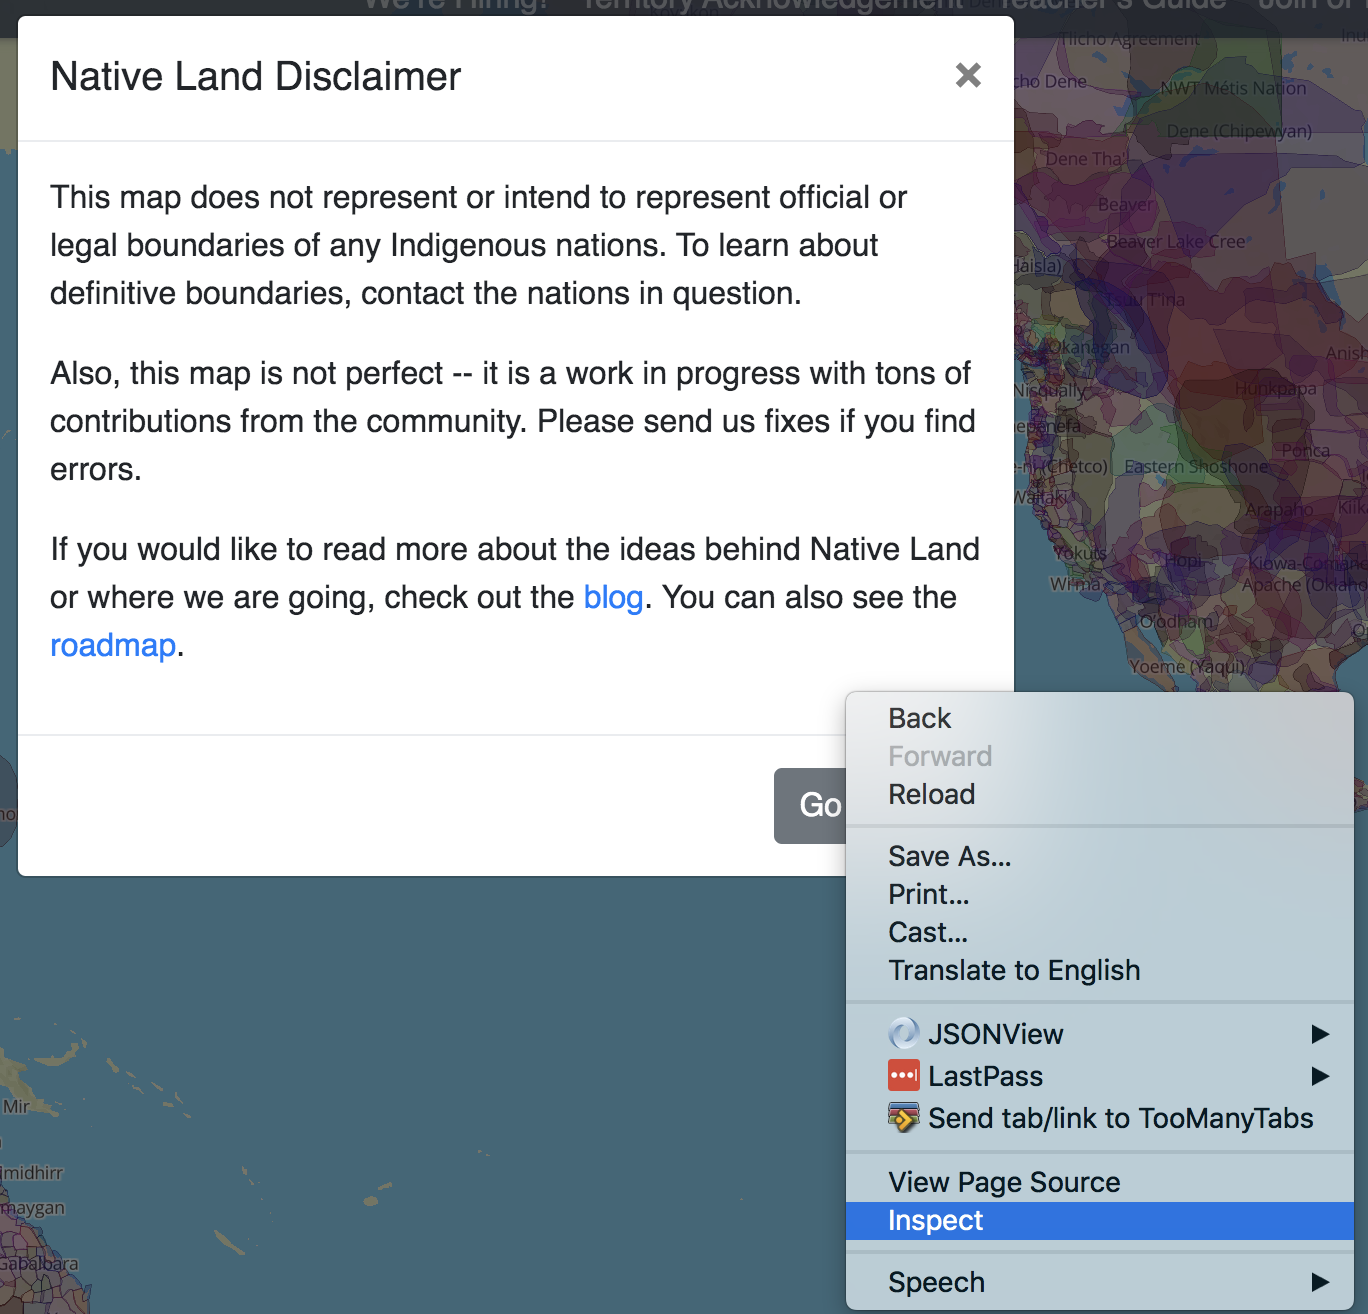
You should see the HTML representing this element as a modal-footer class with a button element as its direct child.

Interacting with elements on a web page
Puppeteer provides methods page.click to click a DOM element and page.type to type text. To click on the modal button, we'll use the CSS selector, .modal-footer > button, which uses the child combinator CSS selector to get the button we're looking for.
Change your code to click on this button and then take another screenshot:
Run this code and the new screenshot should look something like this:
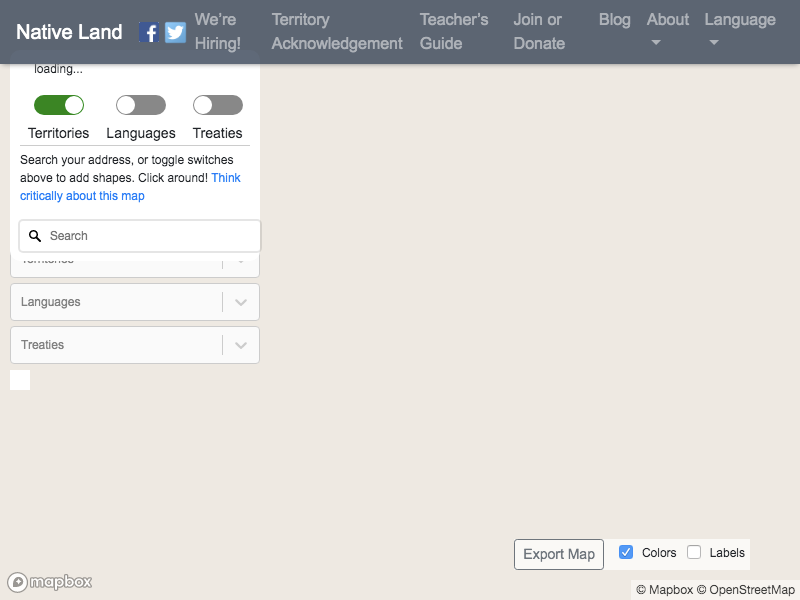
Now we see the modal element is gone and the rest of the page is loading. We'll need to type in the text field, so let's find a CSS selector for that.
The text box is an input field that has a placeholder element, so we can use the attribute selector to get 'input[placeholder=Search]'. We can also use the page.waitForSelector() function mentioned earlier to wait until the dropdown of location suggestions appear after typing a location we want to look up.
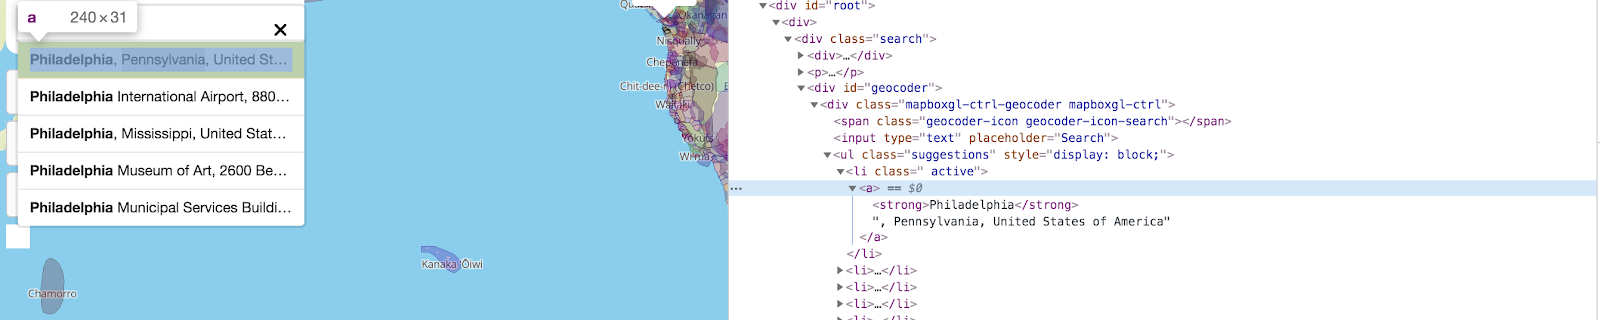
Let's write some new code to type in this text field, and wait for location suggestions to appear using the selector li.active > a before taking another screenshot:
Notice we're also waiting for 500 milliseconds before typing in the search box, just to give the page a little bit of time to load. This latest screenshot should look like this:
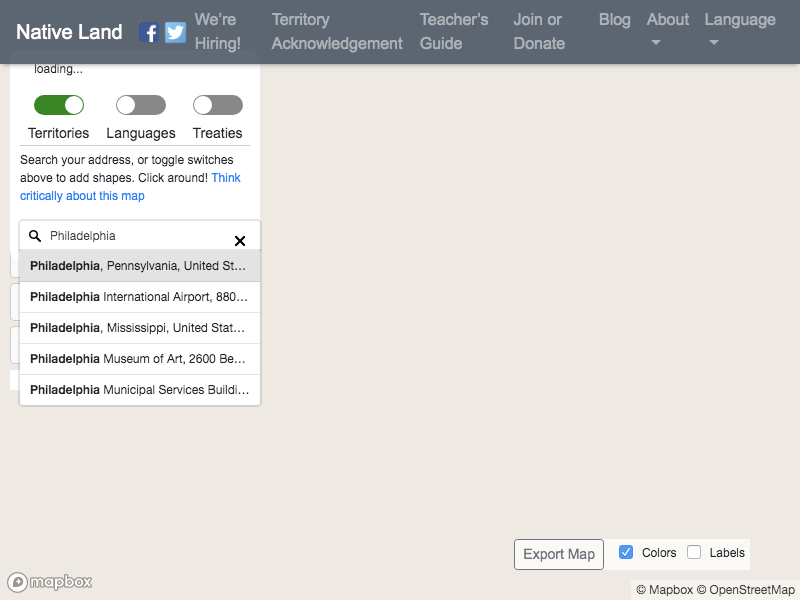
Now we have location suggestions appearing and just need to click on that first one to get a result.
Reading data from the page
With Puppeteer, you can also evaluate HTML elements to read the innerText and innerHTML from them. This is how we're going to access the data itself.
After typing a location and loading the results, inspect the element that the text appears in so we can come up with a good CSS selector for them.
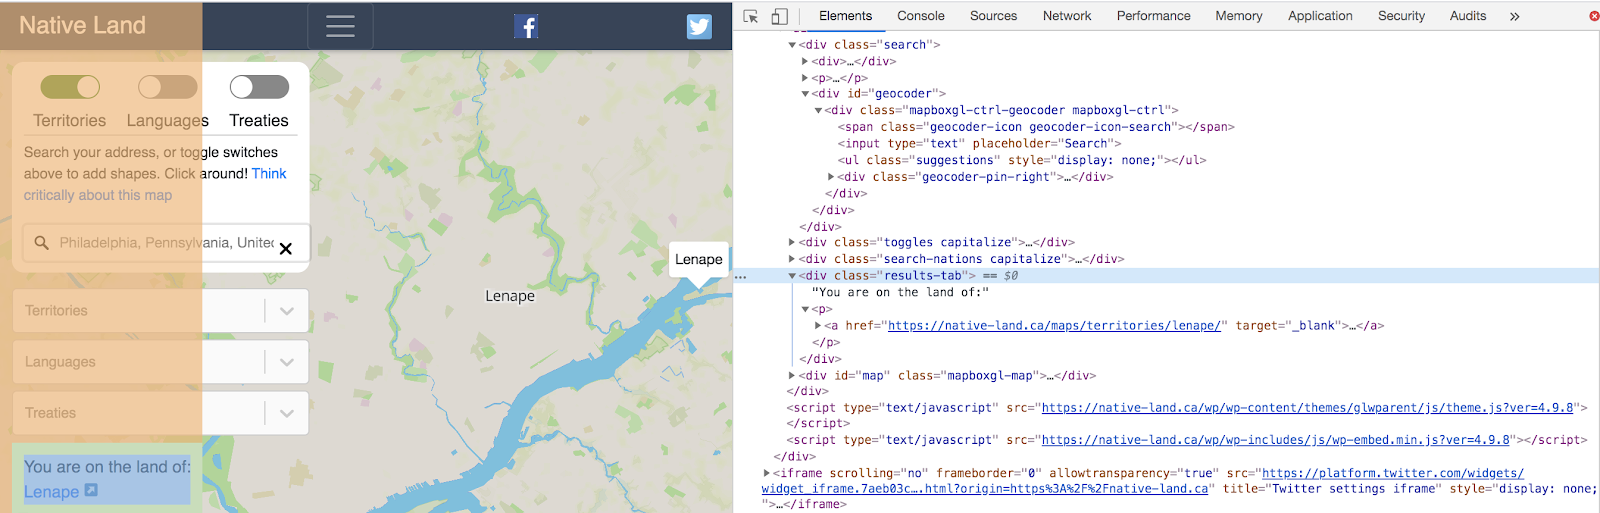
This one is pretty straightforward. It's a div with the results-tab class, so .results-tab should work. This element exists immediately as the page is loaded, however, so if we want to write code that waits for the actual results to appear, we'll have to use .results-tab > p to refer to the child nodes in this tab.
We can use the page.$, which takes a CSS selector, to create an object for the element we want, and then the evaluate method on this ElementHandle object to write code to directly access what's inside of the element.
Modify your code in index.js one last time:
Run this code again and you should see the location text printing to your console, and your final screenshot should look like this:
In this case, we see can see that the city of Philadelphia exists on Lenape land.
Getting it right and moving forward
Sometimes these scripts can be tricky to get working correctly, so another useful trick for debugging is to run Puppeteer in non-headless mode to see exactly what's going on. You can do this when you first launch Puppeteer by passing { headless: false } as an optional parameter. With this option, Puppeteer can even work for testing Chrome Extensions.
Now that you have the ability to programmatically manipulate web pages and access data on them in a way that you can't with static web scraping tools, I’m looking forward to seeing what you build! Feel free to reach out and share your experiences or ask any questions.
- Email: sagnew@twilio.com
- Twitter: @Sagnewshreds
- Github: Sagnew
- Twitch (streaming live code): Sagnewshreds


Related Resources
Twilio Docs
From APIs to SDKs to sample apps
API reference documentation, SDKs, helper libraries, quickstarts, and tutorials for your language and platform.
Resource Center
The latest ebooks, industry reports, and webinars
Learn from customer engagement experts to improve your own communication.
Ahoy
Twilio's developer community hub
Best practices, code samples, and inspiration to build communications and digital engagement experiences.