Instant Lead Alerts with PHP and Laravel

January 10, 2017
Written by
Jose Oliveros
Contributor
Opinions expressed by Twilio contributors are their own
Reviewed by
Paul Kamp
Twilion
Kat King
Twilion

instant-lead-alerts-php-laravel

You probably already have landing pages or product detail views in your web application which you're using to generate some excellent leads for your business.  Would you like to let the sales team know when you've got a new qualified lead?

In this tutorial, we'll use Twilio Programmable SMS in a PHP and Laravel application to send a message when a new lead is found.

In this example, we'll be implementing instant lead alerts for real estate.

We'll create a landing page for a new house on the market with a form to request more information. When a user submits the form we'll automatically notify a real estate agent in the field.

Learn how Porch uses Twilio SMS to send home contractors instant alerts when they are selected for a new project.

Let's begin!

Editor: you can clone the repo for this migrated tutorial from https://github.com/TwilioDevEd/lead-alerts-laravel

Populate the Landing Page Data

To display a landing page for our house, we'll first need to store some data.

For demonstration purposes, we've hard-coded an associative array containing the information we'd like to display.

<?php

namespace App\Http\Controllers;

use Illuminate\Http\Request;

use App\Http\Requests;
use App\Http\Controllers\Controller;

class HomeController extends Controller
{
    public function index()
    {
        $house = [
            'title' => '555 Sunnybrook Lane',
            'price' => '$349,999',
            'description' => 'You and your family will love this charming home. ' .
            'Featuring granite appliances, stainless steel windows, and ' .
            'high efficiency dual mud rooms, this joint is loaded to the max. ' .
            'Motivated sellers have priced for a quick sale, act now!'
        ];

        return view('home.index', [ 'house' => $house ]);
    }
}

Next, let's see how to render the landing page.

Render the Landing Page

In our blade template we'll insert data about the house.  We'll also include a form in the sidebar to collect user contact details when they request more information.

@extends('layouts.master')

@section('content')
<div class="row">
    <div class="col-sm-8">
        <h1>{!! $house['title'] !!}</h1>
        <h3>{!! $house['price'] !!}</h3>
        <img src="images/house.jpg" alt="House" />
        <p>{!! $house['description'] !!}</p>
    </div>
    <div class="col-sm-2 demo">
        <h4>Talk To An Agent</h4>
        <p>
            A trained real estate professional is standing by to answer any
            questions you might have about this property. Fill out the form below
            with your contact information, and an agent will reach out soon.
        </p>
        {!! Form::open(['url' => route('notifications.create')]) !!}
            <input type="hidden" name="houseTitle" value="{!! $house['title'] !!}" />
            <div class="form-group">
                {!! Form::label('name', 'Your Name') !!}
                {!! Form::text('name', '',
                  ['class' => 'form-control', 'placeholder' => 'John Appleseed']) !!}
            </div>
            <div class="form-group">
                {!! Form::label('phone', 'Your Phone Number') !!}
                {!! Form::text('phone', '',
                  ['class' => 'form-control', 'placeholder' => '+16512229988']) !!}
            </div>
            <div class="form-group">
                {!! Form::label('message', 'How can we help?') !!}
                {!! Form::text('message', '', ['class' => 'form-control']) !!}
            </div>
            <button type="submit" class="btn btn-primary">Request Info</button>
        {!! Form::close() !!}
    </div>
</div>
@endsection

Now that we have a landing page, let's look at how we use the Twilio REST Client to send messages.

Creating a Twilio REST API Client

Here we create a helper class with an authenticated Twilio REST API client that we can use anytime we need to send a text message.

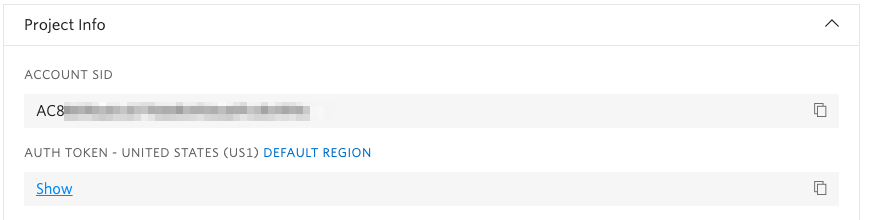
We initialize it with our Twilio Account Credentials stored as environment variables.  You can find the Auth Token and Account SID in the console:

Account Credentials


<?php

namespace App\Providers;

use Illuminate\Support\ServiceProvider;
use Twilio\Rest\Client;

class TwilioServiceProvider extends ServiceProvider
{
    /**
     * Initializes and registers Twilio SDK's object.
     *
     * @return void
     */
    public function register()
    {
        $this->app->bind(Client::class, function ($app) {
            $accountSid = config('services.twilio')['accountSid'];
            $authToken  = config('services.twilio')['authToken'];
            return new Client($accountSid, $authToken);
        });
    }
}

Our Twilio REST Client is ready! Now, let's see what we do when a new lead comes in from the form.

Handle the POST Request

This code handles the HTTP POST request issued by our landing page.

It uses our sendMessage method to send an SMS message to the real estate agent's phone number, which is stored in an environment variable. We include the lead's name, phone number, and inquiry directly into the body of the text message we send to the agent.

<?php

namespace App\Http\Controllers;

use Illuminate\Http\Request;

use App\Http\Requests;
use App\Http\Controllers\Controller;

use Twilio\Rest\Client;

class NotificationsController extends Controller
{
    protected $client;

    public function __construct(Client $client)
    {
        $this->client = $client;
    }

    public function create(Request $request)
    {
        $houseTitle = $request->input('houseTitle');
        $name       = $request->input('name');
        $phone      = $request->input('phone');
        $message    = $request->input('message');

        $formattedMessage = $this->formatMessage($houseTitle, $name, $phone, $message);

        try {
            $this->sendMessage($formattedMessage);
            $request
                ->session()
                ->flash('success', 'Thanks! An agent will be contacting you shortly.');
        } catch (Exception $e) {
            echo $e->getMessage();
            $request
                ->session()
                ->flash('error', 'Oops! There was an error. Please try again.');
        }

        return redirect()->route('home');
    }

    private function sendMessage($message)
    {
        $twilioPhoneNumber = config('services.twilio')['twilioPhoneNumber'];
        $agentPhoneNumber = config('services.twilio')['agentPhoneNumber'];
        $this->client->messages->create(
            $agentPhoneNumber,
            array(
                'from' => $twilioPhoneNumber,
                'body' => $message
            )
        );
    }

    private function formatMessage($houseTitle, $name, $phone, $message)
    {
        return
            "New lead received for $houseTitle. " .
            "Call $name at $phone. " .
            "Message: $message";
    }
}

And that's it! The agent has all the required information to immediately follow up on the lead.  

We've just implemented an application to instantly route leads to sales people in the field using text messages. Next, we'll take a look at some other easy to integrate features for your PHP application.

Where to Next?

PHP and Twilio go together so well - here's a couple of tutorials to prove it:

Browser Calls

Twilio Client allows your website users to make and receive phone calls directly from their web browsers.

Call Tracking

Call Tracking helps you measure the effectiveness of your marketing campaigns.

Did this help?

Thanks for checking out this tutorial!

Tweet @twilio to let us know what you're building.