How to Build Android Chat Apps using Xamarin and Twilio
Time to read:
May 04, 2016
Written by
This post is part of Twilio’s archive and may contain outdated information. We’re always building something new, so be sure to check out our latest posts for the most up-to-date insights.

Were you excited when you heard we had Xamarin support for Twilio IP Messaging in iOS but were wondering ‘what about Android?’. Read on and in just 10 minutes you will build an Android chat app using Xamarin and Twilio IP Messaging.
Get Ready to Build
If you’re developing this tutorial on a Mac, make sure to have Xamarin Studio with Xamarin.Android installed. You’ll need Android API Level 21 installed for this sample. Windows developers will need to have:
Windows developers will need:
- Visual Studio 2015
- Xamarin for Windows with Xamarin.Android
- Administrator access to your development machine.
With those prerequisites installed, we’re almost ready to start building our app. Before we can do that we’ll need to get our Twilio account set up so that we can use IP Messaging in our app.
Getting Started
The first thing we need is a Twilio account. Trial accounts are free so if you don’t already have one, go to the Twilio website and sign up. I’ll wait right here while you do it.
You’re back! Fantastic. Let’s move on to the second thing you’ll need.
To make IP Messaging work we need to create an Access Token. An access token tells Twilio who a chat user is and what they can or can’t do within the IP Messaging service. Tokens are generated on the server in order to help protect your Twilio account secrets.
You can write a token generator in your programming language of choice, or to get chatting faster download and configure one of our quickstarts.
If you are a .NET developer on Windows, head over to this guide and follow the instructions to get the ASP.NET version of our IP Messaging quickstart running. If you’re on a Mac or you just want to use a different backend language on Windows you can head here and choose a language of your choice from the list of available quickstarts.
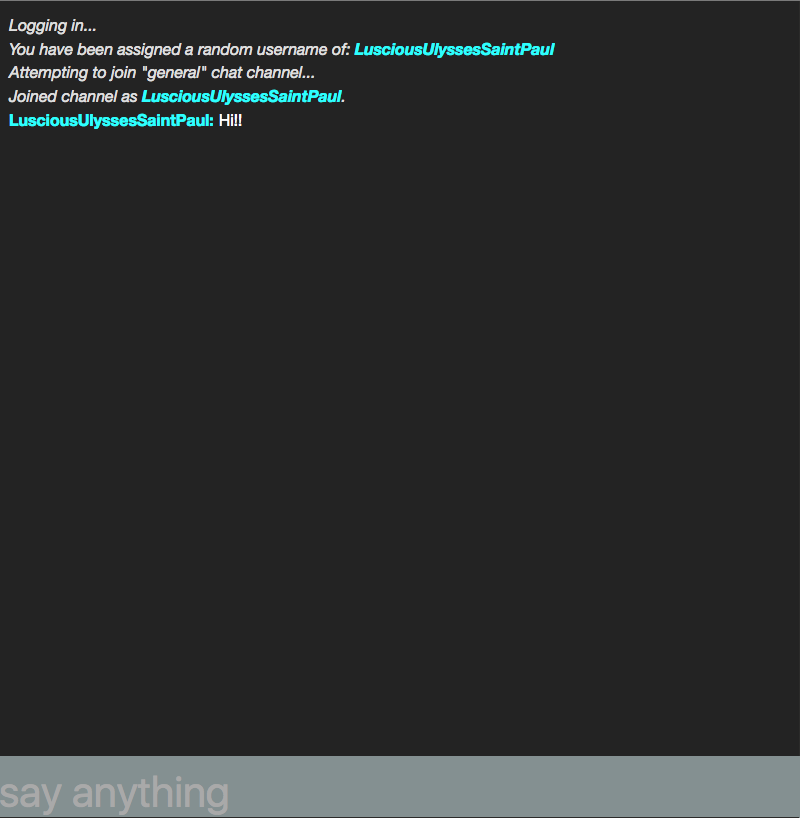
Once you have a quickstart set up, open it in your browser. You should find yourself looking at a chat application. Your application has generated an access token on the server and been assigned a random username.
We’ll use this same backend to request a token for our mobile application. Continue running the application and keep the URL handy. I’ll refer to this URL later as YOUR_TOKEN_SERVER_URL.
There’s one more thing to mention before we move on and it has to do with how the token is accessed from the app. If you want to build this on your Android device your server running on localhost won’t be reachable on the public internet. You have two choices. One option is deploying the project to a web server (or to Azure, Heroku, etc.) and using that URL instead of localhost. Alternatively, you can use something like ngrok to create an HTTP tunnel to your localhost instance. You can follow this post to see how and why you might want to use ngrok. If you’re on Windows, make sure to run ngrok like this: ngrok http [your port] -http-header="localhost:[your port]
Let’s move on to our mobile app code.
Setting Up the Twilio IP Messaging SDK
Alright Android warrior, are you ready to build a chat application? Wonderful! First, clone this starter project from GitHub and open it in your Xamarin IDE of choice.
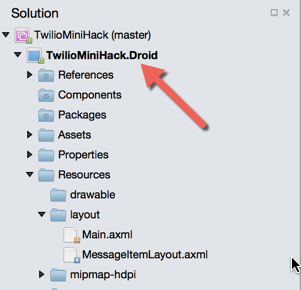
This starter project has the main user interface objects for our chat app already created in Resources/layout/Main.axml and Resources/layout/MessageItemLayout.axml. What we’ll do over the next few minutes is light up those UI objects with Twilio IP Messaging.
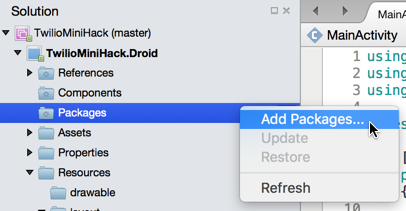
Begin by adding the Twilio IP Messaging NuGet packages. Right-click on the Packages node inside the TwilioMiniHack.Android project and select Add packages…:
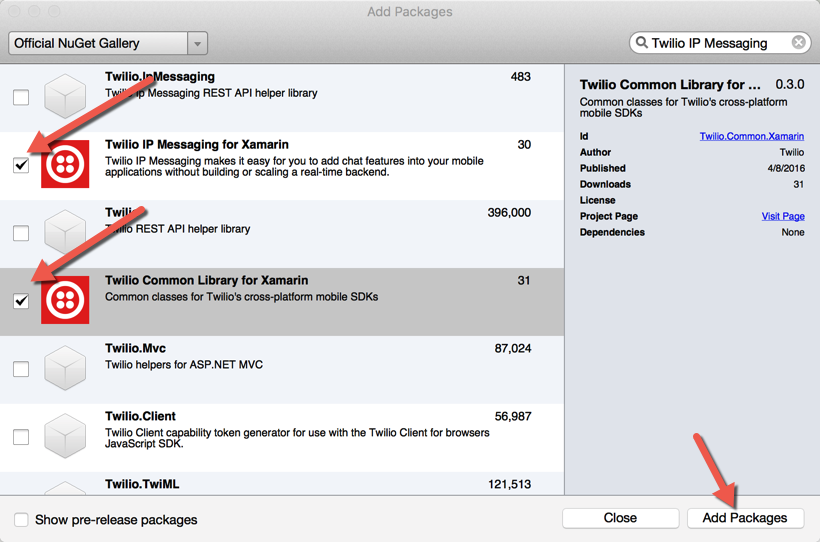
Search for “Twilio IP Messaging” in the Add Packages dialog and check the boxes next to “Twilio IP Messaging for Xamarin” and “Twilio Common Library for Xamarin” and click the Add Package button in the bottom-right:
Now that we have our SDK let’s create some code to handle the message objects we’ll be using in the application.
Creating the Messages Adapter
Start by adding the following using statements to the top of MainActivity.cs:
Update MainActivity to set the Label attribute to “#general” and implement the IPMessagingClientListener, IChannelListener, and ITwilioAccessManagerListener interfaces.
We’ll also add a TAG for logging and declare the instance variables the app requires:
IPMessagingClientListener handles the events we receive from the IP Messaging service, IChannelListener listens for channel-related events, while ITwilioAccessManagerListener is used to coordinate authentication events with the chat service. We’ll add the methods to implement these interfaces as we go along.
Since this is a chat app and we’ll be doing a lot of work with messages, create a class to help manage them for our list view. This class will be a list view Adapter that will store our Message objects and provide our list view with the information it needs to display them in a list.
Create a new class and call it MessagesAdapter. Replace the template code in this class with the following:
We need the ability to add messages to the list as they come in so add that to MessagesAdapter:
To finish up the adapter, we need the GetItemId, GetView, and Count method overrides that configure our adapter to display the messages. Add these to MessagesAdapter:
The GetView method uses the MessageItemLayout layout that’s already provided starter project and configures it using the Message info.
Now that our MessagesAdapter is good to go, let’s get our UI set up for the chat app. Back in MainActivity.cs, replace your OnCreate method with the following code:
Here we’re setting the ActionBar subtitle to indicate we’re in the logging in phase of the app. Then we find the send button, message text and list view objects from our layout. Then we set the list view’s adapter to the MessagesAdapter we created earlier.
Our UI is ready to go but it won’t show anything useful until we connect to Twilio IP Messaging.
Connecting to Twilio IP Messaging
Add a method that will fetch our token and identity:
We pass in the androidId as a unique identifier and a token is returned that includes our identity.
Excellent! Now go back to OnCreate and instantiate the IP Messaging client using the token. Add the following code to OnCreate to initialize the SDK and call a Setup method that we’ll add in the next step:
Next, add the Setup method:
The Setup method requests the token and identity using GetIdentity and then uses the token to create an AccessManager. The AccessManager is then used to create an IP Messaging client object.
Next, IP Messaging client is used to request a list of channels and checks to see if a channel named general exists. If the channel does exist, the client joins it using JoinGeneralChannel and if the channel doesn’t exist the client creates it and joins it using CreateAndJoinGeneralChannel. Let’s add those two methods now as well as the override methods to handle the AccessManager events:
You may have noticed that the CreateAndJoinGeneralChannel method uses a CreateChannelListener class. We need to add that since it only exists as an abstract class in the IP Messaging SDK. Add this class to your MainActivity.cs file:
Now we need to add code to send a message when the sendButton is tapped. In OnCreate add the following line:
Next, add the button click handler function:
This button will allow us to send messages but what about when we receive messages in the channel? Let’s add some code to handle that now. When a message is sent to the channel we’ll use a method that handles the OnMessageAdd event to load it into the Adapter for our Messages and scroll it into view:
One more thing, make sure to right-click on IPMessagingClientListener, IChannelListener and ITwilioAccessManagerListener interfaces and select “Implement interface” to put in default stubs for each of their methods that we haven’t implemented. By default the stub implementations will throw an exception. One of these methods OnChannelAdd will be accessed by our application so you’ll want to delete the NotImplementedException in that method before running the app.
That’s it, you’ve created a chat app in Xamarin using Android and Twilio IP Messaging!
Wrap Up
In this post we used the new Xamarin support for Twilio IP Messaging to build a simple chat application in Android. Now that you have a working chat app there’s a lot you could do to improve it. Try some of these ideas:
- Create a channel list and allow channel creation
- Add the ability to edit messages
- Add typing indication
Whatever it is you create next we’d love to see it. Let me know about it on Twitter @brentschooley or email me at brent@twilio.com.


Related Resources
Twilio Docs
From APIs to SDKs to sample apps
API reference documentation, SDKs, helper libraries, quickstarts, and tutorials for your language and platform.
Resource Center
The latest ebooks, industry reports, and webinars
Learn from customer engagement experts to improve your own communication.
Ahoy
Twilio's developer community hub
Best practices, code samples, and inspiration to build communications and digital engagement experiences.