Building a NASA Satellite Imagery SMS Bot with Python, Flask, and Twilio
Time to read:
January 26, 2021
Written by
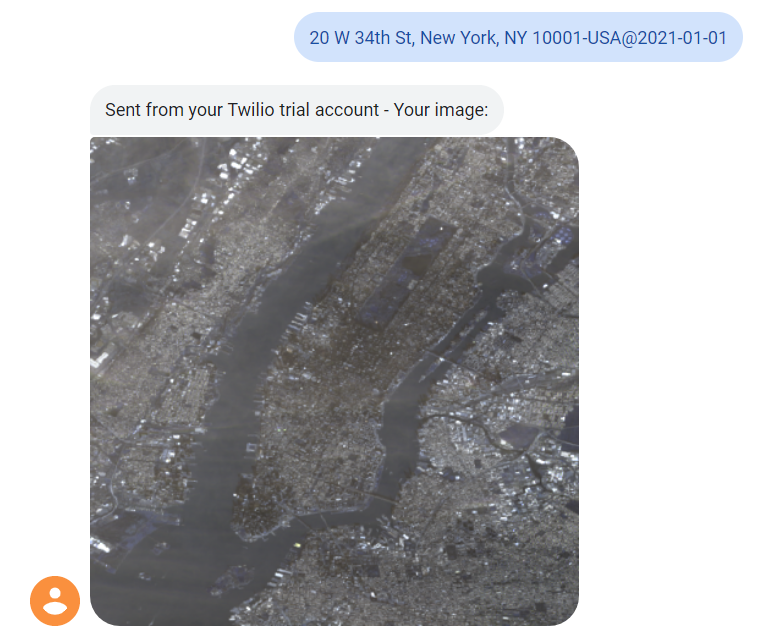
In this article, you’ll learn how to use Twilio Programmable SMS with Python and Flask to build a bot that permits a user to send a text message containing a location, country code, and date, and receive a satellite image for that time and location in response via NASA’s Earth APIs. In the image below, you can see how the bot was used to provide an image of New York City that was captured on January 1st, 2021.
Requirements
- Python 3.6 or newer. You can download a Python interpreter here.
- A Twilio account with an SMS-capable phone number. If you are new to Twilio, create a free account.
Project Configuration
Navigate to the directory where you’d like to create your project, and run the following commands:
Next, create a virtual environment to isolate dependencies:
Then, activate the environment, which you can do on a Unix-based system with:
Or on Windows with:
For the latter command, if using PowerShell on Windows, ensure you have an ExecutionPolicy that permits the running of scripts.
Install the required dependencies as follows:
API Setup
With the project created, you can move forward with registering for the external APIs.
To forward geocode a location into a latitude and longitude, you’ll use a service called HERE. Sign up for a free account and generate a REST Project. Click the Create API Key button to generate a key that you can use to access the HERE Location Services REST APIs, which is the first button in the image below:
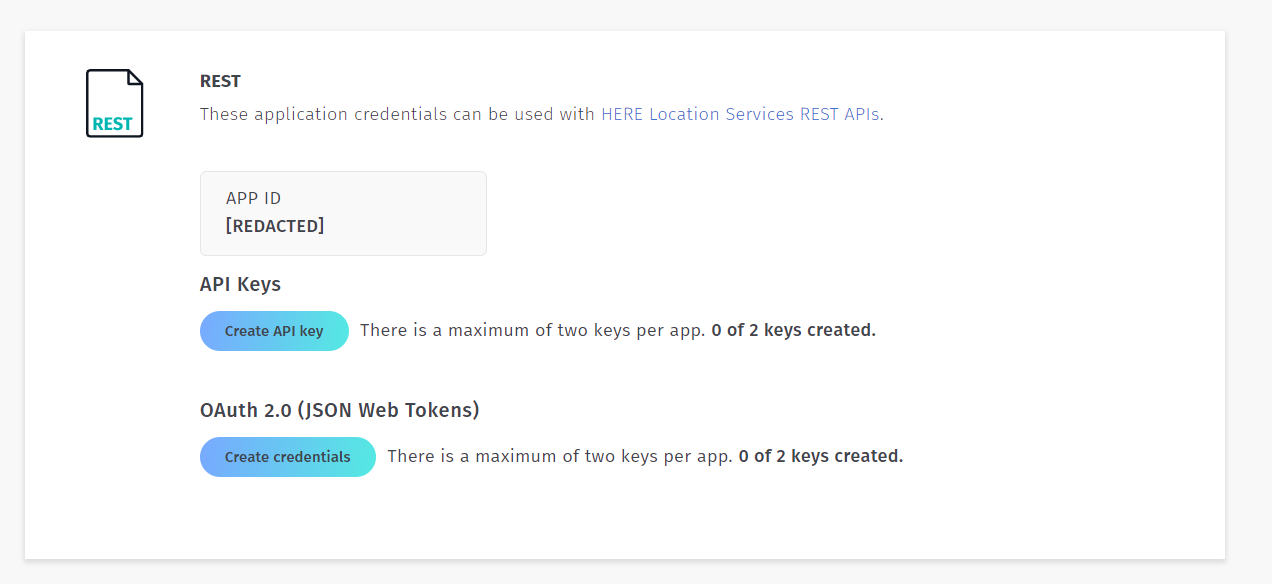
You’ll use this API Key shortly during the translation process from location to latitude and longitude. Note that if you don’t verify your account, your API key will expire after 60 minutes, thus you’ll have to delete and recreate it.
At the root of your project, create a file entitled .env (notice the preceding dot) and paste the following text within it:
Replace your-here-api-key with the API Key you received from Here in the prior step. The DEMO_KEY key for the NASA API is a publicly available trial API key provided by NASA for the purposes of testing. This key is sufficient for this project.
Twilio Setup
To complete the configuration, you’ll need to create an SMS-capable phone number for Twilio Programmable SMS if you don’t already have one. Login to the Twilio Console and visit the Buy a Number page. Ensure you have SMS capabilities enabled and click Search:
When you find a suitable number, select Buy so that it may be provisioned. If you need more information on purchasing phone numbers, visit the relevant page of the Twilio Help Center.
Building the Application
Create a app.py file in the project directory with the following boilerplate for this project:
After the relevant import statements, you call load_dotenv() so that the two environment variables you saved earlier in the .env file are imported.
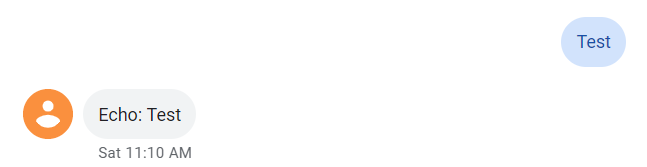
Finally, the POST /sms route will act as a webhook that you’ll configure Twilio to execute when it receives an incoming message to your Twilio Phone Number. This endpoint pulls the Body property, which contains the message, off the JSON data body sent by Twilio, and then simply echoes it back.
To test that your echo route works correctly, run the Flask project, which can be done on macOS or Linux with:
Or on Windows with:
Then open a second terminal window, activate the virtual environment, and then run:
Ngrok is a tool that creates a secure tunnel to any service running on localhost, and in doing so, it provides you with a public URL allowing you to access that service from across the Internet. With the command above, Ngrok will listen to port 5000 on your local machine and will proxy requests from the public URL to the Flask application. After running the command, copy the HTTPS URL as depicted in the image below:
Once you have that URL, visit the Twilio Phone Number Management Console, select your phone number, and point Twilio to your webhook under the messaging section, as depicted below:
Notice that the URL is formed by the https:// forwarding URL from Ngrok with /sms appended to the end. The /sms is the URI of the endpoint in your current project. If you now send an SMS message to your Twilio phone number, you should see your message echoed back.
Next, bring the webserver down with Ctrl + C or the appropriate termination button in your IDE if you use one, but keep Ngrok running, for you'll be testing the project again soon.
Since there will be many instances throughout the various code paths where you will want to terminate the request and respond to the user (such as with error messages), you'll abstract the process away into a simple function, which you can create as shown below right above your route handler.
This function is meant for a one time response use - that is, when you’re ready to respond with a message to a user in the route handler, you’ll simply call respond with that message, returning the result.
Moving on, you’ll expect a text message of the form [location-country]@[YYYY-MM-DD?]:
locationcan be any text-based query, be it a zip code, a city name, a street address, etc.countryrepresents an ISO 3166-1 3-letter country code, such asUSA.YYYY-MM-DD?is an optional date representing the day on which the satellite image was captured. If you don’t specify one, the current date will be used by default.
Examples of valid queries include:
10001-USA94102-USA@2021-01-01New York-USASan Francisco-USA@2021-01-0120 W 34th St, New York, NY 10001-USA@2021-01-01
You’ll want to parse and validate the upcoming SMS message to ensure it’s of the proper form (specified above). To do so, add the following function right underneath the respond function.
Here, you raise ValueError exceptions if the message length isn’t long enough, if there isn’t a country code, or if the date (assuming it’s provided) is of an incorrect format.
Next, you’ll want to add the functions that handle contacting the HERE and NASA APIs - the former for forward geocoding and the latter to obtain an image URI.
The HERE Location Services, as per their documentation, accept a GET request containing a q and apiKey query parameter, and return a list of items each containing a position property, which you’ll want to extract from the first.
That is, for a request of the form GET https://geocode.search.hereapi.com/v1/geocode?q=5+Rue+Daunou%2C+75000+Paris%2C+France&apiKey=API_KEY, you can expect a response of the form:
You’ll be most interested in the lat and lng properties available on position on the first item of the list.
Similarly, NASA’s API will expect a GET request containing the lat, lon, date, dim, and api_key query parameters, and will return a response containing either a url property, which points to the satellite image, or an error message if no image could be found.
latis the target latitude.lonis the target longitude. Notice that the NASA API refers to this aslonwhile HERE API useslng. That’s fine, it just requires a trivial mapping step.dateis the target date for the image. The API may not always be able to find an image for the specified date and location and will error out if so.dimis short for dimensions, and you will set it to the constant0.15, which produces clean-looking images.
With that, add the following code right underneath your parse_and_validate_msg function:
The first function makes the GET request to the HERE API and then parses the JSON response for the first location item in the list, pulling the lat and lng properties off of position. If they don’t exist or if there is no zeroth item, then this will raise an exception with an appropriate error message, which will be caught in the route handler later and sent to the user.
Similarly, for the second function, you make the request and parse the satellite image URL off the response. Once again, if there is no URL, an exception will be raised and caught later.
All that’s left is to update your route handler in order to make use of these functions. Replace it with the following code:
In this route handler, if there is no incoming message, you respond with an error message. Most SMS services won’t permit the sending of a message with no content, thus this is more of a sanity check. If any ValueError exceptions are raised, you respond to the client with those error messages. You can do that because you own the exceptions and there’s no risk of them containing sensitive data.
If any other exception is raised, it could be due to the API response or some transient network error, thus you respond with a slightly more generic message.
The project is now complete and you’re ready to test it.
Running the Application
If Ngrok is still running, the service will be ready to use once you bring the web server up using the method described above. Otherwise, you’ll have to restart Ngrok and re-configure the webhook URL in the Twilio Console.
Note that not all dates and times will have an associated image. You may have to experiment a little to find a date that works for your location. The satellite passes over each point on Earth every 16 days (approximately), so keep that in mind when searching. The date 2021-01-01 seems to work for most locations. If you do too many searches, you may exceed NASA’s permitted rate for that demo key, thus you’ll have to wait a while or sign up for an account with NASA.
Conclusion
In this project, you learned how to make use of Twilio Programmable SMS, Python, Flask, and external APIs to build a satellite image bot. There are a variety of ways that you could improve on this project, such as by returning a list of possible matches for a location and asking the user to select one, etc.
Jamie is an 18-year-old software developer located in Texas. He has particular interests in enterprise architecture (DDD/CQRS/ES), writing elegant and testable code, and Physics and Mathematics. He is currently working on a startup in the business automation and tech education space, and when not behind a computer, he enjoys reading and learning.
- Twitter: https://twitter.com/eithermonad
- GitHub: https://github.com/JamieCorkhill
- Personal Site: https://jamiecorkhill.com/
- LinkedIn: https://www.linkedin.com/in/jamie-corkhill-aaab76153/

Related Resources
Twilio Docs
From APIs to SDKs to sample apps
API reference documentation, SDKs, helper libraries, quickstarts, and tutorials for your language and platform.
Resource Center
The latest ebooks, industry reports, and webinars
Learn from customer engagement experts to improve your own communication.
Ahoy
Twilio's developer community hub
Best practices, code samples, and inspiration to build communications and digital engagement experiences.