Pair Programming in the Browser with Twilio
Time to read:
June 04, 2013
Written by
This post is part of Twilio’s archive and may contain outdated information. We’re always building something new, so be sure to check out our latest posts for the most up-to-date insights.

The tools for creating real-time applications in the browser are getting better all the time. Running node.js on the server, in conjunction with libraries like socket.io, makes it ridiculously simple to facilitate server push and event-driven communication between clients. Combine this with Twilio Client for voice communication in the browser and you have an incredibly powerful platform for facilitating communication between users of your application.
In this tutorial, we will examine a sample application enabling pair (or large group!) programming in the browser. Check it out live here! You’ll be able to voice chat with other coders as changes are magically beamed in real time from their editor to yours. Check out the complete source code on GitHub to see how it all comes together.
Pair programming live with a distributed team is very much a possibility with some of the technologies we’ll look at today. Let’s run through a list of ingredients for this hack:
-
node.js on the server
-
The official twilio node module, available on npm
-
The Twilio Client JavaScript SDK (for the browser)
-
socket.io (both server and browser)
-
Express for routing HTTP requests and serving up responses
-
Ace code editor (browser)
-
AppFog (platform as a service for hosting)
The app is reasonably large, so we’ll only focus on the most important code paths on both the client- and server-side. Let’s start with what’s going on in the browser.
Understanding The Client Side
The markup for the app’s only page is not very complex, but I would like to point out a few key bits:
On line #4, we’re including the browser component of the socket.io library. This will handle communication via web sockets or HTTP long polling with our node.js program running on the server. Looking at the script tag, you might think that “socket.io/socket.io.js” is in our web app’s static content directory, but it’s actually generated dynamically by socket.io. This is handled for you automatically – no need to configure anything extra.
On the next line, we load the JavaScript for the Ace editor from rawgithub.com, which is a handy service to quickly access raw files from a GitHub repository. It is possible to download and serve this JavaScript locally, as well.
Next on line #6, we load the Twilio Client JavaScript SDK from a Twilio-provided static content server. It’s included with a protocol-relative URL, so it can be served over both HTTP or HTTPS. Immediately after that, we load jQuery 2.0 from a Google CDN. We now have all the third-party JavaScript dependencies we need loaded for the page.
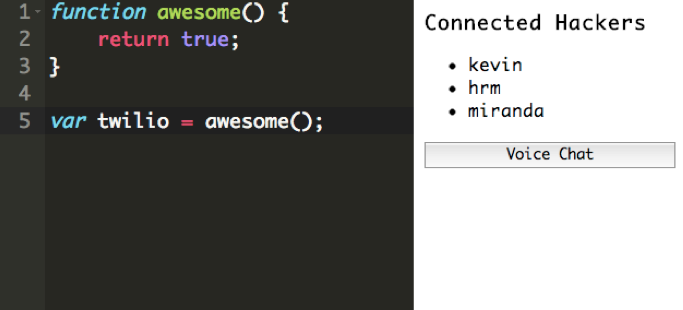
The UI markup for the page is pretty sparse – a few divs and an empty unordered list. We’ll be populating most of this via JavaScript later. On line #20, we load the JavaScript which will actually drive our application. The CSS for the page sets up a full page, two-column layout for our editor and list of connected clients.
Let’s dive into the JavaScript which powers the client side application, which can be found here.
First, we configure the Ace editor with the JavaScript syntax highlighting plugin:
Then, we create our socket.io client-side interface, and listen for updates from other clients:
Note that we’re setting a boolean flag every time we get a new update from the server, to indicate that the editor has been updated by our own client side code. We do this to prevent the editor’s “change” event from firing every time an update is received from the server, which would then fire updates to every other client, causing an undesirable infinite messaging behavior. Sort of like when your mom learned how to send text messages.
Inside the document ready event handler, we set a listener on the editor object to be fired every time the user updates the contents of the text editor:
If the change was initiated by user input, we immediately publish a message on our socket indicating that we have editor changes to publish to all clients. This updates all connected clients almost immediately.
These bits of code power the real time updates for the text editor, but how about the voice chat and presence events as new users log on? This is where we begin to use the Twilio Client JavaScript SDK. In the document ready event, we initialize our browser’s soft phone, the “Twilio.Device” object, with a server-generated capability token:
We send an Ajax request to the server using jQuery to fetch this capability token, using the username our user gave us when we “prompt()”ed them on page load. In the success handler, we initialize our Twilio.Device and are ready to make outbound calls to a voice conference set up for this editor.
Also inside the success handler function, we register a listener for the presence event fired by Twilio Client. This event will fire once for every attached client, whenever they connect or disconnect. In our case, we will add (or remove) them from an unordered list of connected clients, just to demonstrate who is available (potentially) to chat with:
To connect to the editor’s conference call, we call Twilio.Device.connect(). To leave the conference (hang up), we call Twilio.Device.disconnectAll().
That about wraps up the salient bits of the client side part of our application. We propagate changes to the text editor using socket.io, and manage presence and voice chat via Twilio Client. Let’s take a look at the server-side portions of our application.
Understanding The Server Side
Our server-side application is a single JavaScript file which handles HTTP requests and socket communication with the client. Let’s examine the most interesting bits, leaving out the dependency declaration and Express configuration boilerplate.
You might remember that on the client side, we made an Ajax request for a capability token, which empowers our Twilio.Device to make outbound calls (and connect to a conference). This is the Express handler function for that route:
We use the twilio module for node to generate a capability token with two pieces of data – a client identifier (it’s like the client’s inbound phone number) and a TwiML app SID (this is an identifier for a TwiML application that serves up TwiML instructions for an outbound call from the browser). The TwiML used to place the outbound call looks like this:
It uses text-to-speech to announce to the user they are joining a conference, then drops the user into a conference with all other users of the editor currently connected.
Note that the capability token constructor must have access to your Twilio account SID and auth token – by default, the node library looks for these values in environment variables, available programmatically at “process.env.TWILIO_ACCOUNT_SID” and “process.env.TWILIO_AUTH_TOKEN”. Storing your Twilio account credentials in environment variables is a good security practice, so they don’t get accidentally checked into source control.
Now, we’re ready to look at the implementation of socket.io on the server. socket.io first needs to be attached to an HTTP server. Then, you will be able to listen for and emit events:
In this application, every time a message is received from the client, we will turn around and emit it back to all connected clients. The way to accomplish this is with the “socket.broadcast.emit()” function – this will send a message to all connected clients with the new value of the editor in the browser.
In the live demo, I deployed the application to the AppFog PaaS. Like many node.js PaaS services, AppFog does not yet support web sockets. Luckily, socket.io allows us to very easily fall back to HTTP polling, which I configure on the server here. If your PaaS supports web sockets (or you’re running on a dedicated server or VPS), you might omit this configuration.
Conclusion
In a few hundred lines of code, we’ve created a code editor and live chat application that, with a few improvements, can empower distributed teams to code together effectively. We’re able to do this because the tools of real time collaboration have matured significantly, and we have server and client side platforms built from the ground up to support event-driven communications. I hope you’re able to explore this sort of interaction in your own apps very soon!


Related Resources
Twilio Docs
From APIs to SDKs to sample apps
API reference documentation, SDKs, helper libraries, quickstarts, and tutorials for your language and platform.
Resource Center
The latest ebooks, industry reports, and webinars
Learn from customer engagement experts to improve your own communication.
Ahoy
Twilio's developer community hub
Best practices, code samples, and inspiration to build communications and digital engagement experiences.