Twilio SendGrid Day One: Building My Track Jacket App
Time to read:
February 01, 2019
Written by

From the beginning, Twilio and SendGrid have both enshrined customer experience in their core values. SendGrid strives to be Humble and exemplify a customer-first mindset. Twilio encourages employees to Wear the customer’s shoes.
We live those values everyday. There’s a hallowed tradition here at Twilio: every Twilion who builds and demos a Twilio powered app earns their red track jacket. Working on an application from a customer’s perspective helps us truly build empathy for our users.
Today, as Twilio and SendGrid celebrated coming together as one company, I had the opportunity to demo my track jacket app. Using building blocks from Twilio and SendGrid I built an SMS responder which also emails a GIF using Python and the microframework Flask.
Let’s look at how it works so you can build your own.
Prerequisites for my SMS and Email Responder
To reproduce my code you’ll first need to sign up for (or log into) SendGrid and Twilio accounts:
You’ll also need Python 3.6 on your machine. My instructions are for Mac OSX, but should be similar if you have a comparable shell.
We’ll also need a publicly available endpoint to set as a Twilio webhook. You could deploy this application somewhere, but the easiest way to ‘go public’ is to install ngrok.
Build and Run a Python SMS and Email Responder
Once you have your accounts and Python and ngrok installed, you’re ready to get down to coding, running, and testing! Let’s begin by setting up a virtual environment and start installing packages.
Set Up a Python Development Environment
Start by creating a new project directory and virtual environment.
Excellent – now you have an isolated virtual environment running. Everything you install using pip will only affect this local development environment, not your global setup.
Start by installing the twilio and sendgrid helper libraries:
You’ll also need to do email validation. It’s far easier to bring in a library for that – install validate_email to take care of that important step for us:
Grab Your SendGrid Credentials and a Twilio Phone Number
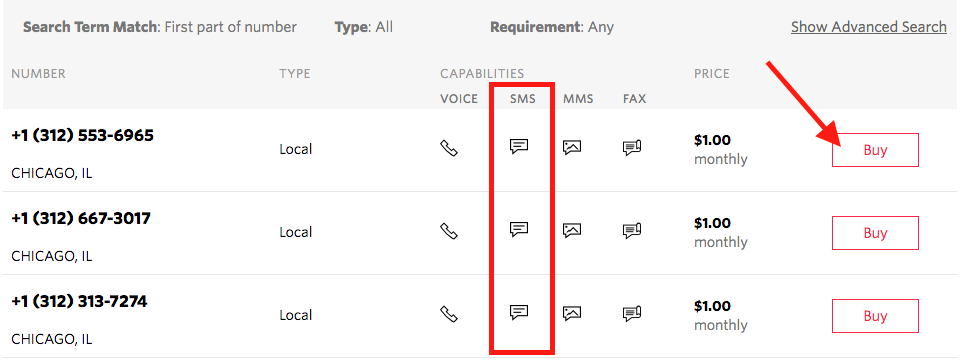
Before you can respond to incoming phone numbers you’ll need to grab a Twilio phone number. Navigate to the Buy a Number page in the console, check the "SMS" box, and click "Search."
When you see numbers returned, select your favorite and click “Buy”:
Next, visit the API Keys page in the SendGrid console. Click the blue ‘Create API Key’ button in the upper right hand corner:

Create a ‘Full Access’ key, and name it something funny.
Important: copy that key somewhere safe! You only get one chance; if you miss your chance to copy the key you’ll have to create a new one.
Excellent work – next we’ll design the email response we’ll be sending.
Create a SendGrid Email Template
SendGrid’s email template designer makes it simple to edit and preview the emails you’ll be sending with SendGrid.
Visit the Template page in your SendGrid console, and if prompted select the ‘Legacy Template’ button. Normally we’d suggest Dynamic Templates, but for simple HTML a legacy template will work.
Assign it a special name and save it. Click the white ‘Add Version’ button that appears. Finally, select ‘Code Editor’ from the options that appear.
You can write HTML directly in the editor that appears. As you edit, the canvas to the right automatically updates the preview. You can even toggle between views (desktop, mobile, and text) – pretty cool.
Insert the following HTML into the template body, overwriting the <%body%> tag there:
You should see something like this:
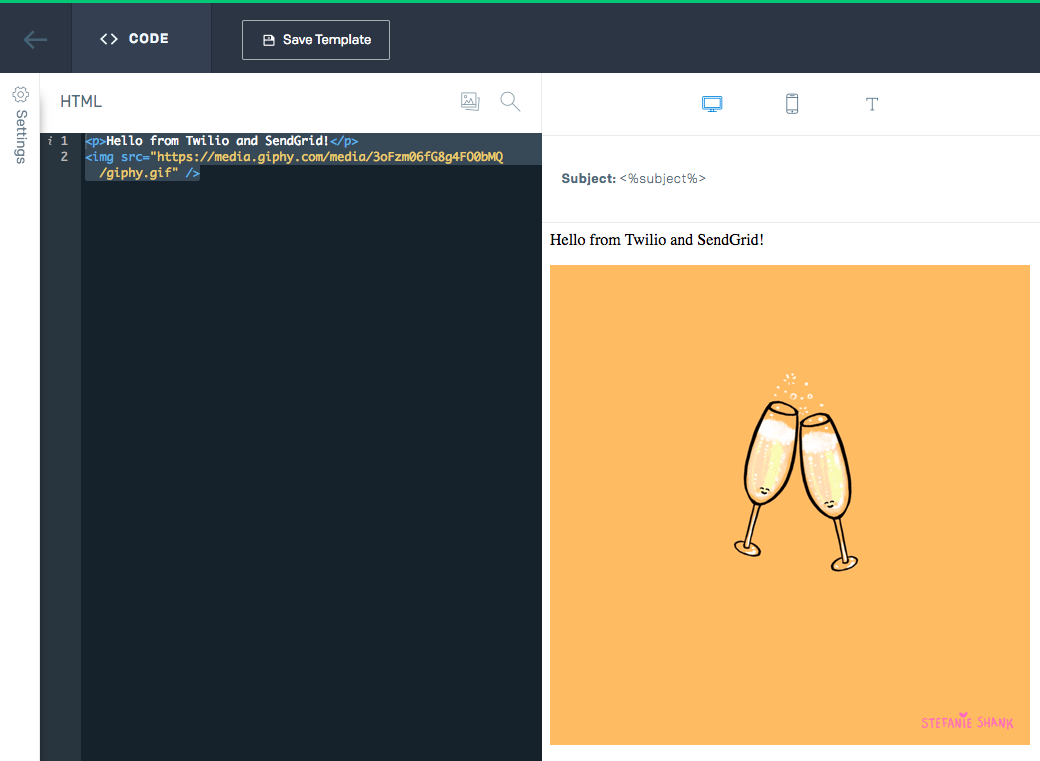
At this point, hit ‘Save Template’.
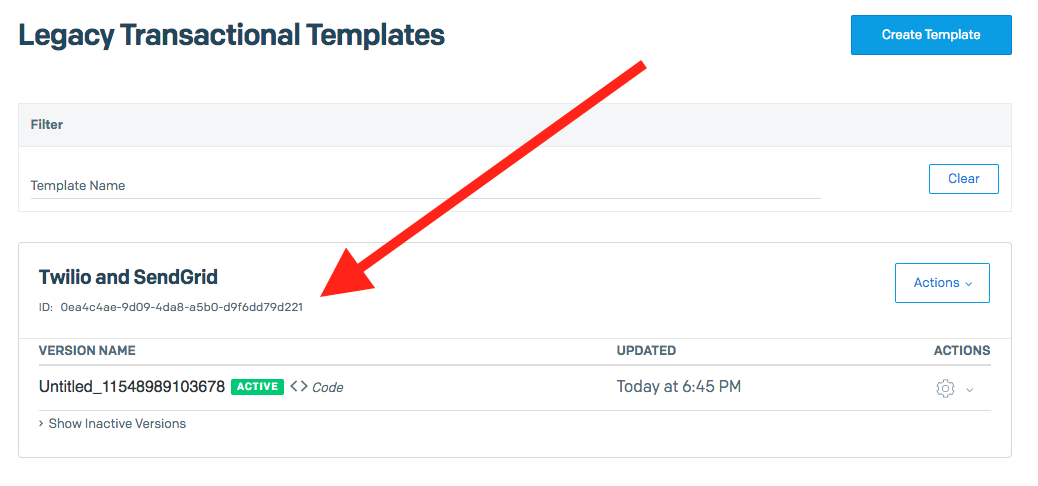
Select the back arrow button, seen in the upper left hand corner of the above screenshot (left of ‘Code’). You’ll be taken back to the Legacy Transactional Templates page, where you can now see the new version with a random name.
Under your template name, you’ll see an ID. Copy that ID and keep it safe (perhaps in the same place you’ve got your API Key saved?):
Great work! Let’s move on to the code… we’re getting close now.
Write the SendGrid and Twilio Python
Create a new file twiliosendgrid.py in your project directory. This part’s simple - I’ve written the code you need already.
In that file paste the following, then save it:
Here’s the above code’s flow:
- When we receive a message at the
/smsendpoint, call theincoming_sms()function - If the body of the SMS contains a valid email, call
send_email() - In
send_email(), add the address as thetoemail address - Add other metadata like the sender and subject
- Use the template we made above for the email
- Have SendGrid mail everything out
- Respond to Twilio’s
/smsrequest with TwiML directing Twilio to reply
Seem like a good flow? We’ll soon see…
Set SendGrid Environment Variables
To prevent, well, API Keys on GitHub, it’s best to use environment variables in sensitive areas of your code. They’re also useful for constantly changing logic which relies on outside functionality.
Since you’ve been saving things fitting that classification in a safe place, let’s set some environment variables now for your Template ID and API Key from SendGrid. The following code will get it done in a terminal on Mac OSX:
Replace <<SENDGRID_API_KEY>> and <<SENDGRID_TEMPLATE_ID>> with your Sendgrid API Key and Template ID called out in earlier steps.
Run ngrok and Set the Twilio Callback URL
When you run your app, usually your development server is only available locally. To expose it to the broader web you need to deploy it somewhere or mess with firewall settings.
There’s a third option. Open an ngrok “tunnel” to port 5000 (anticipating Flask later using that port):
When you run ngrok, you’ll see a screen like the following:
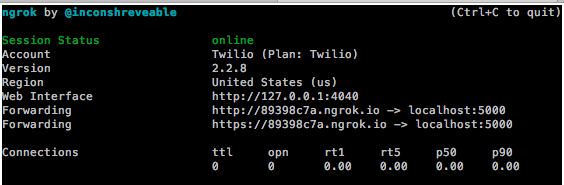
Now, open up the Twilio Incoming Numbers page in the console. Select the number you purchased.
Under ‘Messaging’ in the ‘A Message Comes In’ field, select ‘Webhook’. Paste in the ‘https’ forwarding email from the above ngrok screen followed by /sms:

Hit the red ‘Save’ button.
We’re almost there!
Run and Test the Twilio SendGrid SMS Email Mashup
Ready to make some magic? Start Flask running:
Now you’re ready for the moment of truth...
From your cell phone, text the number you purchased with nothing but an email address in the body. If everything went right you should see two things in rapid succession:
- An SMS reply to your cell saying “Coding is fun!”
- An email in your inbox matching the template:
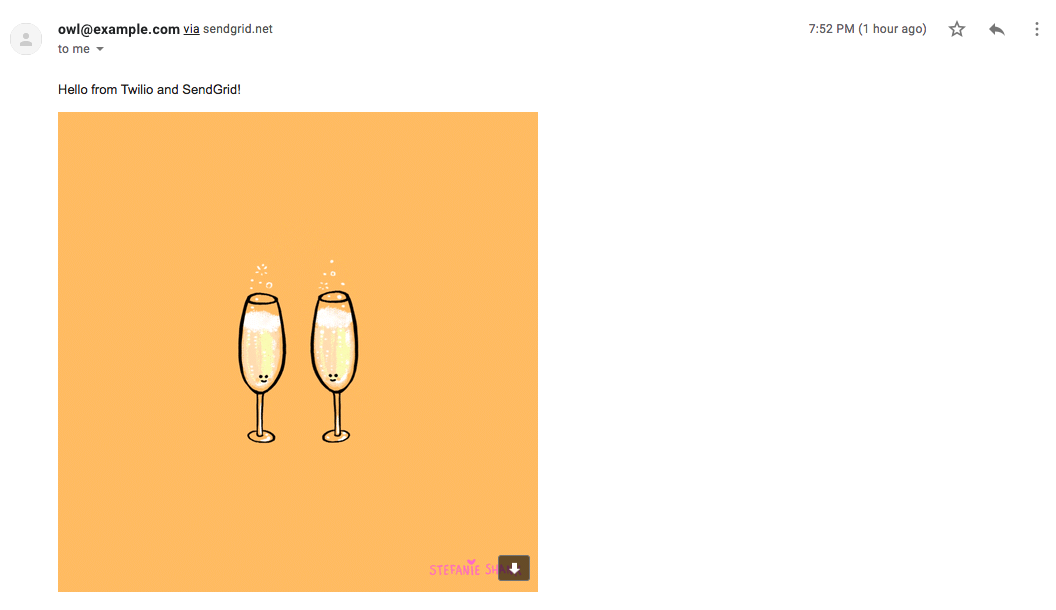
Cheers to that. 🥂

Twilio and SendGrid: Day One
Awesome – now you have a Python app running with Twilio and SendGrid functionality! When you receive an SMS with an email address, you both reply to the SMS and email your clever message (and GIF, of course).
I had an awesome experience building this app, and I’m so thrilled to have earned my red Twilio track jacket. I personally hadn’t coded since 8th grade – and yet, with one week and a little help I was able to build something that felt magical.
Even before our companies came together today, we were kindred spirits. I’m so proud of what we’ve built with SendGrid and with Twilio. And to think: this is only Day One.
I can’t wait to see what we build together.
Sameer Dholakia is the CEO of Twilio SendGrid, a wholly owned subsidiary of Twilio. He's responsible for the overall strategy and operations of the Twilio SendGrid business unit. Outside Twilio, he’s at his happiest hanging out with his wife and kids, eating queso, and drinking margaritas.


Related Resources
Twilio Docs
From APIs to SDKs to sample apps
API reference documentation, SDKs, helper libraries, quickstarts, and tutorials for your language and platform.
Resource Center
The latest ebooks, industry reports, and webinars
Learn from customer engagement experts to improve your own communication.
Ahoy
Twilio's developer community hub
Best practices, code samples, and inspiration to build communications and digital engagement experiences.