Wake-Up Call Service Part 1: Coding a Cron Alarm with Twilio Voice
Time to read:
August 01, 2023
Written by
Reviewed by

If you aren’t familiar with a wake-up call service, it's as literal as it sounds; it’s a telephone call service, typically provided by hotels, intended to wake you up at a specified time. Previously, I built a Shazam-like service that identifies songs using Twilio and it piqued my interest in exploring what other services could be emulated using Twilio.
Consequently, a wake-up call service came to mind. Although most smartphones nowadays have built-in alarms, the tradition and charm of this service is still used by most hotels, which made me want to build an automated wake-up call service with Twilio Programmable Voice.
This first part of the tutorial will focus on creating and triggering the alarm through a Cron job and Twilio Programmable Voice. The second part will focus on handling multiple alarms for multiple users using MongoDB. The third and final part will focus on the front-end by integrating the service with Programmable SMS and using OpenAI's Function Calling to have users set and confirm an alarm through Twilio Programmable SMS.
If you’re looking for the other two parts, here you go:
- Part 2: Managing users with MongoDB
- Part 3: Set Alarms with Twilio SMS and OpenAI's Function Calling (coming soon)
Let's get started!
Prerequisites
- A Twilio account - Sign up with Twilio for free here
- A Twilio number - Read our docs here on how to obtain a Twilio number
- Node.js installation - Download Node.js here
- ngrok installation - Download ngrok here
Alarm Overview
At first glance, the components to any alarm may seem simple, but when creating an automated alarm service there are many components to think about, such as the alarm trigger, snooze button, the snooze interval time, how to stop the alarm, and how to deal with different time zones. So before you dive into the tutorial, let’s take a look at how this service will work.
Trigger
The alarms will be created and triggered by a Cron job using the Node Schedule package. This package allows you to execute functions at specific times with optional recurrence rules.
Call cycle
Once the alarm function is triggered, a call cycle will be triggered to call the user. This cycle will repeatedly call the user at a set interval a set amount of times. This set interval will be your snooze interval and you’ll want to set it to 9 minutes.
Almost all alarms will allow you to snooze infinitely until you stop it. However, since you are dealing with phone calls, you’ll want to set a limit on how many times a user can receive a call so you don’t get flagged by carriers, rack up unnecessary charges, or end up in an infinite call loop. For this tutorial, you’ll set this limit to 5 calls.
Snooze and stop
To snooze the alarm, the user can ignore or decline the call. To stop the alarm, the user will answer the call to an automated greeting, and can press any digit to stop the call cycle.
Time zones
Traditional wake-up call services at hotels don’t need to worry about time zones as they wake up guests at their hotel. However, for this service, you may have users from different time zones or your service could possibly be hosted on a server in a different timezone from yours. Luckily, the Node Schedule package allows you to insert a timezone variable to specify exactly when to trigger an alarm.
Build the service
Now that you’re familiar with the components that will be built, let's start off by scaffolding out the project. Open your terminal/shell, navigate to a preferred directory where your project will be held, and enter the following command to initiate a new Node project:
Now, open up your wake-up-call directory using your preferred IDE. Create two files named index.js and .env, and a folder named /services within the wake-up-call directory. Then, within the /services folder, create a file named alarm.js.
After initiating the Node project and creating these files, your project directory will look like the following:
Install dependencies
Next, you’ll need to install the dependencies needed for this project. You will need:
- The
twiliopackage to use the Twilio Programmable Voice API to send phone calls dotenvto access environment variables, which is where you will store your Twilio credentials, Twilio number, and your ngrok forwarding url- The
expresspackage to build your server which will be used to capture events of the call provided by Twilio. You’ll need to capture whether a user has picked up and pressed a digit to stop the alarm - The
node-schedulepackage to create scheduled cron jobs that will trigger the alarms at specified times
To install these dependencies, enter the following command in your terminal:
Setup environment variables
Open the .env file and add the following:
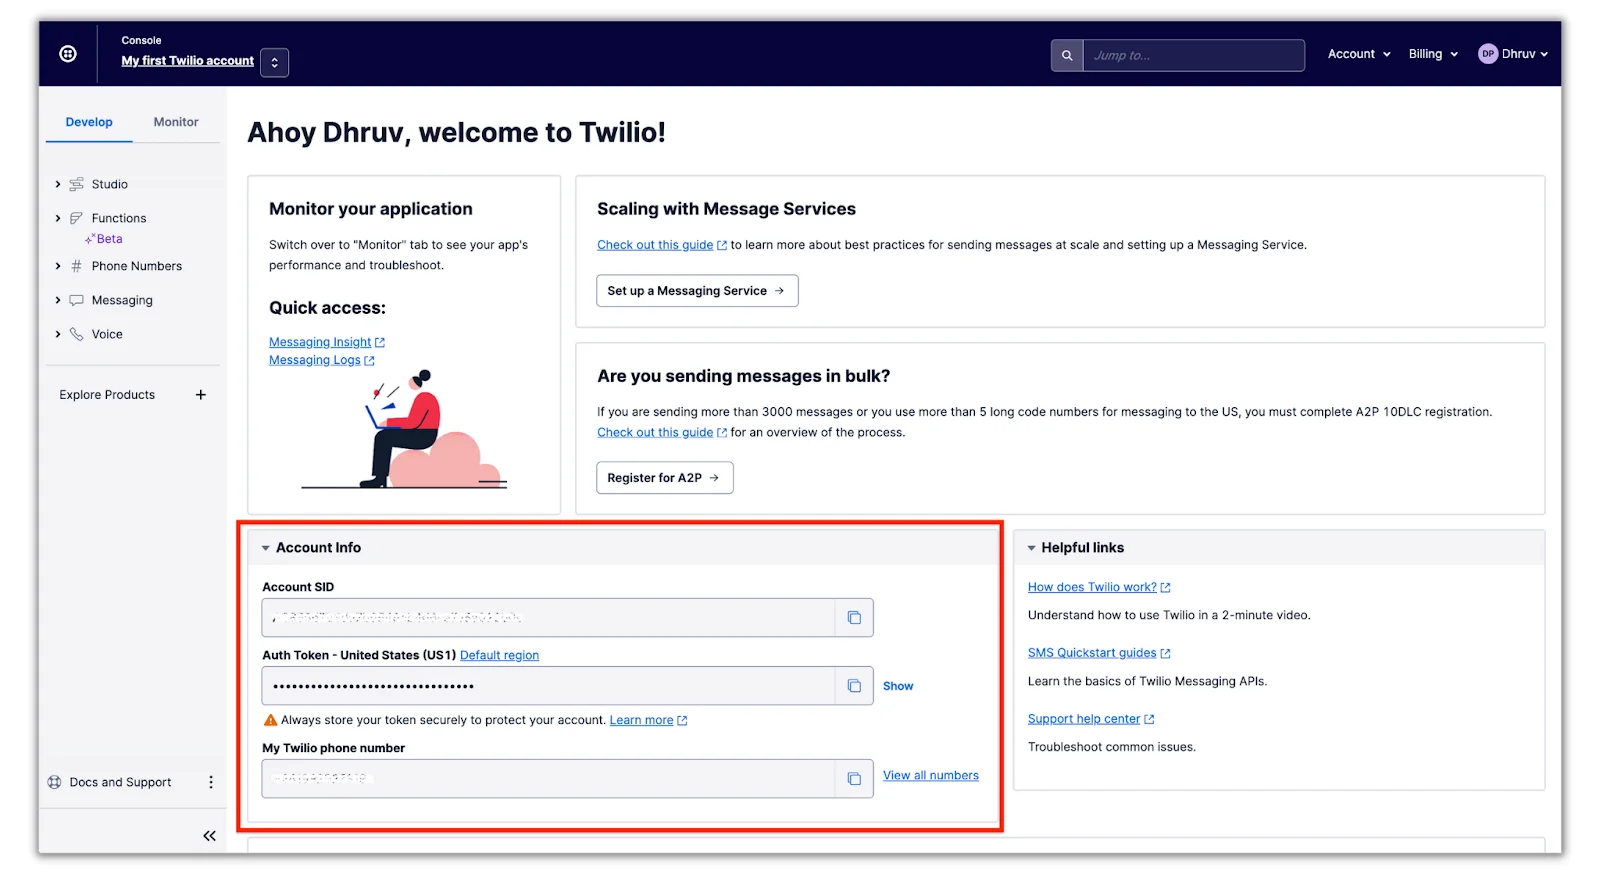
You’ll need to replace the XXXXXXXXXX placeholders with their respective values. Your TWILIO_ACCOUNT_SID, TWILIO_AUTH_TOKEN and TWILIO_PHONE_NUMBER can be found on the dashboard of your Twilio Console:
The SERVER_URL will be the URL of where your server will be hosted. You’ll plug this value in during the testing section of the tutorial as it will be generated by ngrok.
Build the alarm interface
In this section, you’ll build out your index.js file which will essentially be the interface for the alarm. In this file, you’ll create and stop the alarms and handle the voice response when users pick up a call.
Add in the following code at the top of the index.js file:
This code will initialize the express, twilio, and node-schedule packages you installed earlier.
Next, add in the the following line below the initialized packages:
This will import the createAlarm and stopAlarm functions – which you’ll create in the next section – into the index.js file.
Now, add in the following POST route to the end of the index.js file:
This /voiceResponse route will start off by creating a new VoiceResponse object which will be used to create TwiML that will instruct Twilio what to do with the call. The <Gather> verb will be used to gather the user's input. The input attribute is set to dtmf which will recognize touch tones (when a user inputs digits during a call). The numDigits attribute is set to 1 which will immediately trigger the action URL when 1 digit is inputted during the call. The URL route that will be triggered after a user inputs a digit will be /stopAlarm, which you’ll be creating next. The <Say> verb is nested within the <Gather> verb which will greet the user during the <Gather> execution.
This TwiML is finally passed back to the call as an HTTP response. When a user enters a digit during the call, the /stopAlarm route will be triggered to stop the call cycle.
Next, append the following code for the /stopAlarm route at the end of the index.js file:
This route will immediately run the stopAlarm() function when called. It will then create and pass back a TwiML VoiceResponse that will let the user know the alarm has stopped, and will then hang up the call using both the <Say> and <Hangup> verbs.
The last thing you’ll need to add to index.js is the following code, which will spin up the server and listen to all requests on port 3000:
Lets finally start building out the actual components of the alarm.
Build the alarm components
In this section, you’ll create the createAlarm and stopAlarm functions that are used in index.js. You’ll also be creating the executeCallCycle function that runs when an alarm is triggered.
Navigate to the alarm.js file located within the /services folder. Add in the following code to initialize the node-schedule and Twilio packages in the alarm.js file:
Next, add in the following variables, which will be used as your alarm settings. Then, replace the <YOUR_NUMBER> placeholder with your actual E.164 formatted phone number.
As mentioned earlier in the Alarm Overview section, the maxAttempts constant will be the limit on how many times a user can receive a call and the snoozeInterval constant will be the interval time of when the alarm call will be triggered again after being snoozed.
The recurring constant will determine if the alarm will be triggered every day or just once. The currentState variable will store the current state of the alarm and be used in the function's logic. Lastly, the alarmCronJob will hold the cron job object, and is used so it can be accessible throughout the alarm.js file.
Now, add in the createAlarm and stopAlarm functions to the alarm.js file:
The createAlarm function takes in an alarmTime parameter which can be a string in cron format, a JavaScript date, or as a recurrence rule which specifies when the job should recur. You’ll use a recurrence rule to create an alarm in the testing section. This alarmTime variable will then be plugged into the scheduleJob function.
The second parameter of the scheduleJob function will be a function that will be triggered whenever the job gets triggered. This function executes the executeCallCycle function and will set the currentState of the alarm to ’on’.
The stopAlarm function will reset the currentState of the alarm depending on the recurring variable. If the recurring variable is set to true, it will reset the state to ’ready’ so it can be ready to be triggered for the next day. If recurring is set to false, it will reset the state to off and cancel the cron job, so it won’t be triggered ever again.
The last thing left to build is the executeCallCycle function which will attempt to simulate the alarm ring as a phone call to the user. Add the following function to the bottom of the alarm.js file:
The function executeCallCycle is a recursive function named 'cycle' because it continues to be called until it reaches either the maximum number of attempts specified by maxAttempts or the current state of the alarm specified by currentState is not 'on'. Once either of the conditions are met, the function will break out of its cycle with a return statement and the stopAlarm function will be called to stop the alarm.
The function will create an outbound call using your Twilio phone number specified in the .env file and use the TwiML instructions from the /voiceResponse route (specified in the url attribute) you created earlier, to respond to the user.
The setTimeout function is used to set a timer that calls the executeCallCycle function again, once the timer is up. In this case, the timer is set to 9 minutes, specified by the snoozeInterval constant. When the executeCallCycle is called again, the attempt value gets incremented by 1 which is used to keep track of the number of call attempts to the user.
Test the Alarm Service
Now that you’re finished with building all of the alarm components in alarm.js, it’s time to test it all out!
You’ve probably noticed that there is no way for a user to set an alarm other than executing the createAlarm function programmatically, which is not practical. However, no need to worry, I’ll be covering that in part 3 of this tutorial series (coming soon) which will show how to create and set an alarm through Twilio Programmable SMS. But for now, as a demonstration, we’ll programmatically create and set an alarm.
Create an alarm through the code
Navigate back to the index.js file and add in the following code at the bottom of the file:
This code will create a recurrence rule from the node-schedule module that will trigger every day at 8:30 AM ETC. This rule is then plugged into the createAlarm function to be used as the alarm time.
Since this is located in the index.js file, this code will execute once we run the service. In production applications, it’s not recommended to run code like this since your service can restart itself, depending on the state of the application or the hosting service you’re using (which can delete ongoing cron jobs and create another alarm). In part 3 of this series, you will set an alarm through Programmable SMS which will be captured and read by your service.
Create an ngrok tunnel
Before you test and run your service, you’ll need to use ngrok to tunnel your server to a publicly accessible URL so all HTTP requests can be directed to your Node.js server. This is specifically used in the executeCallCycle function when a call is created, so Twilio knows where to fetch TwiML instructions from – the /voiceResponse route on your server. Run this following command on your terminal to set this up:
Your terminal will look like the following after executing the command:
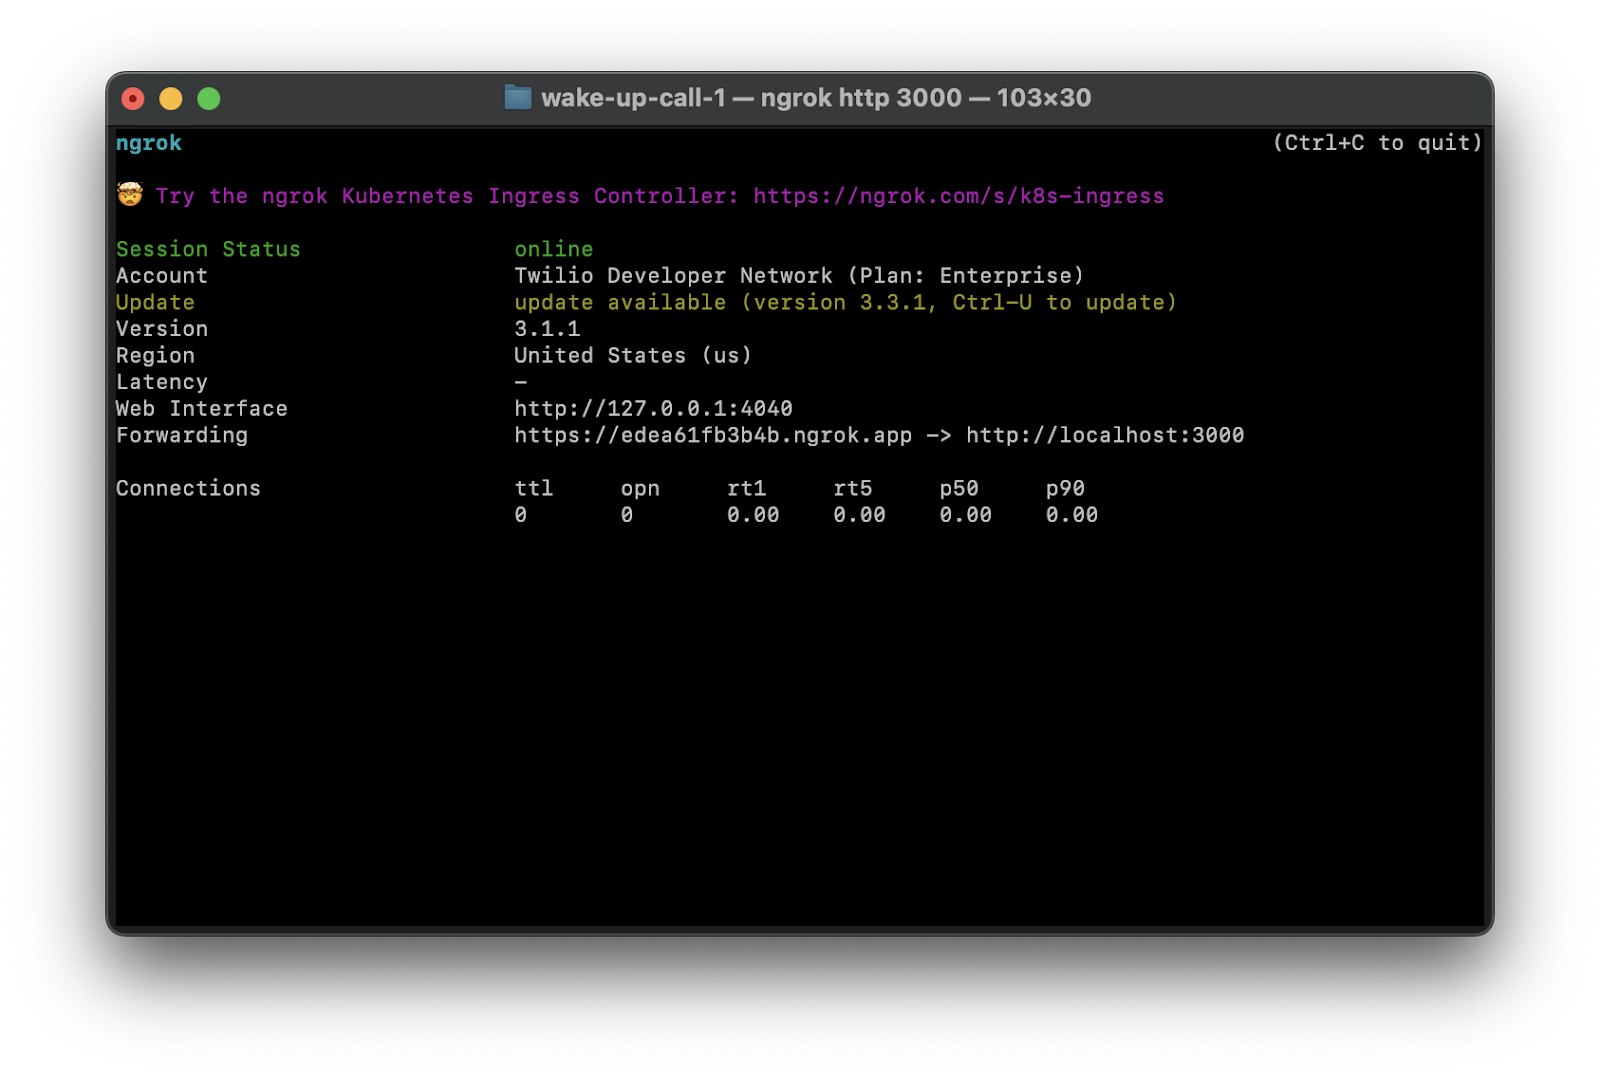
You’ll see that ngrok has generated a Forwarding URL to your local server on port 3000 – this port is where your service will be hosted after you run your application. Copy the Forwarding URL and replace the SERVER_URL placeholder in the .env file with it.
Run and test the alarm service
The last step before you test out your alarm service is to run the application. But before you run it, change the alarmTime.hour and alarmTime.minute values to a time that's closer to you, ideally to the next 2-3 minutes so you can test and see how the alarm call will execute.
Once the alarm time is changed, open a new tab in your terminal and run the following command to run your Node.js application:
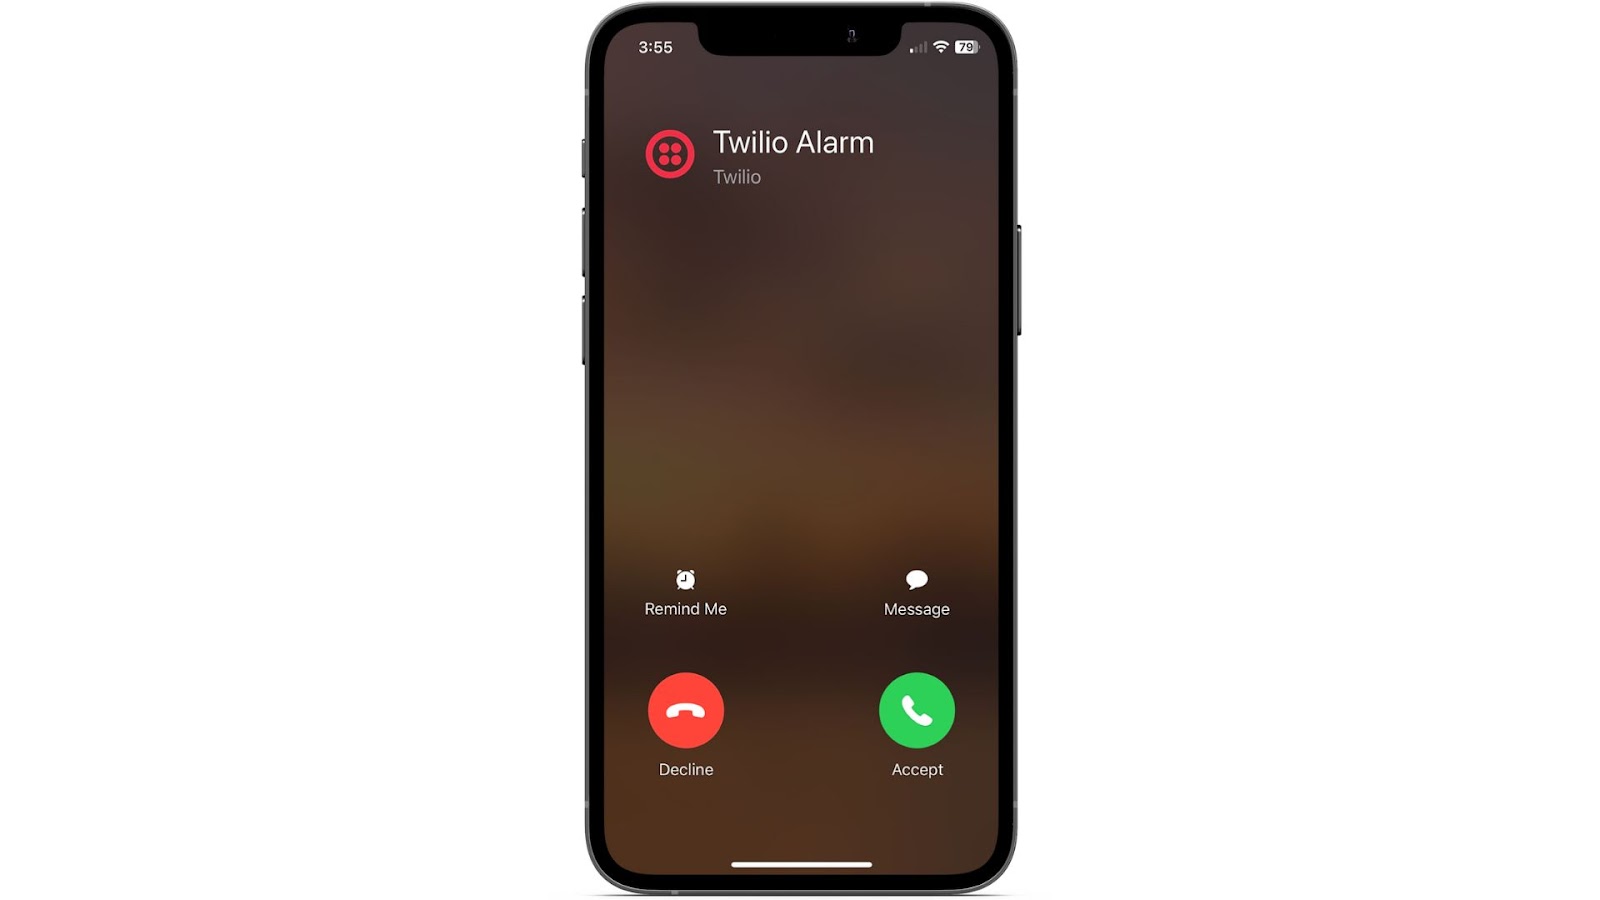
Now wait until you reach the specified time for your alarm and you’ll get a call from your Twilio number.

Pick up the call and listen for the greeting. Feel free to snooze by hanging up or end the alarm by pressing any digit.
Conclusion
Here, in part one of this tutorial series, you built an alarm clock phone service with Twilio Programmable Voice using cron jobs. You learned how to create outgoing phone calls and voice instructions using TwiML Then, you learned how to automate calls at set times using cron jobs.
The code for this part of the tutorial can be found in this Github repository.
Now with the basic wake-up call service setup, the next step will be to integrate the service with a database to handle multiple users and alarms which I'll be showing how to do in part 2 (coming soon)!
Dhruv Patel is a Developer on Twilio’s Developer Voices team. You can find Dhruv working in a coffee shop with a glass of cold brew or he can either be reached at dhrpatel [at] twilio.com or LinkedIn.


Related Resources
Twilio Docs
From APIs to SDKs to sample apps
API reference documentation, SDKs, helper libraries, quickstarts, and tutorials for your language and platform.
Resource Center
The latest ebooks, industry reports, and webinars
Learn from customer engagement experts to improve your own communication.
Ahoy
Twilio's developer community hub
Best practices, code samples, and inspiration to build communications and digital engagement experiences.