Using the Twilio Node.js Helper Library with AWS Lambda Layers
Time to read:
February 06, 2020
Written by

AWS Lambda is a serverless computing platform that enables you to run programs in response to events without having to configure and administer servers. The code that runs on AWS Lambda in response to an event is called a Lambda function.
With AWS Lambda Layers you can separate your function code from its dependencies so you won't have to upload them on every change of your code. A Lambda Layer is a ZIP archive that contains libraries, a custom runtime, or other dependencies. With Layers, you can use libraries without needing to include them in your deployment package. You can share layers across multiple Lambda functions, and moving runtime dependencies into layers can drastically reduce the size of your deployment package.
The Twilio Node Helper Library lets you write Node.js code to make HTTP requests to the Twilio API. Including the Twilio Node Helper Library in the code you deploy to an AWS Lambda Layer enables you to send voice and text messages with your Lambda function code. By using Twilio’s library your applications will require less code to be written and it will be easier to maintain.
What are you going to learn
The purpose of this post is to show you how to create an AWS Lambda Layer containing the Twilio Node Helper Library. You'll then be able to add this layer to your Lambda functions and use Twilio's Node Helper Library without needing to include it in your deployment package. You’ll save time when packaging and deploying your Lambda function.
What are you going to build
You’re going to create a Lambda function on AWS (Amazon Web Services). The function, when run, will send a text message. To make it more fun, you'll connect an Amazon CloudWatch trigger which will run your function automatically each day at a scheduled time.
Prerequisites
You’ll need the following tools and resources to complete the steps in this tutorial:
- AWS Free Tier account
- Twilio trial account
- Twilio Phone Number
- Node.js installed on your computer
Ready to build? Prepare the ZIP archive containing Twilio's library
Follow these steps to create a compressed file that you’ll upload to AWS:
On your Desktop, or other location of your choice, create a new folder: nodejs.
Open a console window and change to the nodejs folder.
Initialize a new Node.js project by executing the following command-line instruction:
Install Twilio's Node Helper Library with the following command:
If your operating system is Windows, find the nodejs folder you just created in the Windows Explorer, right-click on it, then click Send to > Compressed (zipped) folder.
If your operating system is macOS, right click on the nodejs folder, then click Compress "nodejs".
You now have a nodejs.zip archive containing Twilio's library and all the dependencies. The folder structure should look like this:
|-- nodejs.zip
|-- nodejs
|-- node_modules
|-- package.json
|-- package-lock.json
Note: When you installed with npm install twilio --save, Twilio’s library and dependencies (other Node.js libraries) went in the node_modules folder. For brevity these are not shown in expanded form in the above folder structure.
This folder structure (including the nodejs folder name) is necessary if you want to import Twilio's library in your code with require('twilio') without making other changes.
By convention, layers (like your nodejs.zip file) are extracted to the /opt directory in the function’s execution environment. Each runtime (Node.js, Go, Python, etc.) looks for libraries in a different location under /opt, depending on the language.
For a Node.js function using a Node.js runtime, this conventional location is nodejs. The resulting path for the library after uploading the .zip file would be /opt/nodejs/node_modules/twilio. With this path you can then use require('twilio') in your code to import and use the library.
You can read more about paths in the Including Library Dependencies in a Layer section of the AWS Lambda Developer Guide.
Create an AWS Lambda Layer
Open the AWS Lambda console at: https://console.aws.amazon.com/lambda/
On the left navigation panel, click Layers to open the Layers page.
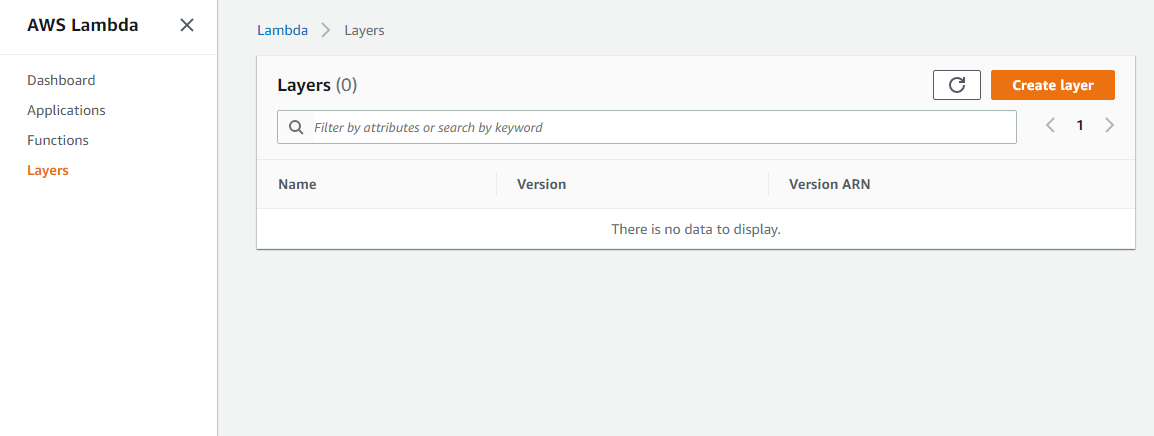
Click the Create layer button. You should see the Create layer page.
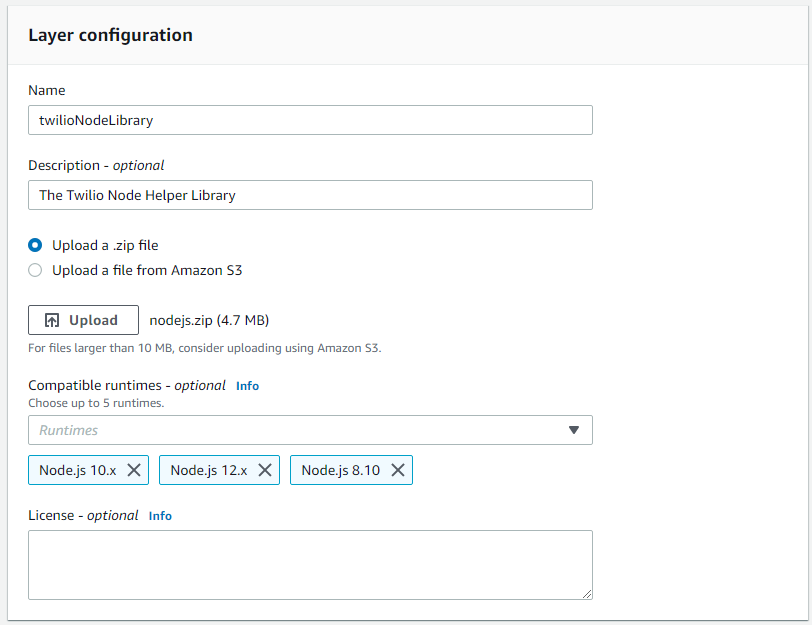
In the Layer configuration section, enter “twilioNodeLibrary” for the Name.
Choose Upload a .zip file.
Click Upload and, when prompted, add the nodejs.zip archive from your Desktop.
From the Compatible runtimes drop-down, select all three Node.js versions (Node.js 10.x, Node.js 12.x, Node.js 8.10), since Twilio’s Node.js library is compatible with all of them.
Click the Create button.
After your twilioNodeLibrary layer has been created, you can go to the next step to create a Lambda function.
Create an AWS Lambda Function
Open the AWS Lambda console https://console.aws.amazon.com/lambda/
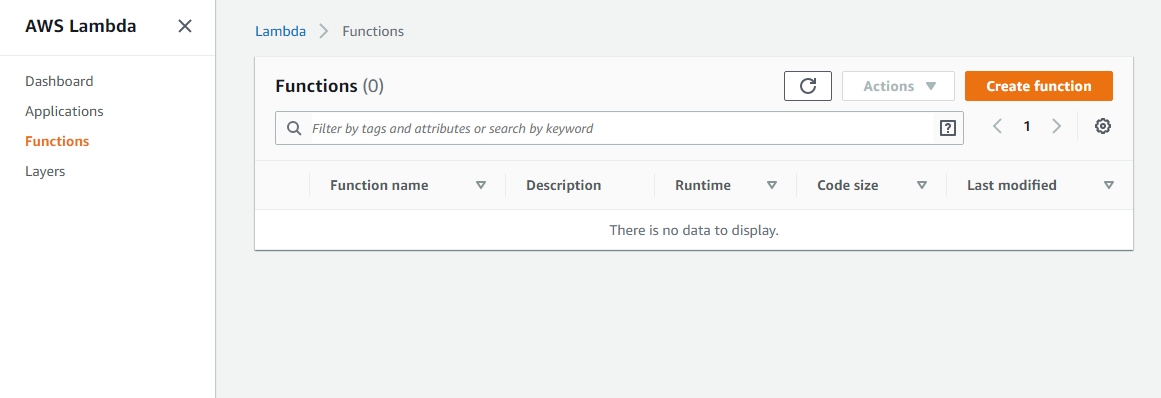
Click Create function.
On the Create function page, select Use a blueprint.
In the Blueprints panel, type “hello” for the filter, press Enter, and choose the hello-world (nodejs) blueprint.
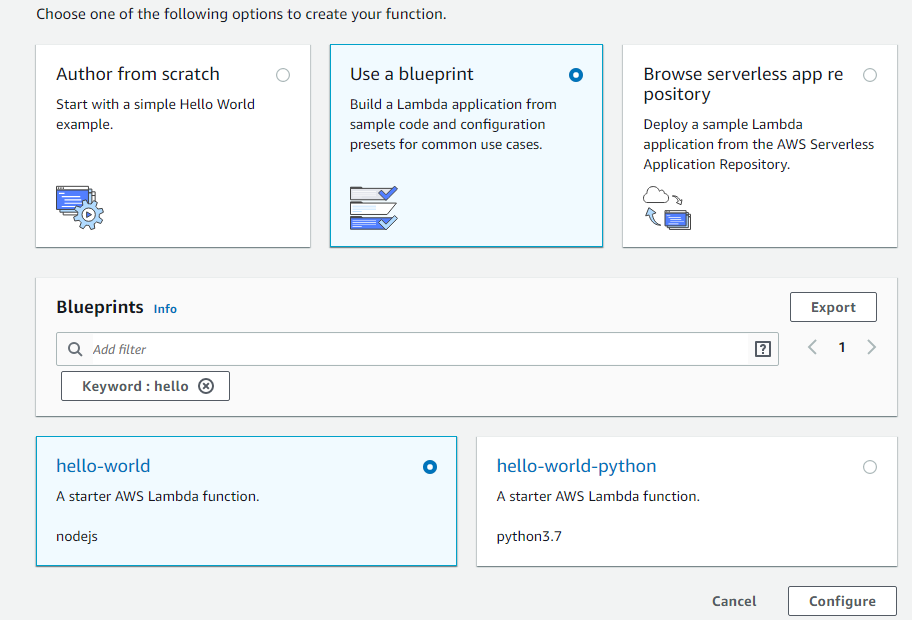
Click Configure.
In the Basic information section of the Configure blueprint hello-world page, do the following:
Enter “sendMessageWithTwilio” for the Function name.
Choose Create a new role with basic Lambda permissions.
Review the Lambda function code section. (You won't be able to edit the code yet.)
Click Create function.
Once the function is created you’ll be redirected to its configuration page:
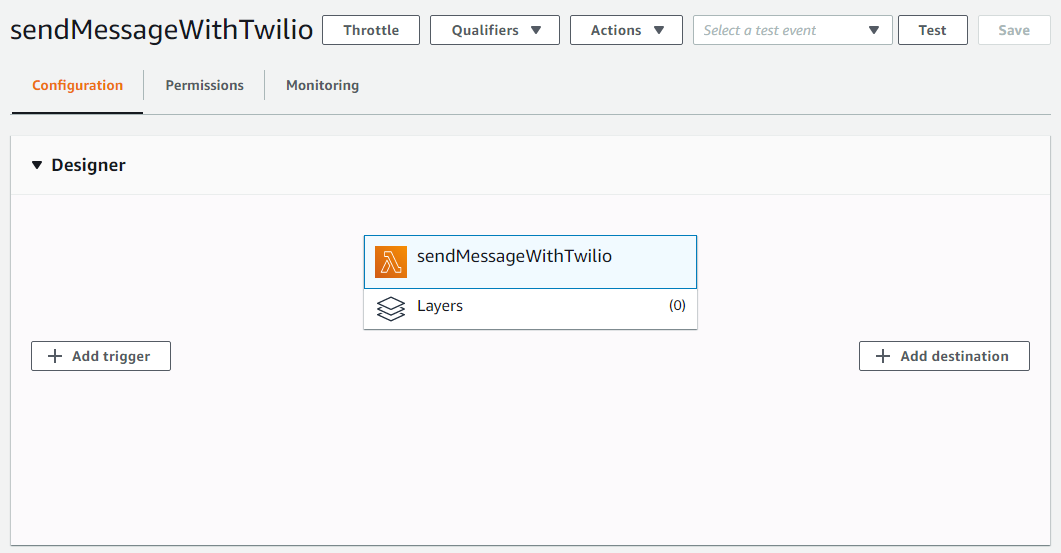
In the Designer section, make sure sendMessageWithTwilio is selected (has a blue shade).
Scroll down to the Environment variables section and enter key-value pairs for ACCOUNT_SID and AUTH_TOKEN.
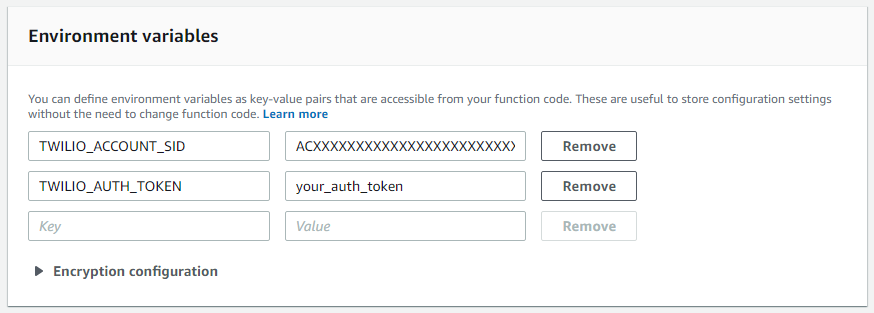
In the two Value fields pictured above, replace ACXXXXXXXXXXXXXXXXXXXXXXXXXXXXXXXX with your Account SID and your_auth_token with your Auth Token from your Twilio Dashboard.
You can use these environment variables to store secrets securely and retrieve them in your function code with const accountSid = process.env.ACCOUNT_SID and const authToken = process.env.AUTH_TOKEN.
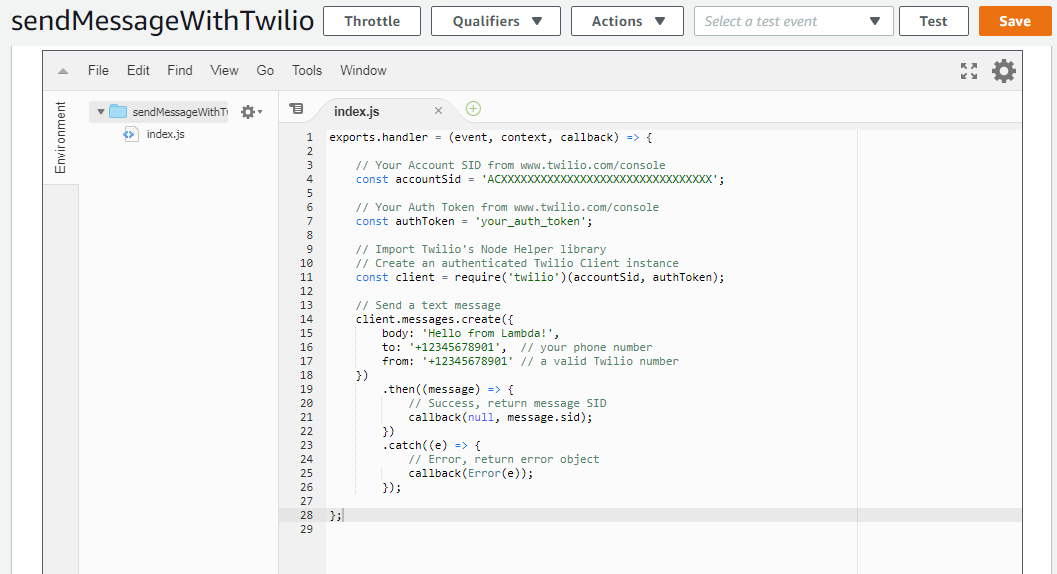
The values are used to create an authenticated Twilio client instance in the following line of code:
const client = require('twilio')(accountSid, authToken);
Scroll up to the Function code online code editor section and delete all the existing code in index.js and insert the following code:
You can send a text message by calling the messages.create() method of the Twilio client. This method takes to: and from: telephone numbers in E.164 as parameters. You should replace the value for from: with your Twilio number and the value for to: with the phone number where you'd like to receive the text message. Note that trial accounts can only send SMS messages to verified numbers, so the number you provide to the to: argument should be the number you used to sign up for Twilio, or another number you’ve verified.
After the message is sent and a response from Twilio is received, the function returns a message SID: callback(null, message.sid);
In case of an error the function returns an error object: callback(Error(e));
Save the code by clicking the Save button at the top right of the page.
Next, scroll down to the Basic settings section and click Edit. Because the default values of 126 MB and 3 sec are too low for the function to run properly, do the following:
Increase Memory (MB) allocation to 256 MB.
Increase the Timeout to 10 sec.
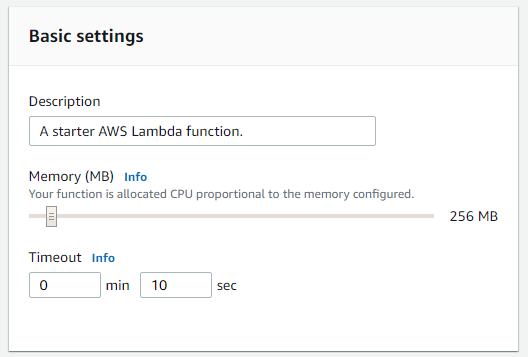
Save the configuration by clicking the Save button at the lower right of the page.
There is one more step left for you to do before you can test the function. Add the twilioNodeLibrary layer to the Lambda function.
Add a layer to your Lambda function
Still in the function’s configuration page, scroll back up to reach the Designer section and this time, click Layers.
Click Add a layer.
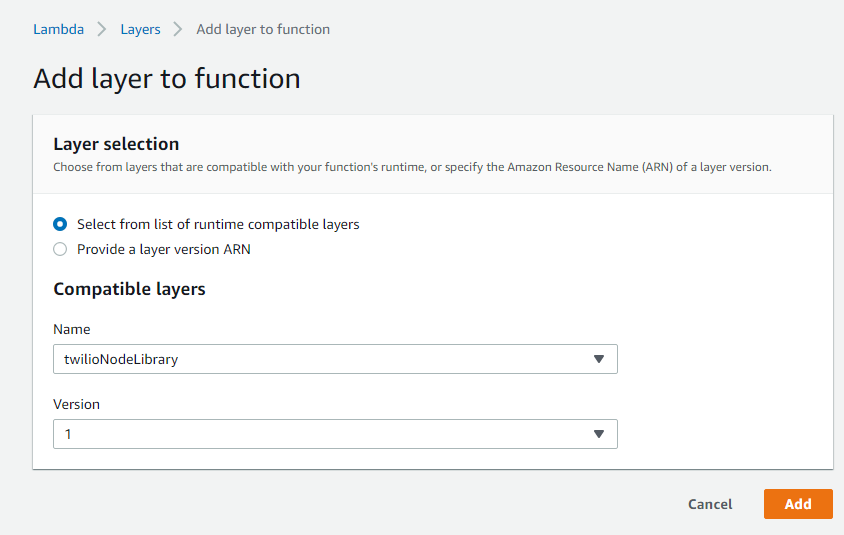
On the Add layer to function page:
Choose Select from list of runtime compatible layers.
Select twilioNodeLibrary in the Name dropdown.
Select 1 in the Version dropdown.
Click Add.
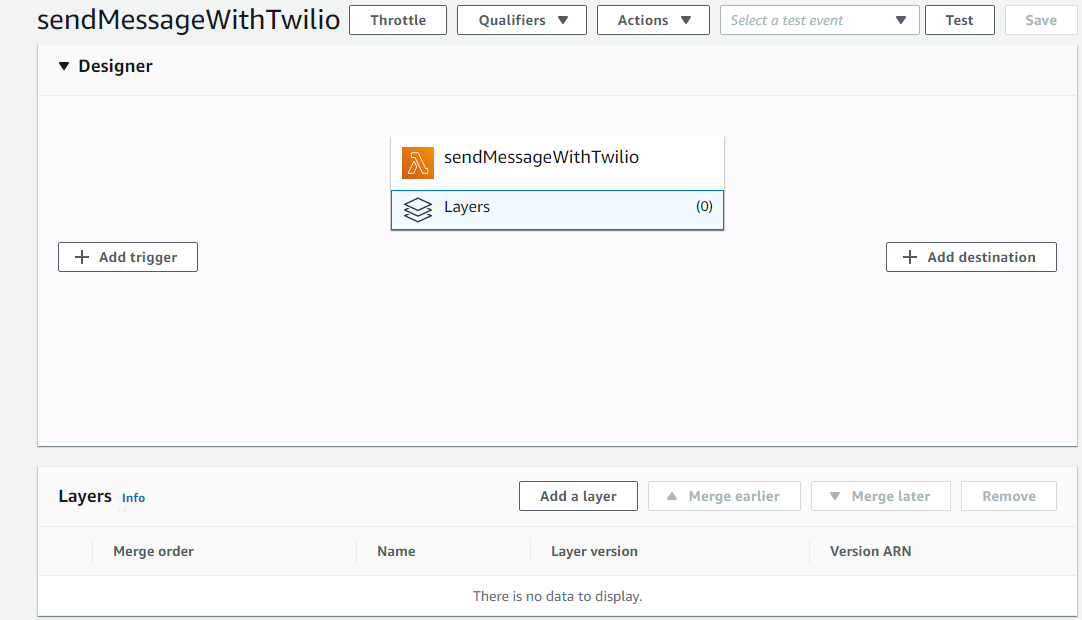
Once the layer is added you’ll be redirected back to the function’s configuration page. You can observe that the Layers box shows the added layer.
Click the Save button at the top right.
Test the Lambda Layer function
Ready to test the function? Click the Test button to configure a test event.
Use the Hello World test template default in the Event template dropdown and name the event, for example, “someTestEvent”.
The code within the body of the test event doesn't affect your function in this case and can be left as it is. Scroll down, and click Create. You’ll see a success message and the Test button will have a blue outline. With the test created, click Test again to test the code.
Once the function has run, the execution result will show at the top of the screen. If the test was successful the result has a green background and shows the message SID. For a failed test, the background will be pink and show the error information. For more detail look in the Log output section.
Want to have some fun? Schedule the AWS Lambda Function to run using CloudWatch
In this section you'll connect a CloudWatch trigger to your function. You can set up a rule to run your function on a schedule. All scheduled events use UTC time zone and the minimum precision for schedules is 1 minute.
After you tested your function, still on the function’s configuration page, if needed scroll to bring the Designer section in view.
Click on the Add trigger button. You should see a Trigger configuration page with a Select a trigger dropdown. Do the following:
Select CloudWatch Events in the Trigger configuration dropdown.
Select Create a new rule in the Rule dropdown.
Enter a Rule name, for example: “scheduledTextMessage”.
Choose the Schedule expression option under Rule type.
In the Schedule expression field enter a cron schedule expression. For example, if you’d like to run the function each day at 9:00 am UTC the expression would be cron(0 9 * * ? *) which means run every 9:00 am UTC, every day of the week, every day of the month.
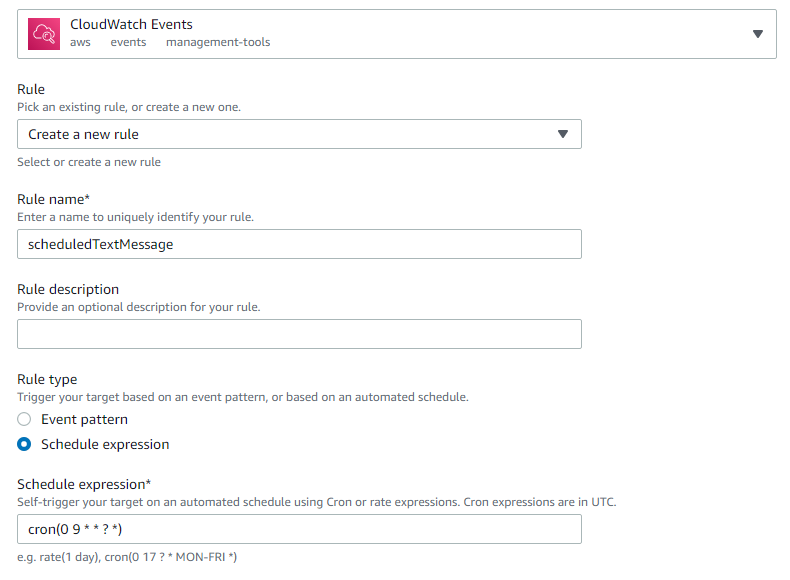
Click Add.
Read more about scheduled events at Schedule Expressions for Rules.
Summary
After following this tutorial you should have an introductory understanding of AWS Lambda Layers and know how to add them to your functions. You also had a chance to see AWS Lambda Layers in action. Layers offer a simple way to provide your Lambda functions with dependencies while saving you time.
Potential enhancements
To take this further, you could write other Lambda functions which use other libraries. Use npm install --save <library_name_here> to install other Node.js libraries before creating the ZIP archive and uploading it to Lambda Layers.
You could also experiment with other runtimes.
Additional resources
More about AWS Lambda Runtimes at AWS Lambda Runtimes - AWS. Lambda
Alex Baban is a Romanian-born Canadian web and mobile developer and is a Twilio Champion. Alex has been working on web sites in various capacities for over 15 years. In addition to software development, Alex has a background in electronics, with a Bachelor of Science in Electrical Engineering from the Technical University of Cluj-Napoca, Romania. Alex can be reached on Twitter @alexbaban.


Related Resources
Twilio Docs
From APIs to SDKs to sample apps
API reference documentation, SDKs, helper libraries, quickstarts, and tutorials for your language and platform.
Resource Center
The latest ebooks, industry reports, and webinars
Learn from customer engagement experts to improve your own communication.
Ahoy
Twilio's developer community hub
Best practices, code samples, and inspiration to build communications and digital engagement experiences.