Build a Chat App with Twilio Programmable Chat and React.js
Time to read: 10 minutes
November 25, 2020
Written by
Reviewed by

This tutorial will teach you how to build a chat app in React using Twilio’s Programmable Chat API. After finishing this tutorial, you will have developed a web app to chat with other participants.
Prerequisites
- Node.js
- A JavaScript package manager of your choice; npm or yarn
- A free Twilio account (if you sign up through this link we'll both get $10 in Twilio credit)
Getting started
React project setup
Create a new directory on your computer called chat-app and change directory into it:
Your new chat-app directory will house both the backend and frontend components of the app. To create a new React project for the frontend, run the following command in your terminal:
Change directory to the newly created React project folder, and start the scaffolded React app to make sure everything works:
After running the above commands, a browser window will open and you’ll see the React logo spinning:
Stop the server by pressing CTRL + C in your terminal. Now it’s time to install the dependencies that will be used throughout the app.
- Axios - HTTP client for all the API calls
- Material UI - React UI components
- React Router - React browser routing
- Twilio Chat SDK - Twilio Chat client library
To install these packages, run the following command:
At this point, you’re done with the React project setup. It’s time to set up the backend.
Backend server setup
Twilio provides you with a backend quickstart so that you can get your backend running in no time. These starters are available in many different languages. This quickstart provides the code required to generate an Access Token, which you’ll need later to authorize the client side of your app.
For this tutorial, you will be using the Twilio SDK Starter Application for Node.js.
In your terminal, navigate back to your parent directory, chat-app.
Clone the Twilio SDK Starter Application repository:
After the repository is cloned, change directory to enter the folder:
Install any dependencies required by the starter app:
Then, install the cors package to allow your React app to make requests of this backend app:
Open the app.js file inside the sdk-starter-node folder. Look for the line:
Anywhere below this line, add the following code:
Save and close this file.
Finally, duplicate the provided .env.example file and rename it to make it your actual .env file. Run the following command from your command prompt to do that:
In the next section you’ll gather your Twilio credentials and add them to your new .env file.
Twilio Account Setup
Head over to Twilio and create a free account if you don't have one already.
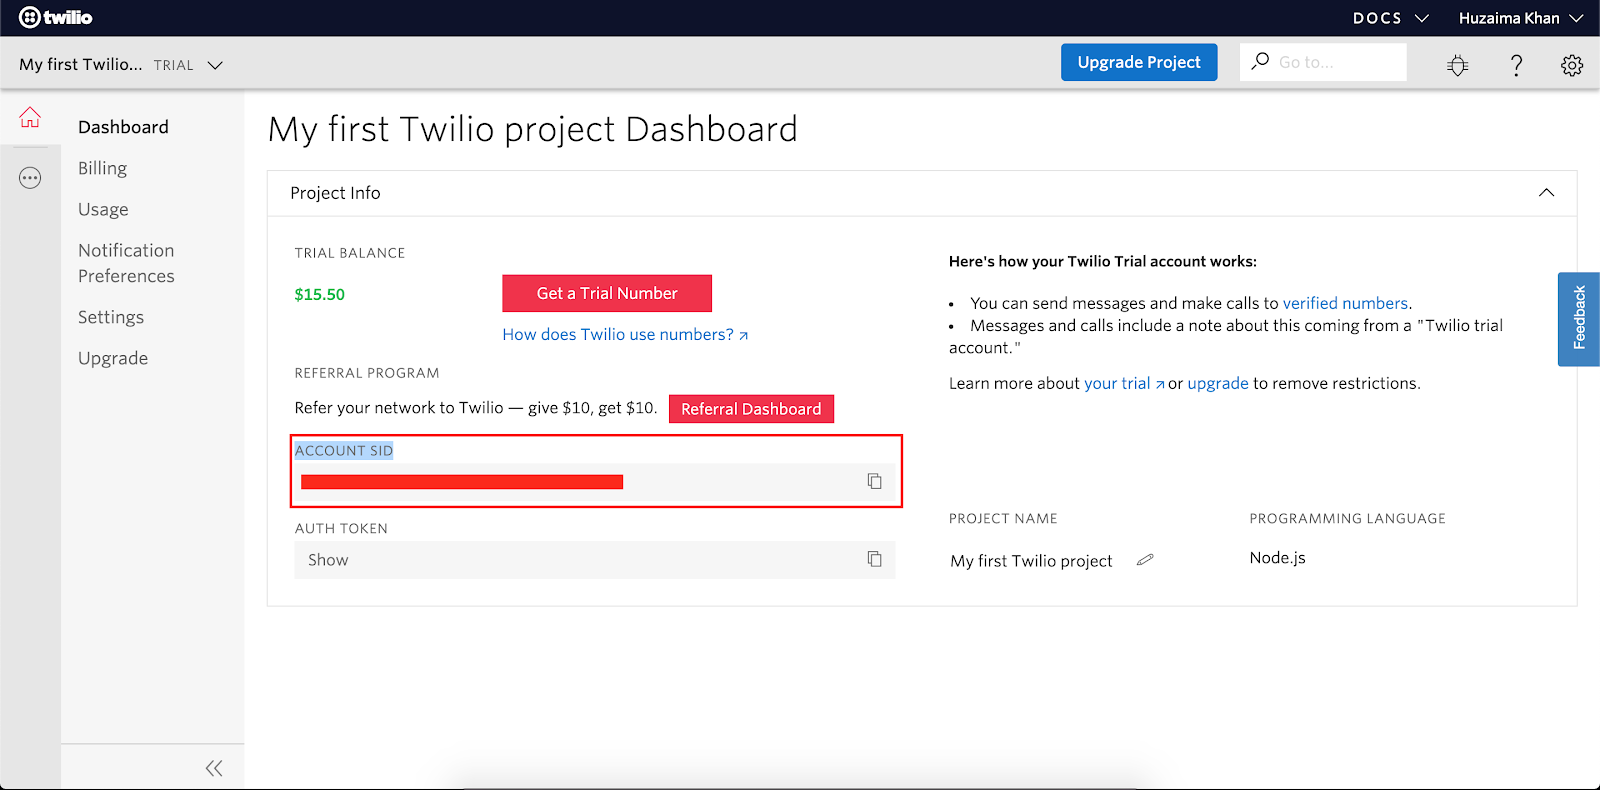
Once your account is ready, go to your Twilio Console and copy the Account SID as shown in the screenshot below. Paste it in your new .env file as the value for the TWILIO_ACCOUNT_SID environment variable, replacing the placeholder value.
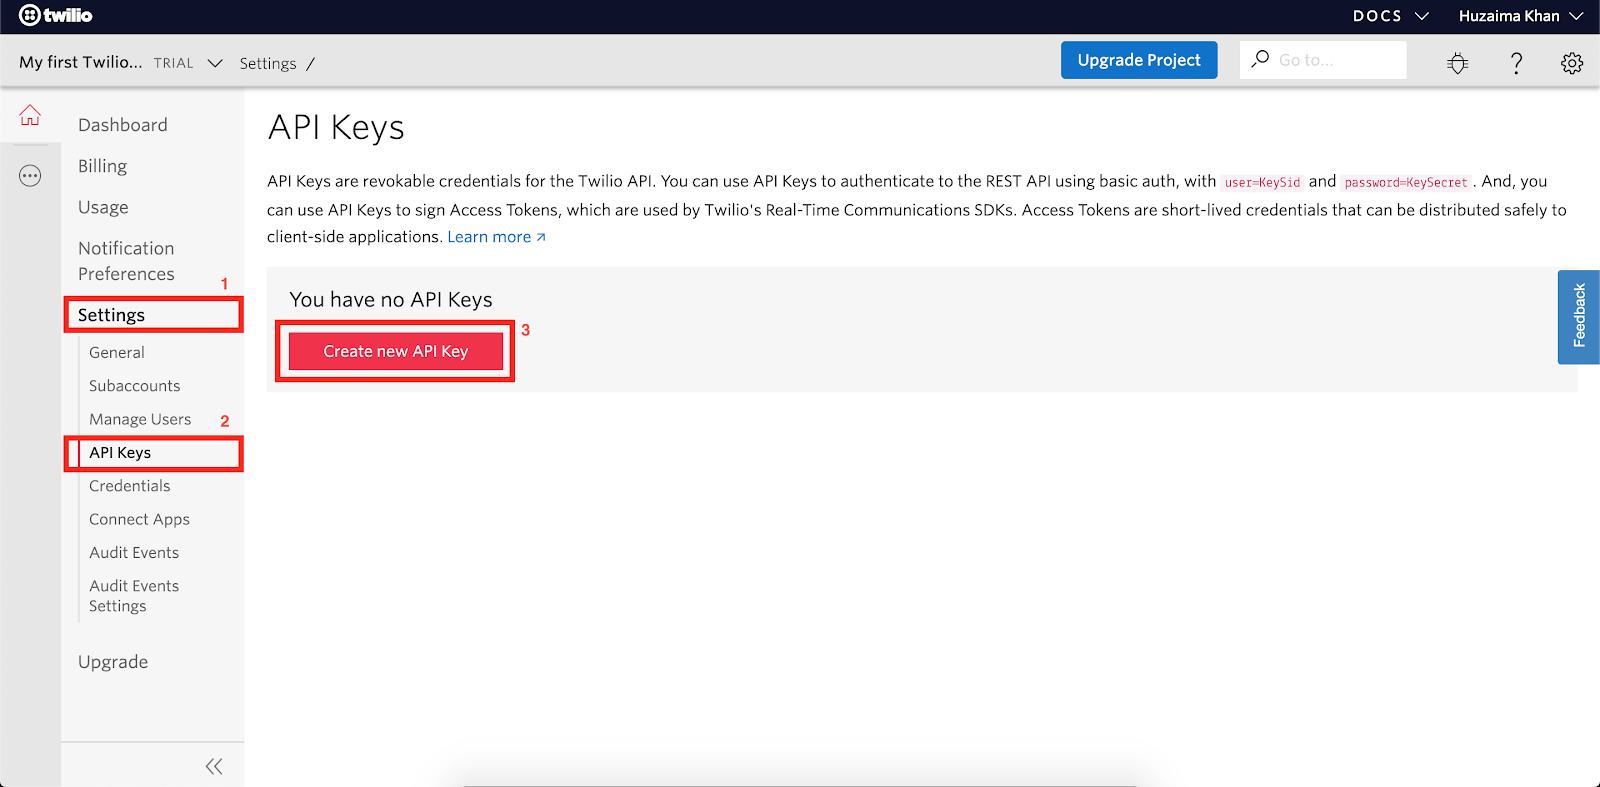
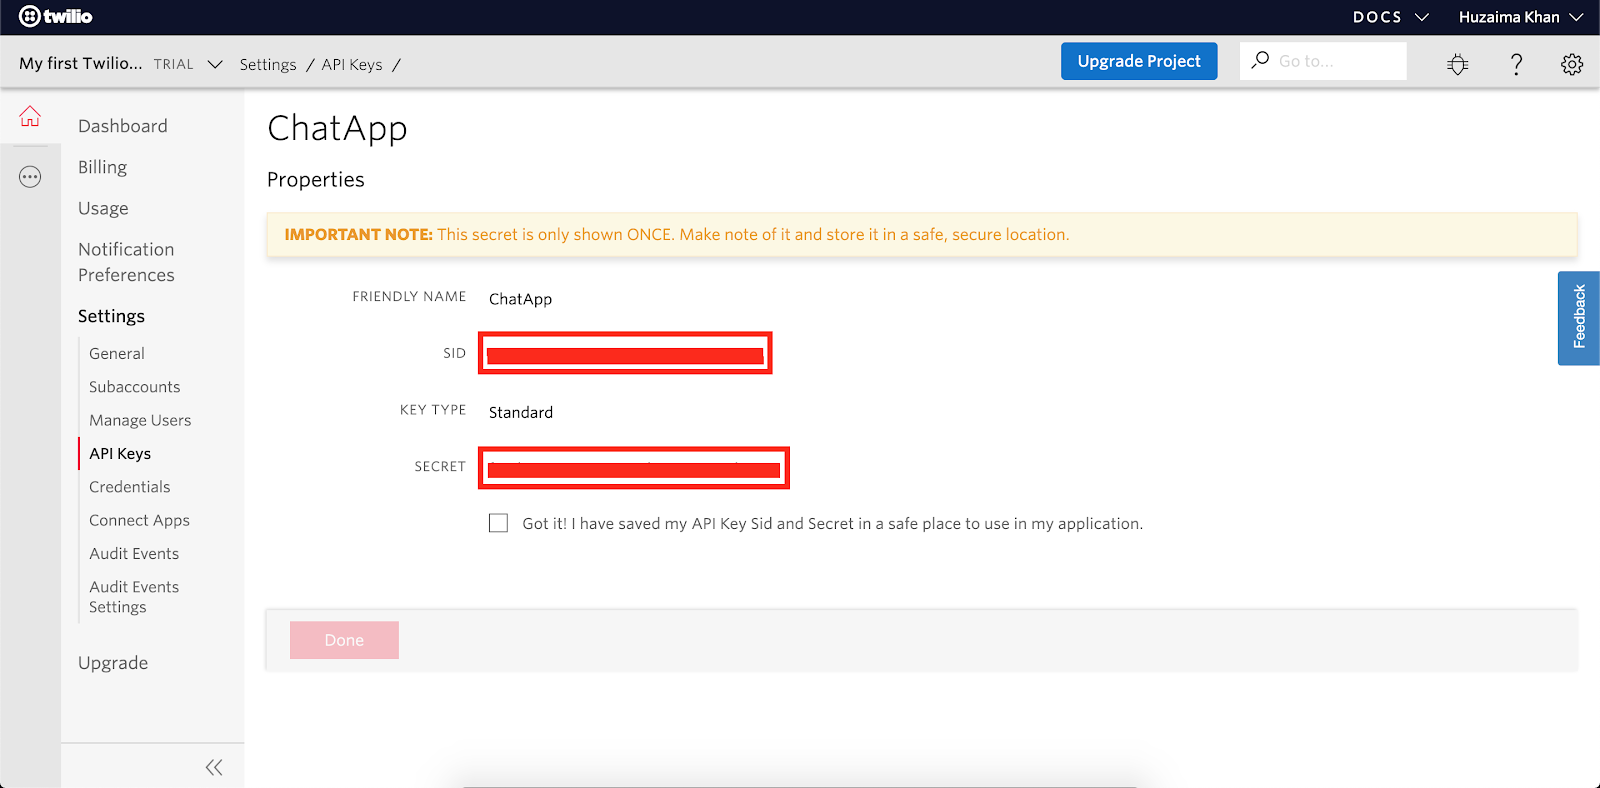
Next, you need to generate an API key for authentication purposes. Go to Settings → API Keys in the sidebar and click Create new API Key.
Give your API key any recognizable name, like ChatApp, and then click create Create API Key.
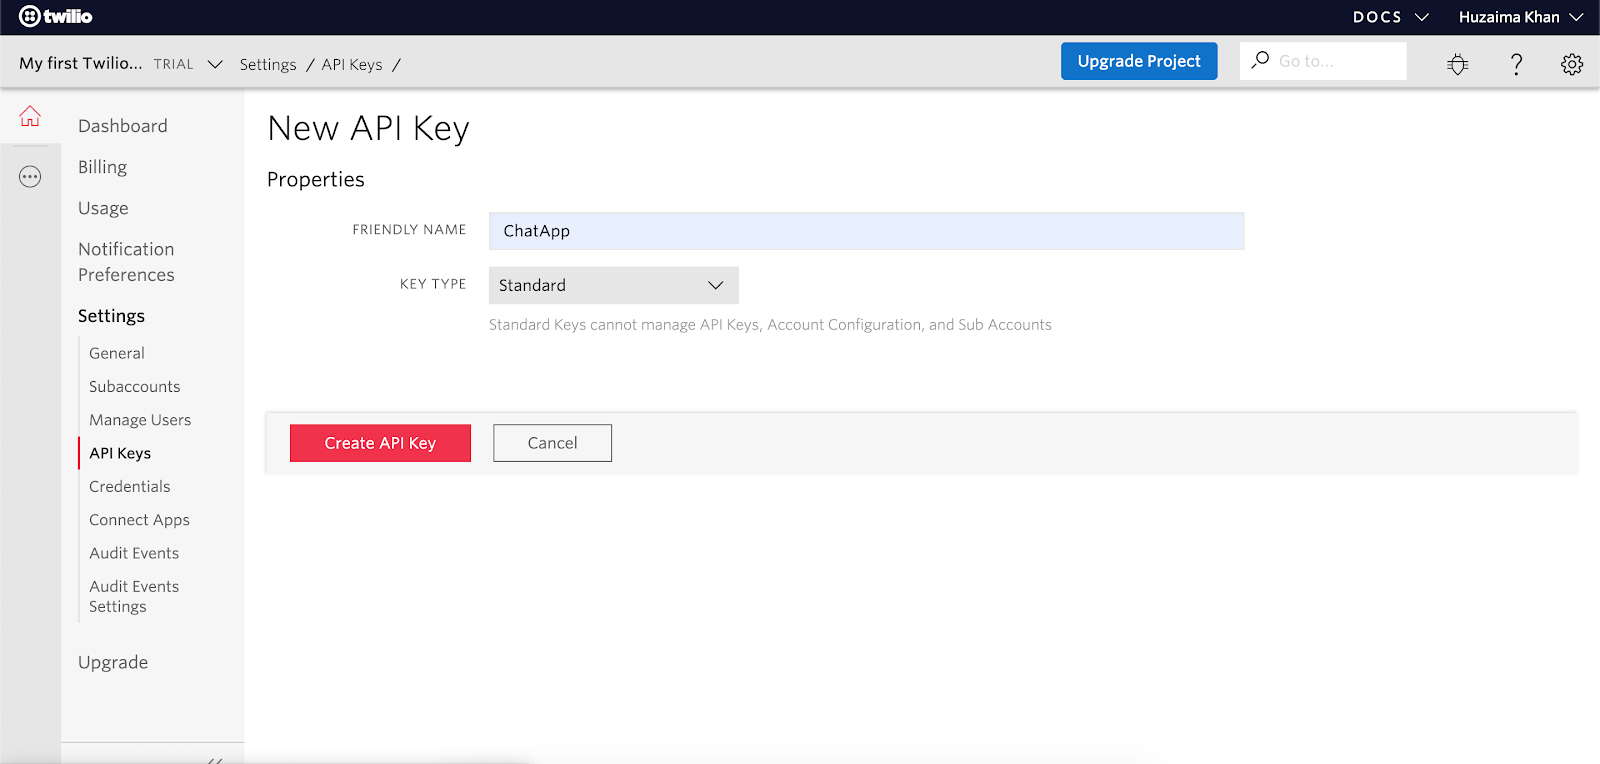
Copy the SID and SECRET and paste them as the values for TWILIO_API_KEY and TWILIO_API_SECRET in your .env file, respectively.
At this point, you’re done with general account settings, so you can move on to service-specific settings.
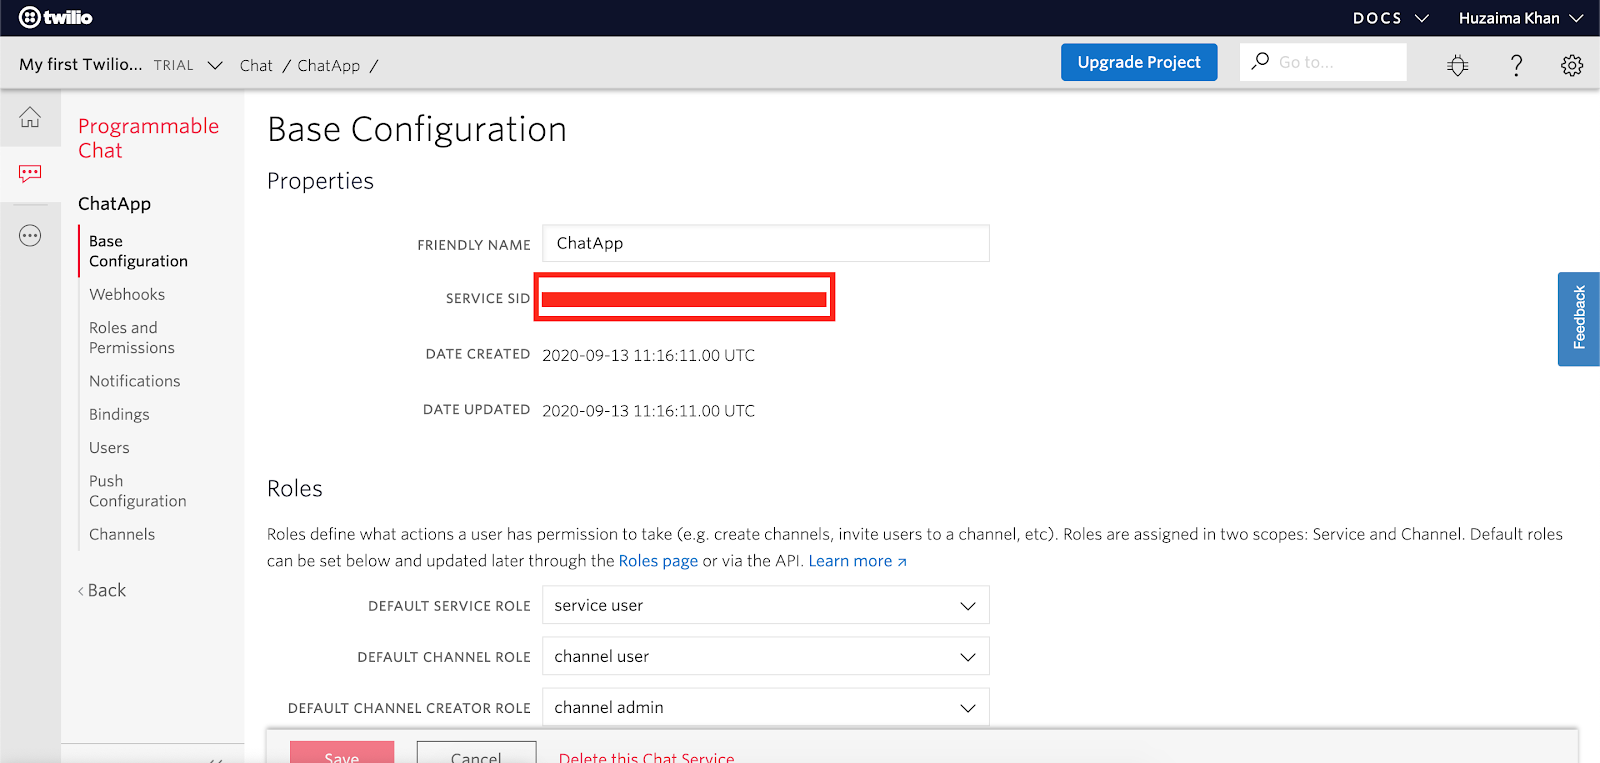
The next step is to create a new Chat Service. Go to the Programmable Chat Services section of the Twilio Console. Click the plus sign or Create button. You’ll be prompted to give your new chat service a name. After naming it, click Create again.
You’ll now be redirected to a configuration page for your new chat service. Copy the SERVICE SID for your service and paste it as the value for the TWILIO_CHAT_SERVICE_SID environment variable in your .env file.
Back in your command prompt, run the following command to start your local server on port 5000.
That’s it for the backend setup. Now it’s time to start fleshing out the React app.
The welcome screen component
The React portion of this project will feature four components: WelcomeScreen, ChatScreen, ChatItem, and Router. React Router will be used to create navigation inside the app, so that the ChatScreen component will be available on its own route: /chat.
The WelcomeScreen component serves as a lobby, where the user can enter their email address and the name of a chat channel to join. Their input will be passed to ChatScreen, where you’ll make use of the Twilio Chat client library to build the actual chat interface.
You’ll start with the WelcomeScreen component. Create a new file called WelcomeScreen.js inside the src folder of the React project (chat-app/react-chat). At the top of the file, add the necessary imports:
Beneath the imports, create the class for the component with a constructor method that initializes the component’s state:
Next, inside the WelcomeScreen class, beneath the constructor method, paste in the following code to create a method called login():
The login() method is called after the user enters their email address and chat channel, and clicks the Login button. The JSX for these login elements will be added inside another method called render() shortly. After the user presses the Login button, the login() method redirects them to the /chat route.
Next, beneath the login() method, still inside the WelcomeScreen class, paste in the following code to create a method called handleChange():
This method is used to create a two-way bind between the contents of an input field and the component’s associated state. For example, as the user types in the email input field, the email state is updated, which triggers a rerender. Upon rerender, the new value of the email input field is the value of the updated email state. This way, the email state is always representative of what’s been typed in the email input and the user has a seamless typing experience.
Now, for the render() method, paste the following code inside the WelcomeScreen class just before the closing bracket. This method contains all the JSX for the lobby screen and login elements.
Finally, below the WelcomeScreen class, before the export, paste in the following styles object.
Save and close WelcomeScreen.js.
The chat screen component
Create a new file called ChatScreen.js inside the src folder of the React project. This file will house the ChatScreen component code.
At the top of ChatScreen.js, add the necessary package and file imports:
Below the package imports, create the ChatScreen class with a constructor method that initializes the state for the component:
On line 12 in the code above, a React ref was created to give you access to the specific HTML element created by the component. This ref will be used shortly to enable scrolling to the bottom of the chat window when a new message is added.
Add utility functions
Now you’ll add a few utility functions to your ChatScreen component.
The joinChannel() function is responsible for joining the channel and subscribing to the event handler for the messageAdded event.
The handleMessageAdded() function appends the incoming messages to the component’s messages state.
The scrollToBottom() function scrolls the chat message list, using the ref created in the constructor method, so the user can see the latest message at the bottom of the chat message list.
To add these methods, copy and paste the following code beneath the constructor() method inside the ChatScreen component.
The componentDidMount() method
The next step is to create a componentDidMount() method inside your ChatScreen component. This is a special React lifecycle method, and is the crux of this chat app. This method is responsible for network requests, event handling, token acquisition and refresh, and channels and message management.
Add this method beneath the constructor() method inside the ChatScreen component:
In the code above, you added validation to make sure that you actually have an email address and room name. If either of them are missing, you will redirect the user back to the welcome screen.
Acquire an Access Token
An Access Token is a credential used to identify and authenticate the client with Twilio's Chat Service. The backend quickstart app you configured earlier in this tutorial contains the code required to generate this Access Token, but for additional reference, you can review Generating an Access Token for Twilio Chat, Video, and Voice using Twilio Functions.
Tokens are short-lived and need to be refreshed upon expiry. The same endpoint is used for both acquiring a new token and refreshing a token. Add another utility function inside your ChatScreen component to fetch a token from your project’s backend:
With the utility function in place, you can edit the componentDidMount() method to call this function. The call to getToken() is wrapped in a try/catch block, because without a valid token you cannot proceed. Add the highlighted lines to your componentDidMount() method:
Initialize the Twilio Chat SDK
As soon as you obtain a token, you can initialize the Twilio Chat Client and put a token refresh mechanism in place. Twilio provides two events to help you manage token expiration: tokenAboutToExpire and tokenExpired. To add event listeners for these two events, copy and paste the highlighted lines beneath the existing code inside your componentDidMount() method.
Create or join a channel
Once the chat client is initialized, you can create a new chat channel or join an existing channel. To join an existing channel, fetch the channel resource from Twilio by using the SDK method getChannelByUniqueName() and passing to it the room name provided by the user.
In case that the channel doesn’t exist, an exception will be thrown. If it does exist, the method will return the channel resource, and from there, the channel can be joined.
To manage the possibility of an exception, fetching and joining the channel can be done in a try block. If the fetch fails, the accompanying catch block can be used to create and then join the channel.
If the client has joined an already existing channel, it should then get any existing messages associated with the channel.
Messages can be fetched by calling the SDK method getMessages() on the channel resource after the channelJoined event is emitted on the client. The component’s messages state can be updated with the returned messages.
To implement this functionality, add the highlighted lines to the end of your componentDidMount() method inside the ChatScreen component:
This completes your componentDidMount() method. Next, you’ll learn how to send new messages to a channel.
Send messages to a channel
To enable message sending in your application, you’ll create a method called sendMessage(). This message will call the SDK method sendMessage() on the channel object and pass to it the message typed by your user. Inside the ChatScreen class, copy and paste the following code:
This method will be called when the user clicks the send button after typing a new message.
Component rendering
Any existing messages in the channel are accessible in the component's messages state. The following render() method will map over these messages to display them to your user. Each individual message will be mapped to its own ChatItem component. You’ll create this component in the next section.
In addition to displaying existing and newly sent messages, the ChatScreen component’s render() method will render a text field where the user can type a message along with a button for sending that message.
Add the following code to the end of the ChatScreen component before the closing bracket:
Finally, beneath the ChatScreen class, before the export, add the highlighted styles object.
The chat item component
Create a new file called ChatItem.js in the src folder inside your React project and paste the following code in it:
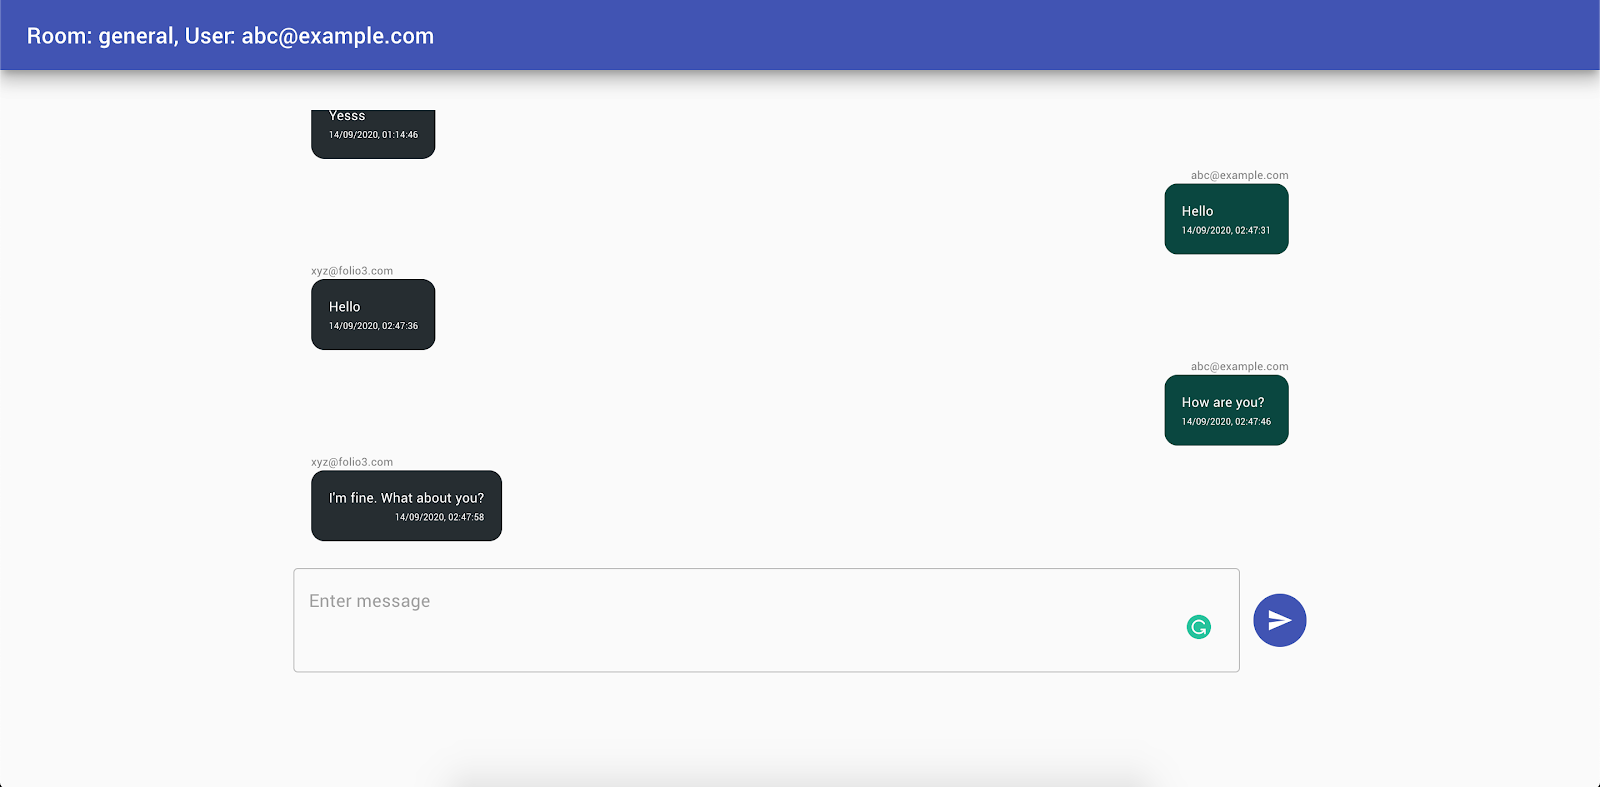
This component receives a message object through its props and renders the message body with other details, like its timestamp and author.
One thing that might catch your eye is the isOwnMessage variable. This variable is a boolean that reflects whether or not your client user is the author of the message. This variable allows you to appropriately style client-authored messages in order to differentiate between message senders. In the above code snippet, I applied different backgroundColor and alignItems styles based on whether the message was sent from this client or not.
Configuring React Router
Now that you have all the screens ready to roll, you need a way to tell React about which component needs to be shown on which route. For this, you will make use of the react-router-dom package that you installed earlier.
Create a new file called Router.js inside the src folder of the React project. Paste the following code in that file:
The above code tells React that whenever someone hits the /chat route, the ChatScreen component should be rendered, otherwise the user should see the WelcomeScreen component.
After your Router component is ready, you need to tell React to use it for routing. Inside the src folder of the React project, find the App.js file that was created automatically when you scaffolded the React app earlier. Replace the contents of that file with the following:
This code tells React to use your Router component for routing purposes.
Testing
In a new command prompt tab or window, navigate to the root of your React project, react-chat, and start the local server by running yarn start. Before starting the app, make sure your backend project is still running on localhost:5000.
Open the browser and head over to http://localhost:3000/ (replace the port with your own port if you’re not running it on 3000). You should be greeted with the welcome screen.
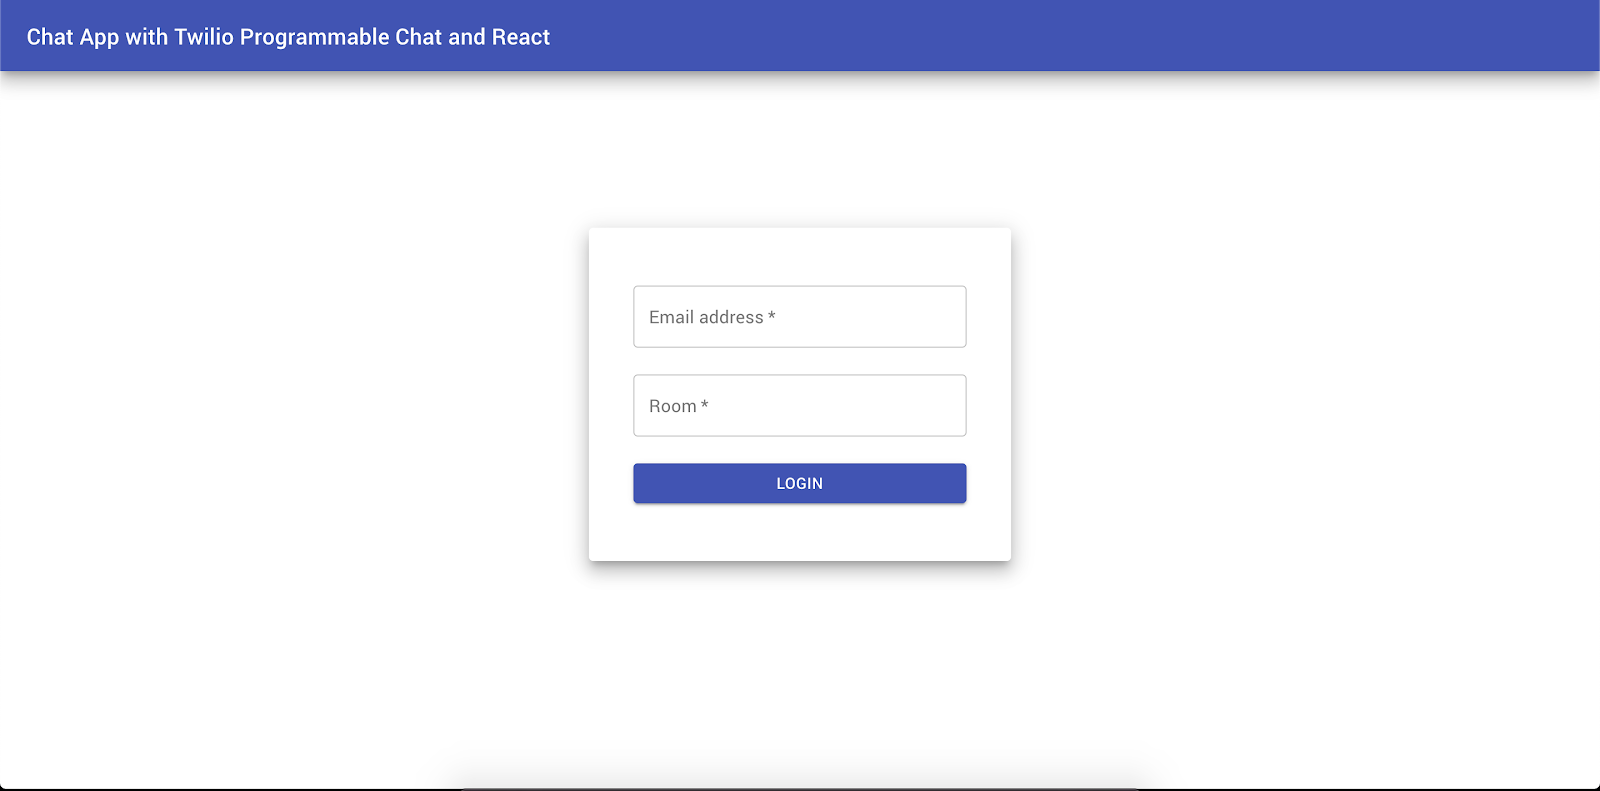
Enter your email address and the name of a channel you wish to join (it will create the channel if it does not exist already) and click the login button. This will take you to the chat window where any existing messages will appear. In a second browser window, visit http://localhost:3000/ again and enter a different email address but the same room name. This will allow you to test out the chat app as two different users.
Conclusion
In this article, you have learned how to build a chat app using React and Twilio Programmable Chat. For more info, check out the Twilio Programmable Chat Docs. You can find the complete React web app code on this GitHub repository. Stay tuned, we’ve more content coming up.
Huzaima is a software engineer with a keen interest in technology. He is always on the lookout for experimenting with new technologies. Other than this, he is passionate about aviation and travel. You can follow him on Twitter @HuzaimaKhan.


Related Resources
Twilio Docs
From APIs to SDKs to sample apps
API reference documentation, SDKs, helper libraries, quickstarts, and tutorials for your language and platform.
Resource Center
The latest ebooks, industry reports, and webinars
Learn from customer engagement experts to improve your own communication.
Ahoy
Twilio's developer community hub
Best practices, code samples, and inspiration to build communications and digital engagement experiences.