Build a Google Nest call notification system using Twilio
Time to read:
January 28, 2021
Written by

Overview
Security is an important factor in our life. Many security camera services provide a call notification as part of their subscription tiers. Unfortunately Google doesn’t let the users opt in for this extra service not even at extra cost.
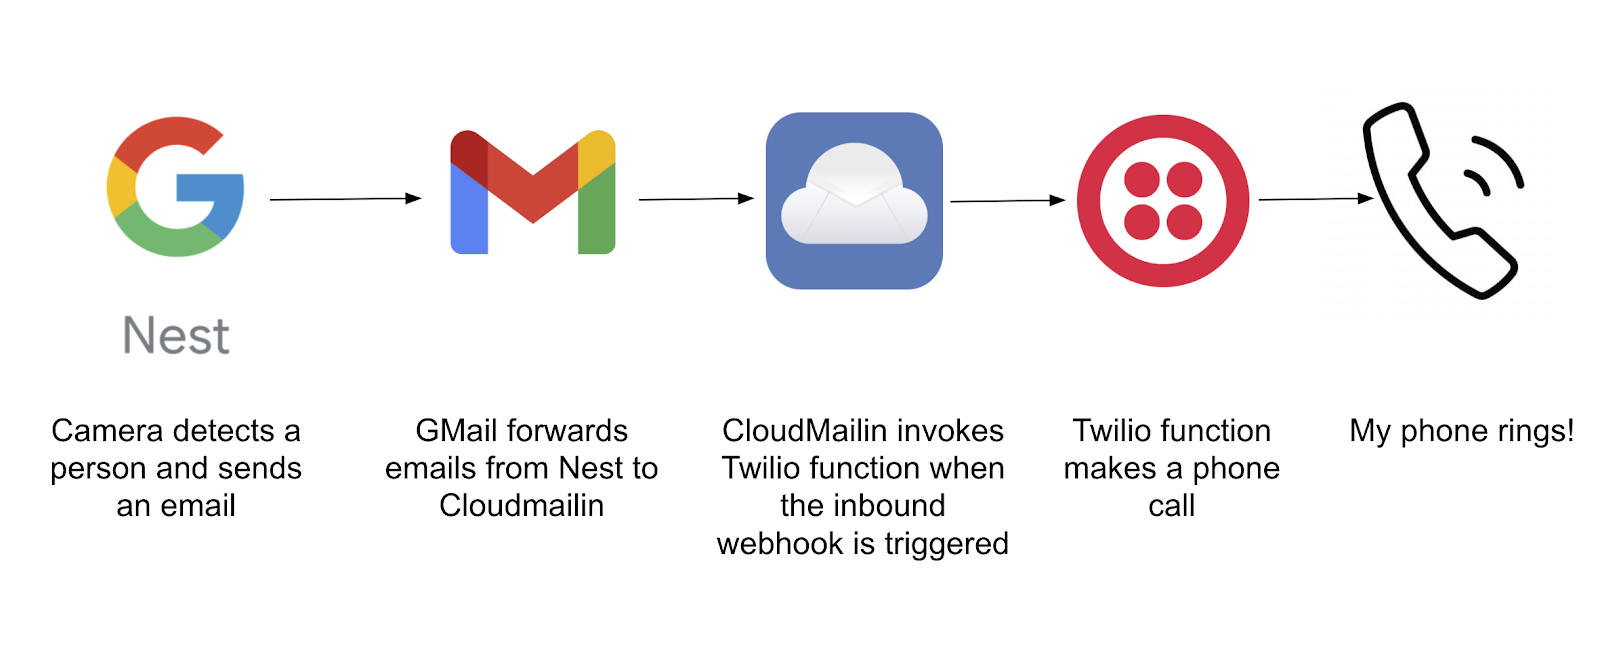
This tutorial will teach you how to create a call security system to alert you when a person is detected by your Nest security cameras using Twilio
Requirements
- A Google Nest Camera. You can buy indoor or outdoor ones directly from the Google store at store.google.com
- A free or paid Twilio account. If you are new to Twilio, get your free account now! (If you sign up through this link, Twilio will give you $10 credit when you upgrade)
- A free or paid Cloud Mailin account.
The Problem
Google Nest cameras are designed to monitor your house day and night and send you notifications directly to your smartphone devices when new activities are detected. From the Nest app, you can customize your notifications triggers and events. If you don’t want to get spammed with a lot of notifications every time a tree is shaken by the wind in your backyard garden, you can easily enable them only when a person is detected instead.
For me, the problem is that you can only get smartphone notifications and emails so, if something happens during the night while my phone is in silent mode, there’s no way I can get alerted in time. This is why I designed a way to get a phone call when this happens.
Application Overview
Configure the Nest Notifications
1. From the Nest app, go to your camera’s settings to enable the email notifications
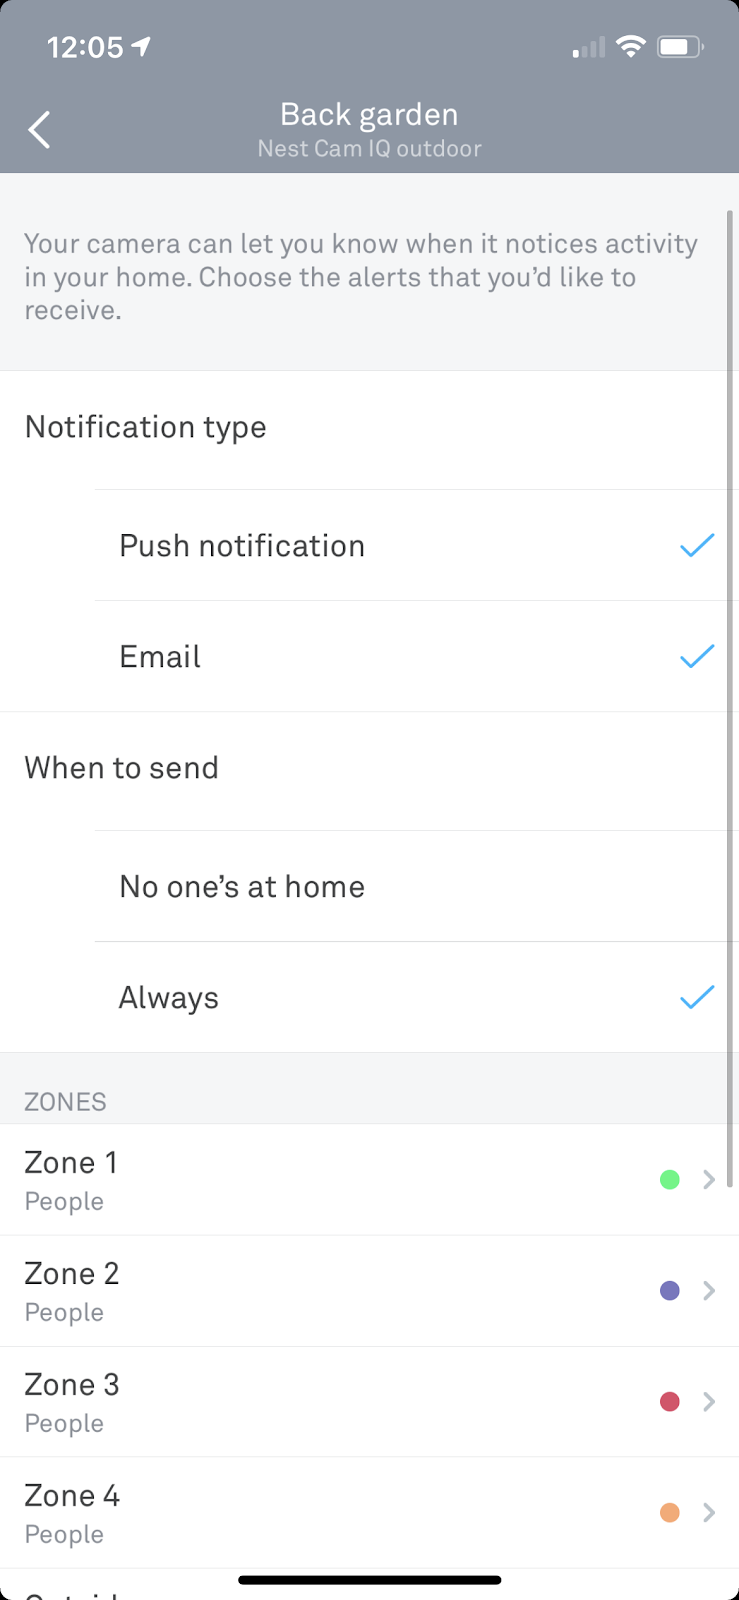
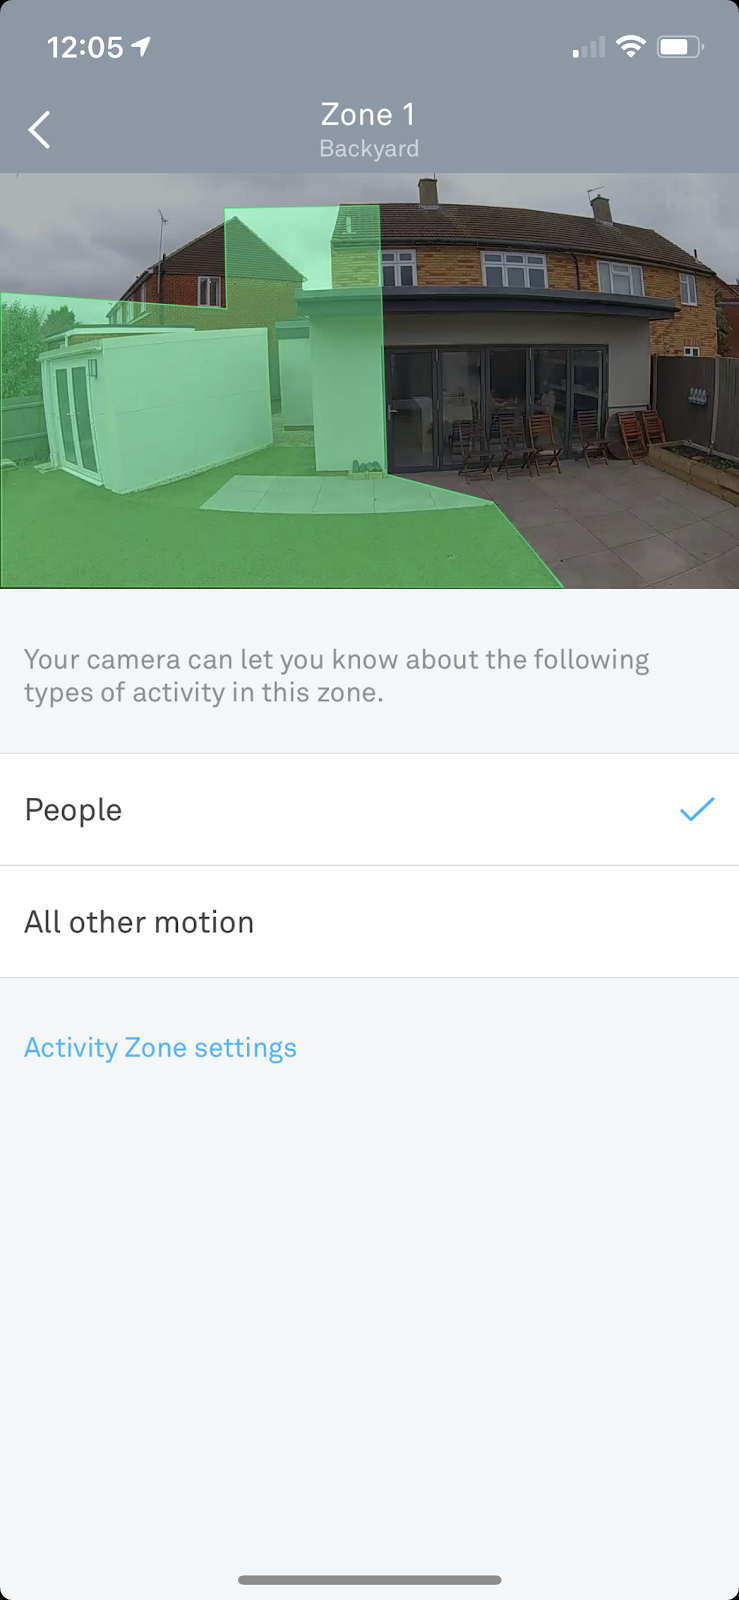
2. Make sure the notifications are delivered only when a person is detected (use the filters and zones if you like to restrict the trigger areas)
Create a Twilio Project
Create a new Twilio project or re-use an existing one. Just make sure you have a phone number available. Since we will need one for making the call to our phone, make sure the phone number is set to the same region of your personal number otherwise your call cost will increase.
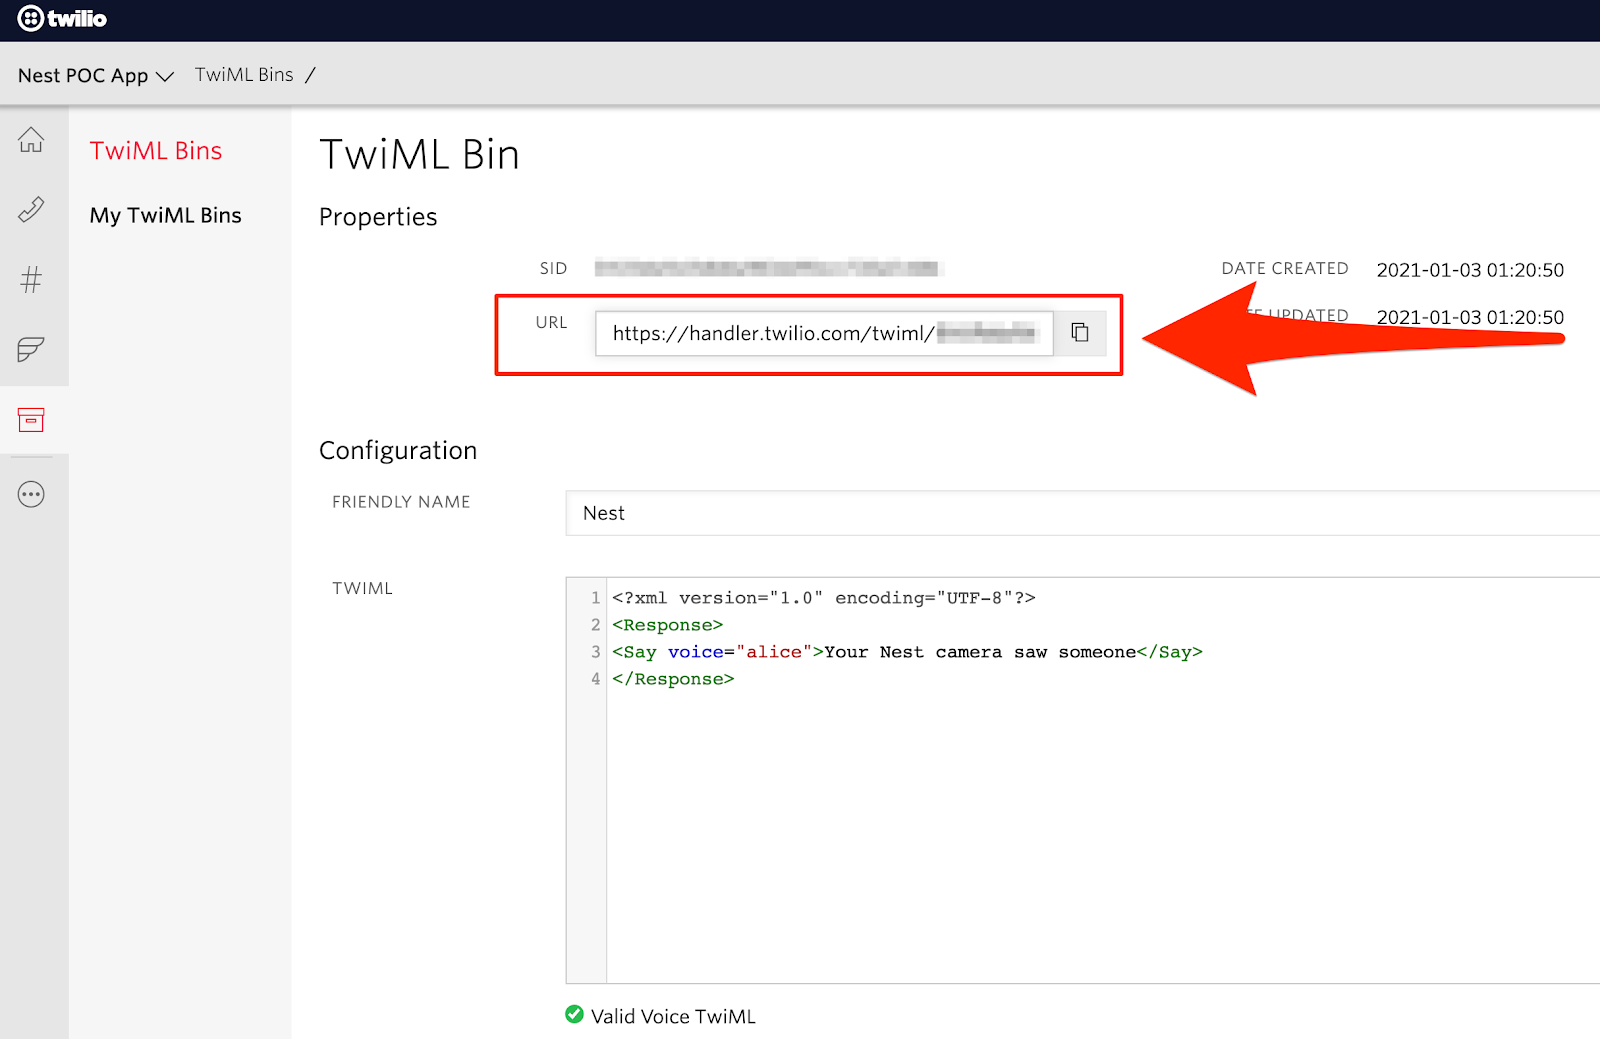
Now we need to create a simple TwiML containing the voice recording we’re going to hear when answering the phone. Navigate to the TwiML Bins from your Twilio console and create a new TwiML Bin named "Nest" with the following XML:
Now copy your TwiML URL and create a new Function.
Click the Functions service from your Twilio console, then click the Create Service button.
Name the service “Nest-Notifications”, then add a new function inside and call it “make_calls”
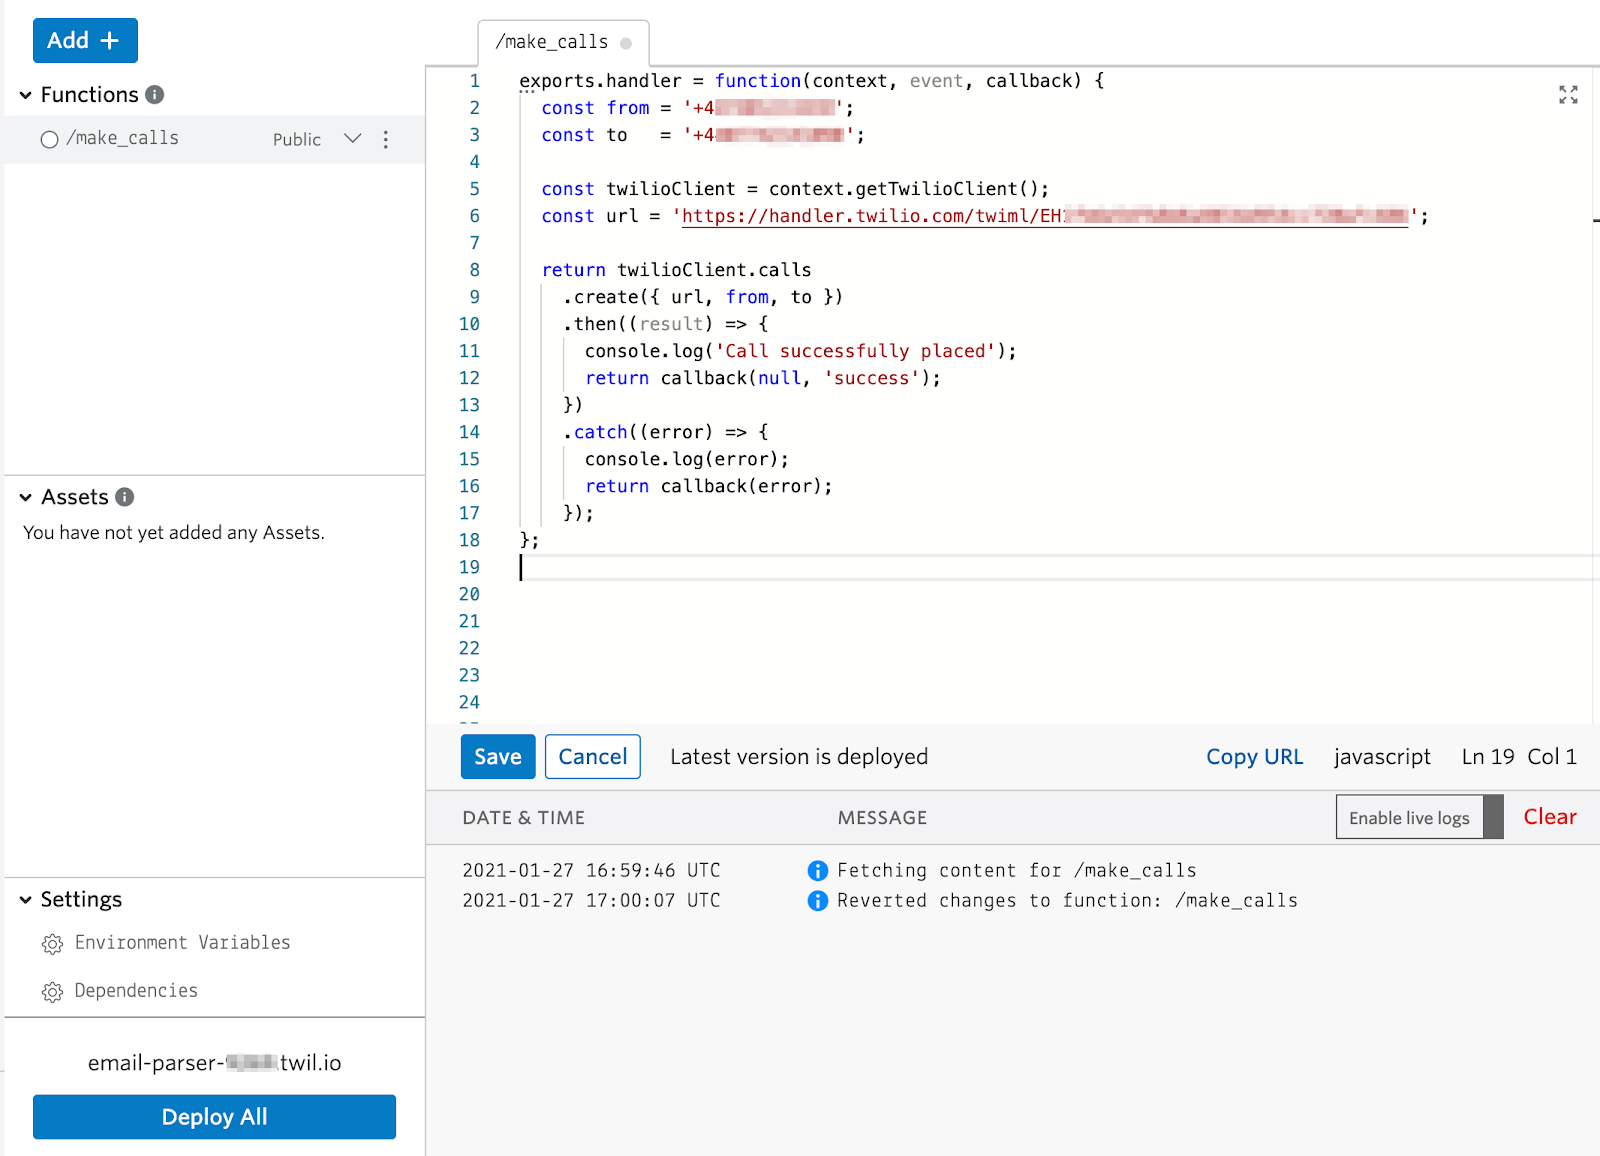
Paste in the following code and replace the missing information. Make sure to put the phone numbers in E.164 format:
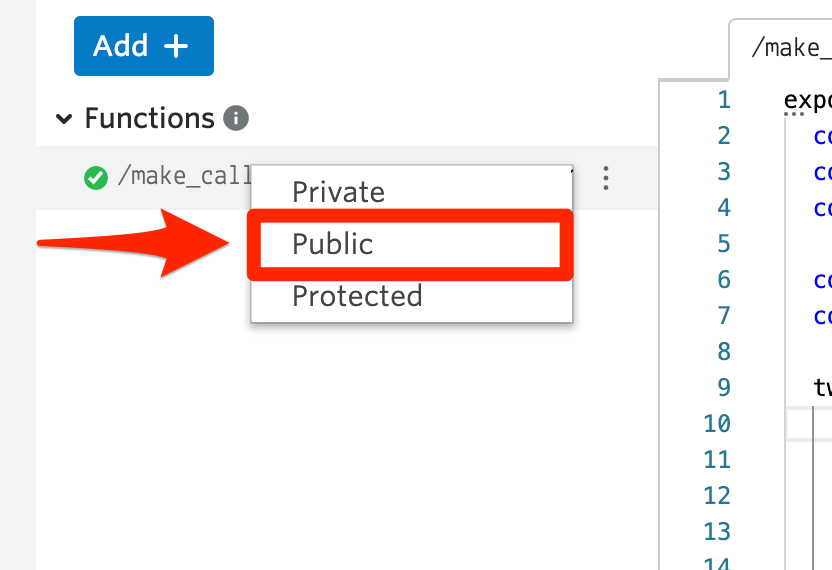
Change the /make_calls function to Public by clicking on the dropdown icon next to Protected.
Finish off this Twilio Function by clicking Save and Deploy All at the bottom of the dashboard. This URL is the HTTP endpoint for the next section.
Create a Free CloudMailIn Account
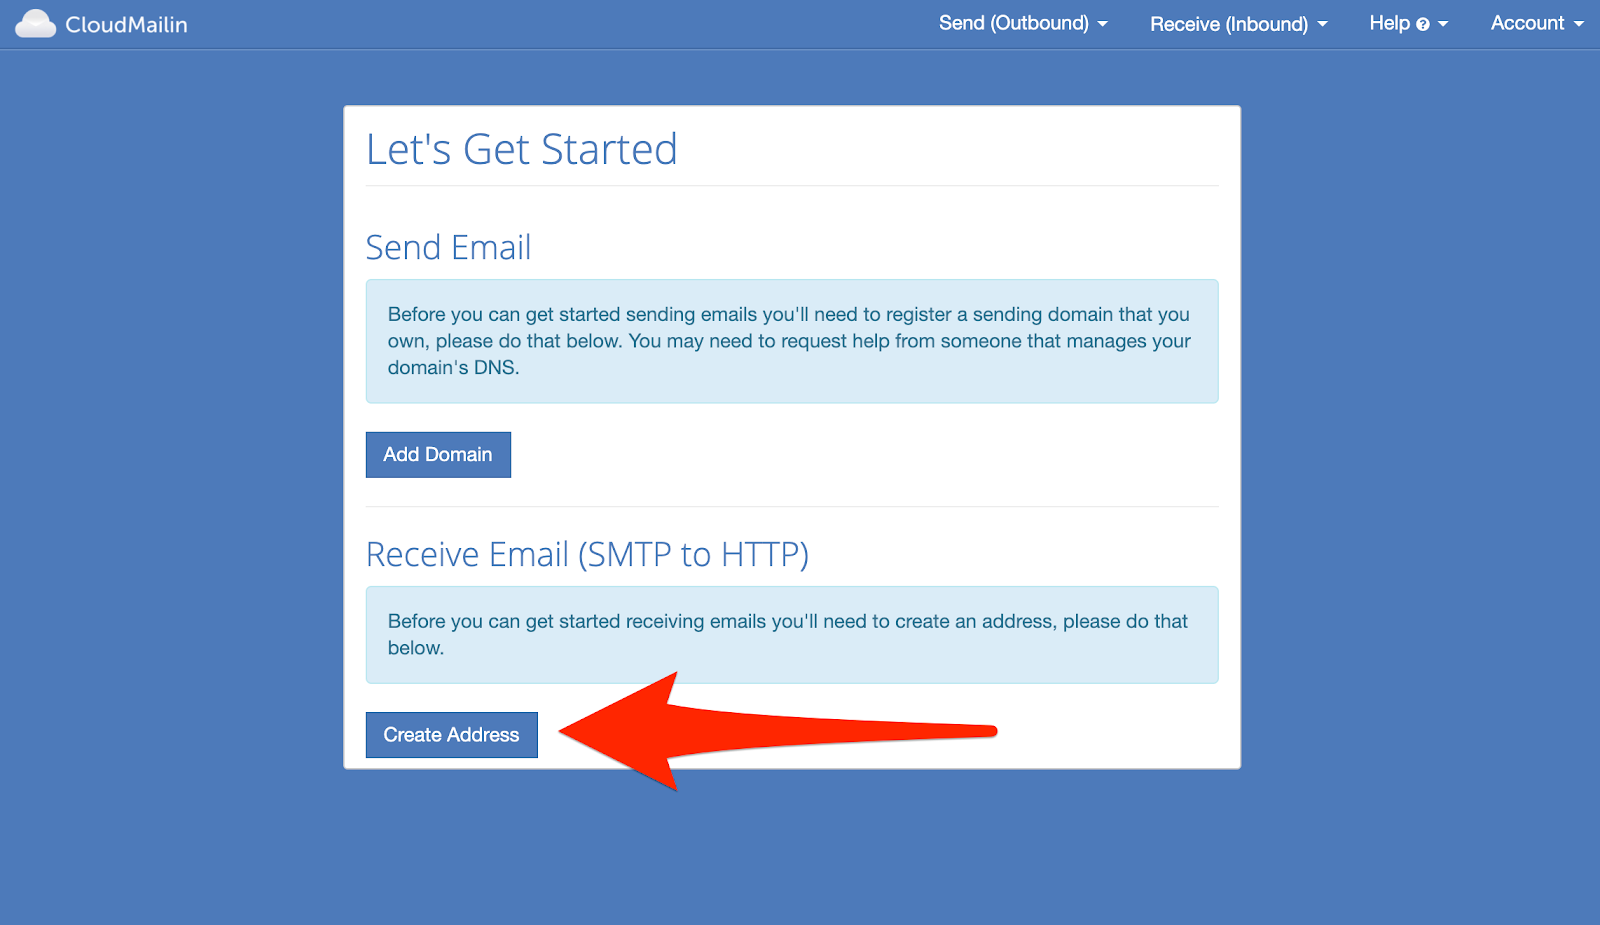
1. Head to CloudMailin and register for a free account if you haven't done so already
2. Once created, set up a new email address by clicking on the Create Address button
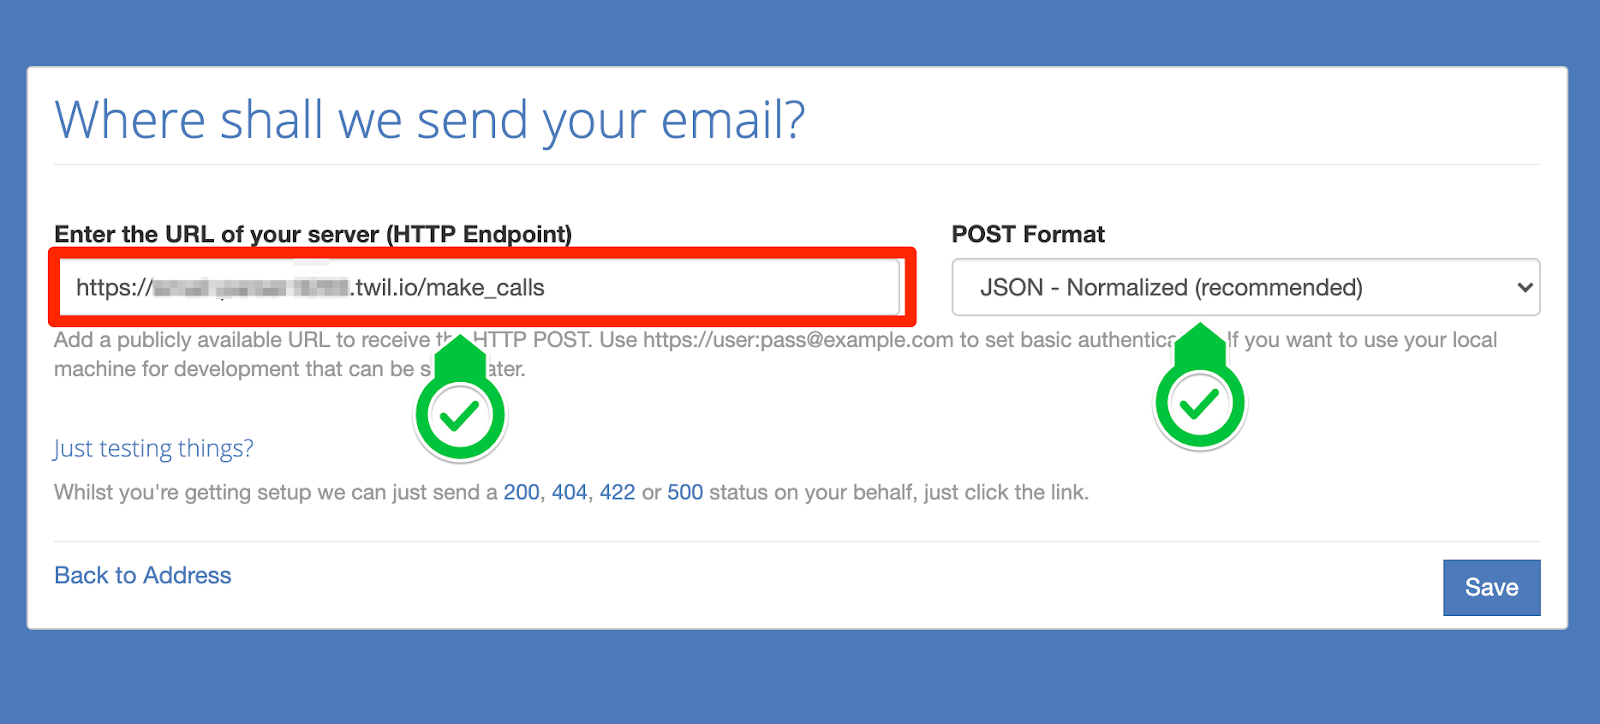
3. Set the POST format to “JSON” and enter your Twilio function URL in the endpoint. Your URL should look like "https://nest-notifications-XXXX.twil.io/make_calls"
Now you should be able to test the webhook by sending an email to your new CloudMailin account.
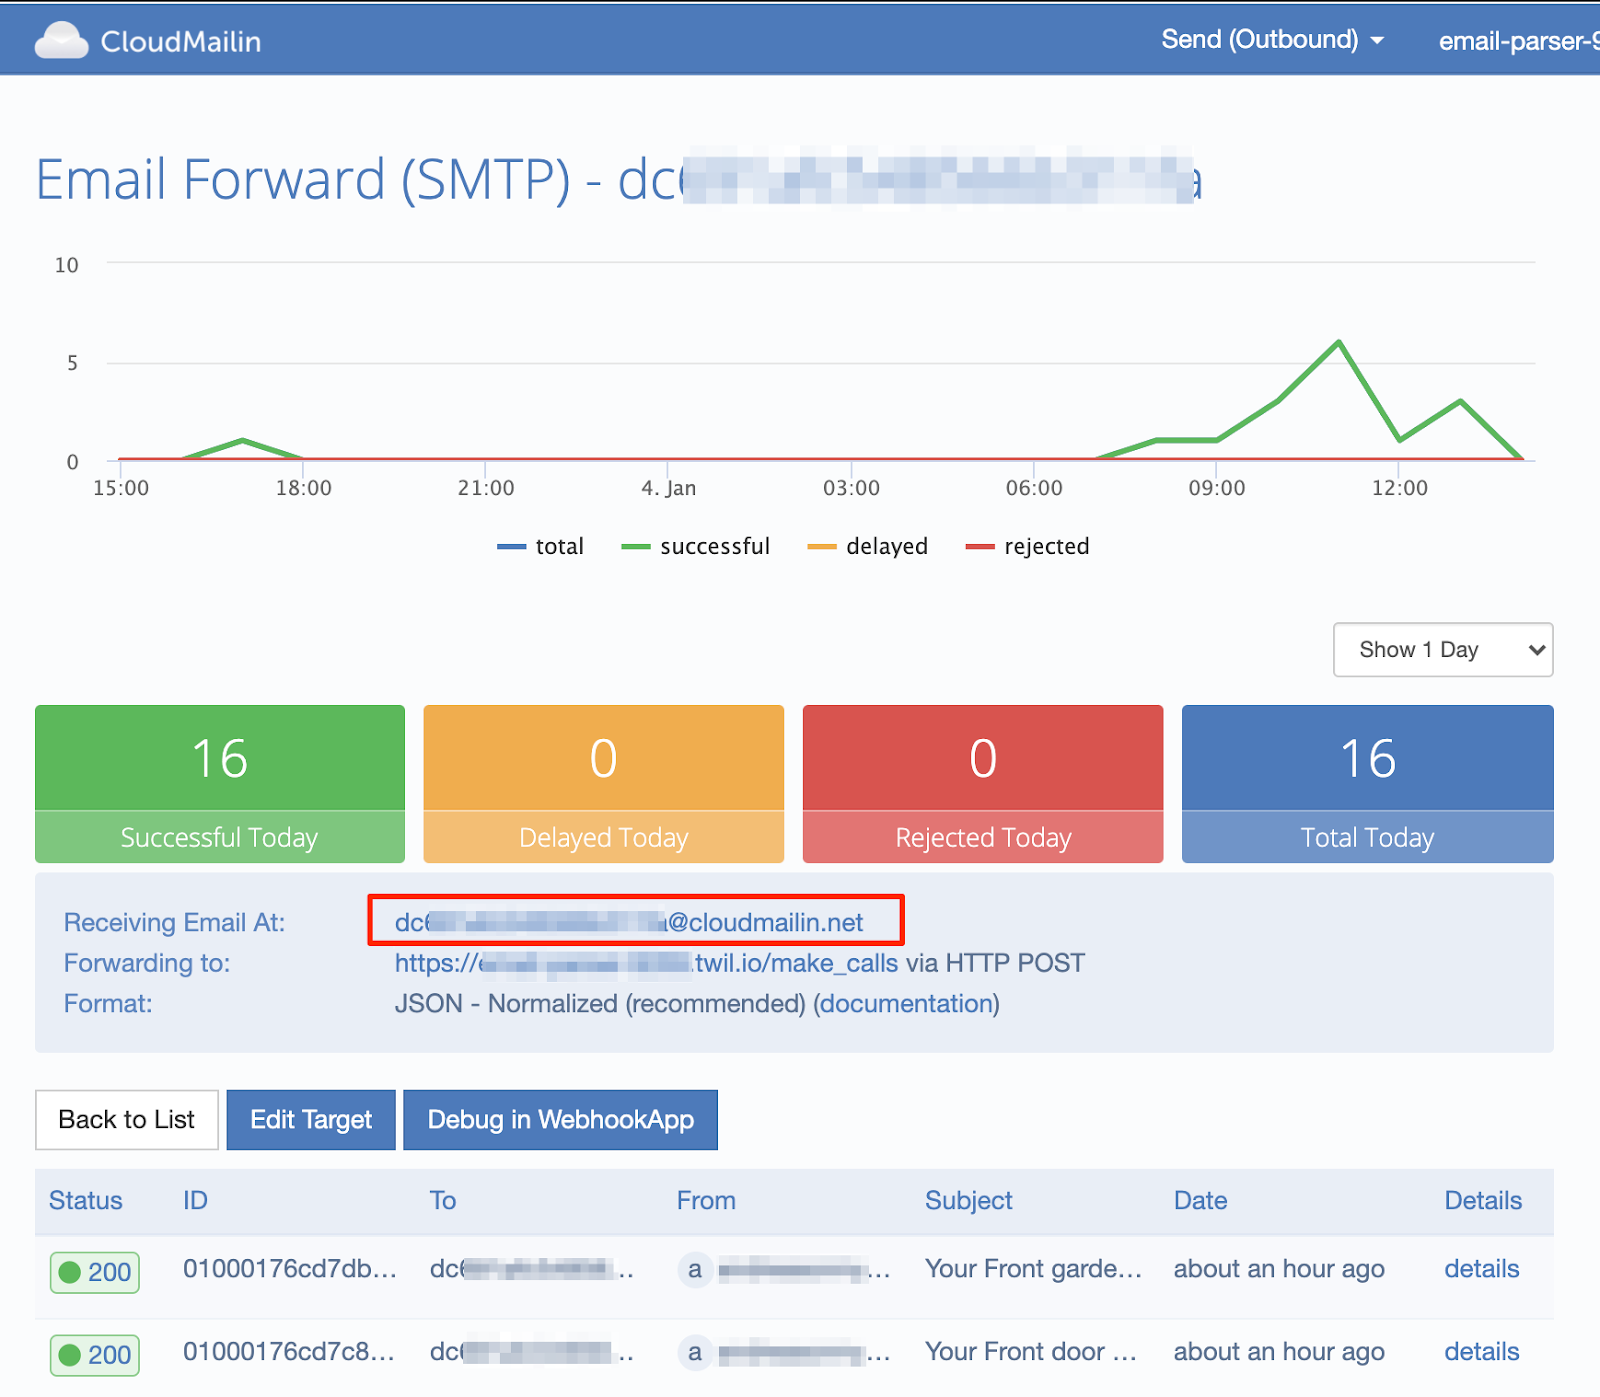
Navigate to your inbound dashboard and click on your newly created email address. Copy your new email address found at Receiving Email At as seen in the screenshot:
If you send an email to your new CloudMailin address, you should be able to see the status update in real time appearing in your new dashboard.
Create a GMail Forward Filter
The next step is to forward all the Nest notifications email to your new CloudMailin mailbox.
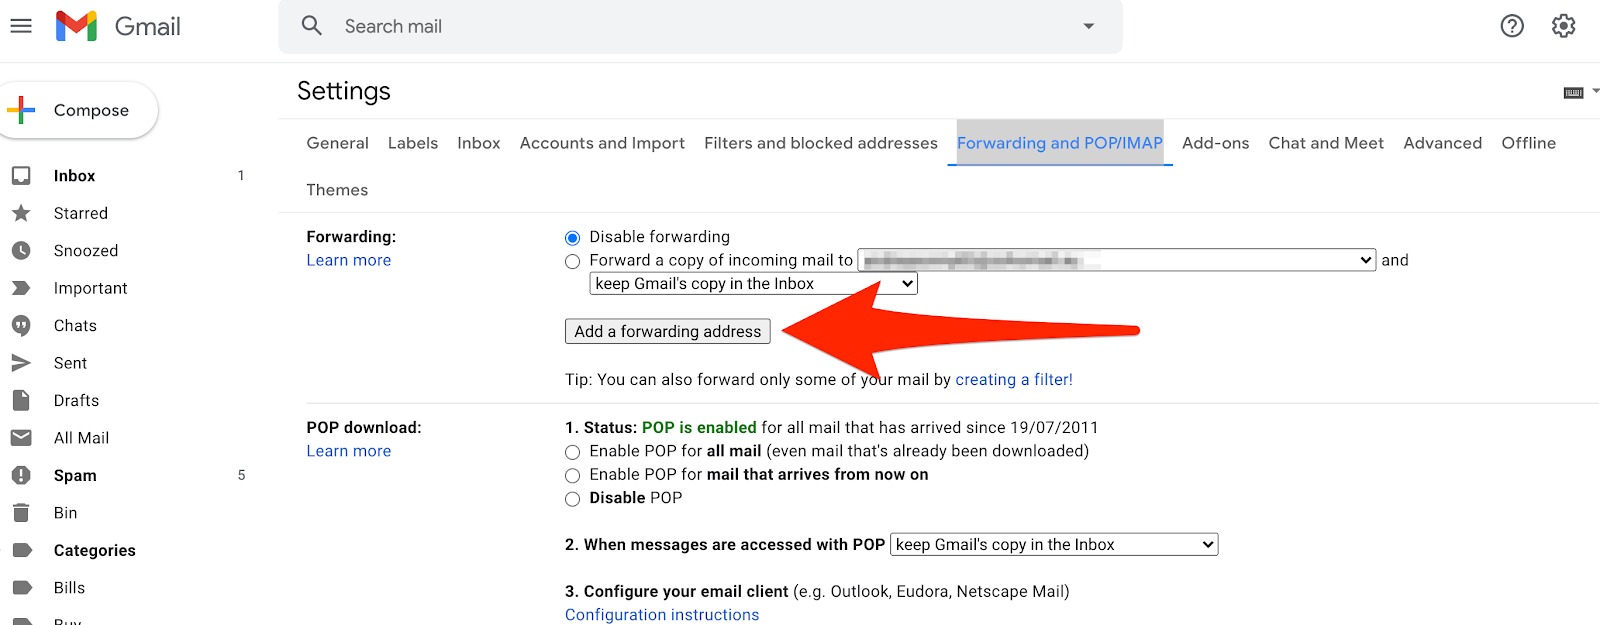
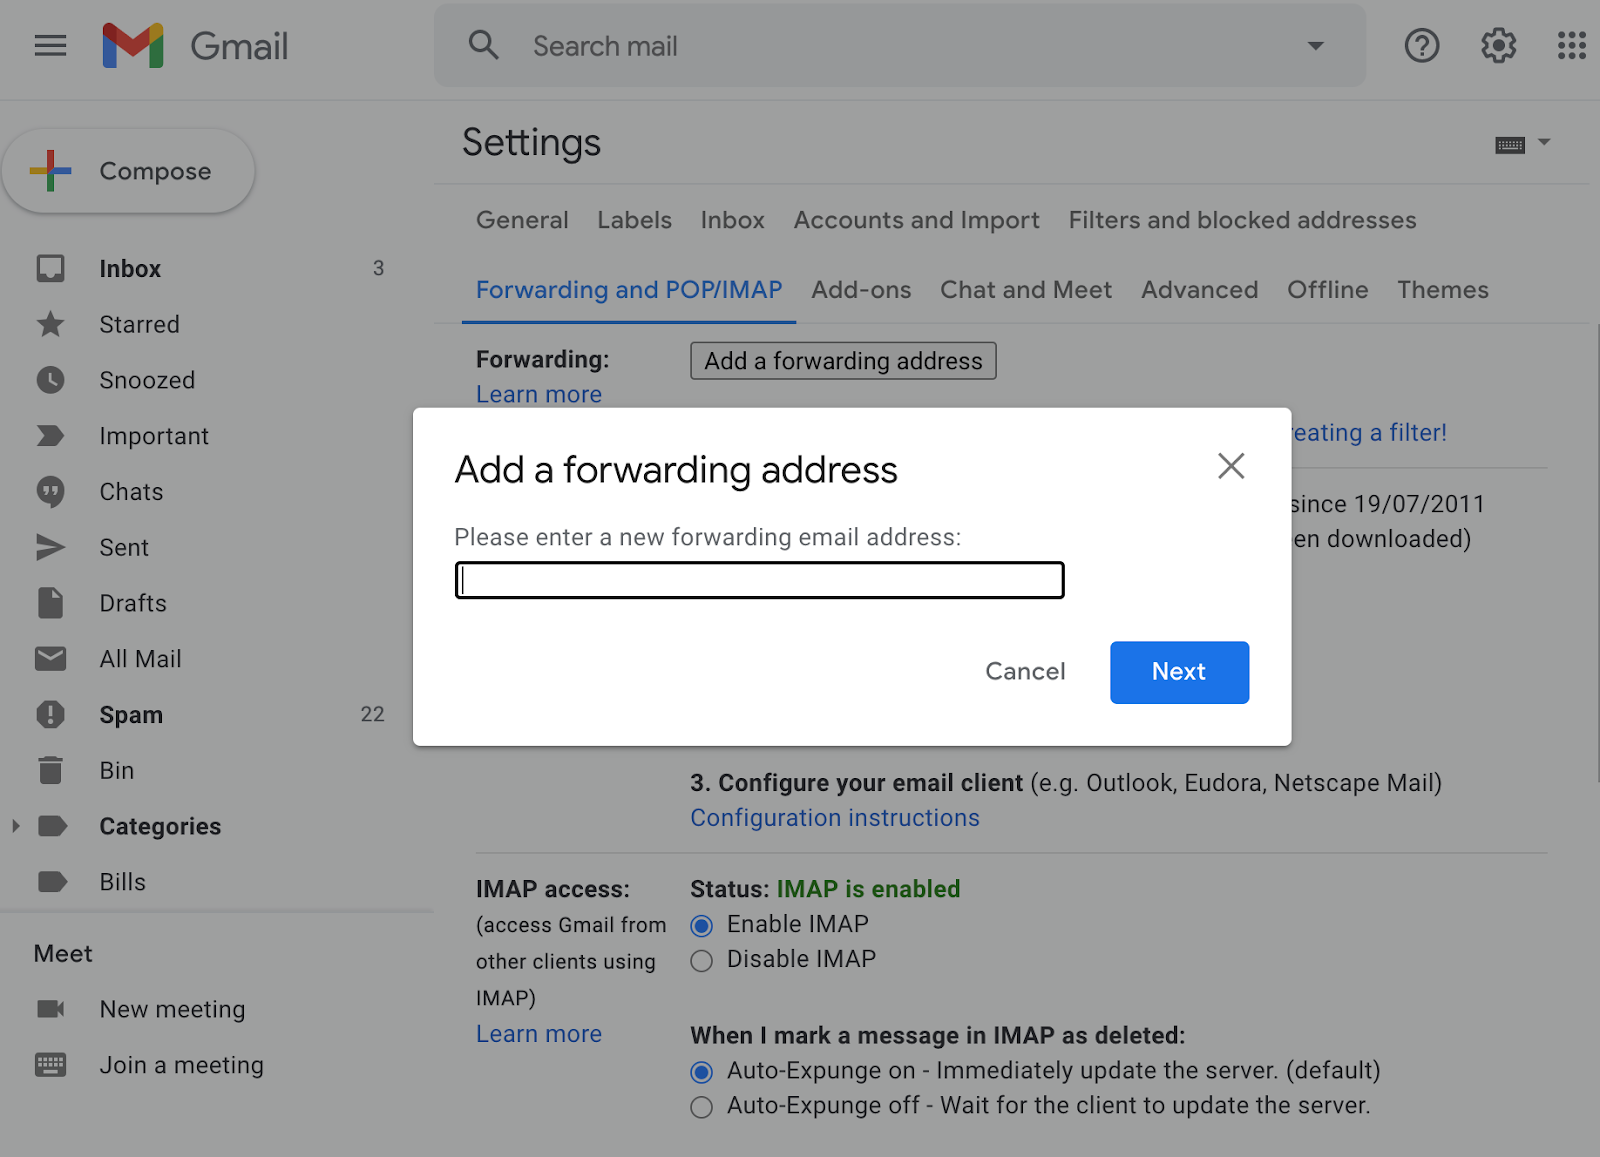
To do that, navigate to your GMail settings and click on the Forwarding and POP/IMAP tab. Click the Add a forwarding address button.
Enter your new email address.
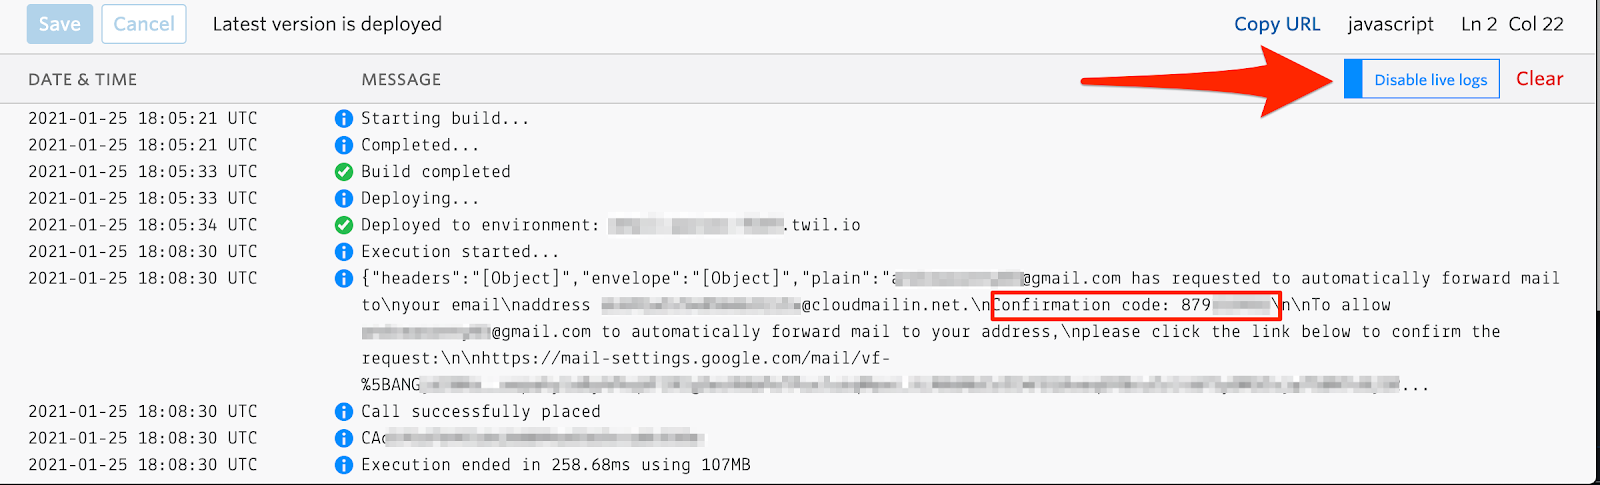
At this point, you will receive a confirmation code to your new email address.
To see the code, reach your Twilio function in a new tab and enable the debug mode. On the GMail tab, click the Send a new confirmation code button. You should be able to see the confirmation code from the Twilio function debug console at this point as seen in the screenshot below:
Enter the code in GMail to verify your email address, then create a new filter from the Filters and Blocked Addresses tab.
Click Create new filter, enter “notifications@nest.com” in the “From” field, then hit the “Create filter” button. At this point check the “Forward it to” and select your CloudMailin address from the dropdown. Finally, click the Create filter button to apply the changes.
Test Time
Now your integration is completed. To verify that everything works, all you need to do is to go outside and wave to the camera.
You should receive an email to your GMail account and immediately after you will receive the call from your Twilio number.
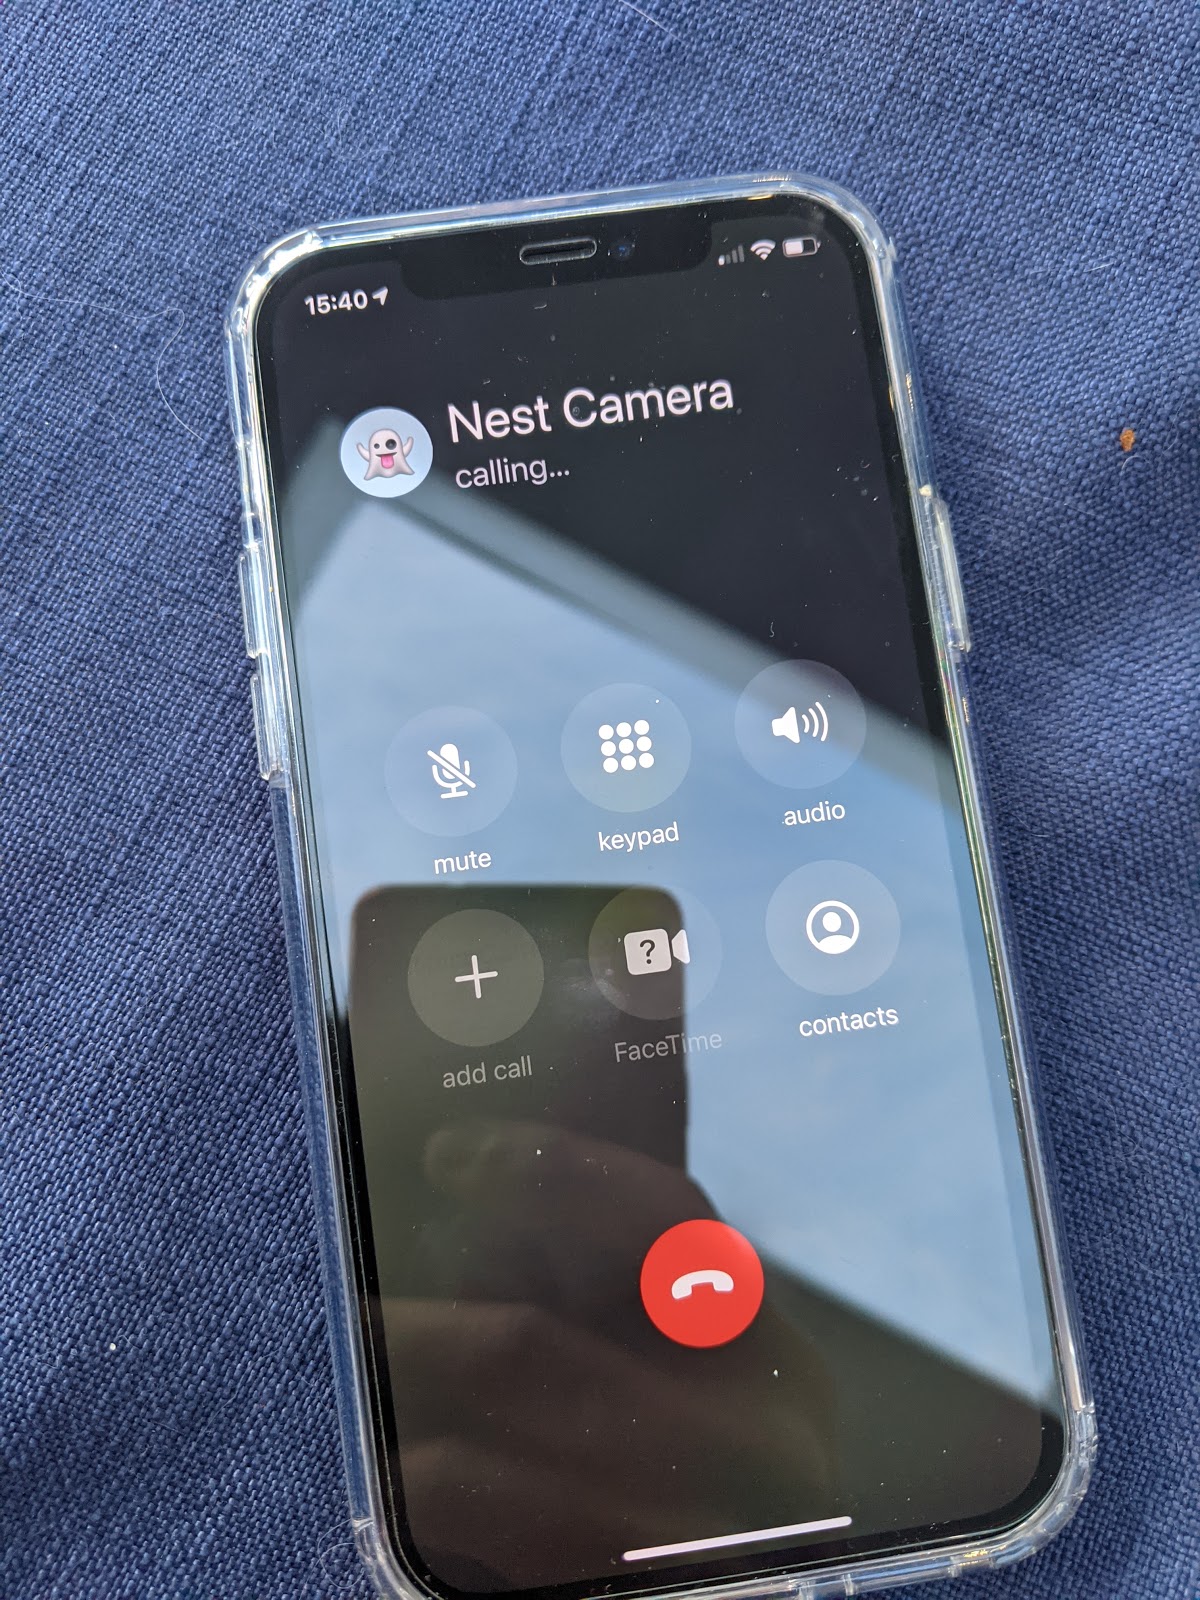
Save the phone number to your phone contacts so you know who is calling you is the next time you receive a phone call from this same number
THAT’S ALL!
We’ve just built a simple solution to receive call notifications from our Google Nest security cameras using Twilio and CloudMailin.
I’m a software engineer who loves building apps and online services during his spare time.
I can’t wait to see what you build!
- Email: azornada@twilio.com
- Twitter: @andreasonny83
- GitHub: andreasonny83
- about.me/andreasonny83

Related Resources
Twilio Docs
From APIs to SDKs to sample apps
API reference documentation, SDKs, helper libraries, quickstarts, and tutorials for your language and platform.
Resource Center
The latest ebooks, industry reports, and webinars
Learn from customer engagement experts to improve your own communication.
Ahoy
Twilio's developer community hub
Best practices, code samples, and inspiration to build communications and digital engagement experiences.