Build a Video Chat App with ASP.NET Core 5.0, Angular 11, and Twilio Programmable Video

June 02, 2021
Written by
David Pine
Contributor
Opinions expressed by Twilio contributors are their own
Reviewed by

Build a Video Chat App with ASP.NET Core 5.0, Angular 11, and Twilio Programmable Video

This article is for reference only. We're not onboarding new customers to Programmable Video. Existing customers can continue to use the product until December 5, 2024.


We recommend migrating your application to the API provided by our preferred video partner, Zoom. We've prepared this migration guide to assist you in minimizing any service disruption.

Realtime user interaction is a great way to enhance the communication and collaboration capabilities of a web application. Video chat is an obvious choice for sales, customer support, and education sites, but is it practical to implement? If you’re developing with Angular on the frontend and ASP.NET Core for your server, Twilio Programmable Video enables you to efficiently add robust video chat to your application.

This post will show you how to create a running video chat application using the Twilio JavaScript SDK in your Angular single page application (SPA) and the Twilio SDK for C# and .NET in your ASP.NET Core server code. You’ll build the interactions required to create and join video chat rooms, and publish and subscribe to participant audio and video tracks.

To learn how to build the same app with previous language and framework versions, see these posts:

Prerequisites

You’ll need the following technologies and tools to build the video chat project described in this post:

To get the most out of this post you should have knowledge of:

  • Angular, including Observables and Promises
  • ASP.NET Core, including dependency injection
  • C# 9
  • TypeScript

The source code for this project is available on GitHub. The code for previous versions of the app are available as branches and versioned corresponding to the .NET version which they represent.

Get started with Twilio Programmable Video

You’ll need a free Twilio trial accountand a Twilio Programmable Video project to be able to build this project with the Twilio Video SDK. Getting set up will take just a few minutes.

Once you have a Twilio account, go to the Twilio Console and perform the following steps:

  1. On the Dashboard home, locate your Account SID and Auth Token and copy them to a safe place.
  2. Select the Programmable Video section of the Console.
  3. Under Tools > API Keys, create a new API key with a friendly name of your choosing and copy the SID and API Secret to a safe place.

The credentials you just acquired are user secrets, so it’s a good idea not to store them in the project source code. One way to keep them safe and make them accessible in your project configuration is to store them as environment variables on your development machine.

ASP.NET Core can access environment variables through the Microsoft.Extensions.Configuration package so they can be used as properties of an IConfiguration object in the Startup class. The following instructions show you how to do this on Windows.

Execute the following commands in a Windows command prompt, substituting your credentials for the placeholders. For other operating systems, use comparable commands to create the same environment variables.

setx TWILIO_ACCOUNT_SID [Account SID]
setx TWILIO_API_SECRET [API Secret]
setx TWILIO_API_KEY [SID]

If you prefer, or if your development environment requires it, you can place these values in the appsettings.development.json file as follows.

Note: Be careful not to expose this file in a source code repository or other easily accessible location.

{
  "Logging": {
    "LogLevel": {
      "Default": "Warning"
    }
  },
  "AllowedHosts": "*",
  "TwilioAccountSid":"AccountSID",
  "TwilioApiSecret":"API Secret",
  "TwilioApiKey":"SID"
}

Create the ASP.NET Core application

Create a new ASP.NET Core Web Application named “VideoChat” with .NET 5 and Angular templating using the Visual Studio 2019 user interface or the following dotnet command line:

dotnet new angular -o VideoChat

This command will create a Visual Studio solution containing an ASP.NET Core project configured to use an Angular application, ClientApp, as the front end. The server-side code is written in C# and has two primary purposes: first, it serves the Angular web application, HTML layout, CSS, and JavaScript code. Second, it acts as a Web API. The client-side application has the logic for presenting how video chat rooms are created and joined, and it hosts the  participant video stream for live video chats.

Add the Twilio SDK for C# and .NET

The ASP.NET Core server application will use the Twilio SDK for C# and .NET. Install it with the NuGet Package Manager, Package Manager Console, or the following dotnet command-line instruction:

dotnet add package Twilio

The VideoChat.csproj file should include the package references in an <ItemGroup> node, as shown below, if the command completed successfully.

Note: The version numbers in your project may be higher.

<ItemGroup>
    <PackageReference Include="Microsoft.AspNetCore.SpaServices.Extensions" Version="5.0.3" />
    <PackageReference Include="Twilio" Version="5.55.0" />
</ItemGroup>

Create the folder and file structure

Create the following folders and files:

/Hubs
   NotificationHub.cs
/Models
   RoomDetails.cs
/Options
   TwilioSettings.cs
/Services
   IVideoService.cs
   VideoService.cs

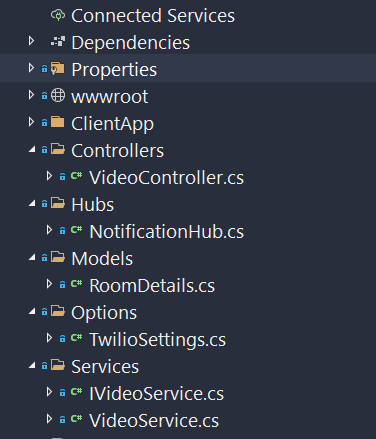
When you’re finished, your Solution Explorer folder and file structure should look like the following:

Initial file and directory structure

In the Controllers directory, rename SampleDataController.cs to VideoController.cs and update the class name to match the new file name.

Create services

The server-side code needs to do several key things, one of them is to provide a JSON Web Token (JWT) to the client so the client can connect to the Twilio Programmable Video API. Doing so requires the Twilio Account SID, API Key, and API Secret that you stored earlier as environment variables.

In ASP.NET Core, it is common to leverage a strongly typed C# class that will represent the various settings. To do that, add the following C# code to Options/TwilioSettings.cs, below the declarations:

namespace VideoChat.Options
{
    public class TwilioSettings
    {
        /// <summary>
        /// The primary Twilio account SID, displayed prominently on your twilio.com/console dashboard.
        /// </summary>
        public string AccountSid { get; set; }

        /// <summary>
        /// Signing Key SID, also known as the API SID or API Key.
        /// </summary>
        public string ApiKey { get; set; }

        /// <summary>
        /// The API Secret that corresponds to the <see cref="ApiKey"/>.
        /// </summary>
        public string ApiSecret { get; set; }
    }
}

These settings are configured in the Startup.ConfigureServices method, which maps the values from environment variables and the appsettings.json file to the IOptions<TwilioSettings> instances that are available for dependency injection. In this case, the environment variables are the only values needed for the TwilioSettings class.

Insert the following C# code in Models/RoomDetails.cs below the declarations:

namespace VideoChat.Models
{
    public record RoomDetails(
        string Id,
        string Name,
        int ParticipantCount,
        int MaxParticipants);
}

The RoomDetails record is an object that represents a video chat room. This is using the “record types”, C# 9 language feature. With positional records, you have immutable reference types and enable the “with” syntax for inline cloning.

With dependency injection in mind, create an abstraction for the server-side video service as an interface. To do that, replace the contents of the Services/IVideoService.cs file with the following C# code:

using System.Collections.Generic;
using System.Threading.Tasks;
using VideoChat.Models;

namespace VideoChat.Services
{
    public interface IVideoService
    {
        string GetTwilioJwt(string identity);
        Task<IEnumerable<RoomDetails>> GetAllRoomsAsync();
    }
}

This is a simplistic interface that exposes the ability to get the Twilio JWT when it is given an identity. It also provides the ability to get all the rooms.

To implement the IVideoService interface, replace the contents of Services/VideoService.cs with the following code:

using System;
using System.Collections.Generic;
using System.Linq;
using System.Threading.Tasks;
using VideoChat.Models;
using VideoChat.Options;
using Twilio;
using Twilio.Base;
using Twilio.Jwt.AccessToken;
using Twilio.Rest.Video.V1;
using Twilio.Rest.Video.V1.Room;
using ParticipantStatus = Twilio.Rest.Video.V1.Room.ParticipantResource.StatusEnum;

namespace VideoChat.Services
{
    public class VideoService : IVideoService
    {
        readonly TwilioSettings _twilioSettings;

        public VideoService(Microsoft.Extensions.Options.IOptions<TwilioSettings> twilioOptions)
        {
            _twilioSettings =
                twilioOptions?.Value
             ?? throw new ArgumentNullException(nameof(twilioOptions));

            TwilioClient.Init(_twilioSettings.ApiKey, _twilioSettings.ApiSecret);
        }

        public string GetTwilioJwt(string identity)
            => new Token(_twilioSettings.AccountSid,
                         _twilioSettings.ApiKey,
                         _twilioSettings.ApiSecret,
                         identity ?? Guid.NewGuid().ToString(),
                         grants: new HashSet<IGrant> { new VideoGrant() }).ToJwt();

        public async Task<IEnumerable<RoomDetails>> GetAllRoomsAsync()
        {
            var rooms = await RoomResource.ReadAsync();
            var tasks = rooms.Select(
                room => GetRoomDetailsAsync(
                    room,
                    ParticipantResource.ReadAsync(
                        room.Sid,
                        ParticipantStatus.Connected)));

            return await Task.WhenAll(tasks);

            Static async Task<RoomDetails> GetRoomDetailsAsync(
                RoomResource room,
                Task<ResourceSet<ParticipantResource>> participantTask)
            {
                var participants = await participantTask;
                return new(
                    room.Sid,
                    room.UniqueName,
                    participants.Count(),
                    room.MaxParticipants ?? 0);

            }
        }
    }
}

The VideoService class constructor takes an IOptions<TwilioSettings> instance and initializes the TwilioClient, given the supplied API Key and corresponding API Secret. This is done statically and enables future use of various resource-based functions.

The implementation of the GetTwilioJwt is used to issue a new Twilio.Jwt.AccessToken.Token, given the Account SID, API Key, API Secret, identity, and a new instance of HashSet<IGrant> with a single VideoGrant object. Before returning, an invocation of the .ToJwt function converts the token instance into its string equivalent.

The GetAllRoomsAsync function returns a listing of RoomDetails objects. It starts by awaiting the RoomResource.ReadAsync function, which will yield a ResourceSet<RoomResource> once awaited.

From this listing of rooms the code projects a series of Task<RoomDetails> where it will ask for the corresponding ResourceSet<ParticipantResource> currently connected to the room specified with the room identifier, room.UniqueName.

You may notice some unfamiliar syntax in the GetAllRoomsService function if you’re not used to code after the return statement. C# 8 includes a static local function feature that enables functions to be written within the scope of the method body (“locally”), even after the return statement. They are static to ensure variables are not captured within the enclosing scope.

Note that for every room n that exists, GetRoomDetailsAsync is invoked to fetch the room’s connected participants. This can be a performance concern! Even though this is done asynchronously and in parallel, it should be considered a potential bottleneck and marked for refactoring. It isn't a concern in this demo project, as there are, at most, a few rooms.

Create the API controller

The video controller will provide two HTTP GET endpoints for the Angular client to use.

Endpoint

Verb

Type

Description

api/video/token

GET

JSON

an object with a token member assigned from the Twilio JWT

api/video/rooms

GET

JSON

array of room details: { name, participantCount, maxParticipants }

Replace the contents of Controllers/VideoController.cs with the following C# code:

using System.Threading.Tasks;
using VideoChat.Services;
using Microsoft.AspNetCore.Mvc;

namespace VideoChat.Controllers
{
    [
        ApiController,
        Route("api/video")
    ]
    public class VideoController : ControllerBase
    {
        readonly IVideoService _videoService;

        public VideoController(IVideoService videoService)
            => _videoService = videoService;

        [HttpGet("token")]
        public IActionResult GetToken()
            => new JsonResult(new { token = _videoService.GetTwilioJwt(User.Identity.Name) });

        [HttpGet("rooms")]
        public async Task<IActionResult> GetRooms()
            => new JsonResult(await _videoService.GetAllRoomsAsync());
    }
}

The controller is decorated with the ApiController attribute and a Route attribute containing the template "api/video". In the VideoController constructor IVideoService is injected and assigned to a readonly field instance.

Create the notification hub

The ASP.NET Core application wouldn't be complete without the use of SignalR, which

is an open-source library that simplifies adding real-time web functionality to apps. Real-time web functionality enables server-side code to push content to clients instantly.

When a user creates a room in the application their client-side code will notify the server and, ultimately, other clients of the new room. This is done with a SignalR notification hub.

Replace the contents of Hubs/NotificationHub.cs with the following C# code:

using System.Threading.Tasks;
using Microsoft.AspNetCore.SignalR;

namespace VideoChat.Hubs
{
    public class NotificationHub : Hub
    {
        public async Task RoomsUpdated(bool flag)
            => await Clients.Others.SendAsync("RoomsUpdated", flag);
    }
}

The NotificationHub will asynchronously send a message to all other clients notifying them whenthat a room is added.

Update Program.cs

The default Program class from the template is a bit boring, let’s spice it up a bit with C# 9’s top-level statements.

Replace the source in the template Program.cs file with the following C#:

using Microsoft.AspNetCore;
using Microsoft.AspNetCore.Hosting;
using VideoChat;

await WebHost.CreateDefaultBuilder(args)
    .UseStartup<Startup>()
    .Build()
    .RunAsync();

The preceding code is literally half the size of the original template as all of the boilerplate code is no longer needed. The application entry point is implicit, the args variable is populated, and you can await running of the WebHost that uses your Startup object.

Configure Startup.cs

There are a few things that need to be added and changed in the Startup class and in the ConfigureServices method. Add the following C# using statements to the top of Startup.cs:

using VideoChat.Hubs;
using VideoChat.Options;
using VideoChat.Services;

In the ConfigureServices method, replace all the existing code with the following code:

services.AddControllersWithViews();

services.Configure<TwilioSettings>(
    settings =>
    {
        settings.AccountSid = Environment.GetEnvironmentVariable("TWILIO_ACCOUNT_SID");
        settings.ApiSecret = Environment.GetEnvironmentVariable("TWILIO_API_SECRET");                        
        settings.ApiKey = Environment.GetEnvironmentVariable("TWILIO_API_KEY");
    })
    .AddTransient<IVideoService, VideoService>()
    .AddSpaStaticFiles(config => config.RootPath = "ClientApp/dist");

services.AddSignalR();

This configures the application settings containing the Twilio API credentials, maps the  abstraction of the video service to its corresponding implementation, assigns the root path for the SPA, and adds SignalR.

In the Configure method, replace the app.UseEndpoints call with the following lines:

app.UseEndpoints(
    endpoints =>
    {
        endpoints.MapControllerRoute(
            name: "default",
            pattern: "{controller}/{action=Index}/{id?}");

        endpoints.MapHub<NotificationHub>("/notificationHub");
    })

This maps the notification endpoint to the implementation of the NotificationHub. Using this endpoint, the Angular SPA running in client browsers can send messages to all the other clients. SignalR provides the notification infrastructure for this process.

This concludes the server-side setup. Compile the project and ensure there are no errors.

Build the client-side Angular app

The ASP.NET Core templates are not updated regularly and Angular is constantly being updated. To build the client app with the newest Angular code, it’s best to start with a current Angular template.

Delete the ClientApp directory from the VideoChat project. Then, open a console window (either PowerShell or Windows Console) in the VideoChat project directory and execute the following Angular CLI command:

ng n ClientApp --style css --routing false --minimal true --skipTests true

This command should create a new ClientApp folder in the VideoChat project along with the basic folder and file structure for an Angular application.

The Angular application has a number of dependencies, including  the twilio-video and @microsoft/signalr packages. Its development dependencies include the type definitions for the @types/twilio-video.

Replace the contents of the package.json with the following JSON code:

{
  "name": "videochat",
  "version": "1.0.0",
  "license": "MIT",
  "scripts": {
    "ng": "ng",
    "start": "ng serve --verbose",
    "build": "ng build"
  },
  "private": true,
  "dependencies": {
    "@angular/animations": "11.2.4",
    "@angular/common": "11.2.4",
    "@angular/compiler": "11.2.4",
    "@angular/core": "11.2.4",
    "@angular/forms": "11.2.4",
    "@angular/platform-browser": "11.2.4",
    "@angular/platform-browser-dynamic": "11.2.4",
    "@angular/platform-server": "11.2.4",
    "@angular/router": "11.2.4",
    "@nguniversal/module-map-ngfactory-loader": "7.0.2",
    "@microsoft/signalr": "3.0.1",
    "aspnet-prerendering": "^3.0.1",
    "core-js": "^2.6.1",
    "tslib": "^2.0.0",
    "twilio-video": "^2.13.0",
    "rxjs": "^6.5.3",
    "zone.js": "~0.11.3"
  },
  "devDependencies": {
    "@angular-devkit/build-angular": "~0.1102.3",
    "@angular/cli": "11.2.3",
    "@angular/compiler-cli": "11.2.4",
    "@angular/language-service": "11.2.4",
    "@types/node": "^12.11.1",
    "@types/twilio-video": "^2.0.9",
    "codelyzer": "^6.0.0",
    "protractor": "~7.0.0",
    "ts-node": "~7.0.1",
    "tslint": "~6.1.0",
    "typescript": "4.1.5"
  }
}

With the updates to the package.json complete, execute the following npm command-line instruction in the ClientApp directory:

npm install

This command ensures that all required JavaScript dependencies are downloaded and installed.

Open ClientApp/src/index.html and notice the <app-root> element. This non-standard element is used by Angular to render the Angular application on the HTML page. The app-root element is the selector for the AppComponent component.

Add the following HTML markup to index.html, in the <head> element below the <link> element for the favicon:

<link rel="stylesheet"
      href="https://use.fontawesome.com/releases/v5.11.2/css/all.css"
     integrity="sha384-UHRtZLI+pbxtHCWp1t77Bi1L4ZtiqrqD80Kn4Z8NTSRyMA2Fd33n5dQ8lWUE00s/"
      crossorigin="anonymous">
<link rel="stylesheet"
      href="https://bootswatch.com/4/darkly/bootstrap.min.css">

This markup enables the application to use the free version of Font Awesome and the Bootswatch Darkly theme.

Continue to src/app/app.component.html and replace the contents with the following HTML markup:

<app-home></app-home>

From the command line in the ClientApp directory, execute the following Angular CLI commands to generate the components:

ng g c camera --nospec
ng g c home --nospec
ng g c participants --nospec
ng g c rooms --nospec
ng g c settings --nospec
ng g c settings/device-select --nospec --flat true

Then execute the following Angular CLI commands to generate the required services:

ng g s services/videochat --nospec
ng g s services/device --nospec
ng g s services/storage --nospec

These commands add all the boilerplate code, enabling you to focus on the implementation of the app. They add new components and services and update app.module.ts by importing and declaring the components the commands create.

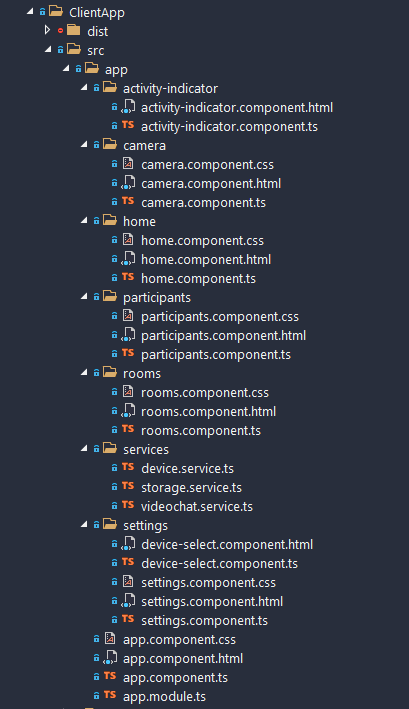
The folder and file structure should look like the following:

Project file and directory structure

Updating the Angular App module

The application relies on two additional modules, one to implement forms and the other to use HTTP.

Add the following two import statements to the top of ClientApp/src/app/app.module.ts:

import { FormsModule } from '@angular/forms';
import { HttpClientModule } from '@angular/common/http';

Next, add these modules to the imports array of the @NgModule as follows:

imports: [
  BrowserModule,
  HttpClientModule,
  FormsModule
],

Add JavaScript polyfills

A JavaScript project wouldn’t be complete without polyfills, right? Angular is no exception. Luckily, the Angular tooling provides a polyfill file.

Add the following JavaScript to the bottom of ClientApp/src/polyfill.ts:

// https://github.com/angular/angular-cli/issues/9827#issuecomment-386154063
// Add global to window, assigning the value of window itself.
(window as any).global = window;

Create Angular services

The StorageService class uses the browser’s localStorage object, which enables the client application to persist state. It can read and write to this localStorage object, and the values are persisted in the browser so the user’s camera preferences are remembered.

Replace the content of services/storage.service.ts with the following TypeScript code:

import { Injectable } from '@angular/core';

export type StorageKey = 'audioInputId' | 'audioOutputId' | 'videoInputId';

@Injectable()
export class StorageService {
    get(key: StorageKey): string {
        return localStorage.getItem(this.formatAppStorageKey(key));
    }

    set(key: StorageKey, value: string) {
        if (value && value !== 'null') {
            localStorage.setItem(this.formatAppStorageKey(key), value);
        }
    }

    remove(key: StorageKey) {
        localStorage.removeItem(this.formatAppStorageKey(key));
    }

    private formatAppStorageKey(key: StorageKey) {
        return `iEvangelist.videoChat.${key}`;
    }
}

The DeviceService class will provide information about the media devices used in the application, including their availability and whether the user has granted the app permission to use them.

Replace the contents of services/device.service.ts with the following TypeScript code:

import { Injectable } from '@angular/core';
import { ReplaySubject, Observable } from 'rxjs';

export type Devices = MediaDeviceInfo[];

@Injectable()
export class DeviceService {
    $devicesUpdated: Observable<Promise<Devices>>;

    private deviceBroadcast = new ReplaySubject<Promise<Devices>>();

    constructor() {
        if (navigator && navigator.mediaDevices) {
            navigator.mediaDevices.ondevicechange = (_: Event) => {
                this.deviceBroadcast.next(this.getDeviceOptions());
            }
        }

        this.$devicesUpdated = this.deviceBroadcast.asObservable();
        this.deviceBroadcast.next(this.getDeviceOptions());
    }

    private async isGrantedMediaPermissions() {
        if (navigator && navigator.userAgent && navigator.userAgent.indexOf('Chrome') < 0) {
            return true; // Follows standard workflow for non-Chrome browsers.
        }

        if (navigator && navigator['permissions']) {
            try {
                const result = await navigator['permissions'].query({ name: 'camera' });
                if (result) {
                    if (result.state === 'granted') {
                        return true;
                    } else {
                        const isGranted = await new Promise<boolean>(resolve => {
                            result.onchange = (_: Event) => {
                                const granted = _.target['state'] === 'granted';
                                if (granted) {
                                    resolve(true);
                                }
                            }
                        });

                        return isGranted;
                    }
                }
            } catch (e) {
                // This is only currently supported in Chrome.
                // https://stackoverflow.com/a/53155894/2410379
                return true;
            }
        }

        return false;
    }

    private async getDeviceOptions(): Promise<Devices> {
        const isGranted = await this.isGrantedMediaPermissions();
        if (navigator && navigator.mediaDevices && isGranted) {
            let devices = await this.tryGetDevices();
            if (devices.every(d => !d.label)) {
                devices = await this.tryGetDevices();
            }
            return devices.filter(d => !!d.label);
        }

        return null;
    }

    private async tryGetDevices() {
        const mediaDevices = await navigator.mediaDevices.enumerateDevices();
        const devices = ['audioinput', 'audiooutput', 'videoinput'].reduce((options, kind) => {
            return options[kind] = mediaDevices.filter(device => device.kind === kind);
        }, [] as Devices);

        return devices;
    }
}

This service provides an observable media device collection to which concerned listeners can subscribe. When media device information changes, such as unplugging or plugging in a USB web camera, this service will notify all listeners. It also attempts to wait for the user to grant permissions to various media devices consumed by the twilio-video SDK.

The VideoChatService is used to access the server-side ASP.NET Core Web API endpoints. It exposes the ability to get the list of rooms and the ability to create or join a named room.

Replace the contents of  services/videochat.service.ts with the following TypeScript code:

import { connect, ConnectOptions, LocalTrack, Room } from 'twilio-video';
import { Injectable } from '@angular/core';
import { HttpClient } from '@angular/common/http';
import { ReplaySubject , Observable } from 'rxjs';

interface AuthToken {
    token: string;
}

export interface NamedRoom {
    id: string;
    name: string;
    maxParticipants?: number;
    participantCount: number;
}

export type Rooms = NamedRoom[];

@Injectable()
export class VideoChatService {
    $roomsUpdated: Observable<boolean>;

    private roomBroadcast = new ReplaySubject<boolean>();

    constructor(private readonly http: HttpClient) {
        this.$roomsUpdated = this.roomBroadcast.asObservable();
    }

    private async getAuthToken() {
        const auth =
            await this.http
                      .get<AuthToken>(`api/video/token`)
                      .toPromise();

        return auth.token;
    }

    getAllRooms() {
        return this.http
                   .get<Rooms>('api/video/rooms')
                   .toPromise();
    }

    async joinOrCreateRoom(name: string, tracks: LocalTrack[]) {
        let room: Room = null;
        try {
            const token = await this.getAuthToken();
            room =
                await connect(
                    token, {
                        name,
                        tracks,
                        dominantSpeaker: true
                    } as ConnectOptions);
        } catch (error) {
            console.error(`Unable to connect to Room: ${error.message}`);
        } finally {
            if (room) {
                this.roomBroadcast.next(true);
            }
        }

        return room;
    }

    nudge() {
        this.roomBroadcast.next(true);
    }
}

Notice that the retrieval of the Twilio JWT is marked private. The getAuthToken method is only used within the VideoChatService class for the invocation of connect from the twilio-video module, which is done asynchronously in the joinOrCreateRoom method.

General concepts

Now that the core services are in place, how should they interact with one another and how should they behave? Users need to be able to create or join rooms. A room is a Twilio resource, and can have one or more participants. A participant is also a Twilio resource. Likewise, participants can track publications that provide access to video and audio media tracks. Participants and rooms share cameras which track publications for both audio and video tracks. The app has Angular components for each of these.

Implement the Camera component

In addition to providing audio and video tracks for room participants to share, the CameraComponent also displays a local camera preview. By rendering locally-created audio and video tracks to the DOM as the <app-camera> element. The Twilio Programmable Video JavaScript Platform SDK, imported from  twilio-video, provides an easy-to-use API for creating and managing the local tracks.

Replace the contents of camera/camera.component.ts with the following TypeScript code:

import { Component, ElementRef, ViewChild, AfterViewInit, Renderer2 } from '@angular/core';
import { createLocalVideoTrack, LocalVideoTrack } from 'twilio-video';
import { StorageService } from '../services/storage.service';

@Component({
    selector: 'app-camera',
    styleUrls: ['./camera.component.css'],
    templateUrl: './camera.component.html',
})
export class CameraComponent implements AfterViewInit {
    @ViewChild('preview') previewElement: ElementRef;

    isInitializing: boolean = true;
    videoTrack: LocalVideoTrack = null;

    constructor(
        private readonly storageService: StorageService,
        private readonly renderer: Renderer2) { }

    async ngAfterViewInit() {
        if (this.previewElement && this.previewElement.nativeElement) {
            const selectedVideoInput = this.storageService.get('videoInputId');
            await this.initializeDevice(selectedVideoInput);
        }
    }

    async initializePreview(deviceId: string) {
        await this.initializeDevice(deviceId);
    }

    finalizePreview() {
        try {
            if (this.videoTrack) {
                this.videoTrack.detach().forEach(element => element.remove());
            }
            this.videoTrack = null;
        } catch (e) {
            console.error(e);
        }
    }

    private async initializeDevice(deviceId?: string) {
        try {
            this.isInitializing = true;

            this.finalizePreview();

            this.videoTrack = deviceId
                ? await createLocalVideoTrack({ deviceId })
                : await createLocalVideoTrack();

            const videoElement = this.videoTrack.attach();
            this.renderer.setStyle(videoElement, 'height', '100%');
            this.renderer.setStyle(videoElement, 'width', '100%');
            this.renderer.appendChild(this.previewElement.nativeElement, videoElement);
        } finally {
            this.isInitializing = false;
        }
    }
}

Replace the contents of camera/camera.component.html with the following HTML markup:

<div id="preview" #preview>
    <div *ngIf="isInitializing">Loading preview... Please wait.</div>
</div>

In the TypeScript code above, the Angular @ViewChild decorator is used to get a reference to the #preview HTML element used in the view. With the reference to the element, the Twilio JavaScript SDK can create local video and audio tracks associated with the device.

Once the tracks are created, the code finds the video track and appends it to the #preview element. The result is a live video feed rendered on the HTML page.

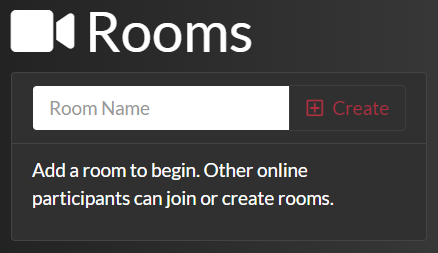
Implement the Rooms component

The RoomsComponent provides an interface for users to create rooms by entering a roomName through an <input type=’text’> element and a <button> element bound to the onTryAddRoom method of the class. The user interface looks like the following:

Create new room

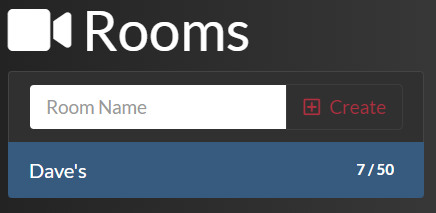
As users add rooms the list of existing rooms will appear below the room creation controls. The name of each existing room will appear along with the number of active participants and the room’s capacity, like the example shown below.

View available rooms

To implement the rooms user interface, replace the markup in rooms/rooms.component.html with the following HTML markup:

<div class="jumbotron">
    <h5 class="display-4"><i class="fas fa-video"></i> Rooms</h5>
    <div class="list-group">
        <div class="list-group-item d-flex justify-content-between align-items-center">
            <div class="input-group">
                <input type="text" class="form-control form-control-lg"
                       placeholder="Room Name" aria-label="Room Name"
                       [(ngModel)]="roomName" (keydown.enter)="onTryAddRoom()">
                <div class="input-group-append">
                    <button class="btn btn-lg btn-outline-secondary twitter-red"
                            type="button" [disabled]="!roomName"
                            (click)="onAddRoom(roomName)">
                        <i class="far fa-plus-square"></i> Create
                    </button>
                </div>
            </div>
        </div>
        <div *ngIf="!rooms || !rooms.length" class="list-group-item d-flex justify-content-between align-items-center">
            <p class="lead">
                Add a room to begin. Other online participants can join or create rooms.
            </p>
        </div>
        <a href="#" *ngFor="let room of rooms"
           (click)="onJoinRoom(room.name)" [ngClass]="{ 'active': activeRoomName === room.name }"
           class="list-group-item list-group-item-action d-flex justify-content-between align-items-center">
            {{ room.name }}
            <span class="badge badge-primary badge-pill">
                {{ room.participantCount }} / {{ room.maxParticipants }}
            </span>
        </a>
    </div>
</div>

The RoomsComponent subscribes to the videoChatService.$roomsUpdated observable. Any time a room is created, RoomsComponent will signal its creation through the observable and the NotificationHub service will be listening.

Using SignalR, the NotificationHub echoes this message out to all the other connected clients. This mechanism enables the server-side code to provide real-time web functionality to client apps. In this application, the RoomsComponent will automatically update the list of available rooms.

To implement the RoomsComponent functionality replace the contents of rooms/rooms.component.ts with the following TypeScript code:

import { Component, OnInit, OnDestroy, EventEmitter, Output, Input } from '@angular/core';
import { Subscription } from 'rxjs';
import { tap } from 'rxjs/operators';
import { NamedRoom, VideoChatService } from '../services/videochat.service';

@Component({
    selector: 'app-rooms',
    styleUrls: ['./rooms.component.css'],
    templateUrl: './rooms.component.html',
})
export class RoomsComponent implements OnInit, OnDestroy {
    @Output() roomChanged = new EventEmitter<string>();
    @Input() activeRoomName: string;

    roomName: string;
    rooms: NamedRoom[];

    private subscription: Subscription;

    constructor(
        private readonly videoChatService: VideoChatService) { }

    async ngOnInit() {
        await this.updateRooms();
        this.subscription =
            this.videoChatService
                .$roomsUpdated
                .pipe(tap(_ => this.updateRooms()))
                .subscribe();
    }

    ngOnDestroy() {
        if (this.subscription) {
            this.subscription.unsubscribe();
        }
    }

    onTryAddRoom() {
        if (this.roomName) {
            this.onAddRoom(this.roomName);
        }
    }

    onAddRoom(roomName: string) {
        this.roomName = null;
        this.roomChanged.emit(roomName);
    }

    onJoinRoom(roomName: string) {
        this.roomChanged.emit(roomName);
    }

    async updateRooms() {
        this.rooms = (await this.videoChatService.getAllRooms()) as NamedRoom[];
    }
}

Under the hood, when a user selects a room to join or creates a room, they connect to that room via the twilio-video SDK.

The RoomsComponent expects a room name and an array of LocalTrack objects. These local tracks come from the local camera preview, which provides both an audio and a video track. The LocalTrack objects are published to rooms that a user joins so other participants can subscribe to and receive them.

Implement the Participants component

What good is a room without any participants? It's just an empty room—that's no fun!

But rooms do have something very cool: they extend EventEmitter. This means a room enables the registration of event listeners.

To implement the ParticipantsComponent, replace the contents of participants/participants.component.ts with the following TypeScript code:

import {
    Component,
    ViewChild,
    ElementRef,
    Output,
    Input,
    EventEmitter,
    Renderer2
} from '@angular/core';
import {
    Participant,
    RemoteTrack,
    RemoteAudioTrack,
    RemoteVideoTrack,
    RemoteParticipant,
    RemoteTrackPublication
} from 'twilio-video';

@Component({
    selector: 'app-participants',
    styleUrls: ['./participants.component.css'],
    templateUrl: './participants.component.html',
})
export class ParticipantsComponent {
    @ViewChild('list') listRef: ElementRef;
    @Output('participantsChanged') participantsChanged = new EventEmitter<boolean>();
    @Output('leaveRoom') leaveRoom = new EventEmitter<boolean>();
    @Input('activeRoomName') activeRoomName: string;

    get participantCount() {
        return !!this.participants ? this.participants.size : 0;
    }

    get isAlone() {
        return this.participantCount === 0;
    }

    private participants: Map<Participant.SID, RemoteParticipant>;
    private dominantSpeaker: RemoteParticipant;

    constructor(private readonly renderer: Renderer2) { }

    clear() {
        if (this.participants) {
            this.participants.clear();
        }
    }

    initialize(participants: Map<Participant.SID, RemoteParticipant>) {
        this.participants = participants;
        if (this.participants) {
            this.participants.forEach(participant => this.registerParticipantEvents(participant));
        }
    }

    add(participant: RemoteParticipant) {
        if (this.participants && participant) {
            this.participants.set(participant.sid, participant);
            this.registerParticipantEvents(participant);
        }
    }

    remove(participant: RemoteParticipant) {
        if (this.participants && this.participants.has(participant.sid)) {
            this.participants.delete(participant.sid);
        }
    }

    loudest(participant: RemoteParticipant) {
        this.dominantSpeaker = participant;
    }

    onLeaveRoom() {
        this.leaveRoom.emit(true);
    }

    private registerParticipantEvents(participant: RemoteParticipant) {
        if (participant) {
            participant.tracks.forEach(publication => this.subscribe(publication));
            participant.on('trackPublished', publication => this.subscribe(publication));
            participant.on('trackUnpublished',
                publication => {
                    if (publication && publication.track) {
                        this.detachRemoteTrack(publication.track);
                    }
                });
        }
    }

    private subscribe(publication: RemoteTrackPublication | any) {
        if (publication && publication.on) {
            publication.on('subscribed',
                (track: RemoteTrack) => this.attachRemoteTrack(track));
            publication.on('unsubscribed',
                (track: RemoteTrack) => this.detachRemoteTrack(track));

        }
    }

    private attachRemoteTrack(track: RemoteTrack) {
        if (this.isAttachable(track)) {
            const element = track.attach();
            this.renderer.data.id = track.sid;
            this.renderer.setStyle(element, 'width', '95%');
            this.renderer.setStyle(element, 'margin-left', '2.5%');
            this.renderer.appendChild(this.listRef.nativeElement, element);
            this.participantsChanged.emit(true);
        }
    }

    private detachRemoteTrack(track: RemoteTrack) {
        if (this.isDetachable(track)) {
            track.detach().forEach(el => el.remove());
            this.participantsChanged.emit(true);
        }
    }

    private isAttachable(track: RemoteTrack): track is RemoteAudioTrack | RemoteVideoTrack {
        return !!track &&
            ((track as RemoteAudioTrack).attach !== undefined ||
            (track as RemoteVideoTrack).attach !== undefined);
    }

    private isDetachable(track: RemoteTrack): track is RemoteAudioTrack | RemoteVideoTrack {
        return !!track &&
            ((track as RemoteAudioTrack).detach !== undefined ||
            (track as RemoteVideoTrack).detach !== undefined);
    }
}

ParticipantComponent also extends an EventEmitter and offers its own set of valuable events. Between the room, participant, publication, and track, there is a complete set of events to handle when participants join or leave a room.

When they join, an event fires and provides publication details of their tracks so the application can render their audio and video to the user interface DOM of each client as the tracks become available.

To implement the user interface for the participants component, replace the contents of the participants/participants.component.html file with the following HTML markup:

<div id="participant-list">
    <div id="alone" [ngClass]="{ 'table': isAlone, 'd-none': !isAlone }">
        <p class="text-center text-monospace h3" style="display: table-cell">
            You're the only one in this room. <i class="far fa-frown"></i>
            <br />
            <br />
            As others join, they'll start showing up here...
        </p>
    </div>
    <div [ngClass]="{ 'd-none': isAlone }">
        <nav class="navbar navbar-expand-lg navbar-dark bg-light shadow">
            <ul class="navbar-nav ml-auto">
                <li class="nav-item">
                    <button type="button" class="btn btn-lg leave-room"
                            title="Click to leave this room." (click)="onLeaveRoom()">
                        Leave "{{ activeRoomName }}" Room?
                    </button>
                </li>
            </ul>
        </nav>
        <div #list></div>
    </div>
</div>

Much like the CameraComponent, the audio and video elements associated with a participant are render targets to the #list element of the DOM. But instead of being local tracks, these are remote tracks published from remote participants.

Implement device settings management

There are a few components in play with the concept of settings. We’ll have a camera component beneath several DeviceSelectComponents objects.

Replace the contents of settings/settings.component.ts with the following TypeScript code:

import {
    Component,
    OnInit,
    OnDestroy,
    EventEmitter,
    Input,
    Output,
    ViewChild
} from '@angular/core';
import { CameraComponent } from '../camera/camera.component';
import { DeviceSelectComponent } from './device-select.component';
import { DeviceService } from '../services/device.service';
import { debounceTime } from 'rxjs/operators';
import { Subscription } from 'rxjs';

@Component({
    selector: 'app-settings',
    styleUrls: ['./settings.component.css'],
    templateUrl: './settings.component.html'
})
export class SettingsComponent implements OnInit, OnDestroy {
    private devices: MediaDeviceInfo[] = [];
    private subscription: Subscription;
    private videoDeviceId: string;

    get hasAudioInputOptions(): boolean {
        return this.devices && this.devices.filter(d => d.kind === 'audioinput').length > 0;
    }
    get hasAudioOutputOptions(): boolean {
        return this.devices && this.devices.filter(d => d.kind === 'audiooutput').length > 0;
    }
    get hasVideoInputOptions(): boolean {
        return this.devices && this.devices.filter(d => d.kind === 'videoinput').length > 0;
    }

    @ViewChild('camera') camera: CameraComponent;
    @ViewChild('videoSelect') video: DeviceSelectComponent;

    @Input('isPreviewing') isPreviewing: boolean;
    @Output() settingsChanged = new EventEmitter<MediaDeviceInfo>();

    constructor(
        private readonly deviceService: DeviceService) { }

    ngOnInit() {
        this.subscription =
            this.deviceService
                .$devicesUpdated
                .pipe(debounceTime(350))
                .subscribe(async deviceListPromise => {
                    this.devices = await deviceListPromise;
                    this.handleDeviceAvailabilityChanges();
                });
    }

    ngOnDestroy() {
        if (this.subscription) {
            this.subscription.unsubscribe();
        }
    }

    async onSettingsChanged(deviceInfo: MediaDeviceInfo) {
        this.settingsChanged.emit(deviceInfo);
    }

    async showPreviewCamera() {
        this.isPreviewing = true;

        if (!this.camera.videoTrack || this.videoDeviceId !== this.video.selectedId) {
            this.videoDeviceId = this.video.selectedId;
            const videoDevice = this.devices.find(d => d.deviceId === this.video.selectedId);
            await this.camera.initializePreview(videoDevice.deviceId);
        }

        return this.camera.videoTrack;
    }

    hidePreviewCamera() {
        this.isPreviewing = false;
        this.camera.finalizePreview();
        return this.devices.find(d => d.deviceId === this.video.selectedId);
    }

    private handleDeviceAvailabilityChanges() {
        if (this.devices && this.devices.length && this.video && this.video.selectedId) {
            let videoDevice = this.devices.find(d => d.deviceId === this.video.selectedId);
            if (!videoDevice) {
                videoDevice = this.devices.find(d => d.kind === 'videoinput');
                if (videoDevice) {
                    this.video.selectedId = videoDevice.deviceId;
                    this.onSettingsChanged(videoDevice);
                }
            }
        }
    }
}

The SettingsComponent object gets all the available devices and binds them to the DeviceSelectComponent objects that it’s a parent of. As video input device selections change the local camera component preview is updated to reflect those changes. The deviceService.$devicesUpdated observable fires as system level device availability changes. The list of available devices updates accordingly.

To implement the user interface for settings, replace the contents of settings/settings.component.html with the following HTML markup:

<div class="jumbotron">
    <h4 class="display-4"><i class="fas fa-cogs"></i> Settings</h4>
    <form class="form">
        <div class="form-group" *ngIf="hasAudioInputOptions">
            <app-device-select [kind]="'audioinput'"
                               [label]="'Audio Input Source'" [devices]="devices"
                               (settingsChanged)="onSettingsChanged($event)"></app-device-select>
        </div>
        <div class="form-group" *ngIf="hasAudioOutputOptions">
            <app-device-select [kind]="'audiooutput'"
                               [label]="'Audio Output Source'" [devices]="devices"
                               (settingsChanged)="onSettingsChanged($event)"></app-device-select>
        </div>
        <div class="form-group" *ngIf="hasVideoInputOptions">
            <app-device-select [kind]="'videoinput'" #videoSelect
                               [label]="'Video Input Source'" [devices]="devices"
                               (settingsChanged)="onSettingsChanged($event)"></app-device-select>
        </div>
    </form>
    <div [style.display]="isPreviewing ? 'block' : 'none'">
        <app-camera #camera></app-camera>
    </div>
</div>

If a media device option is not available to select, the DeviceSelectComponent object is not rendered. When an option is available, the user can configure their desired device.

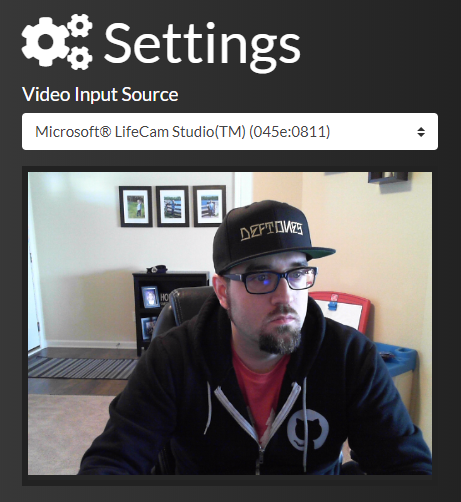
As the user changes the selected device, the component emits an event to any active listeners, enabling them to take action on the currently selected device. The list of available devices is  dynamically updated as devices are connected to, or removed from, the user’s computer. The user also sees a preview of the selected video device, as shown below:

Preview of the selected video device

To implement the settings user interface, replace the contents of settings/device-select.component.ts with the following TypeScript code:

import { Component, EventEmitter, Input, Output } from '@angular/core';
import { StorageService, StorageKey } from '../services/storage.service';

class IdGenerator {
    protected static id: number = 0;
    static getNext() {
        return ++ IdGenerator.id;
    }
}

@Component({
    selector: 'app-device-select',
    templateUrl: './device-select.component.html'
})
export class DeviceSelectComponent {
    private localDevices: MediaDeviceInfo[] = [];

    id: string;
    selectedId: string;

    get devices(): MediaDeviceInfo[] {
        return this.localDevices;
    }

    @Input() label: string;
    @Input() kind: MediaDeviceKind;
    @Input() key: StorageKey;
    @Input() set devices(devices: MediaDeviceInfo[]) {
        this.selectedId = this.getOrAdd(this.key, this.localDevices = devices);
    }

    @Output() settingsChanged = new EventEmitter<MediaDeviceInfo>();

    constructor(
        private readonly storageService: StorageService) {
        this.id = `device-select-${IdGenerator.getNext()}`;
    }

    onSettingsChanged(deviceId: string) {
        this.setAndEmitSelections(this.key, this.selectedId = deviceId);
    }

    private getOrAdd(key: StorageKey, devices: MediaDeviceInfo[]) {
        const existingId = this.storageService.get(key);
        if (devices && devices.length > 0) {
            const defaultDevice = devices.find(d => d.deviceId === existingId) || devices[0];
            this.storageService.set(key, defaultDevice.deviceId);
            return defaultDevice.deviceId;
        }

        return null;
    }

    private setAndEmitSelections(key: StorageKey, deviceId: string) {
        this.storageService.set(key, deviceId);
        this.settingsChanged.emit(this.devices.find(d => d.deviceId === deviceId));
    }
}

Replace the contents of settings/device-select.component.html with the following HTML markup:

<label for="{{ id }}" class="h5">{{ label }}</label>
<select class="custom-select" id="{{ id }}"
        (change)="onSettingsChanged($event.target.value)">
    <option *ngFor="let device of devices"
            [value]="device.deviceId" [selected]="device.deviceId === selectedId">
        {{ device.label }}
    </option>
</select>

The DeviceSelectComponent object is intended to encapsulate the selection of devices. Rather than bloating the settings component with redundancy, there is a single component that is reused and parameterized with @Input and @Output decorators.

Implement the Home component

The HomeComponent acts as the orchestration piece between the various components and is responsible for the layout of the app. To implement the home user interface, replace the contents of home/home.component.ts with the following TypeScript code:

import { Component, ViewChild, OnInit } from '@angular/core';
import { createLocalAudioTrack, Room, LocalTrack, LocalVideoTrack, LocalAudioTrack, RemoteParticipant } from 'twilio-video';
import { RoomsComponent } from '../rooms/rooms.component';
import { CameraComponent } from '../camera/camera.component';
import { SettingsComponent } from '../settings/settings.component';
import { ParticipantsComponent } from '../participants/participants.component';
import { VideoChatService } from '../services/videochat.service';
import { HubConnection, HubConnectionBuilder, LogLevel } from '@microsoft/signalr';

@Component({
    selector: 'app-home',
    styleUrls: ['./home.component.css'],
    templateUrl: './home.component.html',
})
export class HomeComponent implements OnInit {
    @ViewChild('rooms') rooms: RoomsComponent;
    @ViewChild('camera') camera: CameraComponent;
    @ViewChild('settings') settings: SettingsComponent;
    @ViewChild('participants') participants: ParticipantsComponent;

    activeRoom: Room;

    private notificationHub: HubConnection;

    constructor(
        private readonly videoChatService: VideoChatService) { }

    async ngOnInit() {
        const builder =
            new HubConnectionBuilder()
                .configureLogging(LogLevel.Information)
                .withUrl(`${location.origin}/notificationHub`);

        this.notificationHub = builder.build();
        this.notificationHub.on('RoomsUpdated', async updated => {
            if (updated) {
                await this.rooms.updateRooms();
            }
        });
        await this.notificationHub.start();
    }

    async onSettingsChanged(deviceInfo?: MediaDeviceInfo) {
        await this.camera.initializePreview(deviceInfo.deviceId);
        if (this.settings.isPreviewing) {
            const track = await this.settings.showPreviewCamera();
            if (this.activeRoom) {
                const localParticipant = this.activeRoom.localParticipant;
                localParticipant.videoTracks.forEach(publication => publication.unpublish());
                await localParticipant.publishTrack(track);
            }
        }
    }

    async onLeaveRoom(_: boolean) {
        if (this.activeRoom) {
            this.activeRoom.disconnect();
            this.activeRoom = null;
        }

        const videoDevice = this.settings.hidePreviewCamera();
        await this.camera.initializePreview(videoDevice && videoDevice.deviceId);

        this.participants.clear();
    }

    async onRoomChanged(roomName: string) {
        if (roomName) {
            if (this.activeRoom) {
                this.activeRoom.disconnect();
            }

            this.camera.finalizePreview();

            const tracks = await Promise.all([
                createLocalAudioTrack(),
                this.settings.showPreviewCamera()
            ]);

            this.activeRoom =
                await this.videoChatService
                          .joinOrCreateRoom(roomName, tracks);

            this.participants.initialize(this.activeRoom.participants);
            this.registerRoomEvents();

            this.notificationHub.send('RoomsUpdated', true);
        }
    }

    onParticipantsChanged(_: boolean) {
        this.videoChatService.nudge();
    }

    private registerRoomEvents() {
        this.activeRoom
            .on('disconnected',
                (room: Room) => room.localParticipant.tracks.forEach(publication => this.detachLocalTrack(publication.track)))
            .on('participantConnected',
                (participant: RemoteParticipant) => this.participants.add(participant))
            .on('participantDisconnected',
                (participant: RemoteParticipant) => this.participants.remove(participant))
            .on('dominantSpeakerChanged',
                (dominantSpeaker: RemoteParticipant) => this.participants.loudest(dominantSpeaker));
    }

    private detachLocalTrack(track: LocalTrack) {
        if (this.isDetachable(track)) {
            track.detach().forEach(el => el.remove());
        }
    }

    private isDetachable(track: LocalTrack): track is LocalAudioTrack | LocalVideoTrack {
        return !!track
            && ((track as LocalAudioTrack).detach !== undefined
                || (track as LocalVideoTrack).detach !== undefined);
    }
}

To implement the home user interface, replace the contents of home/home.component.html with the following HTML markup:

<div class="grid-container">
    <div class="grid-bottom-right">
        <a href="https://twitter.com/davidpine7" target="_blank"><i class="fab fa-twitter"></i> @davidpine7</a>
    </div>
    <div class="grid-left">
        <app-rooms #rooms (roomChanged)="onRoomChanged($event)"
                   [activeRoomName]="!!activeRoom ? activeRoom.name : null"></app-rooms>
    </div>
    <div class="grid-content">
        <app-camera #camera [style.display]="!!activeRoom ? 'none' : 'block'"></app-camera>
        <app-participants #participants
                          (leaveRoom)="onLeaveRoom($event)"
                          (participantsChanged)="onParticipantsChanged($event)"
                          [style.display]="!!activeRoom ? 'block' : 'none'"
                          [activeRoomName]="!!activeRoom ? activeRoom.name : null"></app-participants>
    </div>
    <div class="grid-right">
        <app-settings #settings (settingsChanged)="onSettingsChanged($event)"></app-settings>
    </div>
    <div class="grid-top-left">
        <a href="https://www.twilio.com/video" target="_blank">
            Powered by Twilio
        </a>
    </div>
</div>

The home component provides the layout for the client user interface, so it needs some styling to arrange and format the UI elements. To do that, replace the contents of home/home.component.css with the following CSS code.

.grid-container {
  display: grid;
  height: 100vh;
  grid-template-columns: 2fr 4fr 2fr;
  grid-template-rows: 1fr 7fr 1fr;
  grid-template-areas: "top-left . top-right" "left content right" "bottom-left . bottom-right";
}

.grid-content {
  grid-area: content;
  display: flex;
  justify-content: center;
  align-items: center;
  background-color: rgb(56, 56, 56);
  border-top: solid 6px #F22F46;
  border-bottom: solid 6px #F22F46;
}

.grid-left {
  grid-area: left;
  background: linear-gradient(to left, rgb(56, 56, 56) 0, transparent 100%);
  border-top: solid 6px #F22F46;
  border-bottom: solid 6px #F22F46;
}

.grid-right {
  grid-area: right;
  background: linear-gradient(to right, rgb(56, 56, 56) 0, transparent 100%);
  border-top: solid 6px #F22F46;
  border-bottom: solid 6px #F22F46;
}

.grid-top-left,
.grid-top-right,
.grid-bottom-left,
.grid-bottom-right {
  display: flex;
  justify-content: center;
  align-items: center;
}

.grid-top-left {
  grid-area: top-left;
}
.grid-top-right {
  grid-area: top-right;
}
.grid-bottom-left {
  grid-area: bottom-left;
}
.grid-bottom-right {
  grid-area: bottom-right;
}

Understand video chat events

The Angular client app uses a number of resources in the Twilio Programmable Video SDK. The following is a comprehensive list of each event associated with an SDK resource:

Event Registration

Description

room.on('disconnected', room => { });

Occurs when a user leaves the room

room.on('participantConnected', participant => { });

Occurs when a new participant joins the room

room.on('participantDisconnected', participant => { });

Occurs when a participant leaves the room

participant.on('trackPublished', publication => { });

Occurs when a track publication is published

participant.on('trackUnpublished', publication => { });

Occurs when a track publication is unpublished

publication.on('subscribed', track => { });

Occurs when a track is subscribed

publication.on('unsubscribed', track => { });

Occurs when a track is unsubscribed

Putting it all together

Phew, this was quite the project! Time to try it out. Run the application. If you’re running the application in Visual Studio 2019 using IIS Express, the user interface will appear at a randomly assigned port. If you run it another way, navigate to: https://localhost:5001.

After the application loads, your browser will prompt you to allow camera access. Grant the request.

If you have two video sources on your computer, open two different browsers (or an incognito window) and select different devices on each browser. Settings enable you to choose the preferred video input source.

In one browser, create a room and then join it in the other browser. When a room is created, the local preview is moved just under the settings. That way, their video stream of remote room participants who subsequently join, will render in the larger viewing area.

If you don’t have two video sources on your computer, watch for a forthcoming post that will teach you how to deploy this application on Microsoft Azure. When you’ve deployed the app to the cloud you can have multiple users join video chat rooms.

Summary of building a video chat app with ASP.NET Core, Angular, and Twilio

This post showed you how to build a fully functioning video chat application with Angular, ASP.NET Core, SignalR, and Twilio Programmable Video. The Twilio .NET SDK provides JWTs to client-side Angular code as well as getting room details via the ASP.NET Core Web API. The client-side Angular SPA integrates the Twilio JavaScript SDK.

Additional resources

A working example of the application is available on the author’s Azure domain: https://ievangelist-videochat.azurewebsites.net/. The companion repository on GitHub includes better styling, persistent selections, and other features you may want to include in your production app.

You can learn more about the technologies used in this post from the following sources:

David Pine is a 2x Microsoft MVP, Google Developer Expert, Twilio Champion, and international speaker. David loves interacting with the developer community on Twitter @davidpine7. Be sure to check out his blog at https://davidpine.net.