Building Real-Time Applications with Blazor Server and Firestore
Time to read: 8 minutes
October 16, 2020
Written by
Reviewed by

Blazor is a framework for building interactive client-side user interfaces for web applications using .NET. Using Blazor, .NET developers can build stylish and performant web interfaces using C# and ASP.NET Core instead of JavaScript. [Pause for applause.]
Blazor Server provides support for hosting Razor components on a server in an ASP.NET Core app. At runtime, the Blazor Server app sends UI events from the browser to the server and applies UI updates sent from the server to the rendered component.
Blazor Server is built on SignalR, which is built on websockets. Among things, websockets enable Blazor Server to push changes from the server to the browser at any time. You can build real time UIs when you combine this with a real-time database such as Google Firestore.
Firestore is Google Firebase's real-time database offering on the Google Cloud Platform (GCP). Google provides .NET libraries for interacting with Firestore. The high-level library for interacting with Firestore is Google.Cloud.Firestore, which can be found on NuGet.
This post will show you how to:
- Create a Firestore on GCP using the Cloud Shell
- Integrate Firestore with a .NET Console application
- Integrate Firestore with Blazor Server to create a real time UI
Note: The Firestore .NET libraries are designed to be run in a server environment with full access/permissions to the database. Client-side technologies—including Blazor WASM—are not supported, nor recommended.
Prerequisites
This tutorial is for developers at any experience level. Prior experience with the following technologies is recommended, but not required:
- .NET and ASP.NET Core
- HTML
- Blazor
- Firebase and Firestore
You’ll need the following development resources to build and run the case study project:
- .NET Core 3.1 SDK or higher
- Visual Studio Code with the C# extension –or– Visual Studio 2019 (the Community edition is free) with the following workloads enabled: ASP.NET and web development, .NET Core cross-platform development
- Google account
- Google Cloud Platform – Get started with this link to receive $300 credit to spend on cloud resources.
There is a companion repository available on GitHub for this tutorial. It contains the complete code for the solution you’re going to build.
Getting started with Firestore
Once you’re set up with a Google account and Google Cloud Platform, open the Cloud Console, locate the Cloud Shell icon at the top right, and click on it:
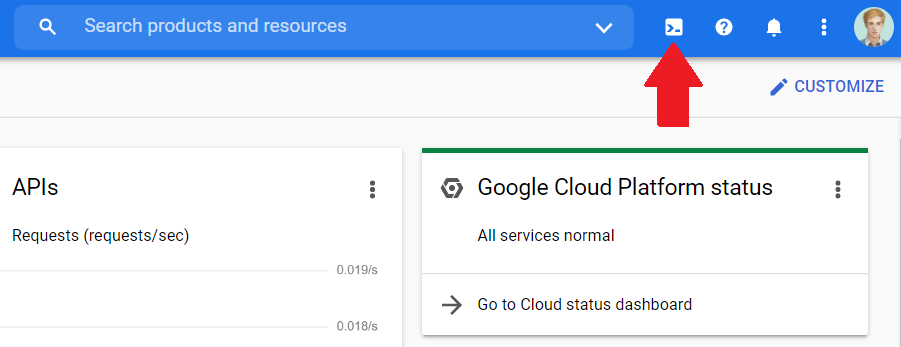
A shell will open up in your browser window. Use the Cloud Shell to create a Firestore by executing the upcoming commands to set variables that will be used in upcoming commands:
The PROJECT_ID will be a concatenation of “blazor-sample-” and your username to ensure the ID is universally unique as required by GCP. Project ID’s in GCP also have the following requirements:
The project ID must be a unique string of 6 to 30 lowercase letters, digits, or hyphens. It must start with a letter, and cannot have a trailing hyphen. You cannot change a project ID once it has been created. You cannot re-use a project ID that is in use, or one that has been used for a deleted project. — GCP – Creating and managing projects
Update the REGION variable to the region closest to you or where you will host your application. To find all available regions for App Engine (Firestore), run this command:
Run these commands next:
This will create a project that will act as the container to hold together all your cloud resources. The second command will configure the new project as the current project you are working on. Subsequent commands will implicitly receive the new project via the --project argument.
Run the following commands to create an App Engine and Firestore resource:
You'll need to create a service account with a project owner role to authenticate and communicate with Firestore.
Run the following commands to create a service account and assign the project owner role:
Run the following commands to create an authentication file and download it:
This file contains the keys and parameters necessary to authenticate/connect with GCP and Firestore.
You can find a copy of the entire script in the GitHub repository.
Integrating Firestore with a .NET Console application
Before integrating Firestore with Blazor, verify that you can interact with Firestore using a simple console application.
Run the following commands to create a .NET console application:
Update Program.cs with the following code:
Update the variables projectName and authFilePath to match your local environment. The console application will set the GOOGLE_APPLICATION_CREDENTIALS environment variable to the path of the json-authentication file. Firestore expects this environment variable and will use the file to authenticate to Firestore.
Enter the command dotnet run to try out the application and verify communication with Firestore works as expected.
In summary, here's what the Firestore functions do:
FirestoreDb.Createcreates aFirestoreDbobject which can be used to perform CRUD operations on collections and documents.firestoreDb.Collection("users")creates a reference to the "users" collection. It does not actually query or create the collection in Firestore, instead aCollectionReferenceis returned even if the collection doesn't exist yet.usersCollection.Document("alovelace")creates a reference to the "alovelace" document. It does not actually query or create the document, instead aDocumentReferenceis returned even if the document doesn't exist yet.docRef.SetAsync(user)will create the user document if it doesn't exist already. If it does exist, it will update the document.usersCollection.GetSnapshotAsync()will fetch the data from Firestore. TheCollectionReferenceclass contains methods to create queries such asOrderBy,Limit,Where…, etc. These query methods will return aQueryobject which also containsGetSnapshotAsync. When you callGetSnapshotAsyncdirectly on a collection, it will return all documents in the collection.- You can pass an action to the
Listenfunction. The action will be invoked initially with the documents returned by the query/collection. When a change is made to the collection, the action will be called again with the documents returned by the query/collection. It's important to note that the specific changes are not returned, but the entire result of the query is. usersCollection.AddAsync(user);will create a new document and generate a document ID.
When you enter the first and last name at the console prompt you should see the console output from the Listen callback.
Creating a real time UI with Blazor Server and Firestore
Create a new Blazor server application by running these commands:
Add the Firestore NuGet package:
Remove all .razor files from the Pages folder and create a new file, ChatRoom.razor, in the Pages folder.
Update ChatRoom.razor to match the following content:
This Chatroom page is a dummy version where the Firestore code needs to be implemented.
First, you'll need a FirestoreDb to interact with Firestore. Add the method CreateFirestoreDb in the @code section:
Update the projectName and authFilePath to match your local environment.
Instead of creating documents using Dictionary<string, object>, you can also use typed classes and annotate them with attributes provided by the Firestore library. Update the ChatMessage class to match the content below:
The FirestoreData attribute marks the class as a Firestore document. The FirestoreProperty attribute marks the property to be serialized and stored in Firestore. The ServerTimestamp attribute will auto-populate the property with the Creation/Update time on the server. CreatedAt will be used later to order the messages in a query.
Complete the implementation of the SendMessage method. Create a new ChatMessage instance. Call CreateFirestoreDb and pass the ChatMessage instance to firestoreDb.Collection("chatMessages").AddAsync.
Modify the SendMessage method so it matches the code below:
When you run the Blazor application, you can now create messages, but they won't show up yet. You can verify the messages are created by viewing the data in the Firebase GCP console.
Replace the existing OnAfterRender method with the following code:
To fetch the messages in real time, override the OnAfterRender method and query the "chatMessages" collection. Use LimitToLast and OrderByDescending to only show the last 100 messages sorted by "CreatedAt". Call Listen on the query. It's important that you only call this when the component is rendered for the first time, otherwise you'll create a new listener after every render.
Inside the Listen lambda callback, empty the chatMessages list and add the new messages to the list.
Use the ConvertTo<ChatMessage> method to convert the documents to ChatMessage instances.
It's important to tell Blazor that the local state has changed, so it can re-render with the updated chatMessages. Doing this directly inside listen will not work because the Listen callback runs on a different thread than renderer's synchronization context. Using InvokeAsync, you can run the code on the correct thread and within the renderer's synchronization context. Now the Blazor component will re-render the component in real time!
Replace the existing Dispose() method stub with the following code:
Stop the firestoreChangeListener in the Dispose method using StopAsync.
For your reference, here's the code for the entire page:
Now you have a working real-time chat application!
Note: This sample and tutorial is a proof of concept. Make sure to verify performance and scalability requirements when using Blazor Server with Firestore!
Testing the completed application
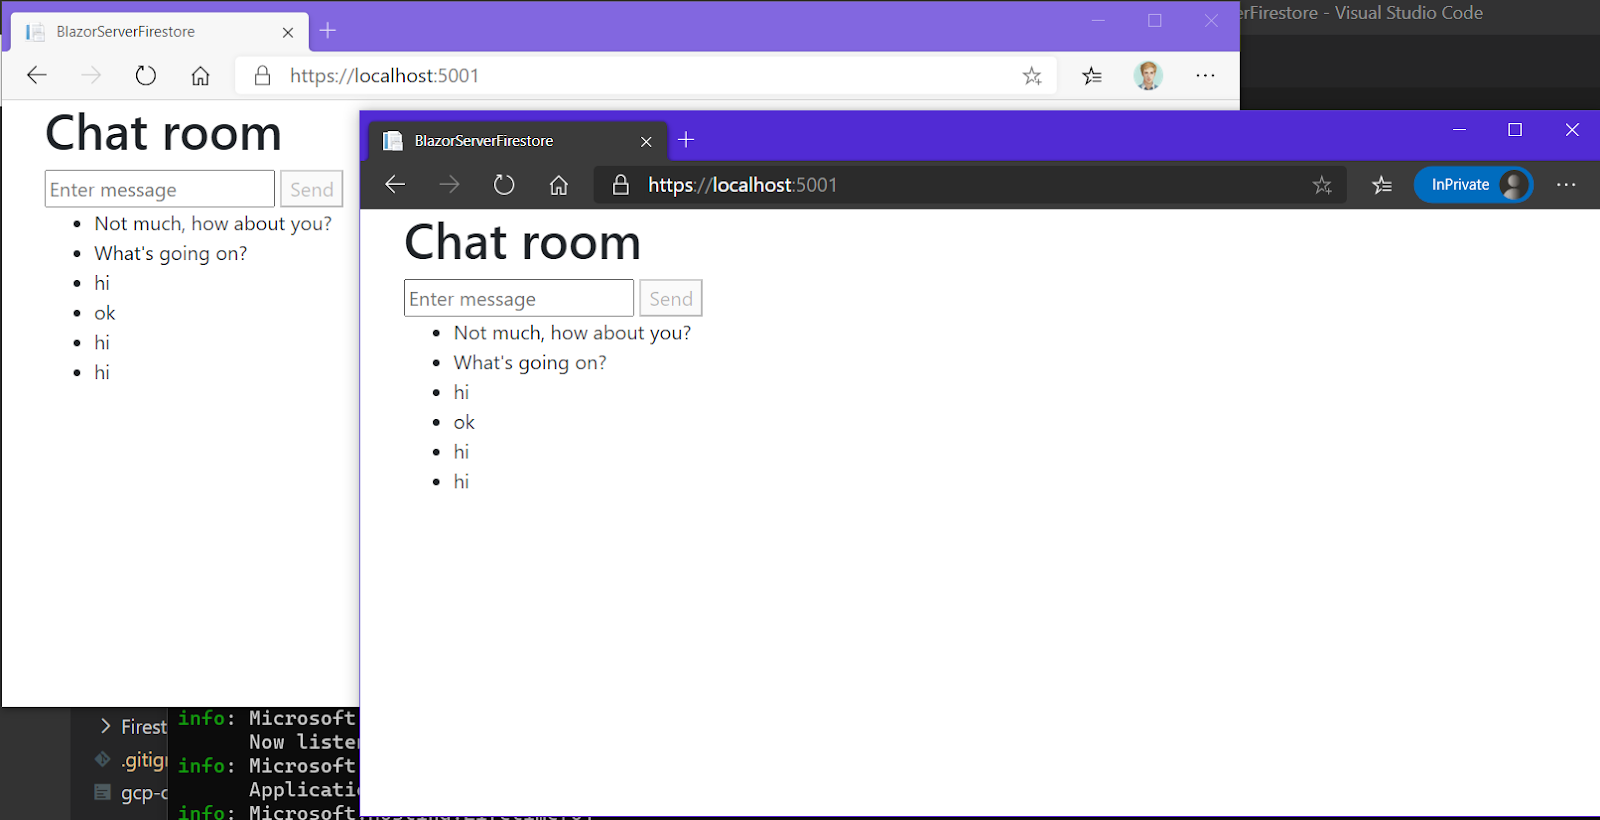
To test the application, execute the dotnet run command on your Blazor Server project. Open the application in a browser. The default URL for local development should be https://localhost:5001.
Open the application in two separate browser windows. You'll notice that when you enter a chat message in one window, the chat message is immediately shown in the other window.
Cleanup cloud resources
Don't forget to delete your cloud resources to save costs. Use the following Google Cloud Shell command to delete you GCP project and all its resources:
Replace blazor-sample-$USER with the name of your GCP project.
Potential enhancements
The ChatMessage class is embedded as a nested class for the sake of the demo. It’s recommended to move this class to its own file as done in the BlazorFirestoreSamples folder of the GitHub repository.
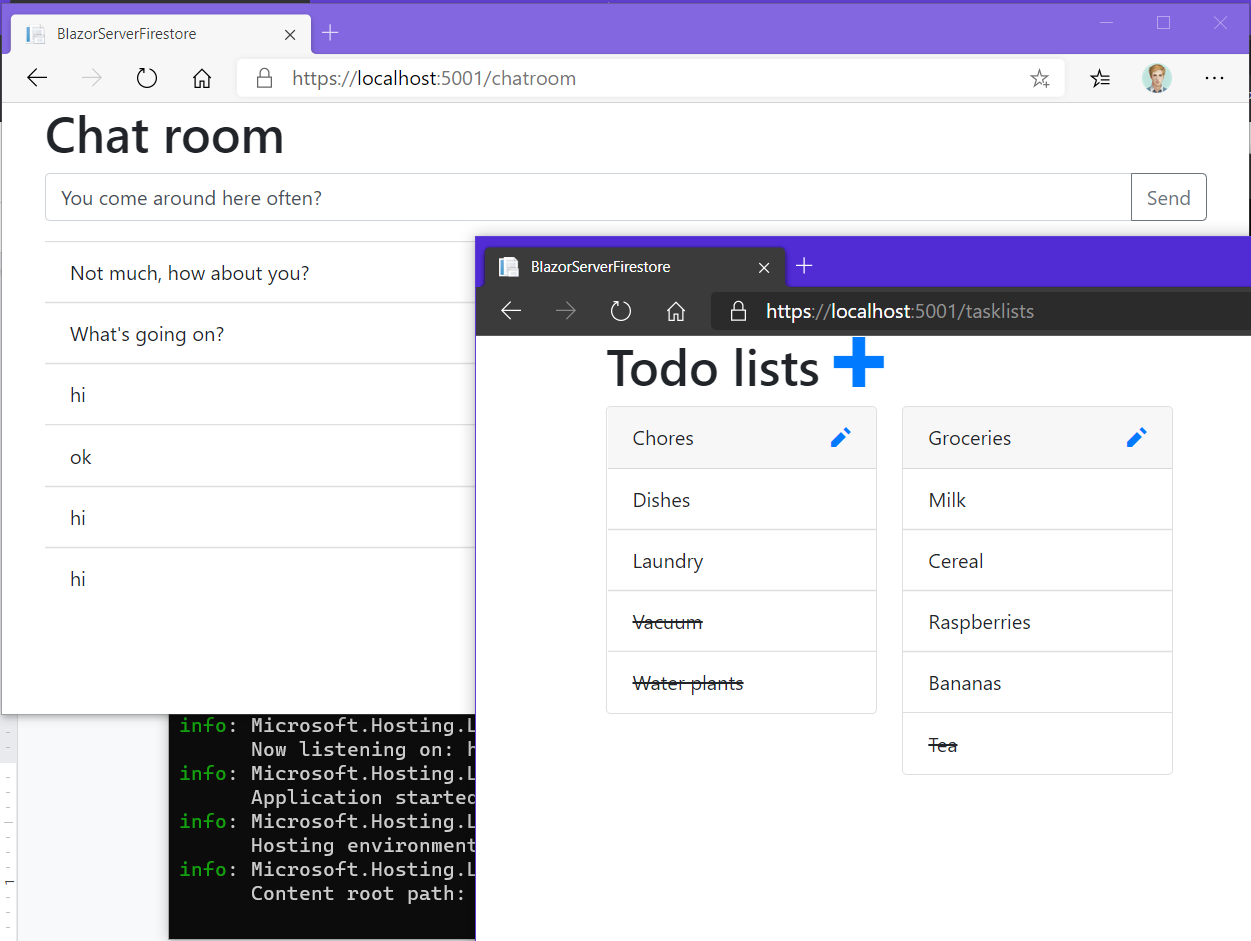
If you want to see more samples, the BlazorFirestoreSamples folder in the GitHub repository contains the same chat application but with some bootstrap styling and a to-do list application. Additionally, the FirestoreDb is injected using dependency injection and configured using AppSettings.json.
Do you want to build a chat app this way?
Probably not.
Robust, scalable chat applications do a lot more than pass messages back and forth between website users. If you want to integrate a chat solution into your production application take a look at Twilio Programmable Chat. It provides real time data failover, secure messaging, team management, and an elastic infrastructure: the kinds of features you need if your organization is going to rely on chat to meet its sales and operational needs. Check out the list of capabilities and developer documentation to get rolling.
Summary
In this tutorial you learned how to create GCP cloud resources and, more specifically, to create a Firestore using the Cloud Shell. You also saw how to integrate a .NET Console application with the Firestore database using Google’s Firestore library. You learned how to integrate the Firestore database with Blazor Server to create a real-time UI by building a functional chat application.
Additional resources
To delve deeper into the topics covered in this post, consult the following references:
Pushing UI changes from Blazor Server to browser on server raised events – This article delves deeper into how Blazor Server pushes its state and UI changes to the browser.
Google’s Firestore .NET documentation – This documentation will provide more details on the .NET Firestore implementation and how to use it to integrate into your projects.
Google’s quickstart using a server client library – A quickstart guide that walks you through using the Firestore with multiple server languages including C#. This guide will use the Google Cloud Console GUI instead of the Cloud Shell to create the Firestore resource.
Firestore documentation – The documentation home of the Firestore documentation to learn about the NoSQL real time database.
Niels Swimberghe is a Belgian Full Stack Developer and blogger. Get in touch with Niels on Twitter @RealSwimburger and follow Niels’ blog on .NET, Azure, and web development at swimburger.net.
Related Resources
Twilio Docs
From APIs to SDKs to sample apps
API reference documentation, SDKs, helper libraries, quickstarts, and tutorials for your language and platform.
Resource Center
The latest ebooks, industry reports, and webinars
Learn from customer engagement experts to improve your own communication.
Ahoy
Twilio's developer community hub
Best practices, code samples, and inspiration to build communications and digital engagement experiences.