Building Video Applications on Android

March 17, 2016
Written by

Web

This article is for reference only. We're not onboarding new customers to Programmable Video. Existing customers can continue to use the product until December 5, 2024.


We recommend migrating your application to the API provided by our preferred video partner, Zoom. We've prepared this migration guide to assist you in minimizing any service disruption.

Context is everything, and there’s nothing more annoying than using a mobile application and then being told you need to switch to a different app to communicate with other users or technical support. In my last blog post I showed you how to add IP communications into an existing application using the Twilio IP Messaging SDK for Android.

Twilio also offers a Video SDK which can be used to add video communications into the apps you’re already building.

In this blog post I will show you how to use the Twilio Video SDK and how to video applications on Android that let you have a video conversation between a device and a browser.

What you’ll need

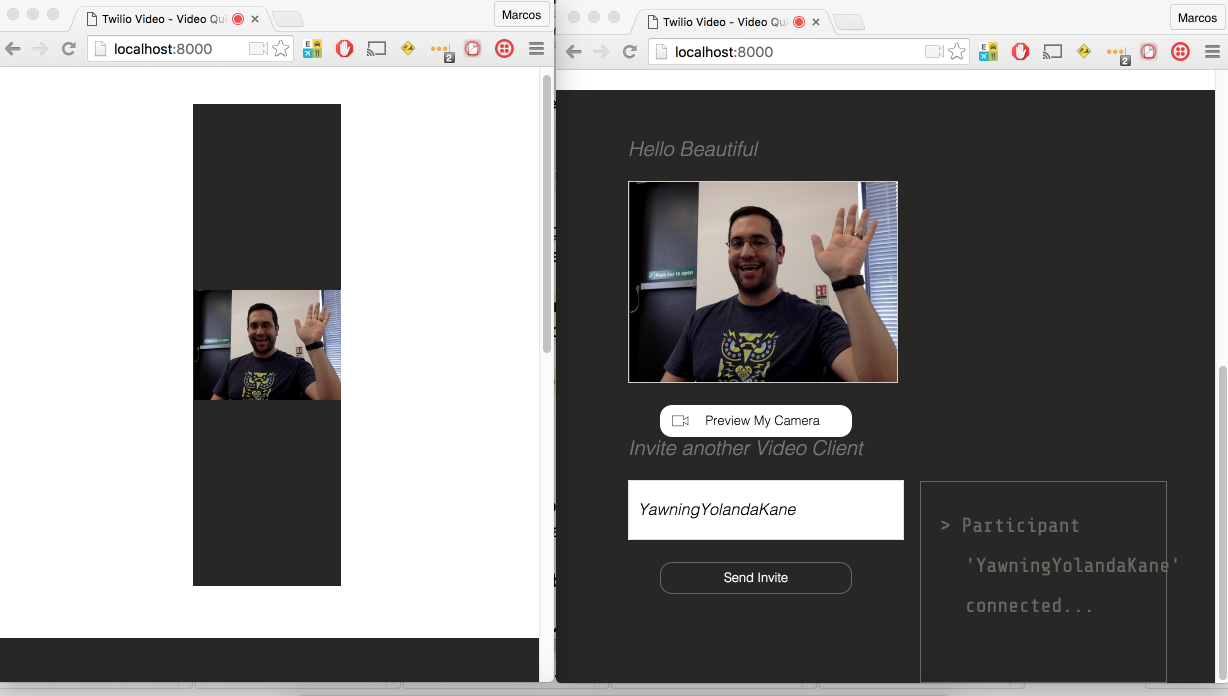
Once you have downloaded the quickstart of your favourite programming language and followed the instructions to get your access tokens, make sure you open up a couple of browser windows and check that you can see yourself on both windows.

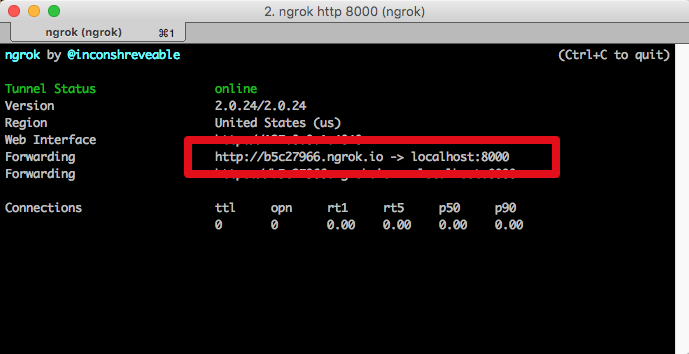
This is also a good time to start ngrok and check that you get access to your application using the ngrok URL. Make a note of it as we will be using it soon.

In my terminal I just ran:

ngrok http 5000

If you don’t feel like going through the entire build, feel free to download and run the app from my GitHub repository.

Setting it up

In Android Studio create a new project called Twilio Video and choose a location for it. I usually store my Android apps in /Users/mplacona/Projects/Android/ but feel free to put it anywhere you like. Choose API 16 as the Minimum SDK.

Choose Basic Activity as your starting point for this application. This will come with a pre-baked Floating Action Button which we will modify and use later on.

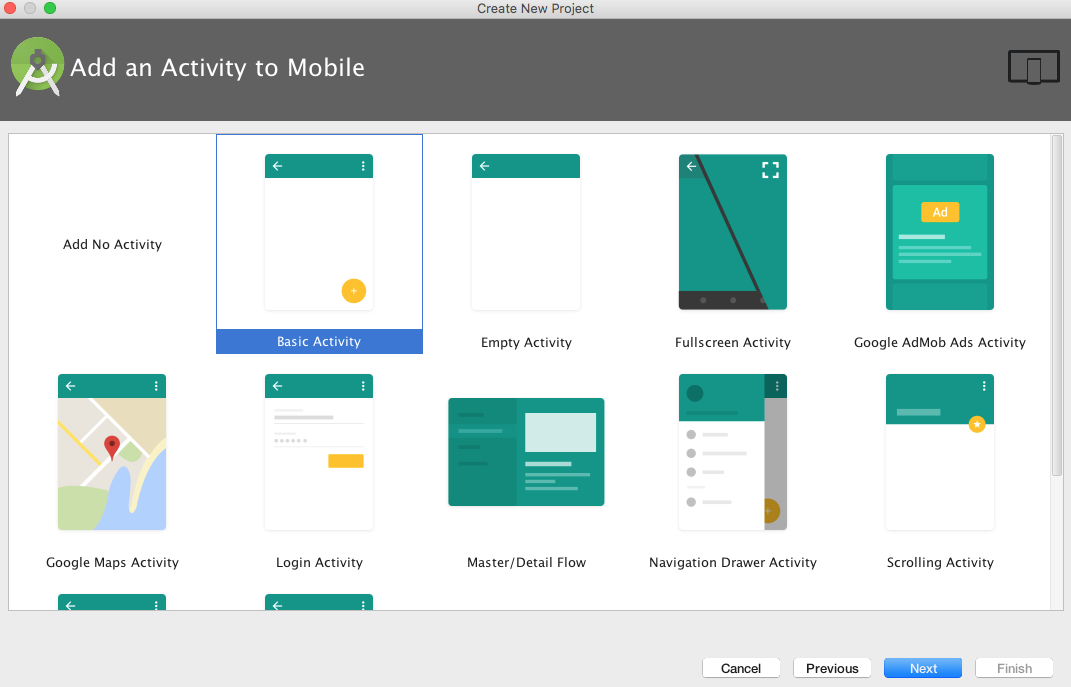
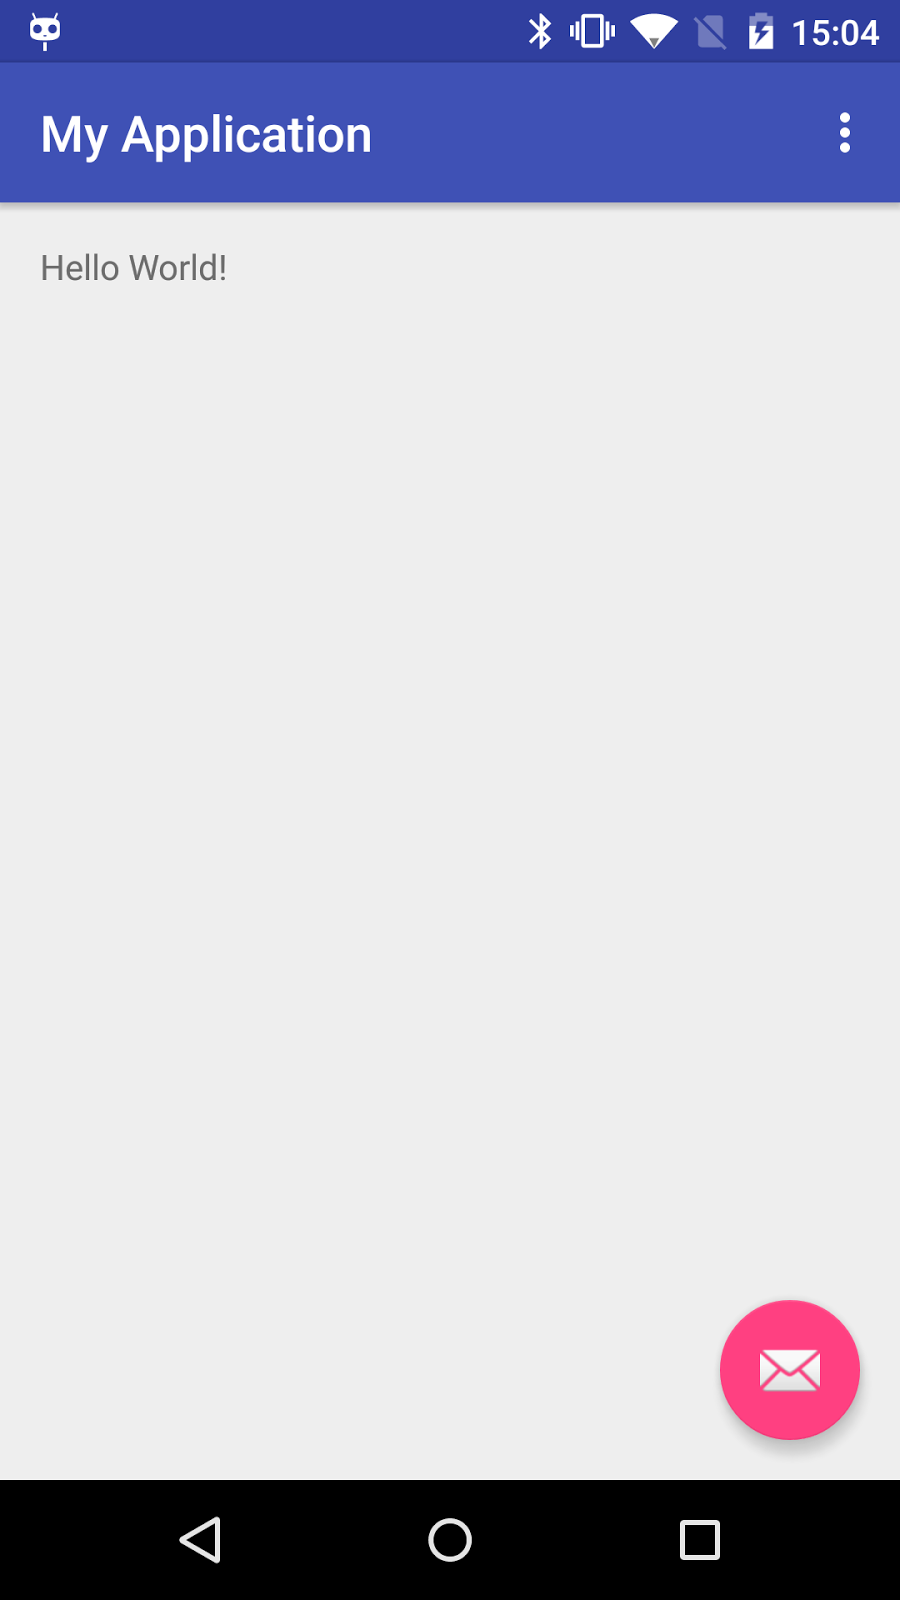
Click Finish on the next screen and you’ll be ready to start building the application. If you want to make sure your build is working correctly, now is a good time to plug in your device and run the application.

Screenshot_2016-03-03-15-04-55.png

Building the layout

Now that we’ve created the app and its initial files let’s make a few changes to the layout to accommodate our video conversations.

Open TwilioVideo/app/src/main/res/layout/activity_main.xml and change the icon and background colour of your floating action button as follows:


<android.support.design.widget.FloatingActionButton
   android:id="@+id/call_action_fab"
   android:layout_width="wrap_content"
   android:layout_height="wrap_content"
   android:layout_gravity="bottom|end"
   android:layout_margin="@dimen/fab_margin"
   android:src="@android:drawable/ic_menu_call"
   app:backgroundTint="@android:color/holo_green_dark" />

In TwilioVideo/app/src/main/res/layout/content_main.xml delete the existing TextView, create a FrameLayout and add a couple of Relative Layouts inside. These will be our containers where we will later see a video of ourselves and one of our friends.


<RelativeLayout
   xmlns:android="http://schemas.android.com/apk/res/android"
   xmlns:tools="http://schemas.android.com/tools"
   android:layout_width="match_parent"
   android:layout_height="match_parent"
   tools:context="com.twilio.twiliovideo.MainActivity"
   tools:showIn="@layout/activity_main">

   <FrameLayout
       android:id="@+id/previewFrameLayout"
       android:layout_width="match_parent"
       android:layout_height="match_parent" />

   <LinearLayout
       android:id="@+id/videoLinearLayout"
       android:orientation="vertical"
       android:layout_width="match_parent"
       android:layout_height="match_parent">

       <RelativeLayout
           android:id="@+id/localContainer"
           android:layout_width="match_parent"
           android:layout_height="match_parent"
           android:layout_weight="1" />

       <RelativeLayout
           android:id="@+id/participantContainer"
           android:layout_width="match_parent"
           android:layout_height="match_parent"
           android:layout_weight="1" />

   </LinearLayout>

</RelativeLayout>


Permissions & Dependencies

Now that our application has a layout we can download and reference the necessary dependencies. We will also ask for the required permissions to access the device’s hardware.

In order to get access to the device’s camera, we need to install and initialise the Twilio SDK. To install it, change TwilioVideo/app/build.gradle to have the following added to it:


repositories {
   // Twilio Maven repository - currently required for TwilioCommon
   maven {
       url "http://media.twiliocdn.com/sdk/maven/"
   }
}

dependencies {
   compile fileTree(dir: 'libs', include: ['*.jar'])
   testCompile 'junit:junit:4.12'
   compile 'com.android.support:appcompat-v7:23.2.0'
   compile 'com.android.support:design:23.2.0'
   compile 'com.twilio:conversations-android:0.8.1'
   compile 'com.squareup.okhttp3:okhttp:3.1.2'
}

At this point Android Studio will tell you that “Gradle files have changed since last project sync”. Click Sync Now, and all the dependencies will be downloaded and properly referenced.

Open TwilioVideo/app/src/main/AndroidManifest.xml and add permissions for camera, audio and internet access.


<uses-feature android:name="android.hardware.camera" />
<uses-feature android:name="android.hardware.camera.autofocus" />
<uses-permission android:name="android.permission.CAMERA" />
<uses-permission android:name="android.permission.INTERNET"/>
<uses-permission android:name="android.permission.RECORD_AUDIO"/>
<uses-permission android:name="android.permission.MODIFY_AUDIO_SETTINGS"/>
<uses-permission android:name="android.permission.ACCESS_NETWORK_STATE"/>
<uses-permission android:name="android.permission.ACCESS_WIFI_STATE"/>
<application
    android:allowBackup="true"
    android:icon="@mipmap/ic_launcher"

Open TwilioVideo/app/src/main/java/com/twilio/twiliovideo/MainActivity.java and create a condition to check that the permissions have indeed been given. We can do that by creating a couple of new methods inside the class to check and then request when the permissions have not been granted.

We can also remove some of the unnecessary methods in this class so it looks like the following code.

public class MainActivity extends AppCompatActivity {
   @Override
   protected void onCreate(Bundle savedInstanceState) {
       super.onCreate(savedInstanceState);
       setContentView(R.layout.activity_main);
   }

   private boolean checkPermissionForCameraAndMicrophone() {
       int resultCamera = ContextCompat.checkSelfPermission(this, Manifest.permission.CAMERA);
       int resultMic = ContextCompat.checkSelfPermission(this, Manifest.permission.RECORD_AUDIO);
       return (resultCamera == PackageManager.PERMISSION_GRANTED) && (resultMic == PackageManager.PERMISSION_GRANTED);
   }

   private void requestPermissionForCameraAndMicrophone() {
       if (ActivityCompat.shouldShowRequestPermissionRationale(this, Manifest.permission.CAMERA) || ActivityCompat.shouldShowRequestPermissionRationale(this, Manifest.permission.RECORD_AUDIO)) {
           Toast.makeText(this, "Camera and Microphone permissions needed. Please allow in App Settings for additional functionality.", Toast.LENGTH_LONG).show();
       } else {
           ActivityCompat.requestPermissions(this, new String[]{Manifest.permission.CAMERA, Manifest.permission.RECORD_AUDIO}, 1);
       }
   }
}

We’re now going to add a few member variables to the class, and replace the whole of onCreate with the following.


private String mAccessToken;
private static final String TAG = MainActivity.class.getName();
/*
* Android application UI elements
*/
private FrameLayout previewFrameLayout;
private ViewGroup localContainer;
private ViewGroup participantContainer;
private FloatingActionButton callActionFab;
private OkHttpClient client = new OkHttpClient();

private TwilioAccessManager accessManager;
private ConversationsClient conversationsClient;
private CameraCapturer cameraCapturer;

private Conversation conversation;
private OutgoingInvite outgoingInvite;
private Context mContext;

/*
* A VideoViewRenderer receives frames from a local or remote video track and renders the frames to a provided view
*/
private VideoViewRenderer participantVideoRenderer;
private VideoViewRenderer localVideoRenderer;


@Override
protected void onCreate(Bundle savedInstanceState) {
   super.onCreate(savedInstanceState);
   setContentView(R.layout.activity_main);

   mContext = this.getApplicationContext();
   /*
    * Check camera and microphone permissions. Needed in Android M.
    */
   if (!checkPermissionForCameraAndMicrophone()) {
       requestPermissionForCameraAndMicrophone();
   }

   /*
    * Load views from resources
    */
   previewFrameLayout = (FrameLayout) findViewById(R.id.previewFrameLayout);
   localContainer = (ViewGroup) findViewById(R.id.localContainer);
   participantContainer = (ViewGroup) findViewById(R.id.participantContainer);

   getCapabilityToken();
}

This will make use of our new permission methods to check whether access to the camera and microphone have been granted, then create references to our layout widgets which we will use later on. Lastly, it will make a call to the method getCapabilityToken which we’re just about to create.

Initialising the Twilio SDK

Make sure the quickstart application you downloaded earlier is still running, and that you have its ngrok URL. We will initialise the Twilio SDK by giving it a Capability Token that is returned by the quickstart.

Very soon you will be wondering which are the correct imports to use because you will have a lot of red squiggles under your code. To make things easier, just copy all the imports from this file and replace what you currently have.

In MainActivity.java create a new method called getCapabilityToken inside the class. This will make use of our ngrok URL.


private void getCapabilityToken() {
   try {
       run("http://[your-ngrok-url].ngrok.io/token", new Callback() {

           @Override
           public void onFailure(Call call, IOException e) {
               e.printStackTrace();
           }

           @Override
           public void onResponse(Call call, Response response) throws IOException {
               try {
                   String token = response.body().string();
                   JSONObject obj = new JSONObject(token);
                   mAccessToken = obj.getString("token");
                   Log.d(TAG, token);
                   initializeTwilioSdk(mAccessToken);

               } catch (Exception e) {
                   e.printStackTrace();
               }
           }
       });
   } catch (IOException e) {
       e.printStackTrace();
   }
}

private Call run(String url, Callback callback) throws IOException {
   Request request = new Request.Builder()
           .url(url)
           .build();

   Call response = client.newCall(request);
   response.enqueue(callback);
   return response;
}

Notice that we have also created a method called run, which uses OkHttp – one of our dependencies – to make an HTTP request to our backend application. Make sure you replace the contents of [your-ngrok-url] with the URL you got from ngrok.

The new method overrides OnResponse with a call to initializeTwilioSDK which we will create in a minute. That method will only be called when we get a response from the server with a capability token.


private void initializeTwilioSdk(final String accessToken) {
   TwilioConversations.setLogLevel(TwilioConversations.LogLevel.DEBUG);

   if(!TwilioConversations.isInitialized()) {
       TwilioConversations.initialize(this.mContext, new TwilioConversations.InitListener() {
           @Override
           public void onInitialized() {
               accessManager = TwilioAccessManagerFactory.createAccessManager(accessToken, accessManagerListener());
               conversationsClient = TwilioConversations.createConversationsClient(accessManager, conversationsClientListener());
               // Specify the audio output to use for this conversation client
               conversationsClient.setAudioOutput(AudioOutput.SPEAKERPHONE);

               // Initialize the camera capturer and start the camera preview
               cameraCapturer = CameraCapturerFactory.createCameraCapturer(MainActivity.this, CameraCapturer.CameraSource.CAMERA_SOURCE_FRONT_CAMERA, previewFrameLayout, capturerErrorListener());
               startPreview();
               // Register to receive incoming invites
               conversationsClient.listen();
           }

           @Override
           public void onError(Exception e) {
               Toast.makeText(MainActivity.this,
                       "Failed to initialize the Twilio Conversations SDK",
                       Toast.LENGTH_LONG).show();
           }
       });
   }
}

There are four important things to notice on the code above. We first get access to the TwilioAccessManager interface which will authenticate the application using the capability token we got earlier and listen to any expirations or errors on that. Once we have that, we pass this information to a listener.

We then create a new conversations client which takes an event listener called conversationsClientListener and listens to things like new invites to the conversation.

Once the conversation is established we get access to the camera and when that’s granted, we start previewing it to the screen.

Let’s add these event listeners to the bottom of the class and a method to start and stop previewing the camera on the screen. We will bind the camera to the previewFrameLayout we created earlier.

private TwilioAccessManagerListener accessManagerListener() {
   return new TwilioAccessManagerListener() {
       @Override
       public void onAccessManagerTokenExpire(TwilioAccessManager twilioAccessManager) {
       }
       @Override
       public void onTokenUpdated(TwilioAccessManager twilioAccessManager) {
       }
       @Override
       public void onError(TwilioAccessManager twilioAccessManager, String s) {
       }
   };
}

private ConversationsClientListener conversationsClientListener() {
   return new ConversationsClientListener() {
       @Override
       public void onStartListeningForInvites(ConversationsClient conversationsClient) {
       }

       @Override
       public void onStopListeningForInvites(ConversationsClient conversationsClient) {
       }

       @Override
       public void onFailedToStartListening(ConversationsClient conversationsClient, TwilioConversationsException e) {
       }

       @Override
       public void onIncomingInvite(ConversationsClient conversationsClient, IncomingInvite incomingInvite) {

       }

       @Override
       public void onIncomingInviteCancelled(ConversationsClient conversationsClient, IncomingInvite incomingInvite) {

       }
   };
}

private CapturerErrorListener capturerErrorListener() {
   return new CapturerErrorListener() {
       @Override
       public void onError(CapturerException e) {
           Log.e(TAG, "Camera capturer error:"   e.getMessage());
       }
   };
}

private void startPreview() {
   cameraCapturer.startPreview();
}

private void stopPreview() {
   if(cameraCapturer != null && cameraCapturer.isPreviewing()) {
       cameraCapturer.stopPreview();
   }
}

The methods accessManagerListener, conversationsClientListener and capturerErrorListener only listen for requests coming back from the access manager, conversations or errors. startPreview and stopPreview will turn your local camera on or off upon the start or end of a conversation.

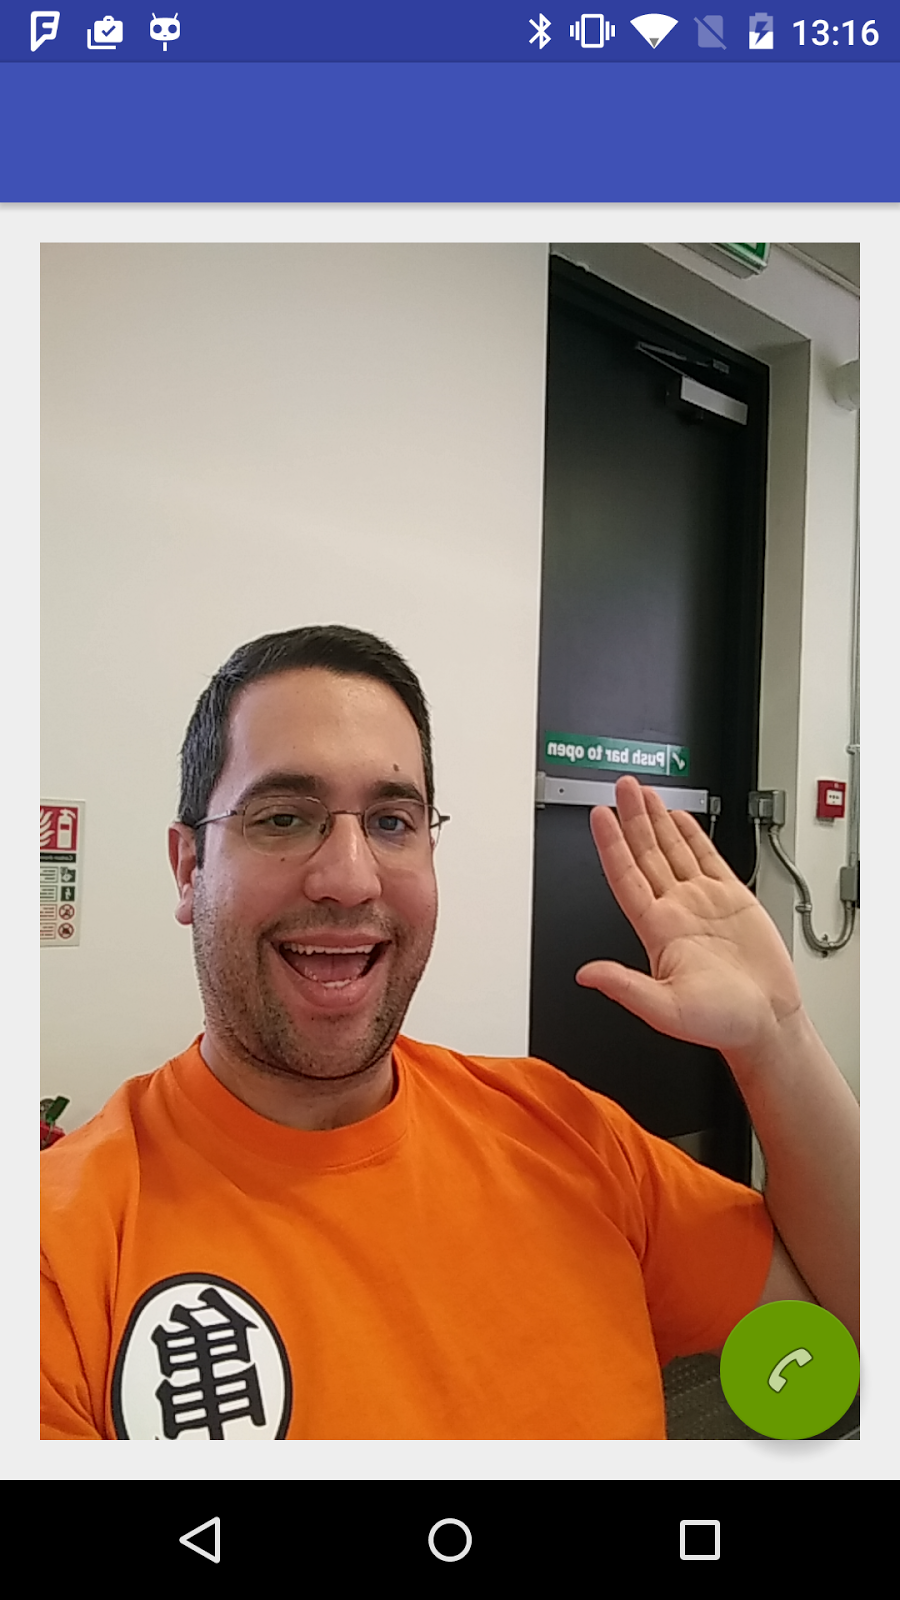
Stop the application and run it again.You should see that the local camera starts and you can see yourself on it.

Now change the onIncomingInvite method so it handles new invites coming to this conversation.


@Override
public void onIncomingInvite(ConversationsClient conversationsClient, IncomingInvite incomingInvite) {
   if (conversation == null) {
       LocalMedia localMedia = setupLocalMedia();
       incomingInvite.accept(localMedia, new ConversationCallback() {
           @Override
           public void onConversation(Conversation conversation, TwilioConversationsException e) {
               if (e == null) {
                   MainActivity.this.conversation = conversation;
                   conversation.setConversationListener(conversationListener());
               } else {
                   Log.e(TAG, e.getMessage());
                   hangup();
                   reset();
               }
           }
       });
       setHangupAction();
   } else {
       Log.w(TAG, String.format("Conversation in progress. Invite from %s ignored", incomingInvite.getInvitee()));
   }
}

We’ve introduced five new methods in the code above. The hangup, reset and setHangupAction methods will disconnect a call and reset the view to remove any active widgets. Paste the following to the bottom of the class:

private void reset() {
   if(participantVideoRenderer != null) {
       participantVideoRenderer = null;
   }
   localContainer.removeAllViews();
   participantContainer.removeAllViews();

   if(conversation != null) {
       conversation.dispose();
       conversation = null;
   }
   outgoingInvite = null;

   if (conversationsClient != null) {
       conversationsClient.setAudioOutput(AudioOutput.HEADSET);
   }
   setCallAction();
   startPreview();
}

private void hangup() {
   if(conversation != null) {
       conversation.disconnect();
   } else if(outgoingInvite != null){
       outgoingInvite.cancel();
   }
}

private void setHangupAction() {
   callActionFab.setBackgroundTintList(ColorStateList.valueOf(ContextCompat.getColor(this, android.R.color.holo_red_dark)));
   callActionFab.show();
   callActionFab.setOnClickListener(hangupActionFabClickListener());
}

private View.OnClickListener hangupActionFabClickListener() {
   return new View.OnClickListener() {
       @Override
       public void onClick(View view) {
           hangup();
           setCallAction();
       }
   };
}

The listeners give us information about when a conversation starts, ends or when a participant connects or disconnects. Then there’s setupLocalMedia which will create an instance of local video and audio by calling LocalMediaFactory.


private ConversationListener conversationListener() {
   return new ConversationListener() {
       @Override
       public void onFailedToConnectParticipant(Conversation conversation, Participant participant, TwilioConversationsException e) {

       }

       @Override
       public void onConversationEnded(Conversation conversation, TwilioConversationsException e) {
           reset();
       }

       @Override
       public void onParticipantConnected(Conversation conversation, Participant participant) {
           Log.d(TAG, "onParticipantConnected: Participant connected");
           participant.setParticipantListener(participantListener());
       }

       @Override
       public void onParticipantDisconnected(Conversation conversation, Participant participant) {
           reset();
       }
   };
}

private LocalMedia setupLocalMedia() {
   LocalMedia localMedia = LocalMediaFactory.createLocalMedia(localMediaListener());
   LocalVideoTrack localVideoTrack = LocalVideoTrackFactory.createLocalVideoTrack(cameraCapturer);
   localMedia.addLocalVideoTrack(localVideoTrack);
   return localMedia;
}

In conversationListener we’ve introduced three more listeners.

  1. participantListener for when a new participant joins.
  2. localMediaListener for listening to our local media, that’s the camera and microphone.
  3. hangupActionFabClickListener for when the hangup button is pressed.

Add these to the bottom of the class.

private ParticipantListener participantListener() {

   return new ParticipantListener() {
       @Override
       public void onVideoTrackAdded(Conversation conversation, Participant participant, VideoTrack videoTrack) {
           Log.i(TAG, "onVideoTrackAdded "   participant.getIdentity());

           // Remote participant
           participantVideoRenderer = new VideoViewRenderer(MainActivity.this, participantContainer);
           participantVideoRenderer.setObserver(new VideoRendererObserver() {

               @Override
               public void onFirstFrame() {
                   Log.i(TAG, "Participant onFirstFrame");
               }

               @Override
               public void onFrameDimensionsChanged(int width, int height, int i2) {
                   Log.i(TAG, "Participant onFrameDimensionsChanged "   width   " "   height);
               }

           });
           videoTrack.addRenderer(participantVideoRenderer);
       }

       @Override
       public void onVideoTrackRemoved(Conversation conversation, Participant participant, VideoTrack videoTrack) {
           participantContainer.removeAllViews();

       }

       @Override
       public void onAudioTrackAdded(Conversation conversation, Participant participant, AudioTrack audioTrack) {

       }

       @Override
       public void onAudioTrackRemoved(Conversation conversation, Participant participant, AudioTrack audioTrack) {

       }

       @Override
       public void onTrackEnabled(Conversation conversation, Participant participant, MediaTrack mediaTrack) {

       }

       @Override
       public void onTrackDisabled(Conversation conversation, Participant participant, MediaTrack mediaTrack) {

       }
   };
}

private LocalMediaListener localMediaListener(){
   return new LocalMediaListener() {
       @Override
       public void onLocalVideoTrackAdded(LocalMedia localMedia, LocalVideoTrack localVideoTrack) {
           localVideoRenderer = new VideoViewRenderer(MainActivity.this, localContainer);
           localVideoTrack.addRenderer(localVideoRenderer);
       }

       @Override
       public void onLocalVideoTrackRemoved(LocalMedia localMedia, LocalVideoTrack localVideoTrack) {
           localContainer.removeAllViews();
       }

       @Override
       public void onLocalVideoTrackError(LocalMedia localMedia, LocalVideoTrack localVideoTrack, TwilioConversationsException e) {
           Log.e(TAG, e.getMessage());
       }
   };
}

Back in the reset and hangupActionFabClickListener methods we introduced a call to setCallAction, which does the opposite of setHangupAction. By clicking the hangup button, your Activity should reset and the widgets should be ready to display video for both parties.


private void setCallAction() {
   callActionFab.setBackgroundTintList(ColorStateList.valueOf(ContextCompat.getColor(this, android.R.color.holo_green_dark)));
   callActionFab.show();
   callActionFab.setOnClickListener(callActionFabClickListener());
}

The last piece of the puzzle is to handle clicks on the Floating Action Button when it’s ready to make a call. At the bottom of the class create a new method called callActionFabClickListener.


private View.OnClickListener callActionFabClickListener() {
   return new View.OnClickListener() {

       @Override
       public void onClick(View v) {
           if(conversationsClient != null){
               stopPreview();

               Set<String> participants = new HashSet<>();
               participants.add("WhateverNameYouWant");

               // Create local media
               LocalMedia localMedia = setupLocalMedia();

               outgoingInvite = conversationsClient.sendConversationInvite(participants, localMedia, new ConversationCallback() {
                   @Override
                   public void onConversation(Conversation conversation, TwilioConversationsException e) {
                       if (e == null) {
                           // Participant has accepted invite, we are in active conversation
                           MainActivity.this.conversation = conversation;
                           conversation.setConversationListener(conversationListener());
                           setHangupAction();
                       } else {
                           hangup();
                           reset();
                       }
                   }
               });
           }else{
               Log.e(TAG, "invalid participant call");
           }
       }
   };
}

When the button is clicked, we call stopPreview so the local camera stops showing us on the big frame. We hard code a participant we want to invite and set up our layout so it’s ready to display both ours and the invitee’s camera.

We then send the invite and upon acceptance reset the button to enable us to hangup the call and disconnect.

We need to make sure our button is ready to be clicked when the application starts. Scroll to the top of the onCreate method and add the following to it.


previewFrameLayout = (FrameLayout) findViewById(R.id.previewFrameLayout);
localContainer = (ViewGroup)findViewById(R.id.localContainer);
participantContainer = (ViewGroup)findViewById(R.id.participantContainer);

callActionFab = (FloatingActionButton) findViewById(R.id.call_action_fab);
callActionFab.setOnClickListener(callActionFabClickListener());

getCapabilityToken();

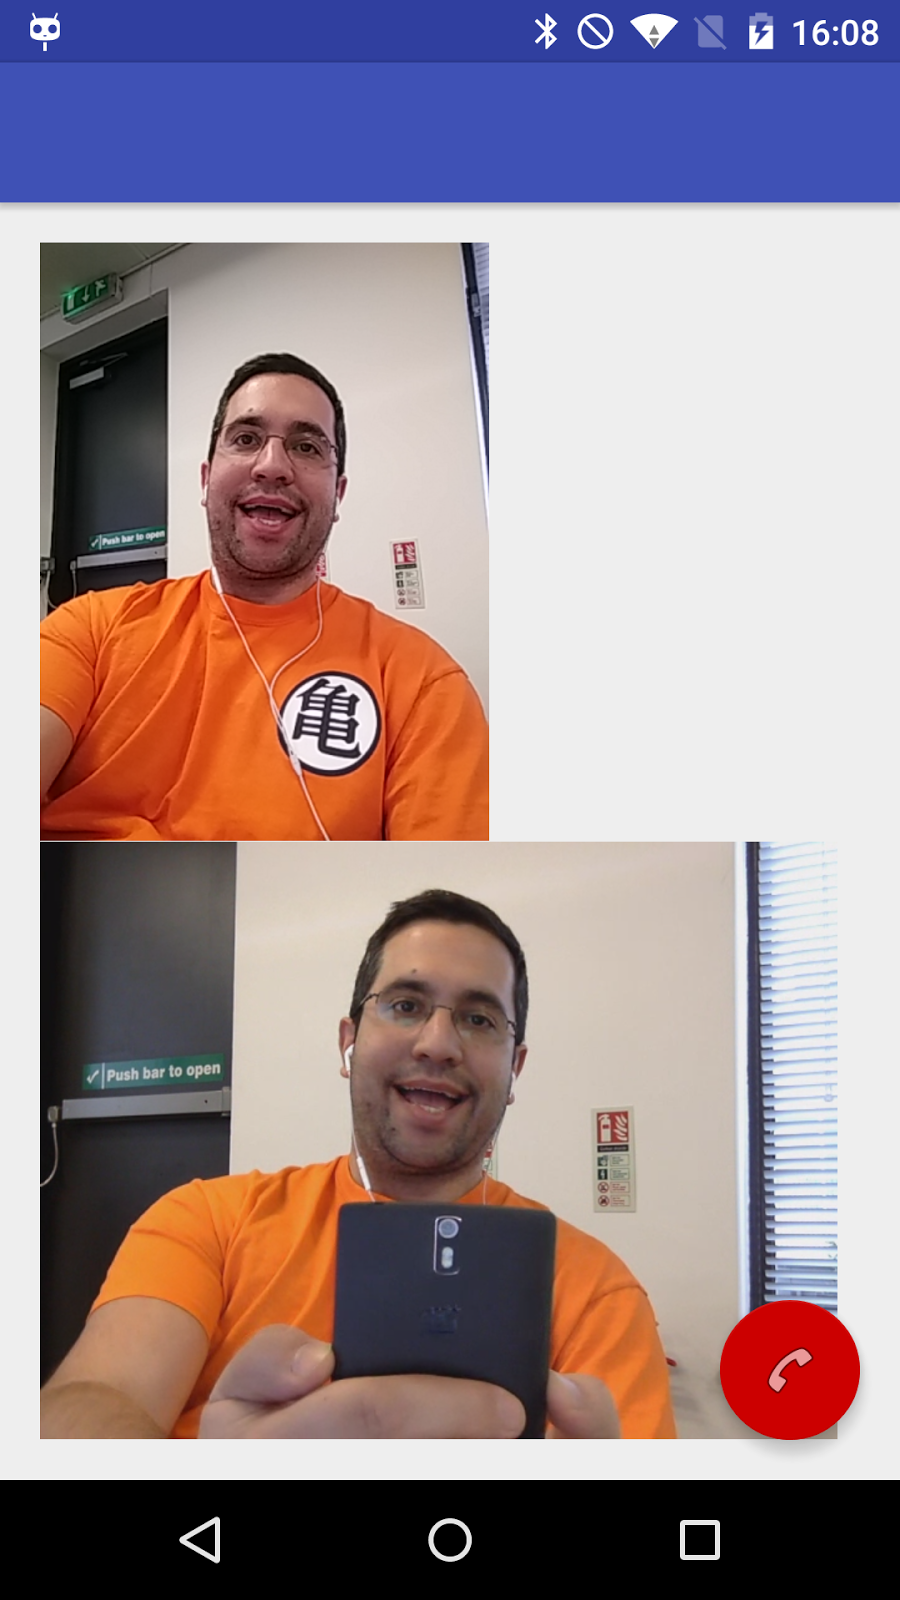
Test this out by loading up the quickstart on the browser and getting the username assigned to that tab. Copy that name into participants.add(“WhateverNameYouWant”) in Android Studio and run the application.

Click the green button and you should see yourself on both screens now. The top one is your local camera, and the bottom one is from your browser. Click the red button to hangup.

Get your friends involved

Now that you’ve built an app that lets you do video chats between your device and the browser it’s time to get your friends involved. Send your ngrok URL to a friend and just tap the call button and get chatting with of them.

Bonus points for modifying the quickstart so your friends can use their actual names. How about adding the ability for them to call you from the browser?

I can’t wait to see what you’re gonna build. Hit me up on Twitter @marcos_placona or by email on marcos@twilio.com to tell me more about it.