Creating a phone number lookup bot using Microsoft Bot Framework and C#
Time to read:
May 04, 2016
Written by
This post is part of Twilio’s archive and may contain outdated information. We’re always building something new, so be sure to check out our latest posts for the most up-to-date insights.

Bots are all the rage and at //BUILD 2016 Microsoft announced their Bot Framework. Let’s see how easy it is to build a bot using the SMS channel powered by Twilio.
Our Tools
Our bot should take a telephone number and reply with information about it using Twilio’s Lookup API. We’ll need:
- Visual Studio 2015 including the latest updates. We’ll be building this on Windows this time, but you shouldn’t struggle replicating this on a Mac or Linux machine.
- A Twilio Account and a Twilio Phone Number – Sign up for free!
- An Azure account which you can get for free here.
Once you have the three things above download and install the the Bot Connector Template for Visual Studio. It will make our lives much easier when creating new bots.
Extract the file to %USERPROFILE%\Documents\Visual Studio 2015\Templates\ProjectTemplates\Visual C# and you should end up with something like this.

Let’s also install the Bot Emulator as it will be really useful for when we’re testing our bot.
If you don’t feel go through the whole post and just want to deploy your bot, feel free to download it from my GitHub repo.
Creating our first bot
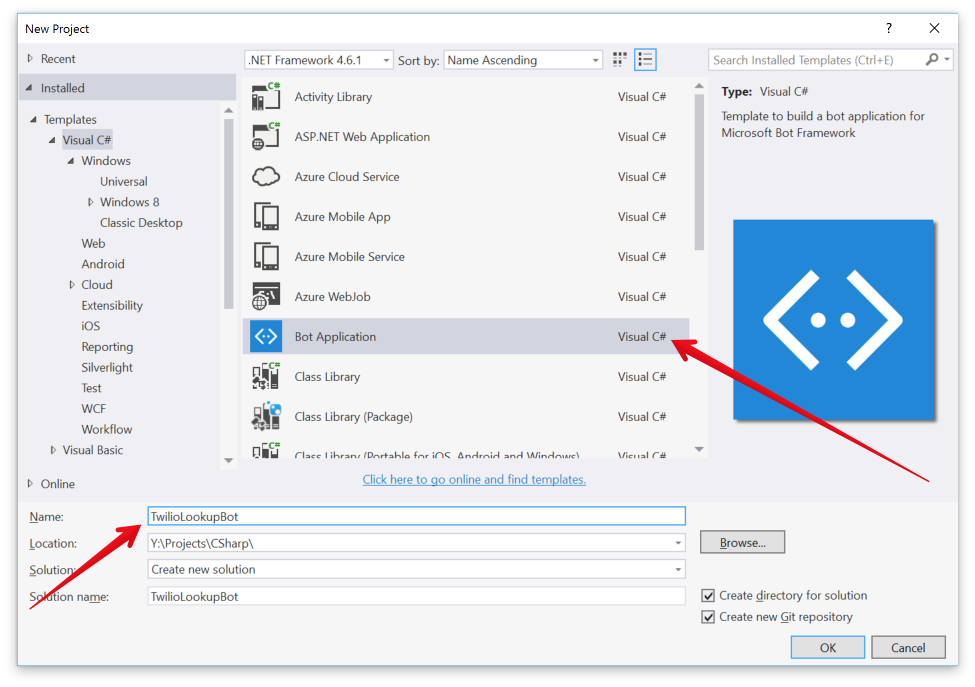
Open up Visual Studio 2015 and choose File > New > Project. Choose the Visual C# tab under Templates and there should be a Bot Application template for you to choose. Name it TwilioLookupBot.
Once your project has loaded, open Package Manager Console and install the Twilio.Lookups library by running:
Running your bot for the first time
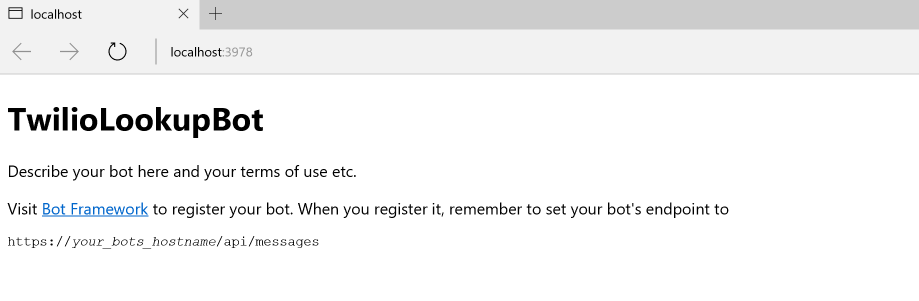
Using the template gives us a working bot in the form of a messaging API which we will modify later. If you want to check what it looks like right now, run the project and you will see a screen like this:
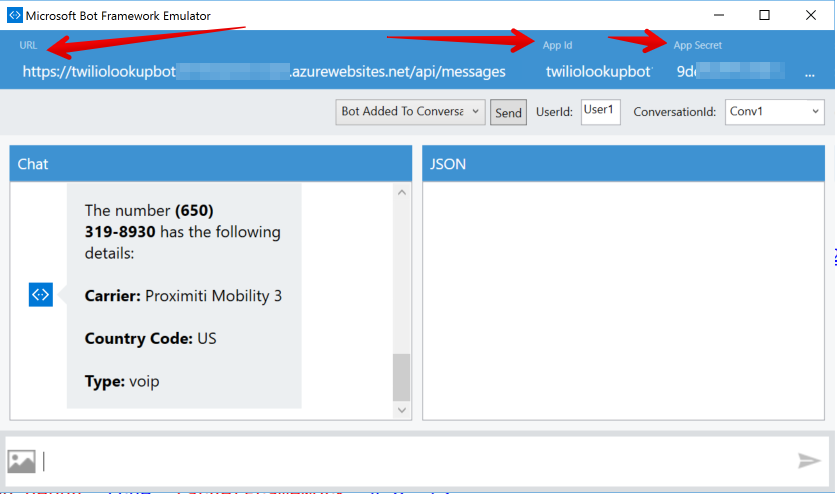
Open up Microsoft Bot Framework Emulator and check that you bot details are as follows:
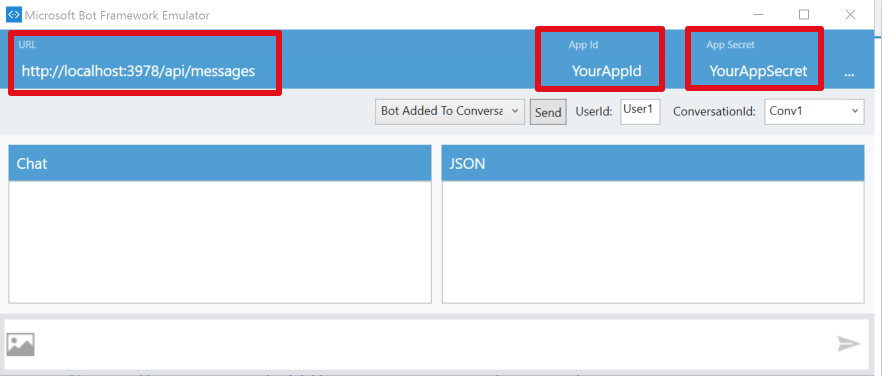
Make sure the URL and port matches with what you’re seeing on your browser and that the App Id and App Secret match what’s in the Web.config. The values we’re using are the default and we will change these later on.
Send your bot a message and check that you get a response.
Modifying our bot
Now that we know our bot works let’s use Solution Explorer to create a folder called Services in the root of the project.. We will create a new class called TwilioLookupService.cs that will have logic on how to connect with the Twilio Lookup API.
In that class add the Twilio.Lookups namespace and a new method called GetNumberInfo which takes a string as argument.
Make sure you replace the account sid and auth token with the ones you can get from the Twilio Account Console. The rest of the code authenticates with and makes the request to the Twilio Lookups API, returning the phone number information.
Back in the MessagesController.cs file you will see that the only logic on the Post method is the one that counts the number of characters in the message received and makes the Bot reply with that.
Delete the code inside the if condition and replace it with the following:
While we still have the same condition to check if the message received if of the type Message, we’re now making a lookup request to the Twilio API to get information about this number.
We format this message using Markdown. If you want to find out more check out the documentation on Markdown formatting for the text property.
Give it another go and run the project again, but this time try to enter a telephone number and you should get information about it.
Deploying our Bot to Azure
Our bot is only running on localhost at the moment, to interact with it via the channels offered by the Bot Framework we need to host it somewhere.
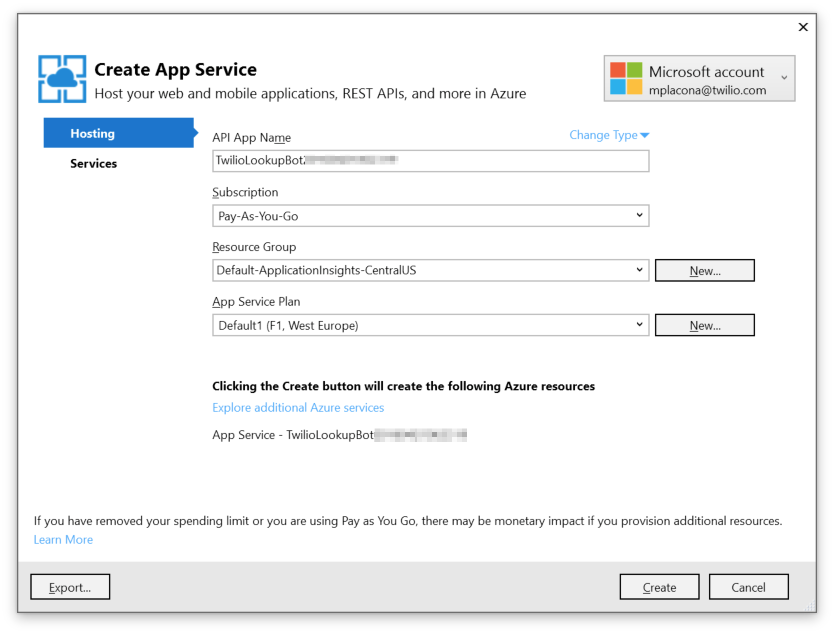
In Visual Studio right click on the project name and choose Publish. We will be using Microsoft Azure App Service as a target. Click New and create and choose a server that is in a geographical location close to you and click Create.
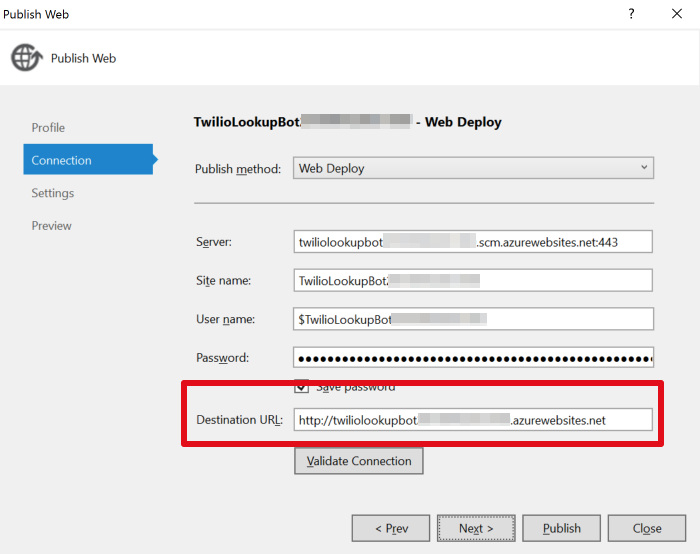
When that completes choose that profile and click Next. On the subsequent screen you can choose which URL you want your bot to run from. Make a note of that URL as we will use it later when we register our bot.
Click Publish, and the deploy will start. Once that is completed your browser should open automatically on the homepage for your bot.

Pat yourself on the back, you have just deployed your first bot!

Registering our bot
Now that our bot has a permanent address on the internet it is time for us to register it so we can start using the various communication channels available.
Head to Register a bot. You can use the same Microsoft credentials here as you used earlier when you signed up for Azure.
On the registration page fill in your bot’s details for all the mandatory fields. Pay attention to the Endpoint, that’s the URL you chose earlier when deploying to Azure plus the path. In my case it ended up being like this:
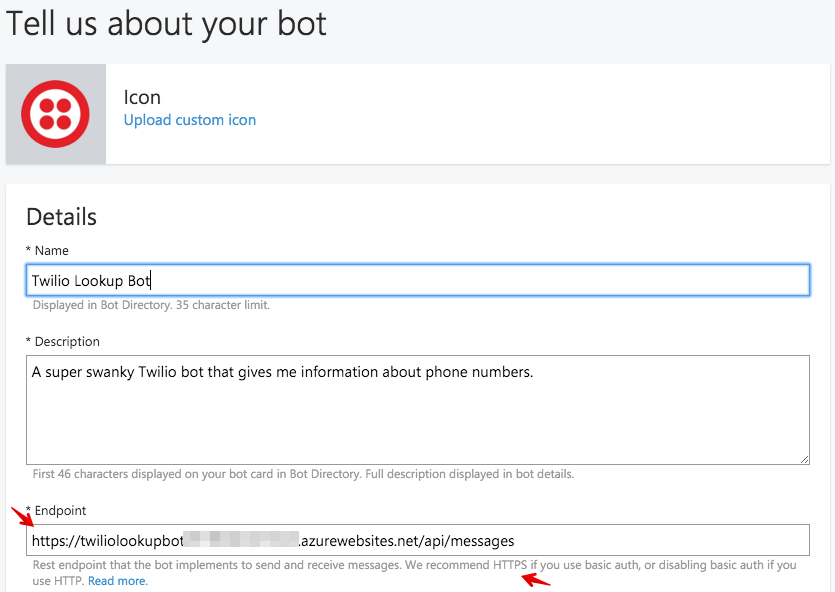
Also notice how I’ve used HTTPS on the URL. A bot will not work if you try to assign channels to it and the URL is not secure.
In the Behaviour section make sure you choose Listen to all messages. You can leave the other checkboxes unchecked for now and change it later if you need.
Lastly enter an App ID. You can use anything you want here so I will leave that to your imagination, but just remember that if you decide to publish this bot later people will be able to see that. Click Register when you’re done.
Changing our bot’s App ID
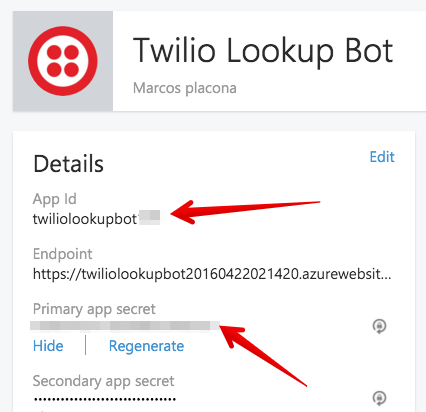
Now that our bot has an App ID and an app secret head back to Visual Studio and enter those in Web.config.
Right click on your project name again and hit Publish. You won’t need a new profile this time so just click the Publish button.
Once that is complete, check that your bot still works by heading back to the Bot Framework Emulator and entering the live credentials for your bot, including the new App ID and App Secret.
Configuring the SMS Channel
Now that you know your bot works and you’ve successfully made a few number lookups on it, it’s time to enable its SMS Channel. You can do that by going back to the settings for your bot and clicking Add on SMS.

This page will take you through all you need to do but the steps are:
- Log in to your Twilio account
- Create a new TwiML application and make sure the Request URL for messaging points to https://sms.botframework.com/api/sms
- Grab yourself a new phone number with SMS enabled
- Configure that number to use your new TwiML application
You can watch this video here if you’re having difficulty doing that.
Lastly you will need to get your account sid and auth token from the Twilio account dashboard and enter it along with your Twilio telephone number in order to give the framework access to your account.
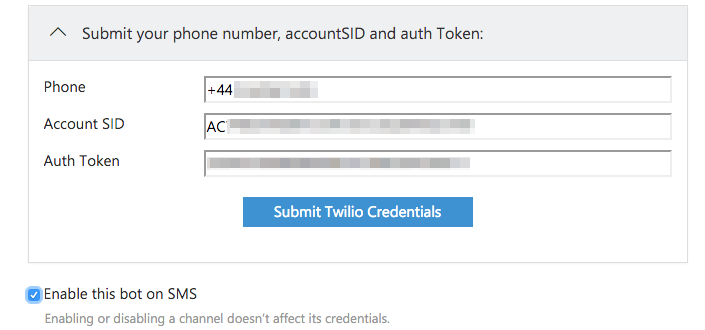
When you’ve got that, click Submit Twilio Credentials and when that’s verified click I’m done configuring SMS.
Grab your phone and send a text message to your Twilio number with a telephone number you want to check.
Bots, bots, bots….
Now that you’ve successfully created and deployed your very own Bot how about adding some extra functionality to it? You could parse all the text sent to it and do something different if you do not get a telephone number.
How about getting the bot to start a new conversation with you everyday to ask you how you’re feeling?
Did you know we have an entire track called “/bots” at SIGNAL this year? Dan Driscoll, an engineer on the Microsoft Bot Platform, will be giving a talk called “10 Tips for Building Awesome Bots“. We’ll also have developers from Slack, Facebook and Twilio talking about best practices for bot building on their respective platforms.
SIGNAL is May 24th and 25th in San Francisco. Use the promo code MPLACONA20 for 20% off. I’d love to have you there.
I can’t wait to see what you will build and which functionalities you will add to your bot. Hit me up on Twitter @marcos_placona or by email on marcos@twilio.com to tell me more about it.

Related Resources
Twilio Docs
From APIs to SDKs to sample apps
API reference documentation, SDKs, helper libraries, quickstarts, and tutorials for your language and platform.
Resource Center
The latest ebooks, industry reports, and webinars
Learn from customer engagement experts to improve your own communication.
Ahoy
Twilio's developer community hub
Best practices, code samples, and inspiration to build communications and digital engagement experiences.