Add Custom Effect Filters to your Twilio Programmable Video Calls
Time to read:
July 13, 2021
Written by
Reviewed by

The Twilio Video JavaScript SDK has been recently enhanced with support for video processors, small effects, and filters that can be applied to the video tracks in a Programmable Video application.
In a previous article, I showed you how to use the background blurring and replacement effects released as part of the Twilio Video Processors library. In this article, I’m going to show you how to create your own custom video effects.

Prerequisites
At the time I’m writing this article, video processors are only available for Chrome and other chromium-based web browsers. You can check the current list of supported browsers in the documentation for updates.
What is a video processor?
A video processor is a small JavaScript object that performs video processing transformations or effects. The structure of a video processor is shown below:
The processFrame() function accepts two arguments: the video frame coming from the video source, and an empty output frame on which the function must draw the processed video frame that will be used instead of the original. Both arguments are off-screen <canvas> elements. To create the video effect, you can use the Canvas API to draw on the output frame, using the input frame as necessary.
Once you have a video processor object, you can add it to the local participant’s video track with the addProcessor() method:
Then, once the video processor is added to the video track, the frames that are published from that track to the other participants in the video call are going to pass through the processFrame() function. It’s as simple as that!
The rest of this article is going to present a few example video effects, so that you have a better idea of how to write your own.
A quick video application
To help you familiarize yourself with custom video effects, we are going to write a short application that displays the video from your webcam on a web page. Since the goal is to focus on the video effects, we are not going to complicate this application with video calling — instead, we’ll limit it to just showing the video locally.
Copy the code below to a index.html file in a suitable place on your computer, such as your desktop:
This file implements all the code necessary to display the video from your webcam on the page, including a very simple video processor effect that just draws the original video frame on the output.
Most of the contents of index.html are boilerplate that we are not going to change. The important part is in these lines:
This is the video effect logic, which at this point just copies the source frame into the output.
Double click your index.html file to open it in your web browser. Then, accept the request to connect the camera to the page, and make sure you can see yourself.
Mirror effect
Let’s now change the processFrame() function to do something a bit more interesting. The version of this function shown below mirrors the video horizontally:
To test this version, replace the processFrame() function in index.html with the code above, leaving everything else unchanged.
Refresh the page to see the same video stream, but horizontally mirrored.
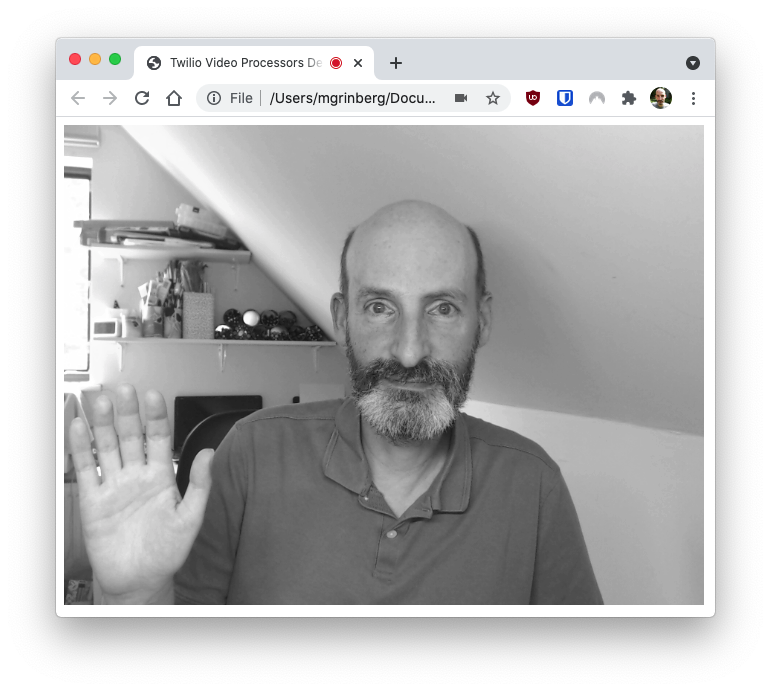
Black & white video
Here is another simple effect that converts the video to black & white:
This example takes advantage of one of the canvas filter effects, which is applied before the source frame is drawn on the output canvas element.
Other interesting filters you can play with are brightness, contrast, and saturation adjustments. If these are connected to sliders that the user can control, it can give each video call participant the opportunity to adjust their own video settings to make them look their best.
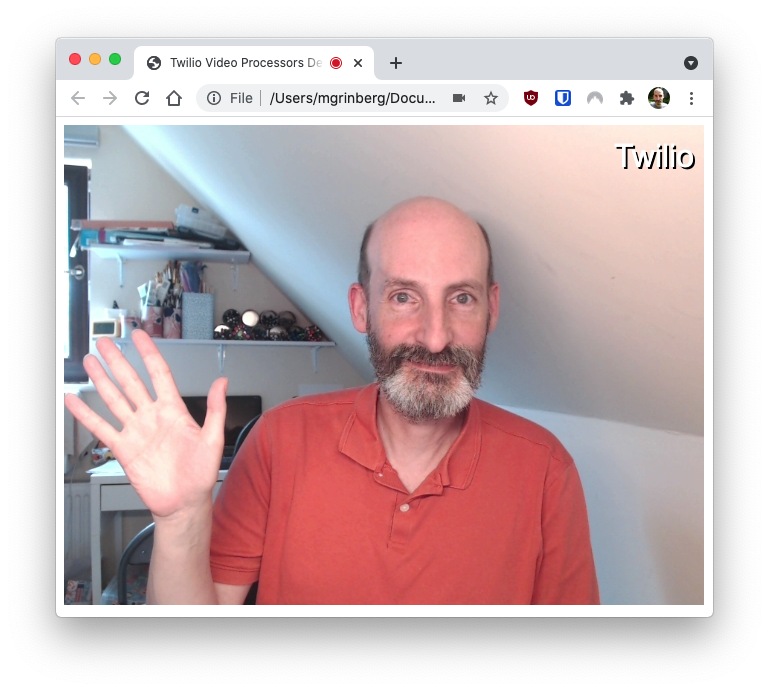
Adding a watermark
Besides processing the video source, the Canvas API allows us to draw on top of the video. This is particularly useful when you want to add a watermark, either text- or image-based. The following example adds a text message on the top-right corner of the video frame:
This effect starts by drawing the source video frame. Then the text drawing capabilities of the Canvas API are used to add a “Twilio” watermark on top of the frame. Note how the measureText() method is used to properly align the text with the right border, and how the text is drawn first in black and then again in white to achieve a nice shadow effect.
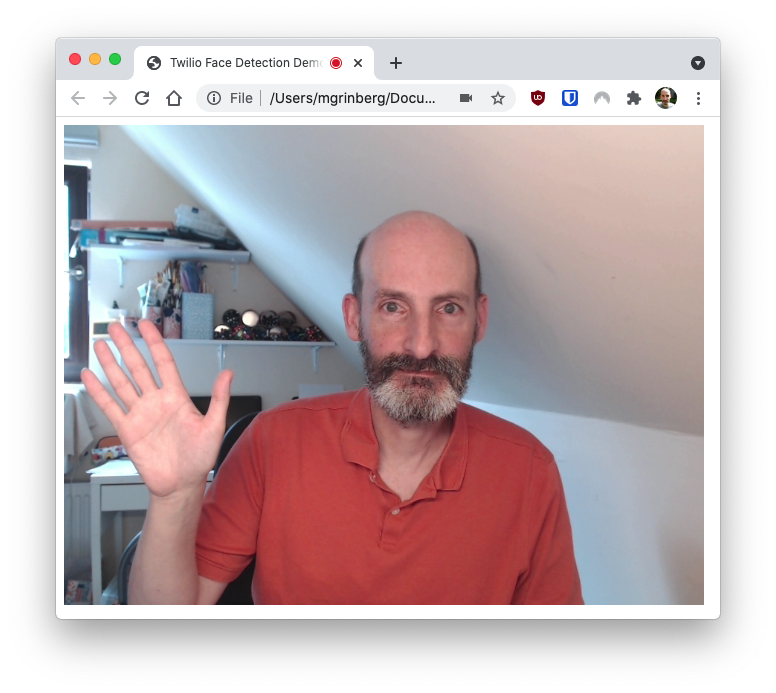
Face detection
I want to end this article with a fairly complex filter that performs face detection using Tensorflow. My intention with this last example is not to show you how to implement a complete face detection system (which is outside the scope of this article), but just to give you an idea of how far you can go with a video processor.
Below you can see an example of how this filter works.
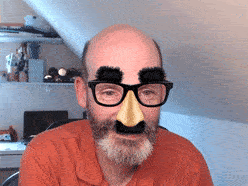
The code for the face detection video processor lives in its own GitHub repository. You are welcome to review the code and learn from it. There is an interactive demo of this effect that you can start by clicking here.
I hope the filters described in this tutorial give you a starting point for building your own video effects. I’d love to see what awesome filters you build!
Miguel Grinberg is a Principal Software Engineer for Technical Content at Twilio. Reach out to him at mgrinberg [at] twilio [dot] com if you have a cool project you’d like to share on this blog!
Related Resources
Twilio Docs
From APIs to SDKs to sample apps
API reference documentation, SDKs, helper libraries, quickstarts, and tutorials for your language and platform.
Resource Center
The latest ebooks, industry reports, and webinars
Learn from customer engagement experts to improve your own communication.
Ahoy
Twilio's developer community hub
Best practices, code samples, and inspiration to build communications and digital engagement experiences.