Deploying and Running Angular ASP.NET Core Video Chat Applications on Microsoft Azure
Time to read: 7 minutes
April 12, 2019
Written by

With Twilio Programmable Video you can add robust video chat functionality to web applications built with Angular and ASP.NET Core. With the Microsoft Azure App Service you can host your video-enabled apps on a fully managed, enterprise-grade cloud platform. Deployment and configuration are easy and take just minutes.
Build a Video Chat App with ASP.NET Core, Angular, and Twilio showed you how to integrate the Twilio JavaScript SDK and the Twilio .NET SDK seamlessly with ASP.NET Core and Angular. This post will show you how to deploy applications built with these technologies to the Azure App Service.
You will learn how to publish your application to the Azure App Service, and securely configure the app on Azure to use the Twilio Video Chat API with the App Service settings. You’ll be able to try out the production applications’ video chat features and verify that it’s correctly configured.
Prerequisites
- GitHub account (if you want to fork the project source code, free)
- Microsoft account (free, required to create an Azure account)
- Azure account (trial account with 12 months of free services)
- Twilio account (free developer account)
- Visual Studio 2017 or 2019 (free Community Edition)
Get the video chat project source code
There are two ways to get the source code for the video chat project you’ll be deploying to Azure:
- Follow the instructions in the previous post (if you haven’t already) which will teach you how to build a fully-functioning video chat application running locally.
- Get the source code from the author's GitHub repository (Offered under the MIT License, this project includes additional UI styling, functionality for persistent configuration selections, and other features typically found in a production app.)
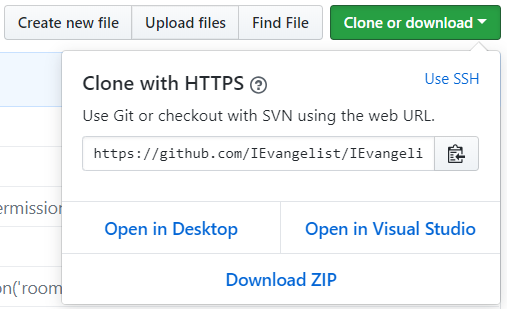
To get the source code from GitHub, navigate to https://github.com/IEvangelist/IEvangelist.VideoChat in your browser and click Clone or download.
If you have a GitHub account and have enabled Visual Studio integration you can click Open in Visual Studio. You’ll have the opportunity to select the directory where the local repository will be located.
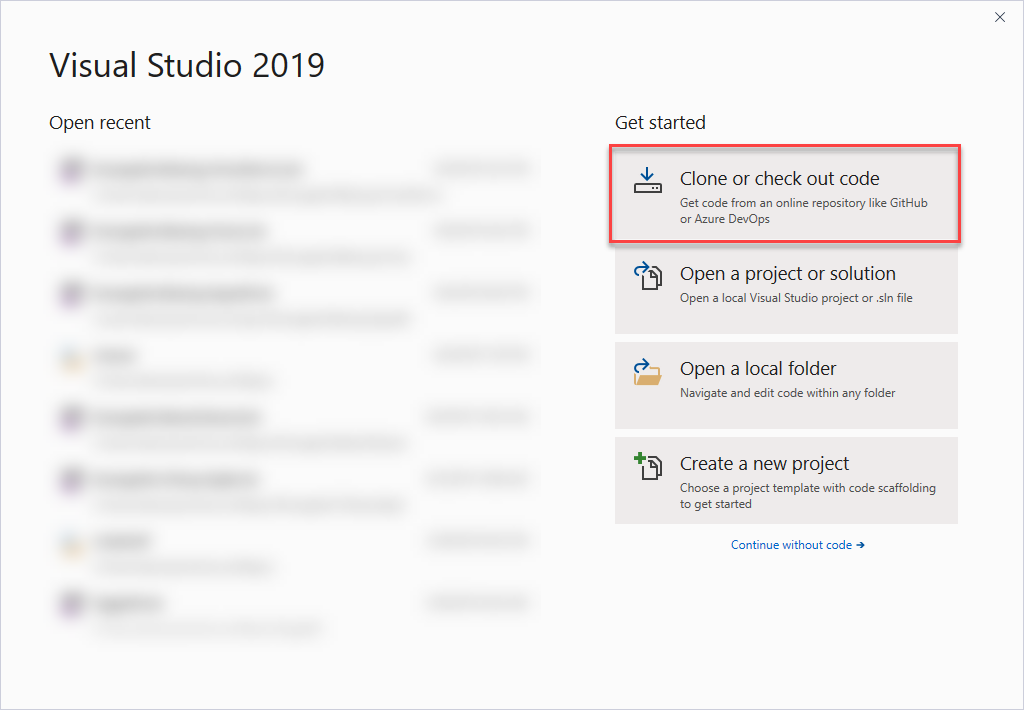
You can, of course, also use whatever process you prefer for creating local projects and repositories. If you’re using Visual Studio 2019, the cloud-first workflow enables a quick alternative to cloning the GitHub repository.
Get started with Twilio Programmable Video
If you build the project by following the steps in the previous post you will create a Twilio account and a Programmable Video project as part of that process. You can skip the rest of the instructions in this section.
If you’ve downloaded the project source code from GitHub you’ll need a free Twilio trial account and a Twilio Programmable Video project to be able to run the project locally or on Azure. Getting set up will take just a few minutes.
Once you have a Twilio account, go to the Twilio Console and perform the following steps:
- On the dashboard home, locate your Account SID and Auth Token and copy them to a safe place.
- Select the Programmable Video section of the Console.
- Under Tools > API Keys, create a new API key with a friendly name of your choosing and copy the SID and API Secret to a safe place.
The credentials you just acquired are user secrets, so don’t store them in the project source code. Remember that inadvertent disclosure of user secrets can result in unexpected billings.
If you are going to run the project locally, which you’ll need to do to make changes and experiment with Azure’s continuous integration features, you’ll need your Twilio credentials on your local machine. One way to keep them safe and make them accessible in your project configuration is to store them as environment variables on your development machine.
ASP.NET Core can access environment variables through the Microsoft.Extensions.Configuration package so they can be used as properties of a IConfiguration object in the Startup class. The following instructions show you how to do this on Windows.
Execute the following commands at a Windows command prompt, substituting your credentials for the placeholders. For other operating systems, use comparable commands to create the same environment variables.
If you prefer, or if your development environment requires it, you can place these values in the appsettings.development.json file as follows, but be careful not to expose this file in a source code repository or other easily accessible location.
If you’ve installed your credentials and set up the project correctly you should be able to run it on your local machine at this point. Whether you’ve built the project from scratch or downloaded it from GitHub, it’s a good idea to run it locally before deploying to Azure.
Publish the video chat app to Azure
Publishing the app to Azure the first time involves two steps: 1) publishing the code from Visual Studio and 2) adding your Twilio configuration credentials to app in Azure through the Azure Portal. Once you’ve added your Twilio credentials to Azure you’ll only need to publish the updated project from Visual Studio to update the app on Azure.
From the Visual Studio Build menu, select Publish VideoChat or right-click on the project from the Solution Explorer and select Publish. This will open the Publish window and the Pick a publish target dialog box, which defaults to App Service\ and Azure App Service: Create New.
Click Create Profile to continue with the aforementioned selections.
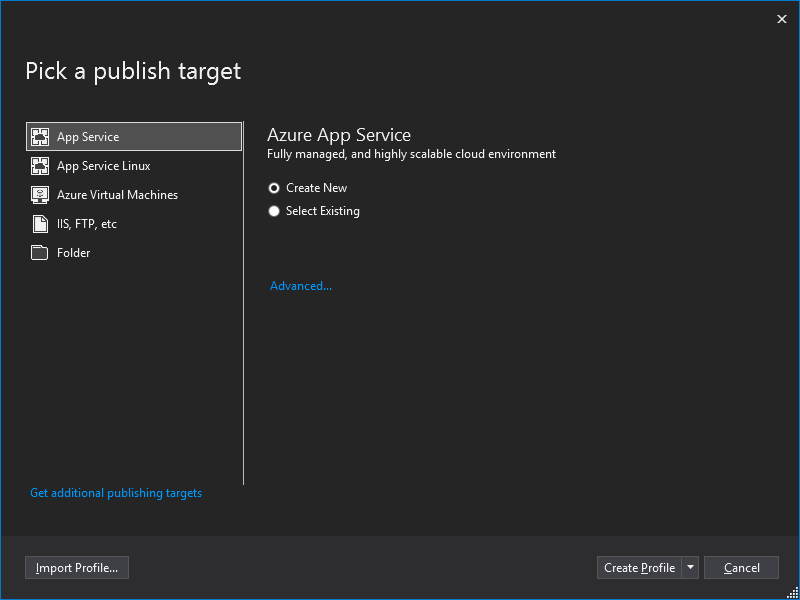
This will open the Create App Service dialog box.
The value for App Name will be publicly available when your application is published, followed the azurewebsites.net domain, like the following:
You may want to specify a shorter and more convenient name.
The Create App Service dialog box will look similar to the following:
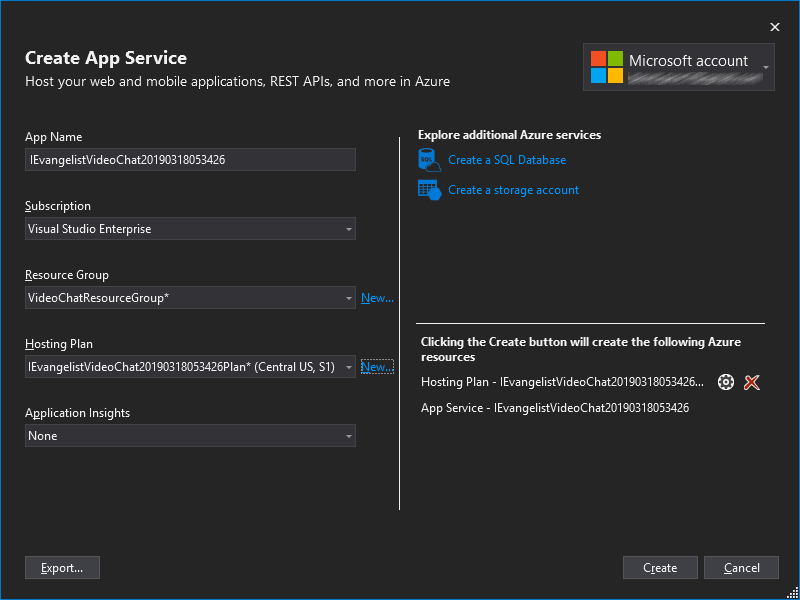
Depending on whether you’re new to Azure or not, you might have existing resource groups or a hosting plan. If you’re new simply click New and enter the information required by the simple prompts, and click Create.
When you click Create Visual Studio will take the project’s newly-created publish profile and execute it on Azure. This will include creating a Resource Group, if necessary; a Hosting Plan, and a new Azure App Service. Behind the scenes the source code is compiled, bundled, and packaged up.
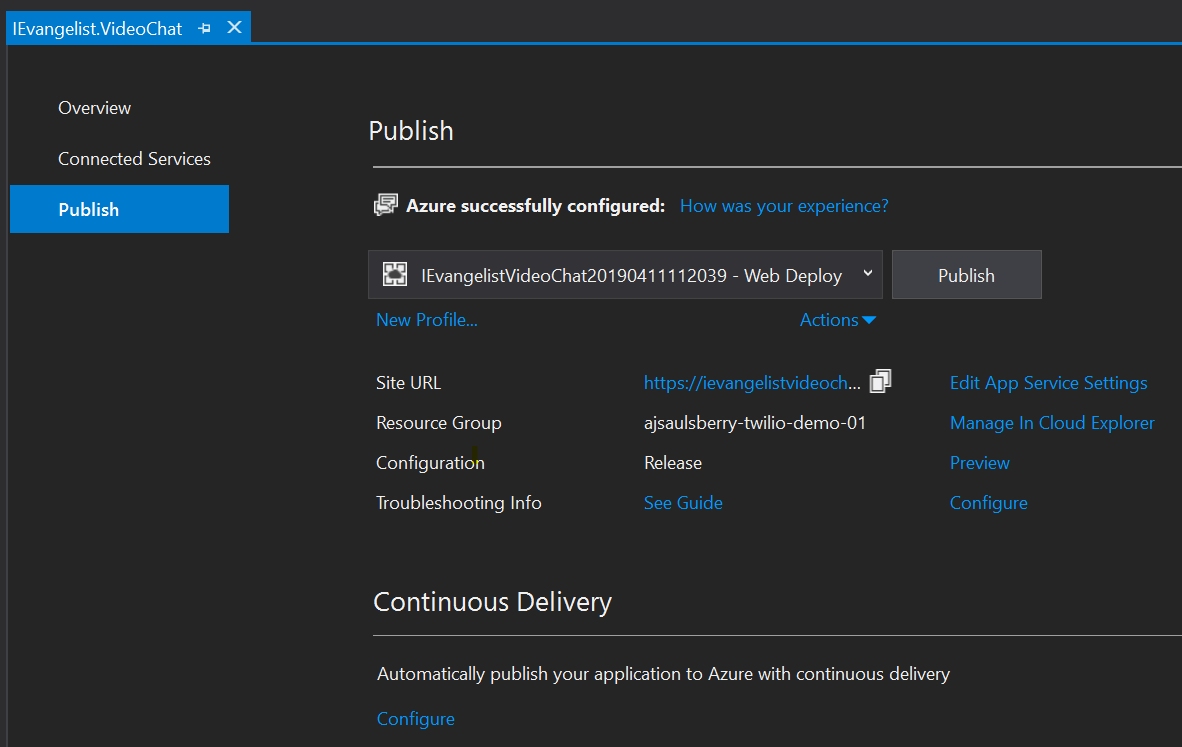
When the publish profile creation process finishes the Publish tab should display Azure successfully configured: followed by <app name> - Web Deploy and the Publish button, similar to the following:

If you don’t already have the Web Publish Activity window open at the bottom of your Visual Studio workspace, open it by selecting View > Other Windows > Web Publish Activity. In the Publish box you should the name you gave the video chat app.
Click Publish.
Visual Studio will build the project, if necessary, then begin the publishing process with npm install. This could take a few moments, depending on your development environment, then you’ll see an ng build --prod command followed by a series of “Adding file” messages. Finally, you should see messages indicating the app was published successfully.
Depending on your Visual Studio settings, your default debugging browser will open the URL of your video chat app on Azure.
Note that at this point the application is not configured and will not work properly.
Configure the video chat app in the Azure Portal
Your application is being hosted in Azure, but it lacks the appropriate configuration. You need to add the Twilio user secrets for your account and your Twilio Programmable Video project.
Open the Azure Portal and select App Services. The App Services directory will open and you should see your video chat app listed.
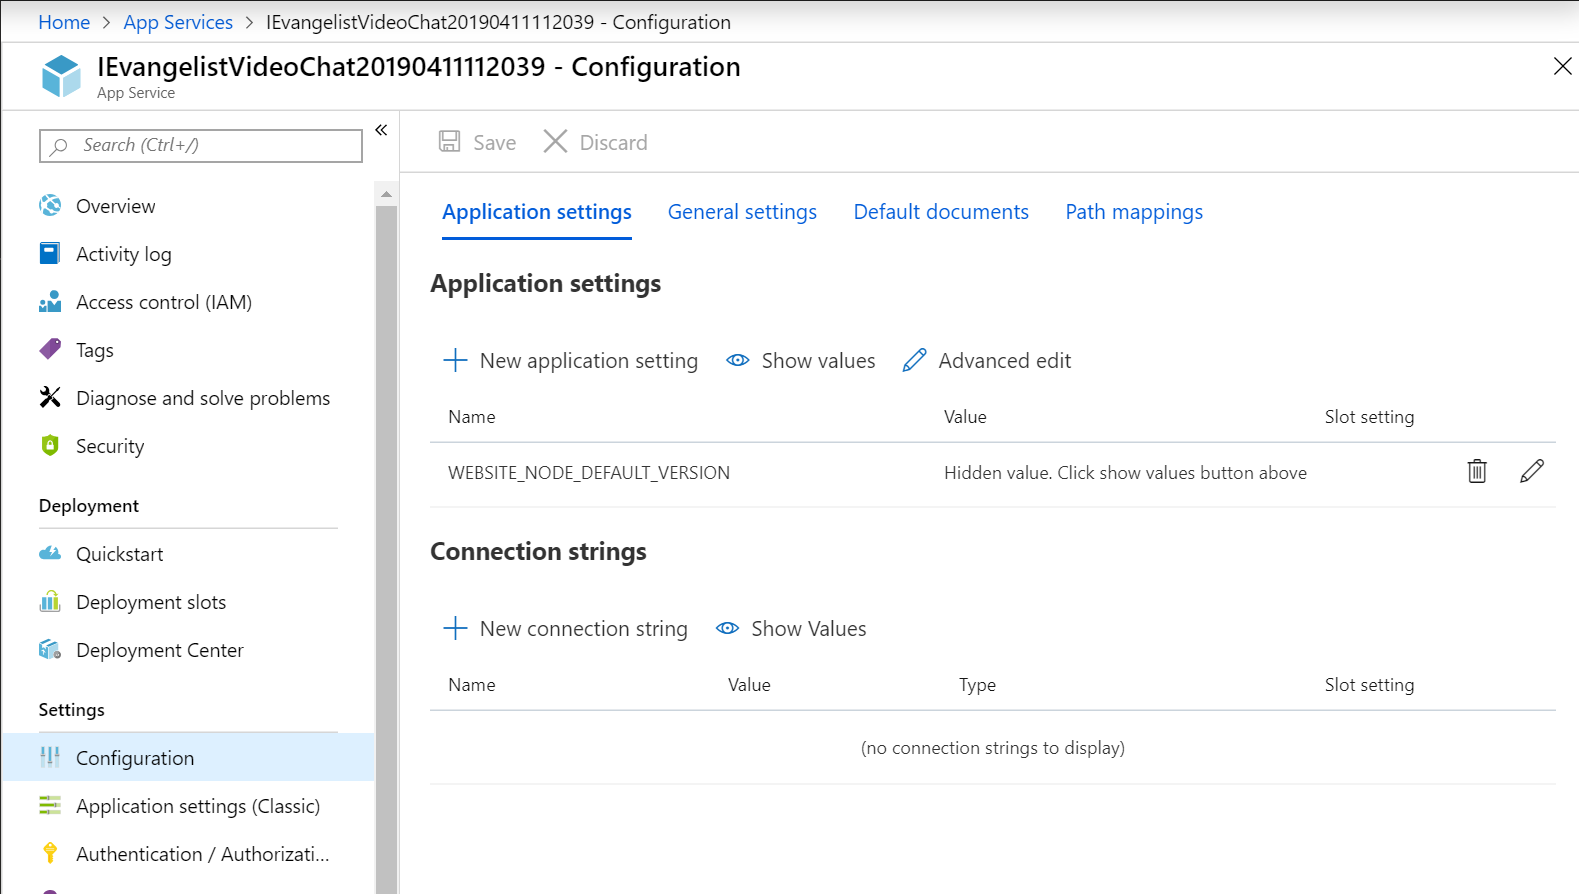
Click on the name of your app. The Configuration window for your app will open.
In the list of Settings, click Configuration.
Under Application settings you should see WEBSITE_NODE_DEFAULT_VERSION.
Click Configuration. The Add/Edit Application Setting panel will open.
Click Configuration. The Add/Edit Application Setting panel will open. This is where you’ll enter the Twilio user secrets you obtained when you created your account and your Twilio Programmable Video project in the previous section.
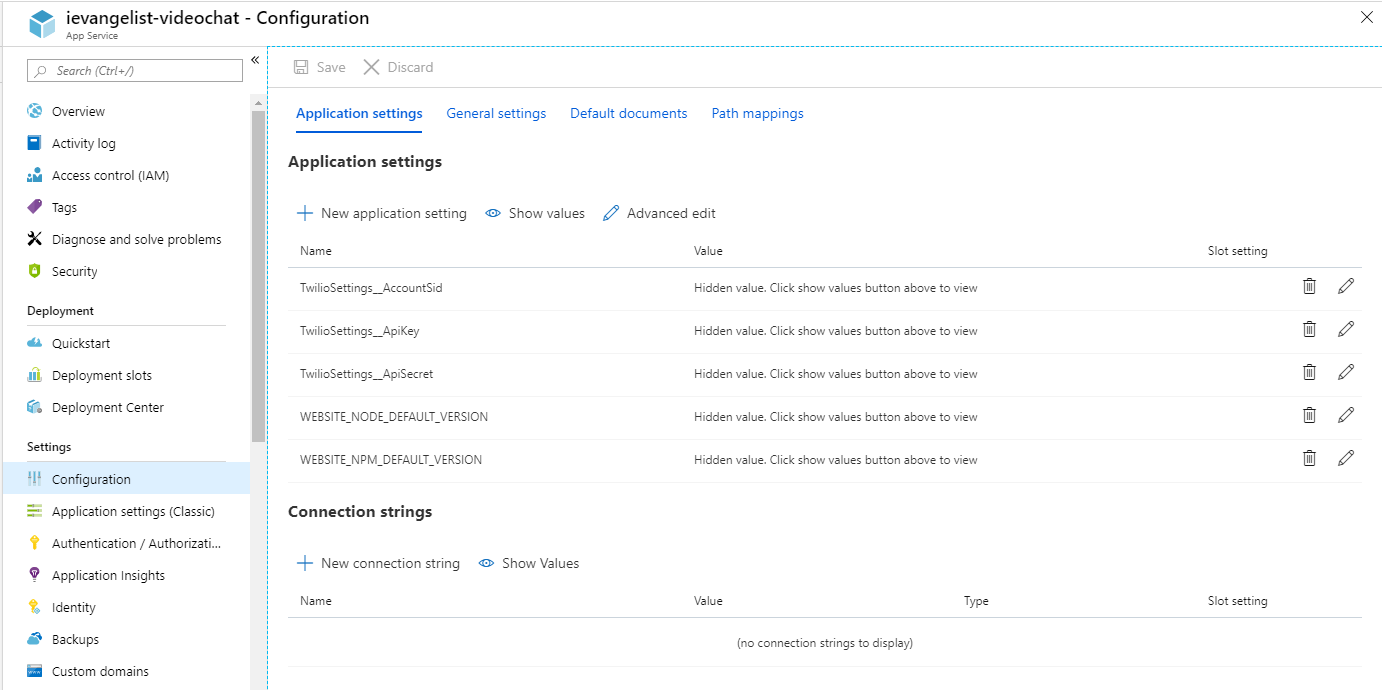
Enter the name and value pairs listed below. The value will be your user secret. Click Update. The panel will close and you should see each setting in the Applications settings list.
|
NAME |
VALUE |
|
TwilioSettings__AccountSid |
[ Account SID ] |
|
TwilioSettings__ApiKey |
[ API Secret ] |
|
TwilioSettings__ApiSecret |
[ SID ] |
Click Save at the top of the Configuration panel to persist these application setting changes. You should see a confirmation message indicating the changes have been applied successfully. Azure will restart your App Service automatically to update your app with the new settings.
Testing your video chat application functionality
Open a browser and navigate to the https://<app name>.azurewebsites.net. The URL can be found on the Overview tab of the App Service page in the Azure portal.
Your browser may prompt you to allow your app website to use your camera and microphone. Click Allow.
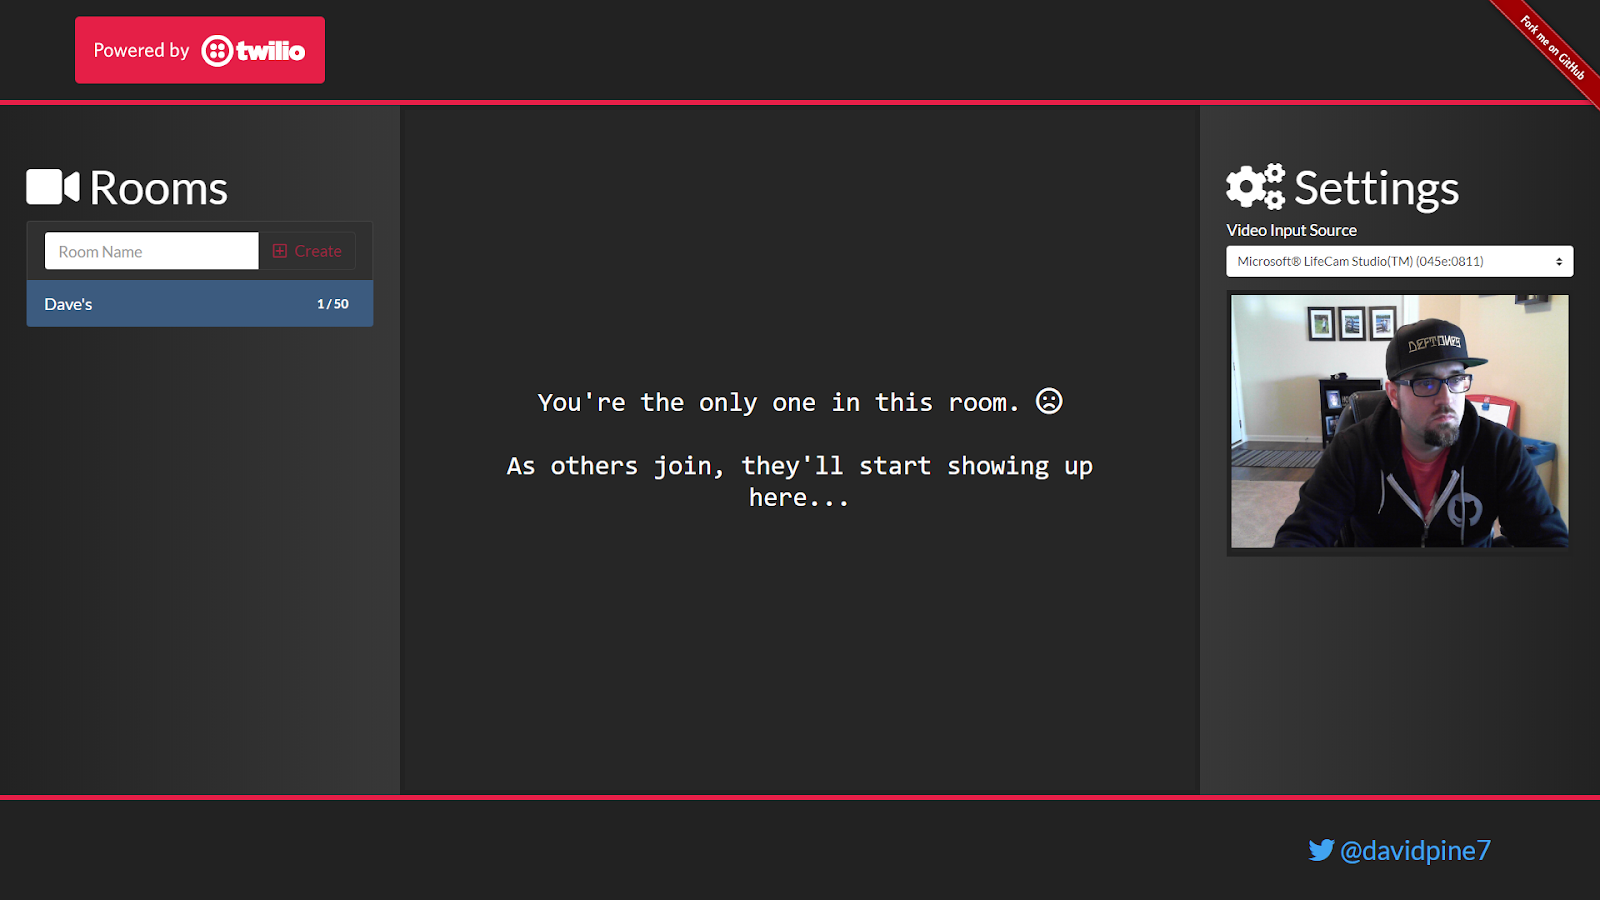
Under Settings, select a video input source. At this point you should see a live video image in the center panel.
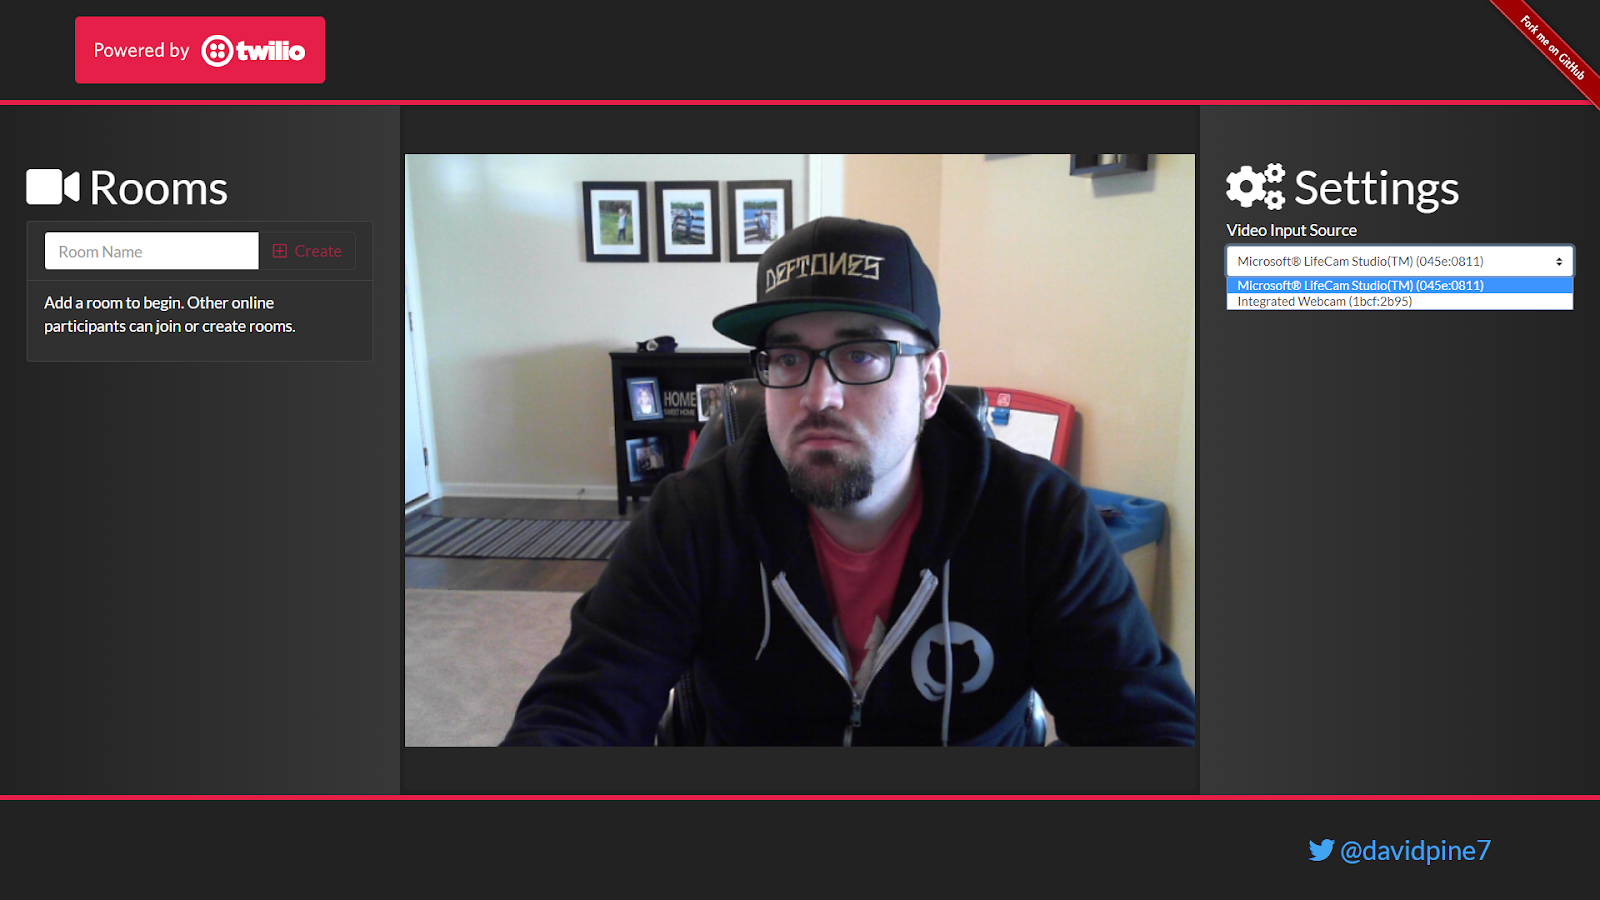
Under Rooms, add a room by typing a room name and clicking “Create”.
If the application is correctly configured, the room will be successfully added and the video preview will besnapped to the right panel under Settings.
Once you’ve finished testing the app in the Azure App Service, you may want to stop it to avoid incurring the nominal fees associated with keeping the Azure service running. Right-click the app name in the App Services pane of the Azure portal and click Stop.
Building and Deploying to Microsoft Azure
In a few short steps you’ve learned how to take a web application consisting of an Angular user interface and an ASP.NET Core server, including a custom video chat interface using Twilio programmable video, and deploy it to a Microsoft Azure app service. By doing so you can leverage Azure’s robust, enterprise-class web hosting capabilities and the continuous deployment system provided by Visual Studio and Azure.
Additional Resources
A working example of the application is available on the author’s Azure domain: https://ievangelist-videochat.azurewebsites.net/, but feel free to use yours.
You can learn more about the technologies used in this post from the following sources:
- Azure App Services
- SignalR: Learn About ASP.NET SignalR on ASP.NET
- Twilio Programmable Video on Twilio Docs
David Pine is a Microsoft MVP, Google Developer Expert, technical evangelist, and international speaker. You can follow him on Twitter at @davidpine7. Be sure to checkout his blog at https://davidpine.net.

Related Resources
Twilio Docs
From APIs to SDKs to sample apps
API reference documentation, SDKs, helper libraries, quickstarts, and tutorials for your language and platform.
Resource Center
The latest ebooks, industry reports, and webinars
Learn from customer engagement experts to improve your own communication.
Ahoy
Twilio's developer community hub
Best practices, code samples, and inspiration to build communications and digital engagement experiences.