Daily Dog with C#, WhatsApp and Azure functions
Time to read:
April 03, 2019
Written by

I love Bing Image of the day, it always makes me smile! I also love dogs, so I thought why not combine the two and create an app that sends a daily dog picture via WhatsApp.
This post will take you through all the steps to create an azure scheduled function in C#, make a call to the Dog API to retrieve a photo and then send the returned image to a number via the Twilio API for WhatsApp.
This post assumes some base knowledge of C# and RESTful APIs.
To get started, we will need:
- A Twilio account (sign up for a free Twilio account here)
- The WhatsApp Sandbox Channel installed in your account (go through this process to activate the sandbox)
- An Azure Account (sign up for free here)
Create an Azure Function
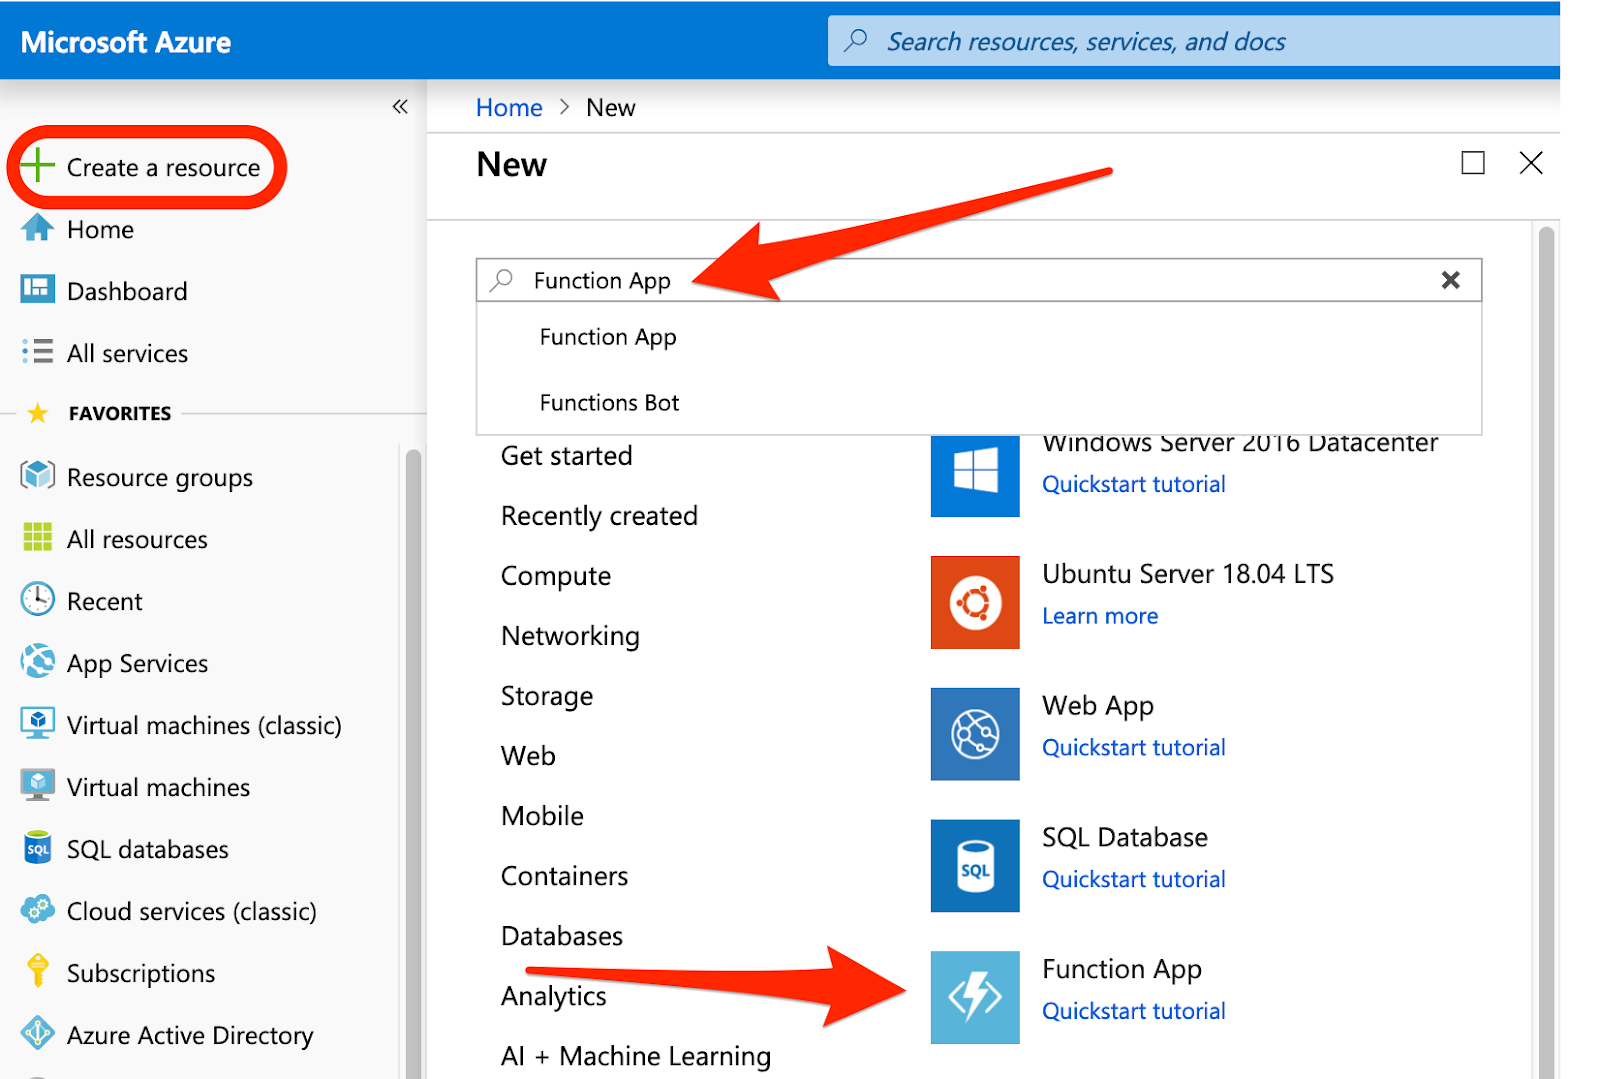
From the Azure portal, click the Create a resource button, found at the top of the menu on the left. Search for a Serverless Function App and then click on the matching result.
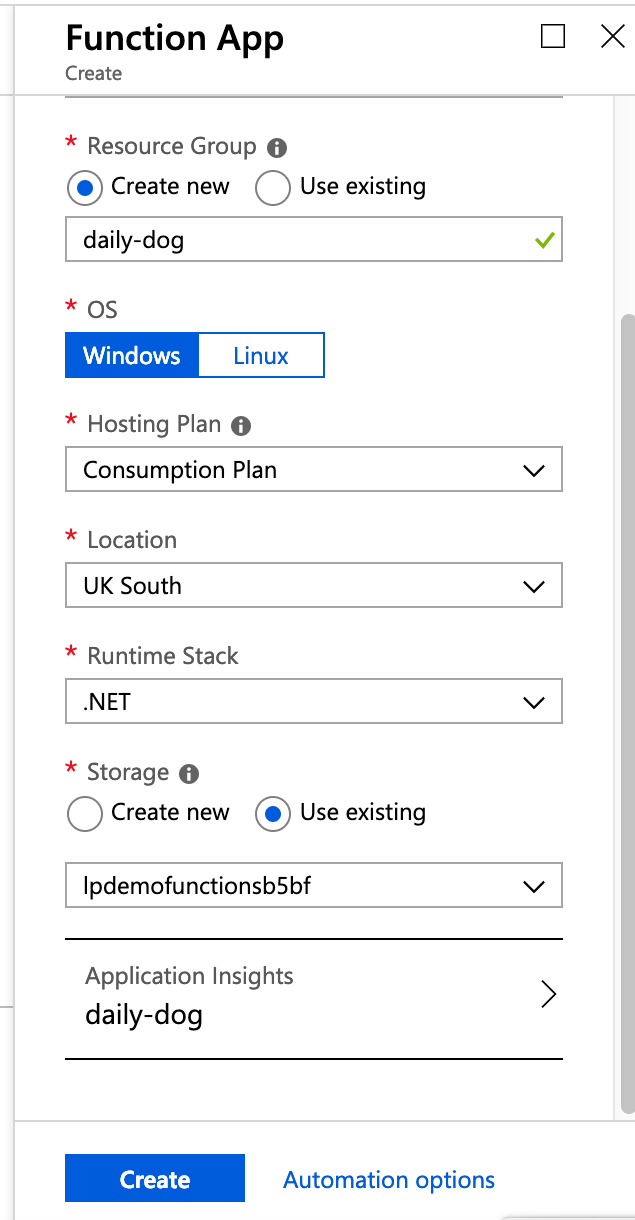
Give your app a name like "daily-dog", it will need to be unique to you though. Create or reuse a resource group, choose the Location that best suits you, and either create or reuse a storage location. You can then click Create at the bottom of the panel.
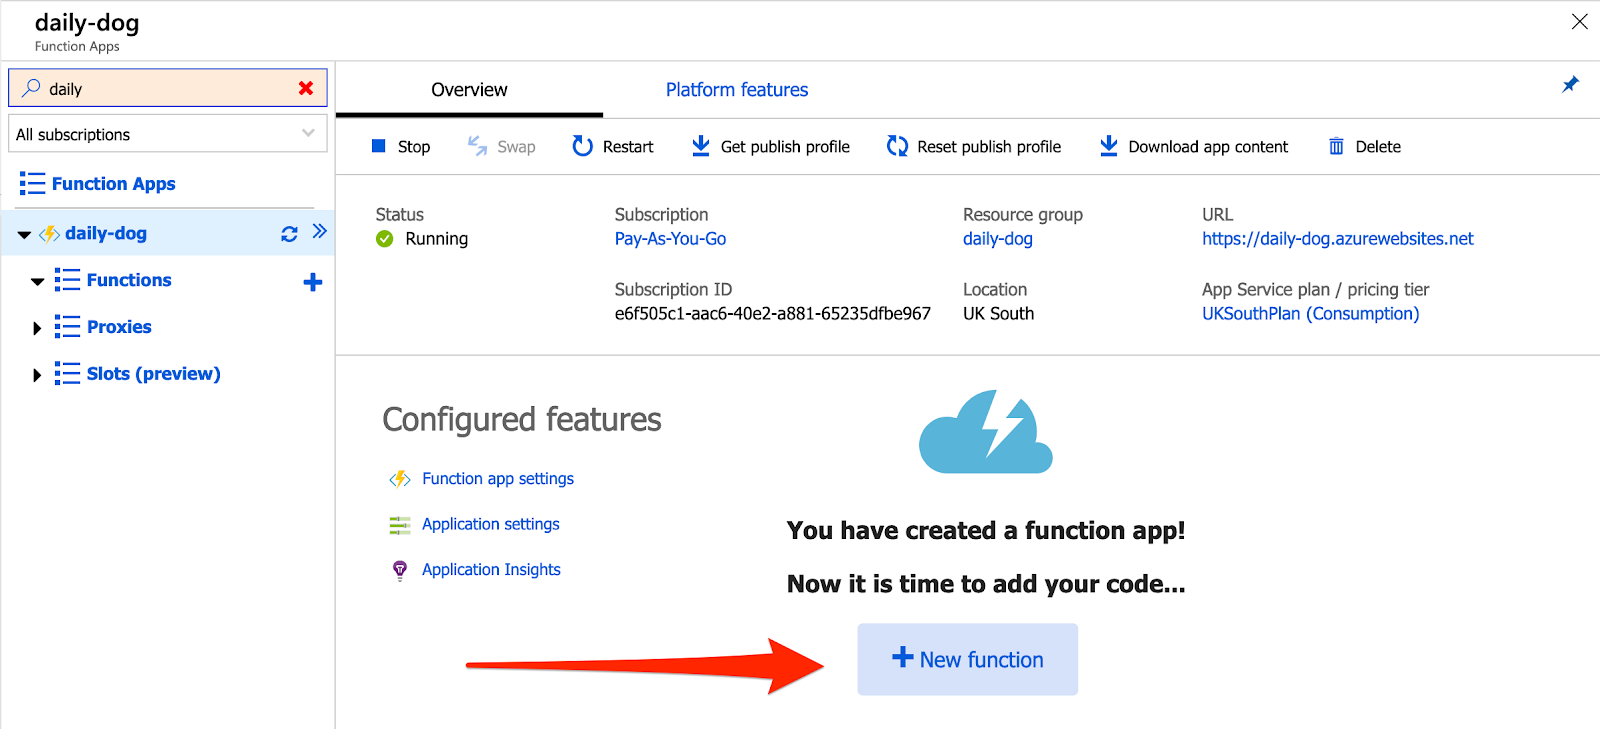
Once that has deployed, go into the Functions from the menu on the left-hand side. You should see your newly created Function App with three submenus; Functions, Proxies and Slots.
Adding a function to the Function App
To add a function to our Function App, click on the "+ New Function" button.
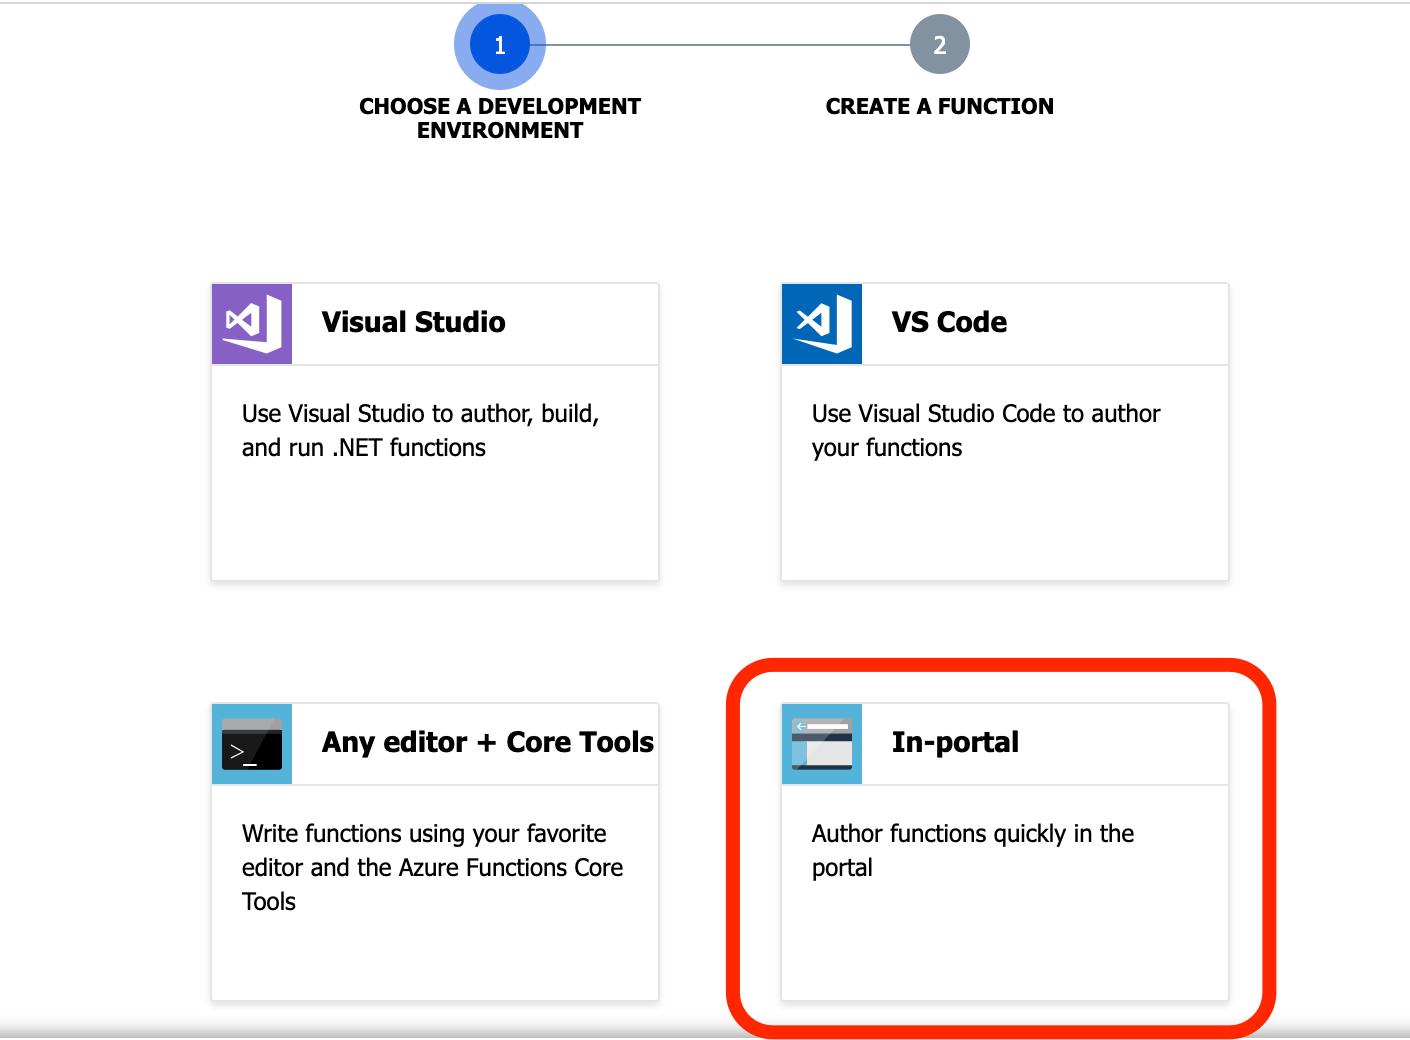
We will then be asked which environment we would like to create our function in. For ease, we will create this app in the Azure portal.
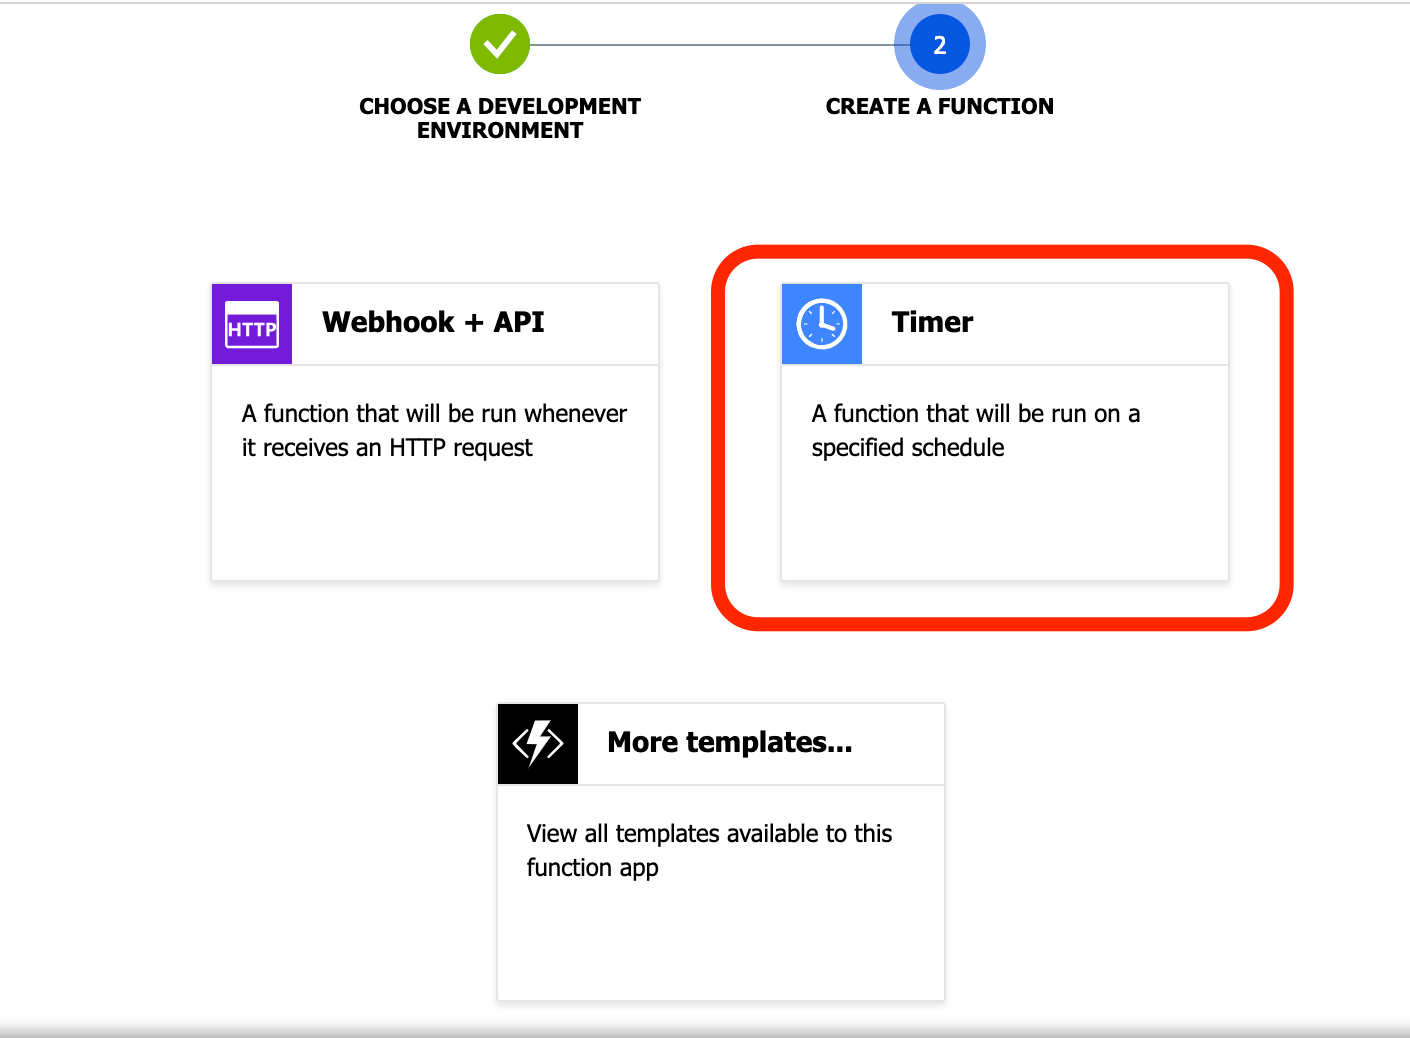
Finally, we will need to choose the type of function we want. We want our photos to be sent on a schedule, so we need to choose the Timer function.
Azure will then take a few moments to deploy our function to our function app.
Updating the Azure function
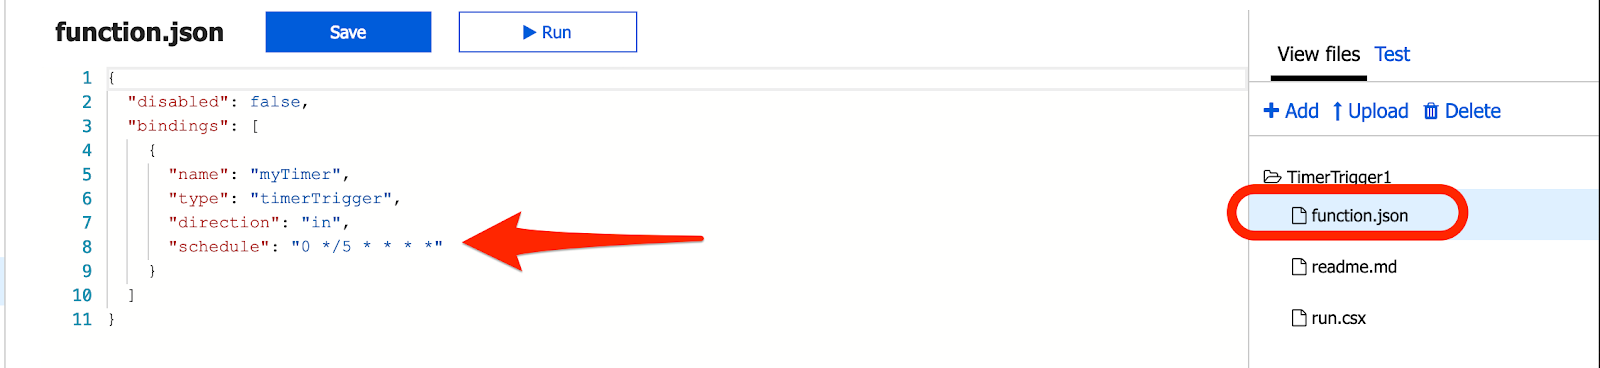
Once it is deployed, go to the far right of the browser and click on the view files tab. Then click on the function.json file. This is the default config for our function and the place where we can update the cron expression in the schedule node to define when our function will fire. It defaults to every half hour on the hour. We will leave it on the default, for the time being, you can always update the schedule later. Here is a handy online cron expression generator.
Next, we are going to add two new files called "function.proj" and "sendMessage.csx" respectively, using the "Add" button under "View Files".
Adding dependencies to Azure
Click on "function.proj" to open it in the portal. This file is where we can bring in any dependencies our project will need. We need the Twilio NuGet package for our app, so add the following code to the "function.proj" file and save.
Sending a message using the Twilio API for WhatsApp
Next, open "sendMessage.csx". This is where we send the WhatsApp message using the Twilio API for WhatsApp. Update the file with the following code:
In the above code, we have a SendMessage method and we will pass in the URL for our image as a parameter called imageUrl.
We initiate the Twilio client and then create a new message using the MessageResource.Create method. We then build up our message, which needs a body and mediaUrl parameter, making sure to pass the imageUrl as an item in a List.
We have used Environment Variables to store our Twilio Account SID and Auth Token, so let's add those to Azure next.
Click on the Function App and then select "Application Settings"; yes it is in two places!
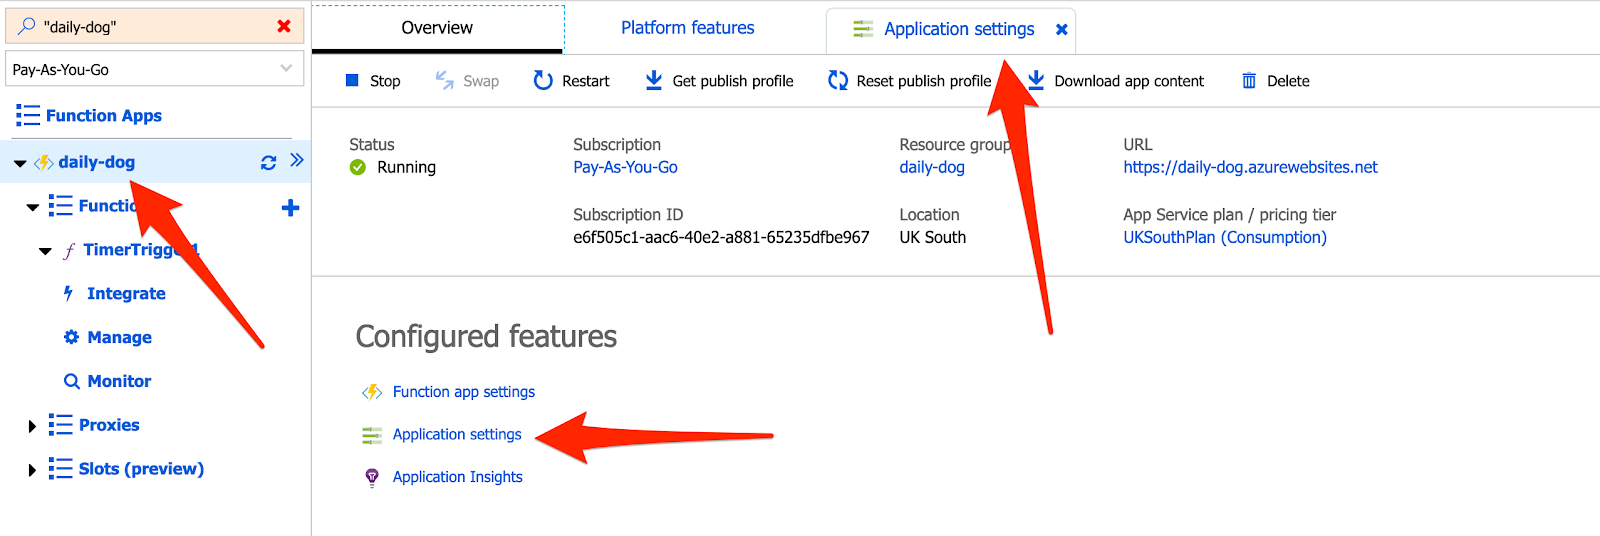
Then scroll down to the "Application Settings" section and add our two key/value pairs.

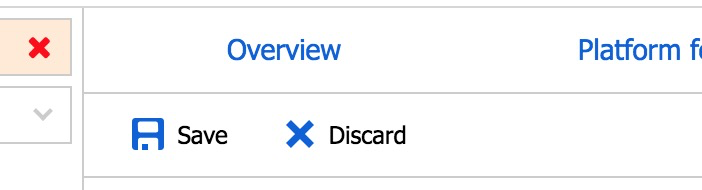
Tip: Be sure to save your Application Settings after adding your Twilio keys. You can find the save button at the top of the page under “Overview”.
You can find your keys in the Twilio console.
Sending the message with WhatsApp
The last part of our function requires us to update the run.csx file, so open that now. This is the method that will be called by our schedule.
Update the file with the following code:
The first line, #load "sendMessage.csx", references our sendMessage.csx file, making the SendMessage method available.
Inside the Run method, add a variable called imageUrl and a fallback image URL.
Below this, initiate the HttpClient within a using statement.
We then build our request and send it asynchronously. With the following code:
We want to check the status code on our responseMessage and then, if it was successful, update the imageUrl variable with the new URL.
The final point is to call our SendMessage method, passing in the imageUrl variable.
Save and run the function and you will receive a lovely photo of a dog via WhatsApp!
Summary
In this post, we learned how to create a scheduled Azure function, add dependencies to our function, call a REST API and finally, send a photo using the Twilio API for WhatsApp.
Let me know what other cool ideas you have for Azure Functions and the Twilio API for WhatsApp. I can't wait to see what you build!
- Email: lporter@twilio.com
- Twitter: @LaylaCodesIt
- GitHub: layla-p

Related Resources
Twilio Docs
From APIs to SDKs to sample apps
API reference documentation, SDKs, helper libraries, quickstarts, and tutorials for your language and platform.
Resource Center
The latest ebooks, industry reports, and webinars
Learn from customer engagement experts to improve your own communication.
Ahoy
Twilio's developer community hub
Best practices, code samples, and inspiration to build communications and digital engagement experiences.