Control a Spooky Ghost Writer for Halloween with OpenAI's GPT-3 Engine, Python, and Twilio WhatsApp API
Time to read: 9 minutes
October 13, 2020
Written by
Reviewed by

October is a pretty cool month because not only do the days get dark faster, but Halloween is just around the corner. If you enjoy finding new ways to trick your friends or spook someone out, this article has a fun and unique idea for you! Whether you're already tech savvy or a beginner at coding, you might find it enjoyable to build an app to spook someone out this year!
Using Python, GPT-3, and Twilio WhatsApp API, you have the chance to control a ghost writer and have them write a story directly onto your computer screen. No witch magic involved, just Twilio magic!
Tutorial Requirements
- Python 3.6 or newer. If your operating system does not provide a Python interpreter, you can go to python.org to download an installer.
- An OpenAI API key. Request beta access here.
- A free or paid Twilio account. If you are new to Twilio get your free account now! (If you sign up through this link, Twilio will give you $10 credit when you upgrade.)
- ngrok, a handy utility to connect the development version of our Python application running on your system to a public URL that Twilio can connect to. This is necessary for the development version of the application because your computer is likely behind a router or firewall, so it isn’t directly reachable on the Internet. You can also choose to automate ngrok as shown in this article.
Configuration
Since we will be installing some Python packages for this project, we will need to make a new project directory and a virtual environment.
If you are using a Unix or Mac OS system, open a terminal and enter the following commands:
For those of you following the tutorial on Windows, enter the following commands in a command prompt window:
The last command uses pip, the Python package installer, to install the four packages that we are going to use in this project, which are:
- The OpenAI Python client library, to send requests to the OpenAI GPT-3 engine.
- The Twilio Python Helper library, to work with SMS messages.
- The Flask framework, to create the web application.
- The python-dotenv package, to read a configuration file.
Set the OpenAI API Key
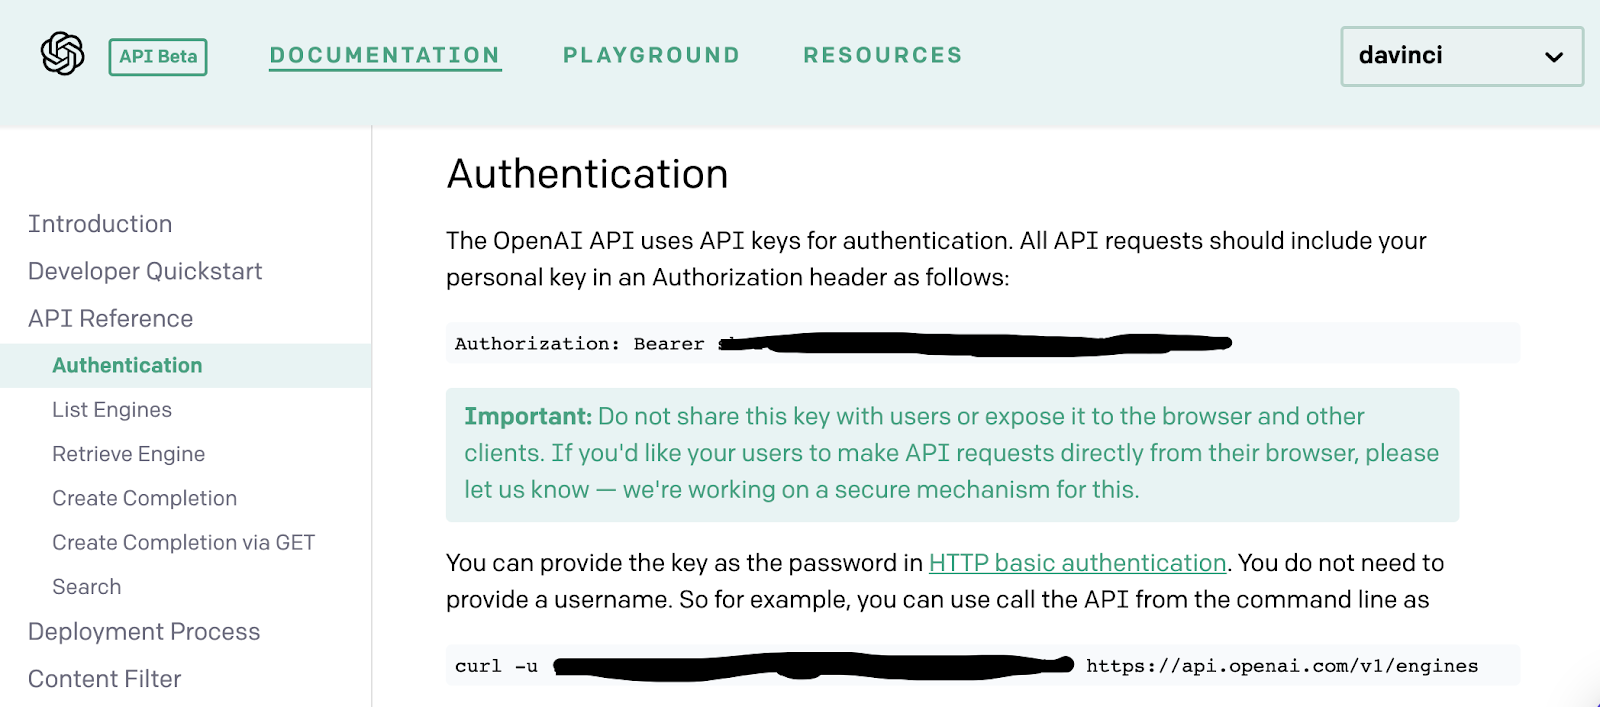
As mentioned above, this project requires an API key from OpenAI. During the time of this article, the only way to obtain the API key is by being accepted into their private beta program.
If you have access to the Beta page, the API key can be found in the Authentication tab in the Documentation.
The Python application will need to have access to this key, so we are going to create a .env file where the API key will be safely stored. The application we write will be able to import the key as an environment variable later.
Create a .env file in your project’s root directory (note the leading dot) and enter the following line of text, being sure to replace <YOUR-OPENAI-KEY> with your actual key:
Make sure that the OPENAI_KEY is safe and that you do not expose the .env file in a public location.
Build your scary story generator app
Seriously, who isn't curious to read or hear about a suspenseful and spooky story? Plus, the fun part is tricking someone into thinking that a ghost wrote it, and not just a couple lines of code on a computer!
The OpenAI playground allows users to explore GPT-3 (Generative Pre-trained Transformer 3), a highly advanced language model that is capable of generating written text that sounds like an actual human wrote it. This powerful model can also read a user's input and learn about the context of the prompt to determine how it should generate a response.
In this project, we will be feeding the GPT-3 engine with a sentence to create a full scary story that will keep running on your WhatsApp device.
Start your scary story
Inside of the spookystory-whatsapp directory, create a file named story.py. This file is where you will store the story prompt as well as the functions to generate text using OpenAI's GPT-3 engine.
Copy and paste the following code to prepare the story.py file:
The highlighted line in the code block above is where you’ll add your story prompt, so it's time to get the creative juices flowing and channel your imagination. If you're having a writer's block, you can look up some ideas for scary stories and take a sentence prompt.
I decided to use this as my prompt in order to make the story family friendly:
If you’d like, feel free to replace the session_prompt with the one provided above.
Teach your ghost writer how to write
Now that the file has been created, you need to define the functions and teach the ghost writer (OpenAI's GPT-3 engine) how to process this information. Since the goal of this app is to write a story, the app needs to keep track of what's happening in the story and how to add to it appropriately.
Create a function named write_story() under the session_prompt variable. This function is responsible for generating the next line of the story and receives the current state of the story, session_story, as a parameter. If session_story doesn’t exist yet, then the prompt you created will be assigned to prompt_text. Otherwise, the ongoing story generated by the OpenAI engine will be assigned to prompt_text.
Copy and paste the following code below the session_prompt variable:
After setting the value for prompt_text, this function calls the openai.Completion.create() method on the OpenAI client and passes to it a series of arguments that customize the engine’s response, including the new prompt. Since the ghost writer will tell the story over WhatsApp text messages, the max_tokens variable, which stands for either a word or punctuation mark, was set to 96. You can read more about the GPT-3 customization options in the Ultimate Guide to OpenAI-GPT3 Language Model or explore the OpenAI Playground for yourself.
Teach the ghost writer to remember what happens in the story
A ghost writer is like any writer, they need to comprehend what's going on in the story and how to continue. A function named append_to_story is defined to help solve this problem. This function checks if anything has been written in the story yet. If not,, it concatenates the next part of the generated story onto the existing story. Copy and paste the following code below the write_story function:
Control when the ghost writer adds to the story
As we have seen in the functions defined above, we're returning a string output, but it won't be returned to the terminal window. Since this is a tutorial to create a WhatsApp story generating bot, we will need to use a webhook (web callback) to allow real-time data to be delivered to other applications and write to a text file named spookystory.txt.
Create a new Python file in the project’s root directory named app.py. This file will set up a Flask session that will reload and reflect any changes that are made in the code.
Copy and paste the following code to your app.py file:
The Flask framework allows us to use configuration values to store information specific to a user. In this case, a session is implemented so that the user can send messages to the ghost writer app which controls when the next part of the story is written. Thus, app.config['SECRET_KEY'] is a dictionary object used to encrypt an individual's session.
Any random string can replace "'top-secret!'" and if for some reason, you don't like where the story is going or want to simply change the prompt, you can change the secret key value and clear the contents of the spookystory.txt file.
Inside of the /bot webhook, various functions are called upon in order to return the proper string format that TwiML requires to send as a text message over WhatsApp. request.values is a special object from Flask that parses incoming data and exposes it in a convenient dictionary format. We can assign the value of the object’s Body key to a variable called incoming_msg to keep track of the user's input and use it to determine when to continue or end the story.
If it's the beginning of the story, the operating system checks if the spookystory.txt file is empty or not. If it's empty, we write in the exact string created for session_prompt in story.py. Otherwise, the ghost writer will continue to append to the story and write everything to the text file until the user signals it to stop. By texting "the end" to the WhatsApp number, the ghost writer bot will stop writing the story, close the file, and return the WhatsApp message of "To be continued…?" for some ominous and suspenseful effect. That is, until you proceed to message it again...
The session_story, of course, is a variable that takes the session's story and passes it to the write_story() and append_to_story() functions created in the story.py file. Every time Flask updates the session_story variable, the same newline is added to the spookystory.txt file. This updates in real time, which adds a cool effect because you can control when to deceive the eyes of the audience when they observe the text file on the screen.
Configure Twilio WhatsApp
It's time to connect the /bot webhook to the Twilio WhatsApp Sandbox. If you haven't already, log onto the Twilio Dashboard to view your Programmable Messaging dashboard. There is a section on the page that says "Building with WhatsApp? Get started here". Click on the link to learn how to set up your sandbox.
The sandbox is provided by Twilio, however, once you complete your app, you can request production access for your Twilio phone number.
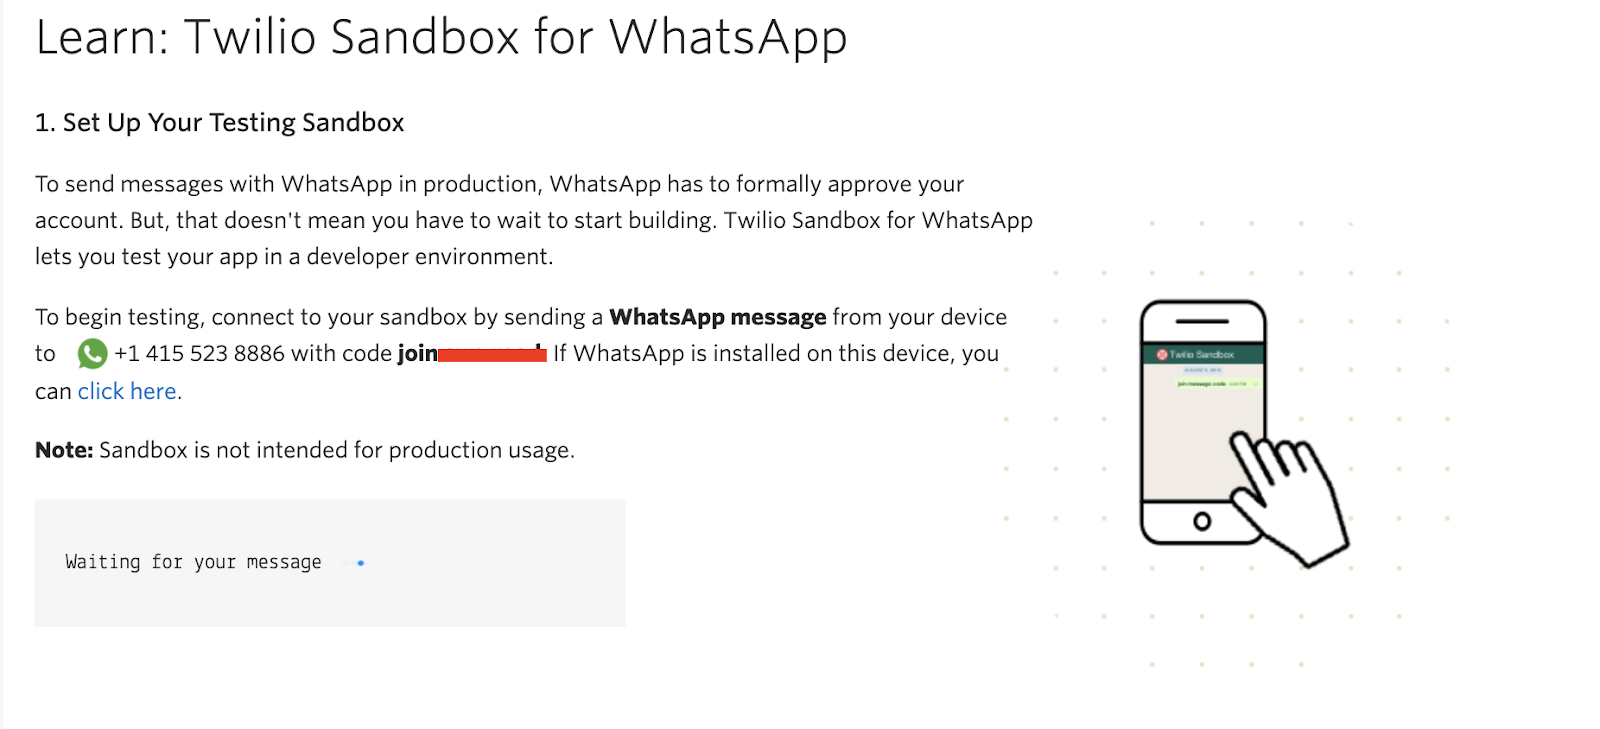
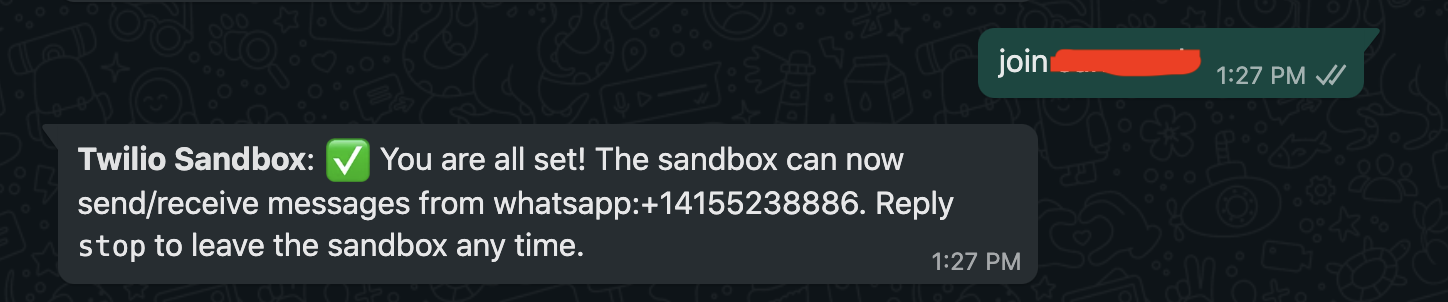
Use your smartphone to send a WhatsApp message with the requested phrase to your assigned WhatsApp number. If you are successful, you should receive a reply as shown below.
Set up a webhook with Twilio
Open your terminal window and navigate to the "spookystory-whatsapp" project directory if you are not already there. Start ngrok with the following command to enable the Flask service publicly over the Internet:
Ngrok is a great tool because it allows you to create a temporary public domain that redirects HTTP requests to our local port 5000.
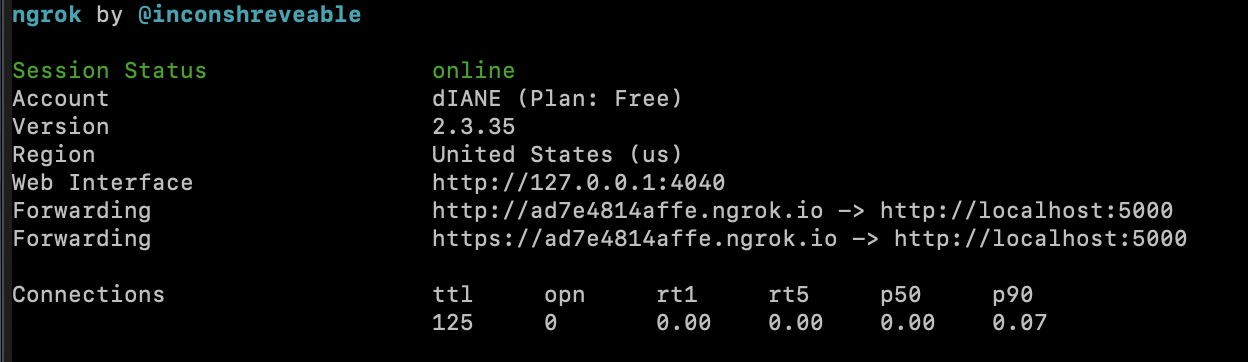
Your ngrok terminal will now look like the picture above. As you can see, there are URLs in the “Forwarding” section. These are public URLs that ngrok uses to redirect requests into our flask server.
Copy the URL starting with https://, then return to the Twilio Console and navigate to the Programmable Messaging dashboard. Look at the sidebar for Programmable Messaging to find WhatsApp Sandbox Settings under the Settings option. This is where we tell Twilio to send incoming message notifications to this URL.
Paste the URL copied from the ngrok session into the “WHEN A MESSAGE COMES IN” field and append /bot, since that is our endpoint. Here is my example for reference:
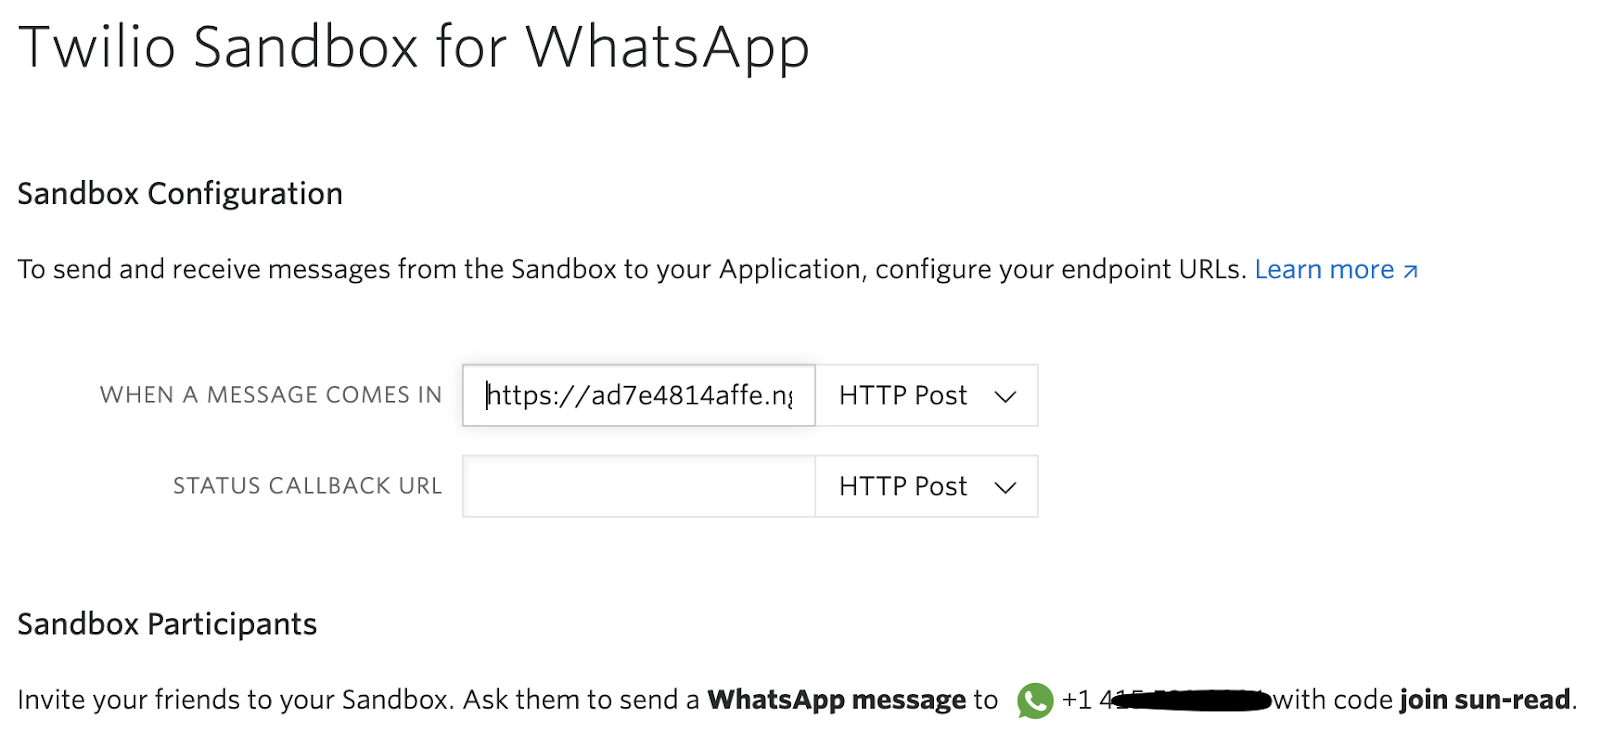
The URL from ngrok is “https://ad7e4814affe.ngrok.io/bot” but again, yours will be different.
Before you click on the “Save” button at the very bottom of the page, make sure that the request method is set to HTTP POST.
Awesome - it's time to test things out!
Run the scary story WhatsApp app
We've nearly reached the end of the tutorial. If you need to check your code, here's my GitHub repo.
While one tab on your terminal is actively running the ngrok session, open another tab in the terminal. Rerun the command source venv/bin/activate to activate the virtual environment then start your app with the command python app.py.
This should be the following output once the Flask app has been booted up:
Commence a night of spooky stories… if you dare! Go ahead and type anything in your WhatsApp enabled mobile device and text your WhatsApp number. Remember that you have to keep texting it in order for the ghost to write. You control when and where to stop. If you have someone else in the room with you, simply pretend you are surprised just like them but secretly you're the one texting the ghost writer to keep going!
Keep in mind that you can't control what your ghost writer decides to write so it's up to you whether you want to read what they have to say.
If you're looking for a way to trick someone into thinking a ghost wrote this story on their own right in front of their eyes, this may be it! Check out a cropped version of the story generating demo. Here's a copy of the story as seen in the demo below, if you are curious to see just how spooky OpenAI GPT-3 can be.
Conclusion: Building a Scary Story Generating App
Congratulations on bringing this ghost writer to… well it's not life, but I'm sure the ghost is happy to be helping you write a story! Although this is a fun project to write a spooky story and impress people with what code is capable of doing, this app can even inspire you to write your own scary stories. Who knows, this new writing partner can help you write the next best-selling thriller or horror movie idea!
This fun WhatsApp story generating tutorial is just one of the many fun projects you can do using Twilio API, Open AI GPT-3, and of course, Python and Flask tools. Perhaps you can think of other ways to trick your friends using the magic of Twilio and code!
What’s next for OpenAI GPT-3 projects?
If you're dying to build more, try out these ideas:
- Convert this Ghost Writing App to Twilio SMS text
- Generate Dragon Ball Fan Fiction with OpenAI's GPT-3 and Twilio SMS
- Build a Michelin Star Chef bot Using OpenAI's GPT-3 and Twilio WhatsApp
Let me know if you used any Twilio APIs or coding magic to trick your friends this Halloween by reaching out to me over email!
Diane Phan is a Developer on the Developer Voices team. She loves to help beginner programmers get started on creative projects that involve fun pop culture references. She can be reached at dphan [at] twilio.com or LinkedIn.


Related Resources
Twilio Docs
From APIs to SDKs to sample apps
API reference documentation, SDKs, helper libraries, quickstarts, and tutorials for your language and platform.
Resource Center
The latest ebooks, industry reports, and webinars
Learn from customer engagement experts to improve your own communication.
Ahoy
Twilio's developer community hub
Best practices, code samples, and inspiration to build communications and digital engagement experiences.