How To Save A Child’s Life with Python, AWS IoT, AWS Lambda and Twilio Wireless
Time to read:
January 24, 2019
Written by

Every summer, I read tragic stories of children that die because they were left in a hot car. And every summer, my heart breaks because of the senselessness of the deaths.
So I decided to build a solution.
Today, I want to show you how easy it is to build a Help! Button that a child in a hot car could press in order to alert someone that they are in danger and need assistance.
As an aside, while I was building this project, it occurred to me that children dying in hot cars is actually two problems, not one. It is two problems because:
- Toddlers have the cognitive ability to recognize they are in danger and take some action to get out of the situation.
- Babies are not capable of recognizing danger, nor capable of taking any action. So a different solution is necessary for each scenario.(I’ll tackle how to save babies in another post.)
The solution I’ve built here is an answer to the first problem: A button for a toddler to press, when they are in danger.
The tech stack: prerequisites for the IoT Help Button
The app we are going to create will use an unlocked cell phone, the Python programming language, AWS Lambda function, an AWS IoT button, a physical Twilio product, and Twilio SMS API:
- Python version 3.6: The language for our code
- AWS IoT button: The trigger that calls the Lambda function
- AWS Lambda: The serverless environment to hold our function
- Twilio SIM: To be a radio relay, and carry the signal from the AWS IoT button to the cloud
- Twilio SMS: Send a text message
IoT help button flow
Let’s walk through how the safety notification system will work when finished:
- You will attach the completed button to a child’s car seat. Should the situation ever arise, they will be able to push the button and alert someone that they need help.
- The unlocked phone will be placed in the car, equipped with a Twilio SIM card, with the phone’s WiFi Hotspot active.
- The button will be connected via the phone’s WiFi Hotspot, so when the the button is pushed, it will trigger a Lambda function.
- The Lambda function will make a request to Twilio’s SMS API to send a text.
- Grandma/Mom/Dad/Neighbors/Police/Firefighters/whomever you designate will be alerted and come to the child’s rescue.
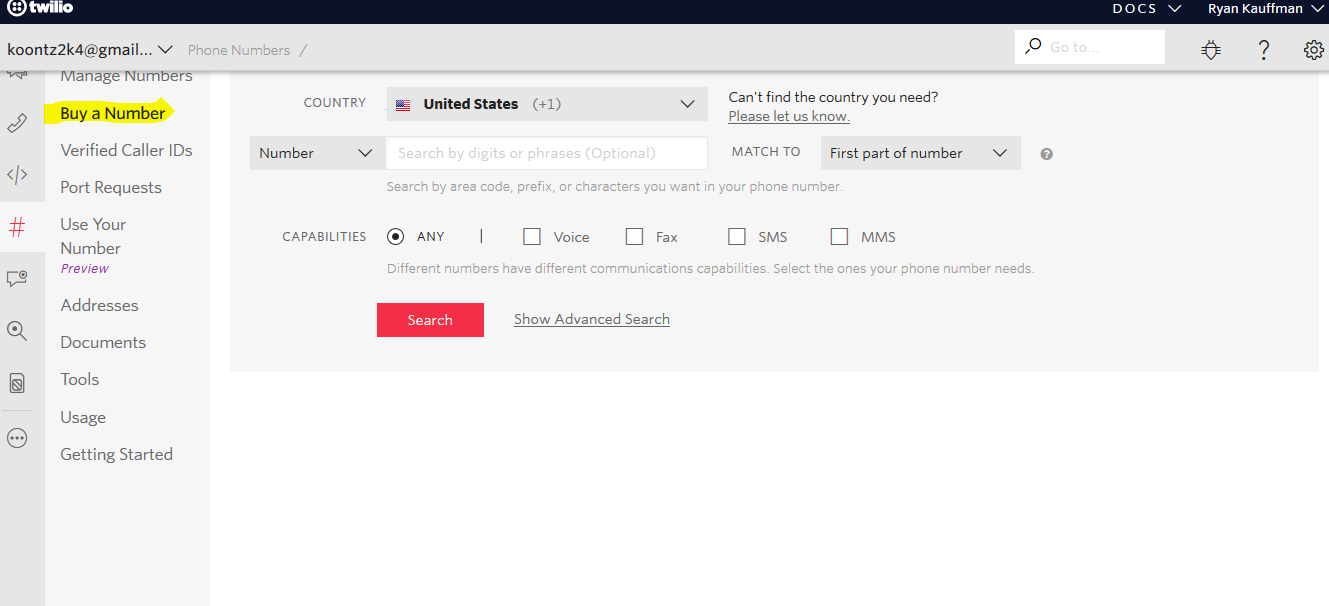
Create a Twilio account and select your phone number
The first thing to do is sign up for a Twilio account. Next, buy a phone number. Make a note of the phone number you’ve bought, your Account SID, and your Auth Token. You’ll need them all later.
Set up a Twilio SIM
After you’ve created your Twilio account and selected a phone number, you will need a Twilio SIM card to use in your unlocked cell phone.
Navigate to the Programmable Wireless area of the Console. Click on Orders, and then the big red plus to order new SIM cards. I ordered the “SIM Starter Pack,” which comes with three SIMS.
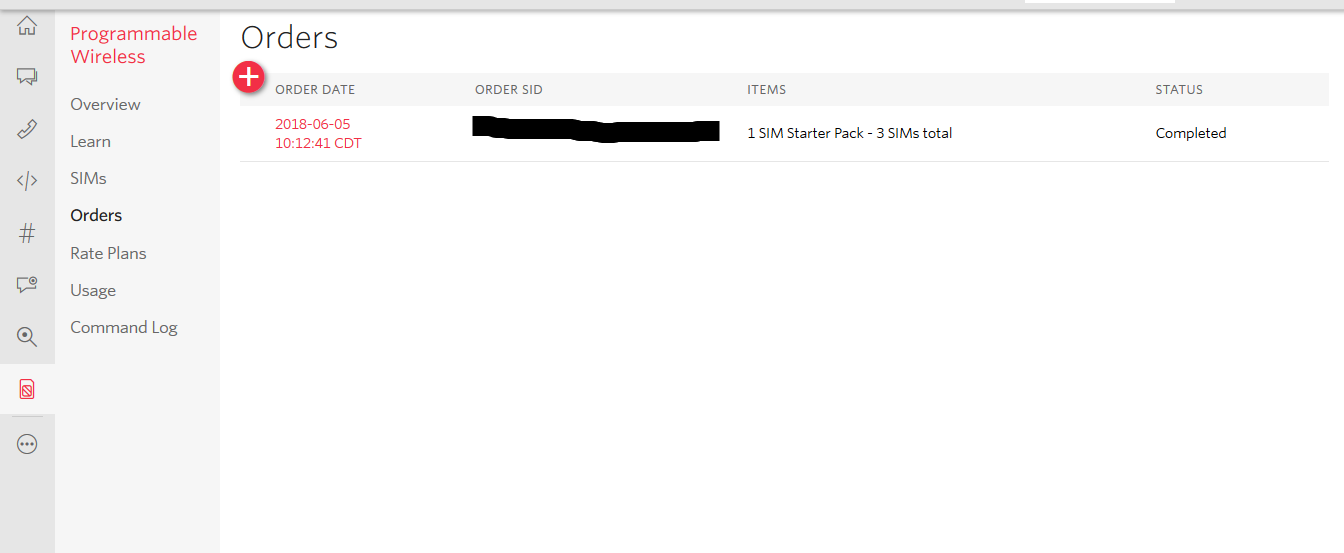
Once you have your new SIM cards, you will need to register at least one of them, since Starter SIMs are not pre-registered to a Twilio account.
On the SIMs portion of the Console, click on the big red plus, and select Register a SIM.
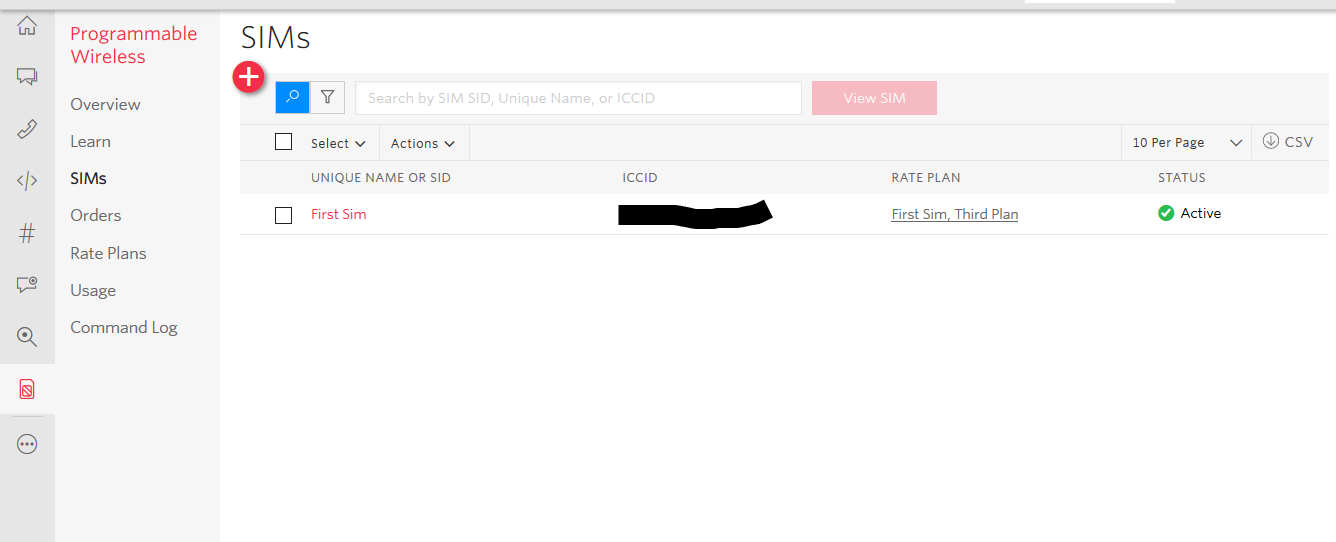
First, enter the Registration Code on the back of the SIM card, and click the “Register SIM Card” button.
Second, give your SIM card a unique name.
Third, set up a Rate Plan. Click on the big red plus (as seen in the below screenshot) to add a new rate plan.
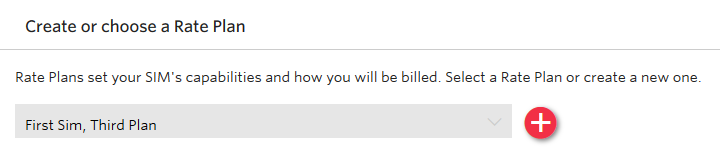
Fourth, Activate your SIM card.
Make sure that when you create your rate plan, you enable Data, or your phone won’t be able to act as a WiFi Hotspot for your IoT Button.
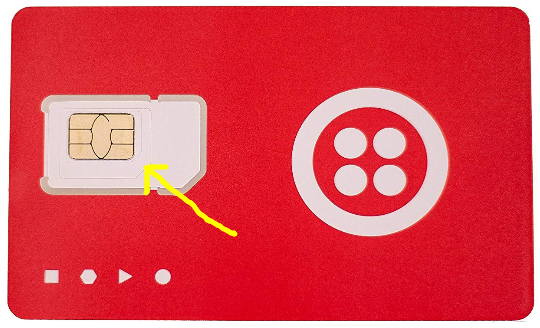
An important note here: The Twilio SIM card pops out in three different sizes. For the BLU C4 phone, (details below) the medium sized SIM is used.
Acquire an Unlocked Cell Phone
Now that your SIM card is activated, and you set up a Rate Plan, you are ready to use your new Twilio SIM card, but you need a phone to put it in.
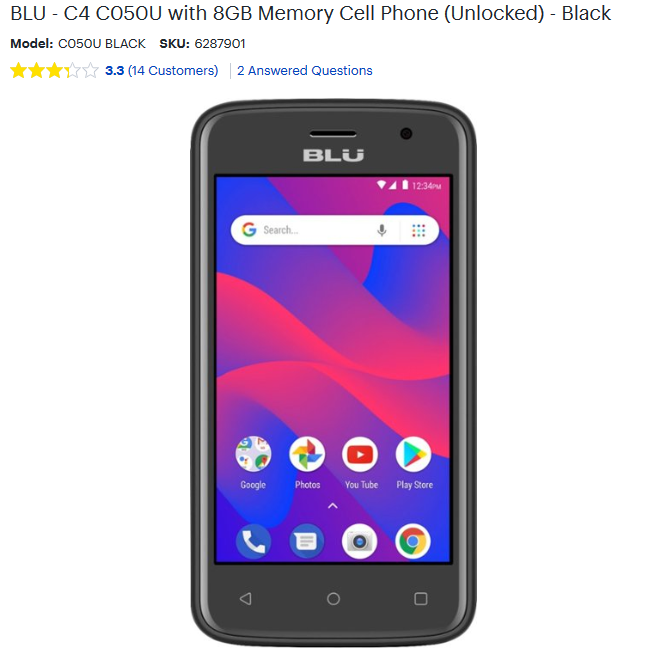
For this, you will need an unlocked cell phone. It’s important that the phone is unlocked, because you can’t put the Twilio SIM card into just any phone.
If you have a spare and unlocked cell phone laying around, feel free to use it for this app. If you don’t have an extra, you can do what I did and buy one from Best Buy. I bought the least expensive one I could find.
Put your SIM card into the phone.
You need to enable your phone to access the Twilio network, which means you need to configure your APN (Access Point Name).
To do this (instructions will vary based upon the phone you buy), go to Settings ---> Network & Internet ---> Mobile Network ---> Advanced ---> Access Point Names ---> add an APN (which is the blue plus sign in the top right corner) ---> Name: Twilio ---> APN: wireless.twilio.com
Once you’ve done this, you should be able to access the internet. Note there was a little bit of a lag time between the time I configured mine and the time I was able to get on the internet. (Don’t be discouraged if it doesn’t work for an hour or two.)
Navigate to a site like YouTube, or Google to ensure you have an internet connection.
Create an AWS Account
Even if you already have an Amazon account or Prime membership, you will need to create a new AWS login, because it is separate from the rest of Amazon.
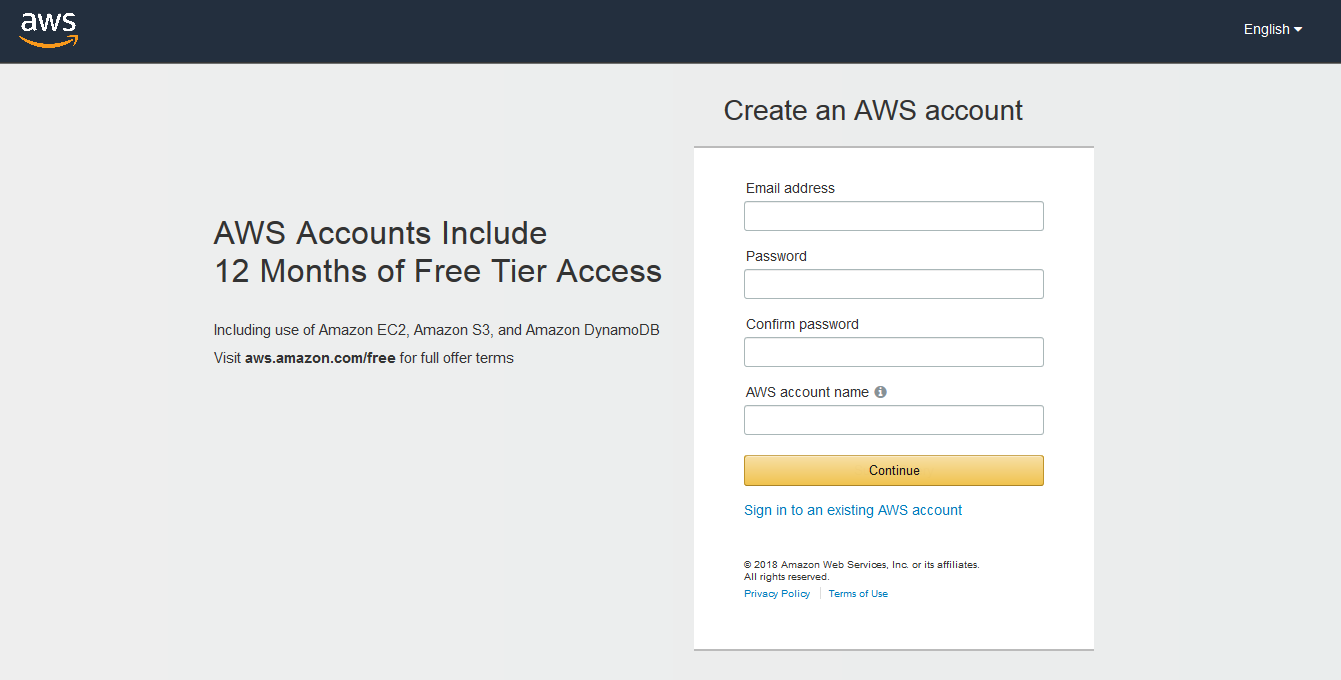
Go ahead and create your account now; we will come back to the configuration shortly.
Set Up an AWS IoT Button
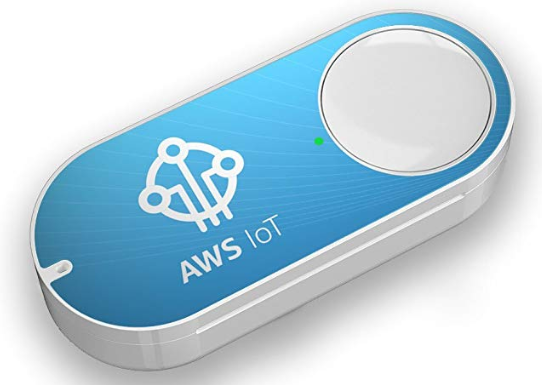
Once you have your Amazon IoT Button, you need to configure it as the Help Button trigger. First, download the AWS BTN Dev app from the app store onto your Twilio phone.
Configuring the button couldn’t be easier, and the app will walk you through the steps. You can also check here for more info.
One important item to note is that you want to ensure your button is connected to the phone’s WiFi hotspot, so that the button can be used anywhere. To ensure your hotspot is on, go to Settings ---> Network & Internet ---> Hotspot & Tethering ---> Wi-Fi hotspot (click on it to turn it on).
Create a Lambda Function
Now it’s time to come back to configuring your AWS Lambda function.
When you configured your IoT button in the previous step, it automatically set up an empty Lambda Function for you, which is a really neat feature that we will piggyback off of:
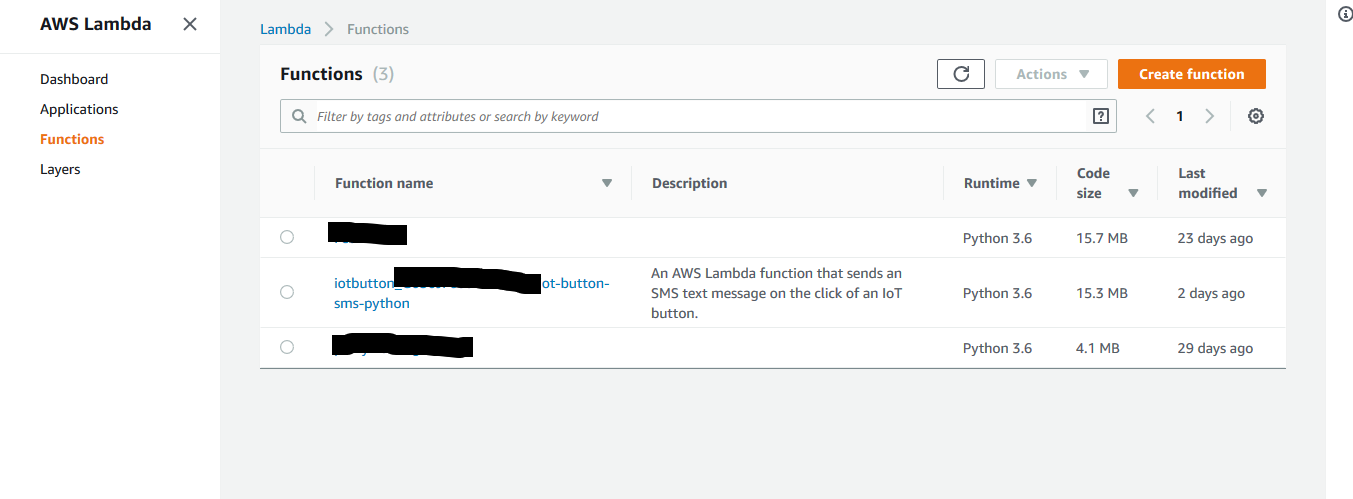
Click on the IoT button function. That will bring you to the designer screen:
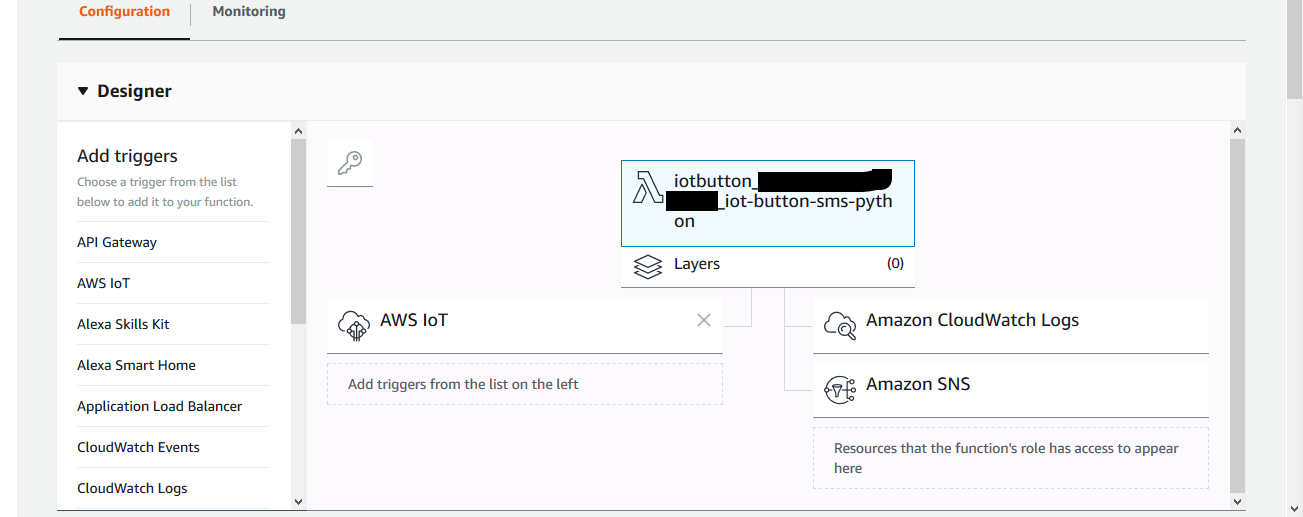
Click on the Lambda function (right above where it says “Layers” in the picture above).
Now we are going to need some code inside our Lambda. Either copy the below into your Python editor, or clone the repository via GitHub.
Save it as rescue_button.py.
That’s it for the code! Simple, right?!
Now, we need to create a zip file to be uploaded into our Lambda function. When you host your code in AWS, you can do it one of two ways: edit the code inline, or upload a zip file.
Uploading a zip file is vastly preferred to editing it inline, in all but the simplest cases where your code has no dependencies.
In this case, our code is reliant on the Twilio Client, so we want to make sure we upload as a zip file.
To do this, we first need to configure a virtual environment using our command line.
First, create a directory:
Second, move into that directory:
Third, create a virtual environment. This step may take a minute to complete:
Fourth, activate your environment:
Fifth, install dependencies. (Don’t forget the period after --target . I always make that mistake!)
Sixth, deactivate the environment:
Now you’re ready to zip it up!
Navigate to the directory you just created. In your Lib\site-packages folder, (C:\~\v-env\Lib\site-packages) make sure the Twilio library is there.
Now copy/paste the rescue_button.py file you created a little bit ago into then Lib\site-packages folder, and create a zip file.
Next, navigate back to the AWS Console. In your Lambda function, upload the zip file you just created.

Make sure the “Handler” is “rescue_button.handler”. Click save, on the top right.
Now we need to enter our Environment Variables.
The ALERT_PHONE is the phone that will receive the emergency text message. The HELP_MSG is the message that will be sent when the button is pressed. The TWILIO_ACCOUNT is your account sid, that you can find on the Console. The TWILIO_TOKEN is your auth token, which is also available on the Console.
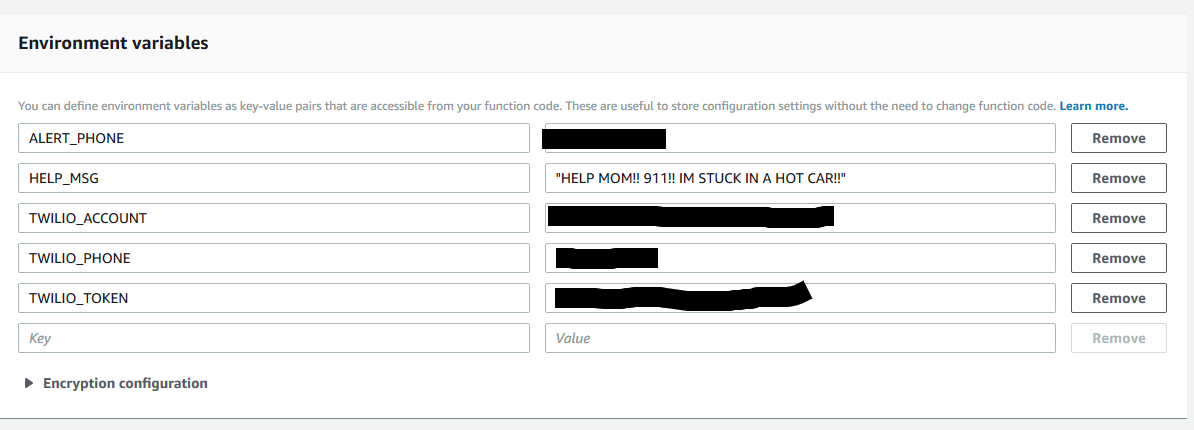
Click Save on the top right.
Now, let’s test your Lambda function to make sure it’s working.
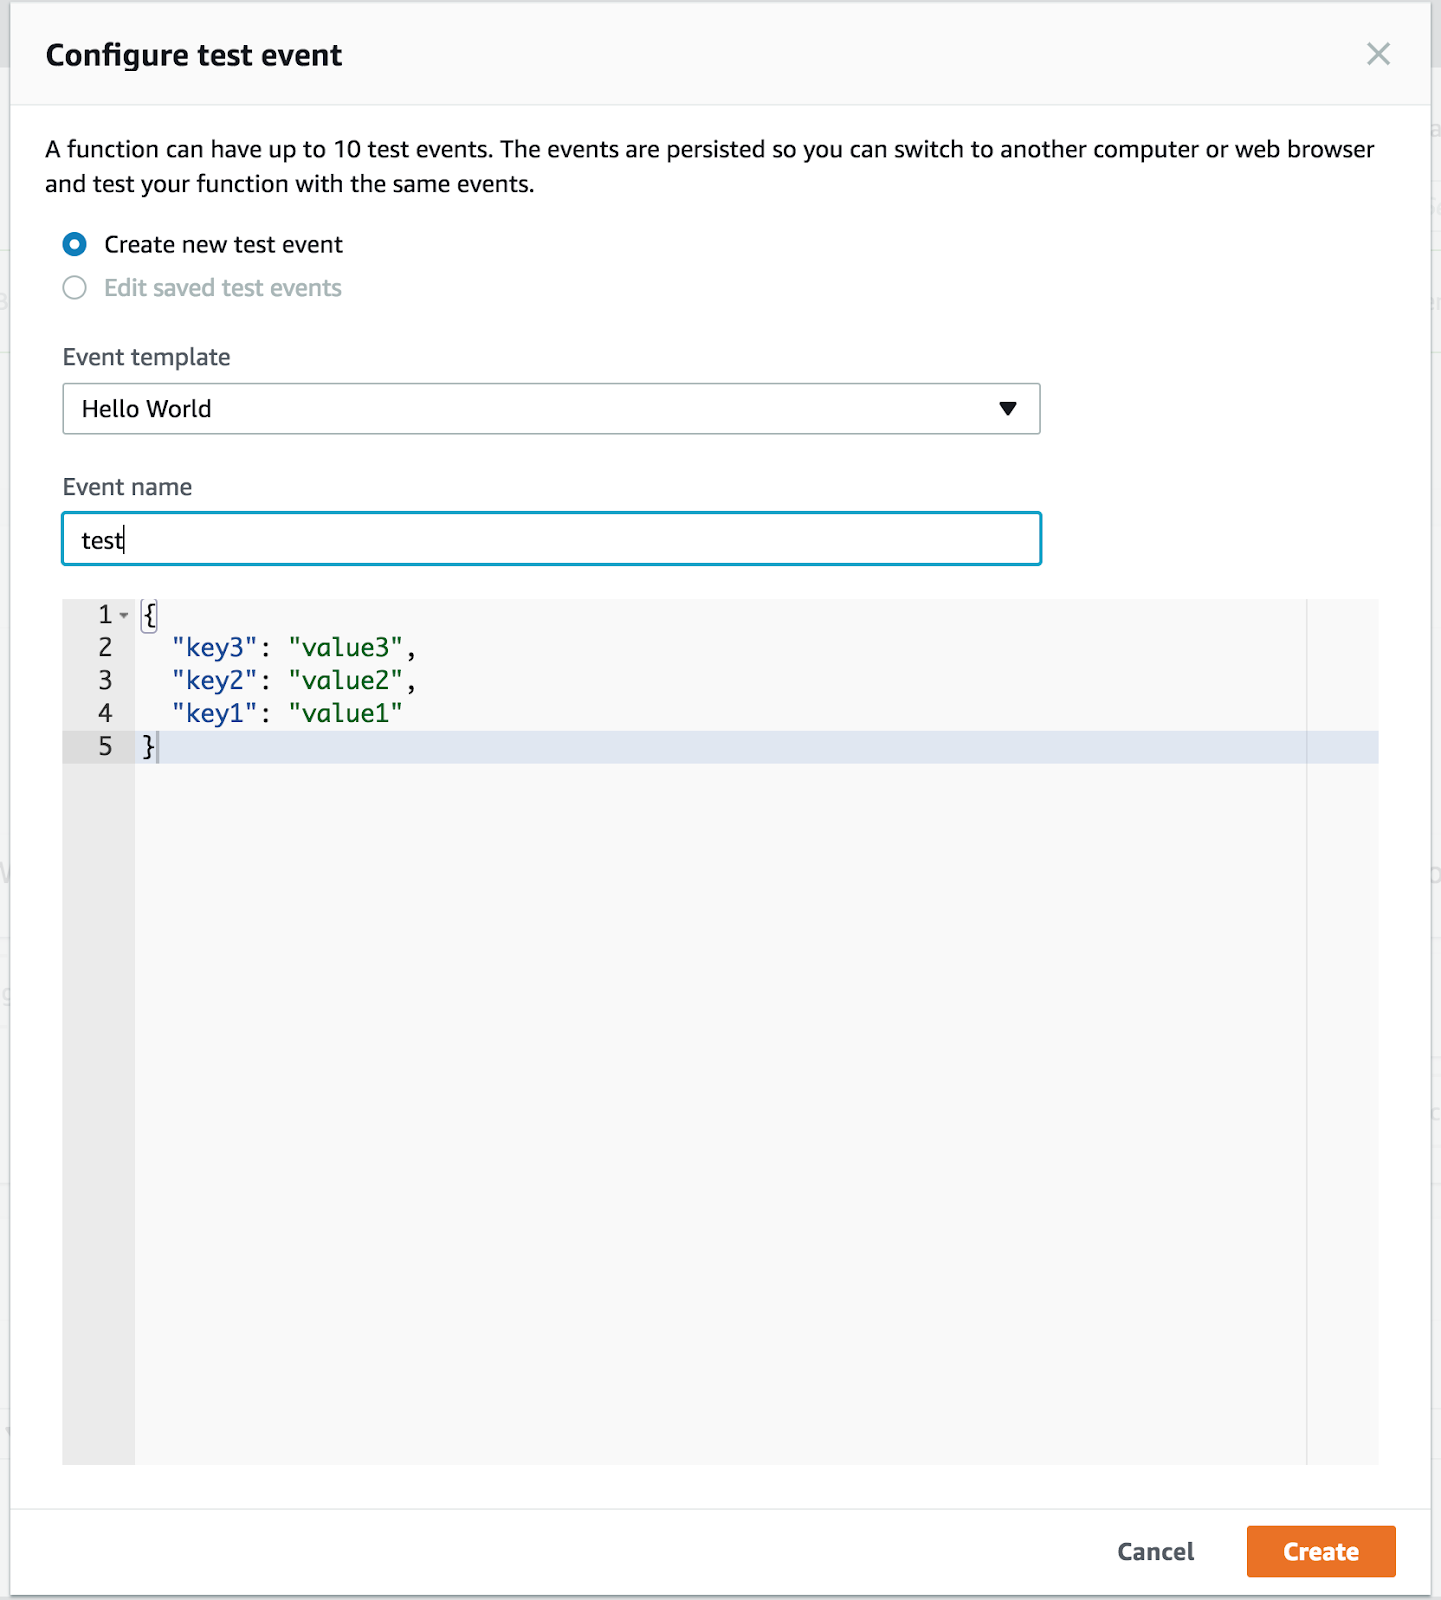
Run a test event in Lambda
At the top right of your AWS Console, you should see a dropdown that says “Test”. Click on that and “Select a test event”. Choose “Configure test events”. The input is unimportant here, so feel free to use the default “Hello world”. Name it “test” and click “Create”.
Now click the “Test” button on the top right of the AWS Console. The phone number you have designated as ‘ALERT_PHONE’ should receive the ‘HELP_MSG’ text.
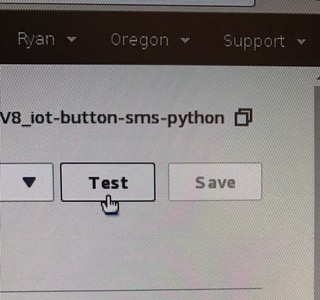
If the Test was successful, then a text message was sent to the ALERT_PHONE, and you have successfully set up your Lambda function.
The next step is to move on to testing the button itself.
Press the IoT button. Whomever you set as the ALERT_PHONE should receive an emergency text message. If successful, then your button is connected to the Cloud, and your kid has a way to tell the world he/she needs assistance, should the need ever arise.
Now that you’ve tested everything, and you know it’s working, it’s time to put it in your car.
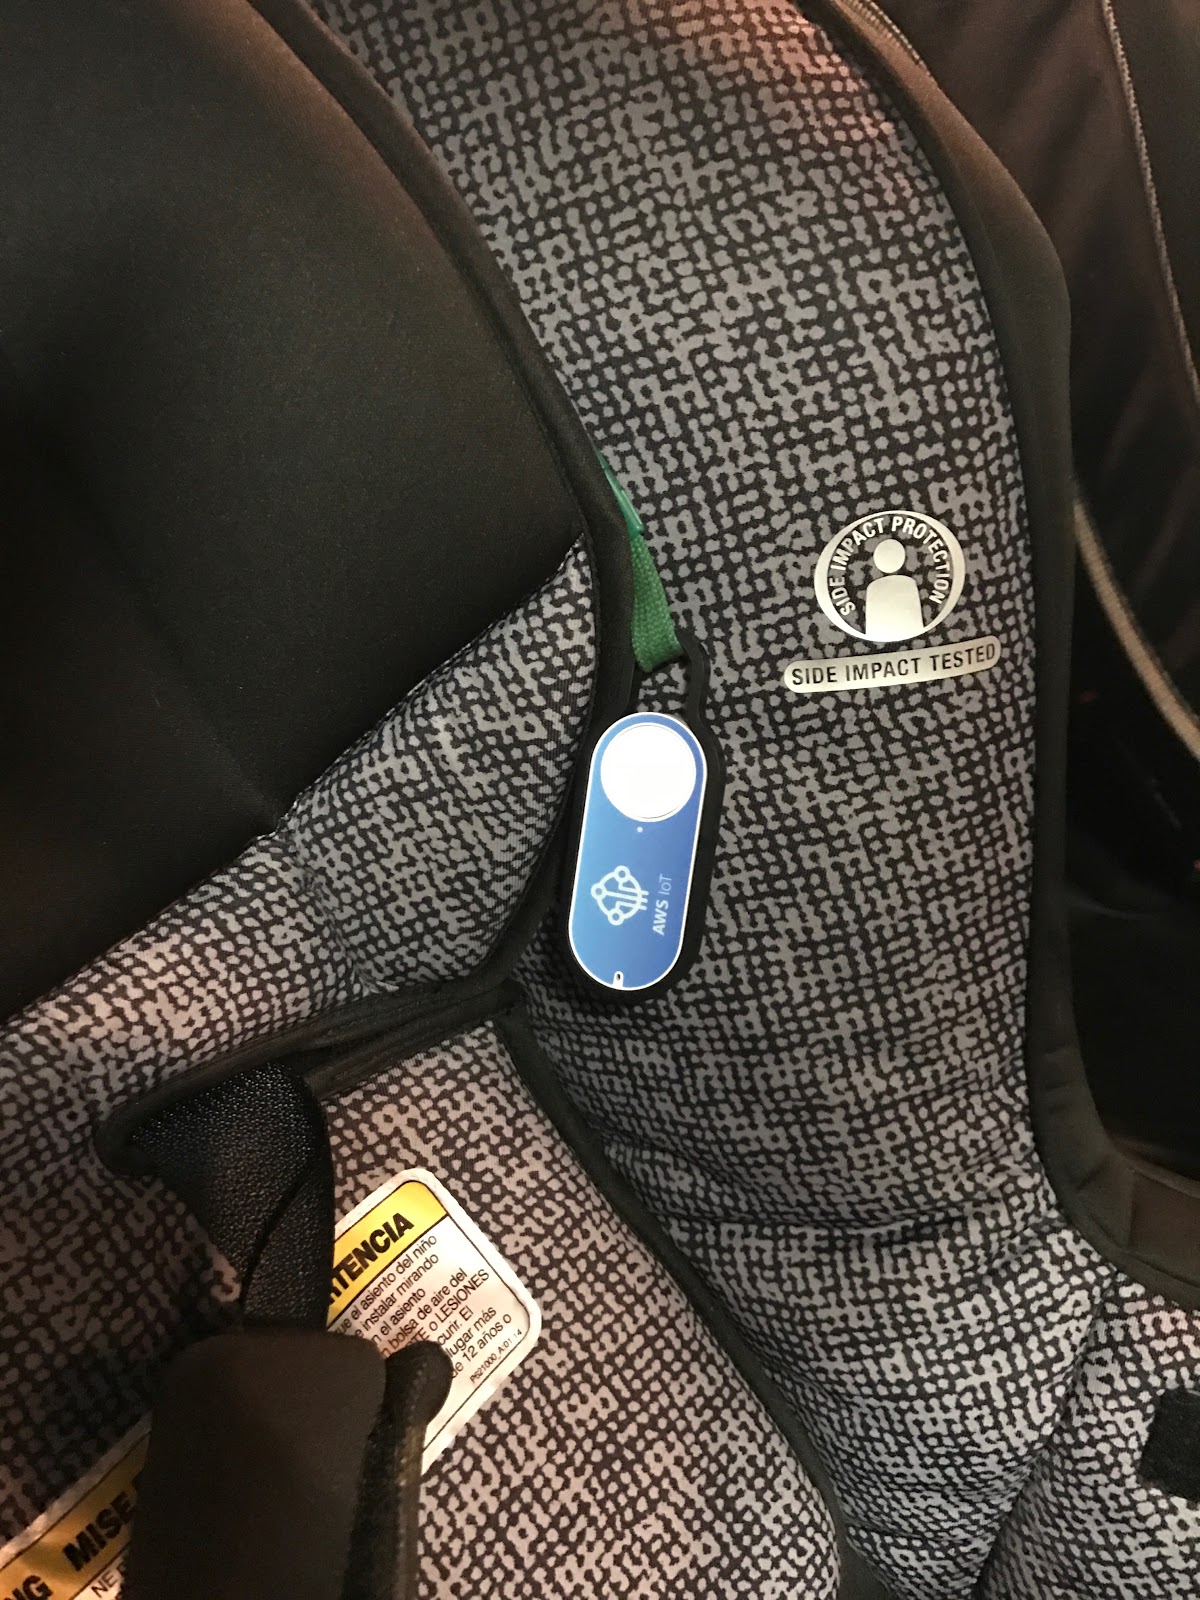
Attach the IoT button to your carseat in any way you choose, but make sure it’s accessible to the child. Here is picture of the button in my Toddler’s car seat:
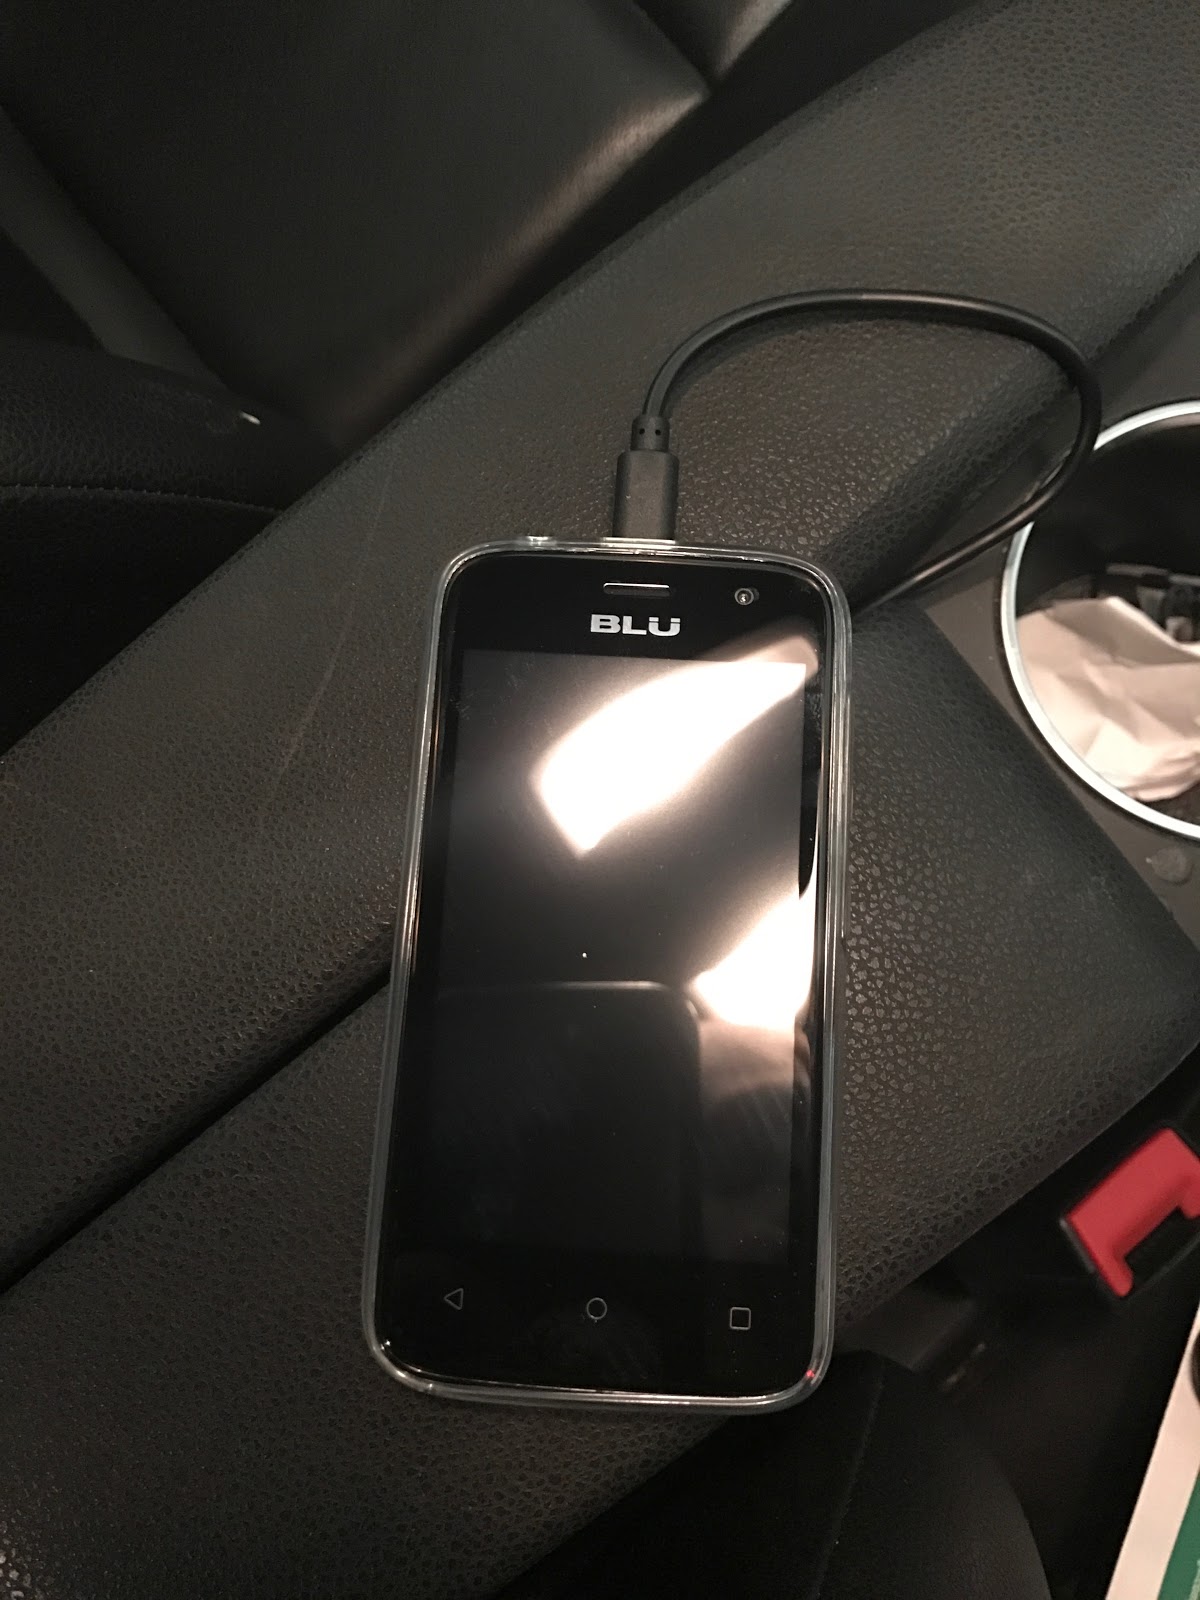
Now, plug the phone in to your car and turn the WiFi hotspot on.
My phone lives in my center console and is plugged in via USB. Here is a picture of my Twilio phone plugged in, to make sure the battery stays charged:
Once you have it completely set up, press the button again, to double check everything is working as expected.
Creatively providing a lifeline with an IoT Help Button
Congratulations! You’ve just built a wireless communications lifeline for a child, in case they are ever trapped in a hot car and forgotten. If this saves even one child from dying, I will be extremely happy.
Here is what the text message should look like. (Feel free to change the contents of the emergency text message itself, but the idea is to alert a responsible person to the extreme danger a child is in.)
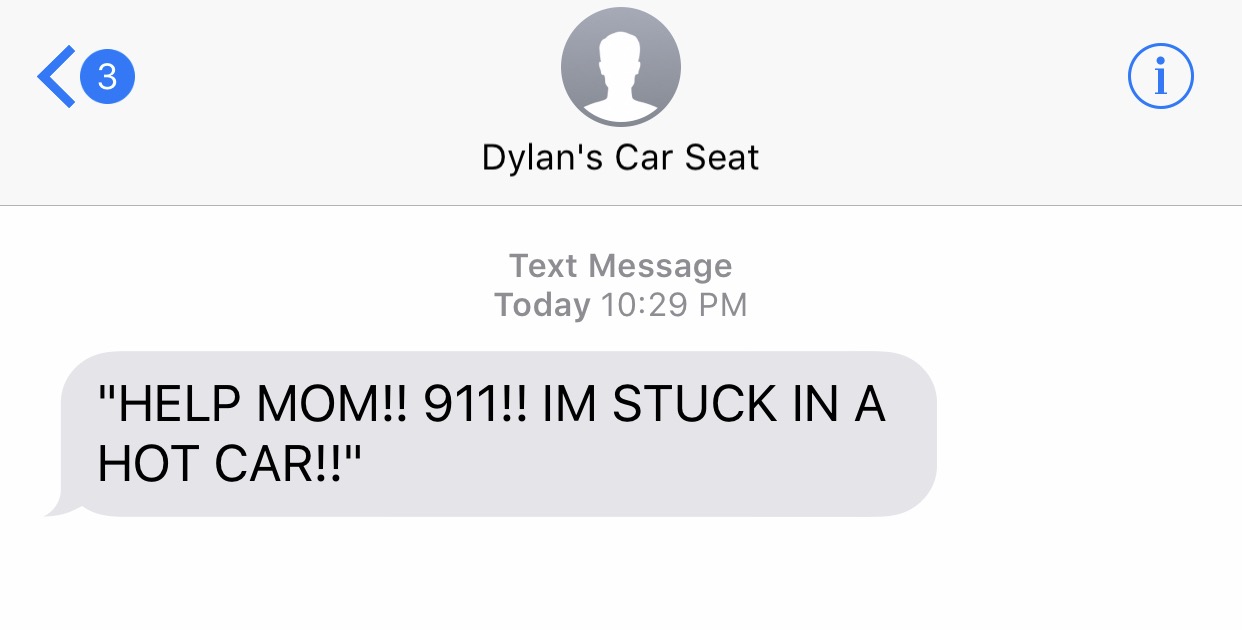
Once you are done, create a contact in the phone of the person (or people) who you set up to receive the text message. Then they know the number is coming from the child’s car seat. If my wife ever gets this message, she will know our son has pressed the button, and is in immediate need of rescue.
Your child’s car seat now has a phone number!
Please share this post and let’s save some children.
If you have any questions regarding how to use Lambda functions, here is another blog post I wrote with Joe Previte. Or, here is a post by Matt Makai. Both are great resources about using Lambda with Twilio SMS.
Feel free to reach out to me on Twitter @ryankauffman80, LinkedIn, send me an email at koontz2k4@gmail.com.

Related Resources
Twilio Docs
From APIs to SDKs to sample apps
API reference documentation, SDKs, helper libraries, quickstarts, and tutorials for your language and platform.
Resource Center
The latest ebooks, industry reports, and webinars
Learn from customer engagement experts to improve your own communication.
Ahoy
Twilio's developer community hub
Best practices, code samples, and inspiration to build communications and digital engagement experiences.