How I Made a Data Tracker for My Sourdough Starter
Time to read: 4 minutes
April 16, 2020
Written by

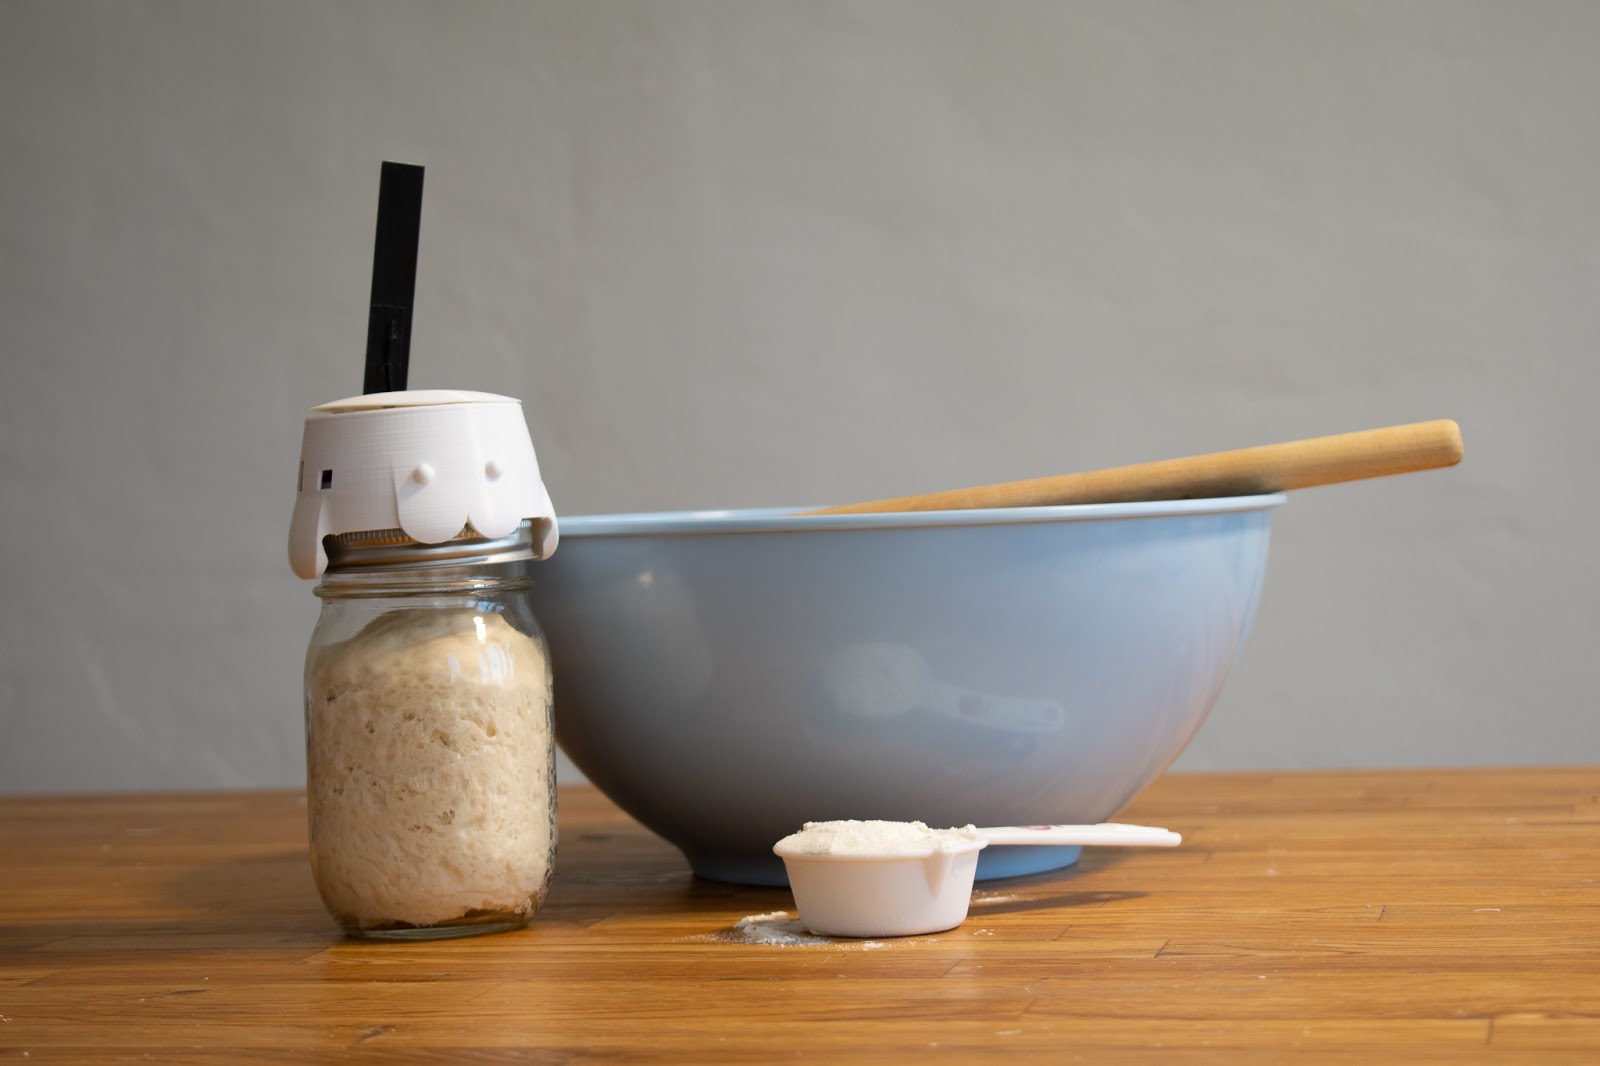
A sourdough starter is a little yeast-driven pet that eats flour and water and makes sourdough. More and more people are keeping these delightful critters in their houses, feeding them when they start to look sluggish and baking bread with them every few days.
With Twilio's Narrowband IoT Developer Kit, we can build a little monitor that helps us keep track of our starter's temperature, humidity, and rise.
Why Narrowband?
Twilio's Narrowband IoT dev kit happens to have some great sensors we can use to get started, and it's also designed for constant, low-power connectivity, which is what I want for this particular product. Cellular connectivity also means we don't have to do any setup or fight with our Wi-Fi routers.
The downside to Twilio Narrowband is that it only works in the US. If you're hoping to monitor your bread from outside the US, stay tuned! I'm planning another bread monitor in the future that connects with Super SIM, which is available everywhere.
What you'll need
The Basics: What you need to get a proof-of-concept up and running
- If you haven’t yet, sign up for a Twilio Account. If you sign up for a new account through this link, you’ll get an extra $10 in credit when you upgrade.
- 1 x Twilio Developer Kit for Narrowband IoT. Dev kits are currently ordered through the console. To order, first add your payment info to your Twilio account, then go to the Wireless order page and fill out the form.
- 1 x LiPo battery 3.7V 1900MAH (35mm x 50mm) (Note: this is not the one that comes in the kit)
- The Arduino IDE
- The sourd.io Github repo
- An MQTT broker of choice. This build has been tested with Adafruit IO and Thingspeak, and has info on how to set that up in the
/nbiot-sourdough-monitorfolder of the repo. - The United States. Twilio Narrowband currently works in the US.
Enclosures: What you need to make it pretty
- A way to print the .stl files found in the
/enclosurefolder of this repo. You can use a 3D printer, or go through a third-party service like 3D Hubs. - 11 x M2.2 8mm screws
- 1 x canning jar (2.5" mouth) with canning lid (the one where the center is removable)
- Hot Glue Gun (if you want your sourd.io to have ears and a hat)
Putting it together
Bringing your Narrowband Kit online
Rather than replicating the tutorial here, I'm going to suggest that you follow the steps in the Narrowband Kit Quickstart to get your Twilio SIM registered and your libraries installed. The one exception to these instructions is that you should use your other LiPo battery rather than the thin, square one that comes in the Narrowband Kit.
Check that the code compiles. You can even try uploading it and resetting the board to see if you can get it to come online. Once your board is making happy blue lights, then come back to this tutorial.
Hook up your hardware
This kit comes with several sensors. We're going to use the Ultrasonic Distance sensor and the Temperature/Humidity sensor. Plug the distance sensor into D38 and the temp/humidity sensor into D20.
Add custom bread firmware
Download or clone this repo and open the folder nbiot-sourdough-monitor in Arduino. Add your MQTT info to the file mqttcreds-edit-and-rename.h and then-- you guessed it-- rename it to mqttcreds.h
To fill out this file, you'll probably need to actually set up a broker. Instructions in the file tell you what you need to set up Adafruit IO or Thingspeak to work with this monitor, since those have an easy way to create public visualizations so you can share your bread's health with friends. Feel free to use a different broker of your choice as well!
You also may need to install additional libraries for the Grove Temperature/Humidity and Ultrasonic Ranger sensors. Those can be found at the following links:
- https://github.com/Seeed-Studio/Grove_Temperature_And_Humidity_Sensor
- https://github.com/Seeed-Studio/Grove_Ultrasonic_Ranger
You can download these as .zip files and use Sketch > Include Library > Add .ZIP Library... to add them. Afterward, restart the Arduino IDE.
Next, put your board in bootloader mode by holding the bootloader button and tapping the reset button. Compile and upload nbiot-sourdough-monitor.ino.
If all is working, then your board should come online with a happy blue light. Open the Serial Monitor to see if the board is sending commands.
See your data
Navigate to your chosen MQTT broker and check out the commands coming into your channel or dashboard!
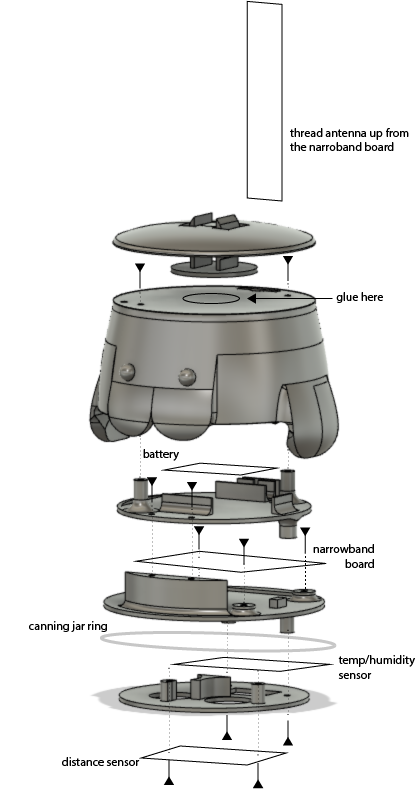
Assembling the enclosure
Print the .stl files in the /enclosure folder.
Remove the Grove Header from the Temperature/Humidity Sensor and solder the wires directly to the back of the board (opposite the blue sensor).
Assemble like this:
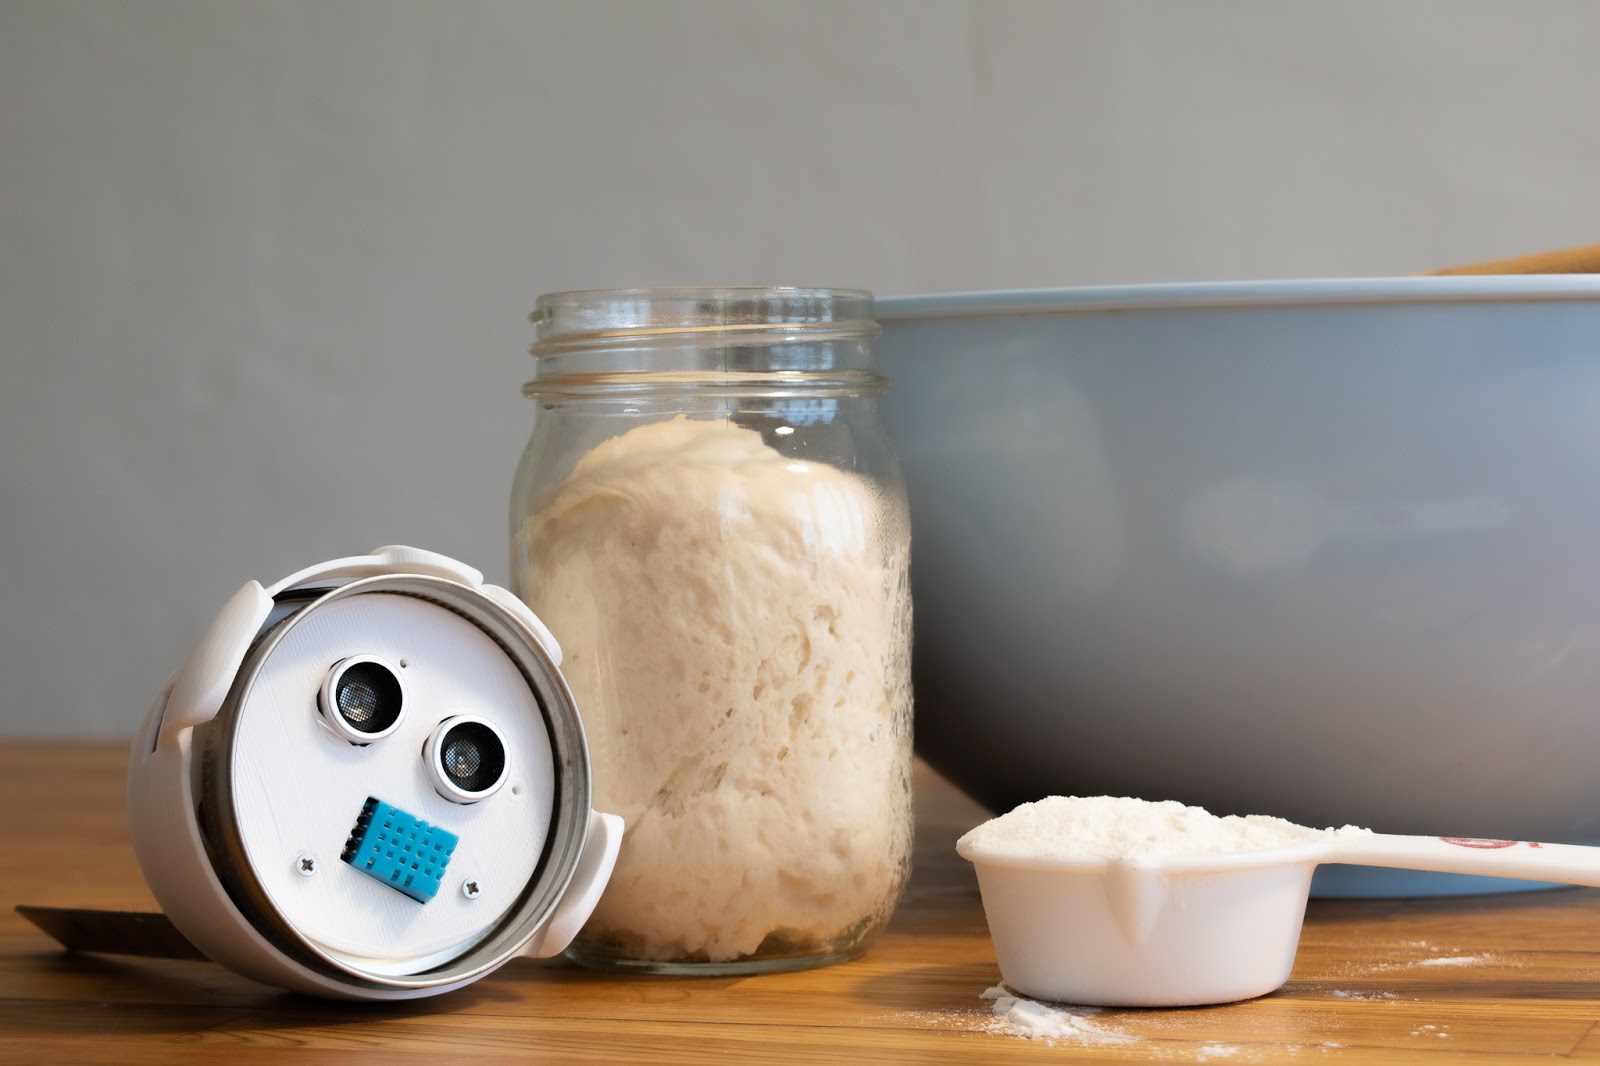
Screw the bread monitor onto your jar and put your sourdough starter in the jar!
Monitor your bread
Humidity is a particularly interesting one to watch. In the enclosed environment of the jar, the humidity produced as the yeast respirates is delightfully detectable. My monitor may be online right now; feel free to look at the data here.
This gif is low-res, but you can still see the dough fogging the glass as its humidity rises and it doubles in size.

Questions on the build? Feel free to leave comments and issues on the Github repo, find me on Twitter, or check out Twilio on Twitch, where I will inevitably stream a sourd.io build.
Questions about Twilio? Sign up for an account to build one yourself, or talk to Sales about IoT connectivity solutions.
Christine Sunu is the Internet of Things Developer Community Engagement Manager at Twilio. She's currently working on IoT, ambient computing, and robots that pretend to be alive. Find Christine on Twitter (@christinesunu) or Github (cmsunu28)
Related Resources
Twilio Docs
From APIs to SDKs to sample apps
API reference documentation, SDKs, helper libraries, quickstarts, and tutorials for your language and platform.
Resource Center
The latest ebooks, industry reports, and webinars
Learn from customer engagement experts to improve your own communication.
Ahoy
Twilio's developer community hub
Best practices, code samples, and inspiration to build communications and digital engagement experiences.