How to Build an Object Recognition App With Google Cloud Vision API, Java Spring Boot, and Twilio WhatsApp
Time to read:
July 26, 2022
Written by
Reviewed by

Our world today can be described as smart. Smart houses, smartwatches, smartphones, smart cars and even smart foods 😜 is the talk of the day. These smart devices are made possible majorly due to advancements in the field of computer vision. This consists of object and text recognition, which opens doors for unimaginable technology that will certainly influence how humans live and learn in the coming times.
The Google Cloud Vision API gives access to powerful pre-trained machine learning models that can be employed via easy-to-use REST APIs. It promises to be an exciting project that you will be proud to show to your friends after you complete it.
This article provides insight into integrating object and text recognition features into your Java Spring Boot application. In the tutorial, you will learn how to use the Google Cloud Vision API to create a cool app that can analyse images and extract labels, find and read printed text from images sent over a private WhatsApp Sandbox created using the Twilio WhatsApp API.
So without wasting any more time, let’s go!!! 🚀🚀🚀

Tutorial Requirements
To build the project, you will need the following tools:
- ngrok, a tool that maps your localhost server to a public Uniform Resource Locator (URL) that can be accessed over the internet. ngrok is used to enable two-way communication between your application and the Twilio WhatsApp Sandbox.
- A free or paid Twilio account. If you are new to Twilio, create a free account using this link and get a $10 credit when you upgrade your account.
- A free tier Google Cloud Developer account. Create an account, login to your account and ensure to set up your Billing Account.
- A suitable IDE. Screenshots in this tutorial will be from the IntelliJ IDEA.
- Reliable Internet Connection.
Add Project Dependencies
Create a new Spring Boot project by going to the Spring Initializr.
On the Spring Initializr, select the Spring Boot version that you want to use for your application. Select “Java” as the Spring Boot Language.
Fill the fields under the Project Metadata tab (feel free to fill the fields with your data.) For now, it is best to leave the packaging as a JAR(Java Archive) and the java version as Java 11.
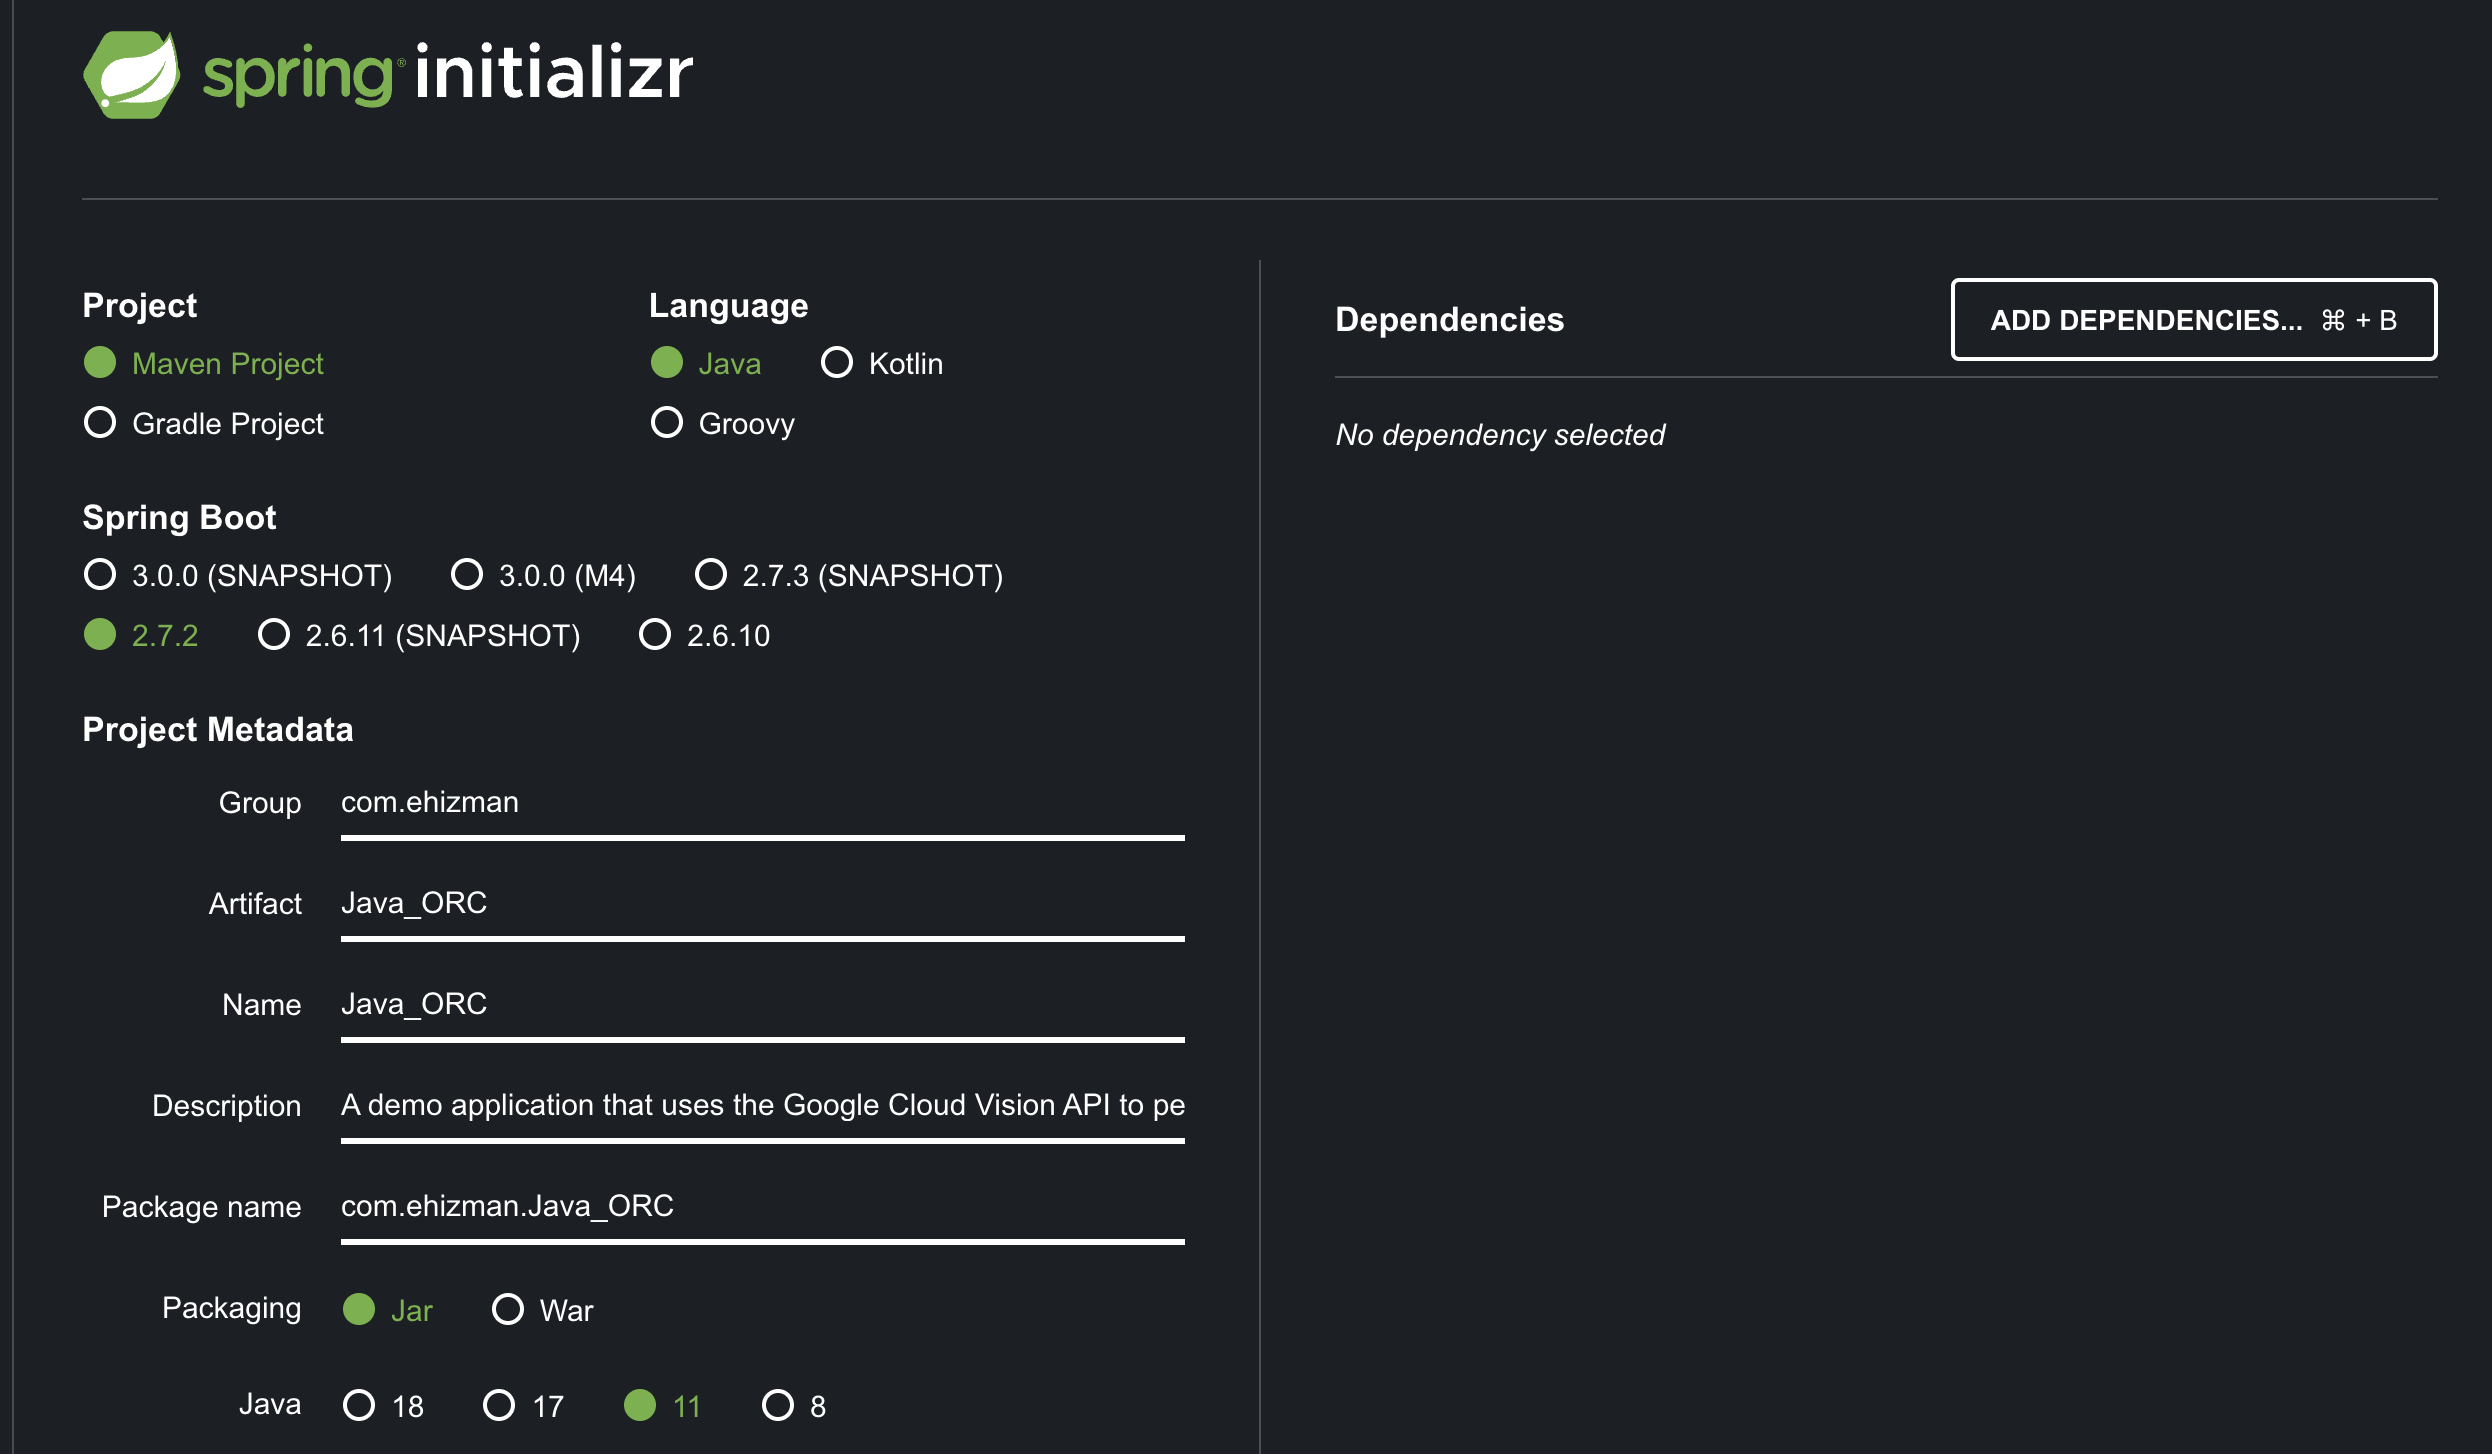
To add dependencies to the project, click on the ADD DEPENDENCIES button at the top right-hand corner of the screen (alternatively, you can use CTRL + B).
We add the following dependencies to our project:
- The Spring Web - The Spring Web Starter dependency pulls all dependencies relating to web development. With the Spring Starter Web dependency, we can create a controller in our Spring Boot application that allows the application to be accessed over the internet.
- Lombok - The Lombok dependency simplifies the project. By adding a single annotation, you can create your
getters,setters,equals,toStringandhashCodemethods under the hood. Lombok also comes with anSlf4jlogger which you will use many times in the project. - Validation - The Spring Starter Validation dependency provides support for validating user input. With the Spring Starter Validation dependency, we can provide constraints to target fields by using annotations.
Note that these are not the only dependencies that you will add to your project, you still have the Google Cloud Vision dependency and the Twilio SDK, but these dependencies are not readily available on the Spring Initialzr.
Download the project as a zip file by clicking on the GENERATE button at the mid-bottom position of the screen, and then extract the contents of the zip file into a suitable folder.
Open the extracted file on IntelliJ IDE by clicking on the File tab at the top left-hand corner of the screen. Click on the Open Tab and then direct to the folder where you extracted the file.
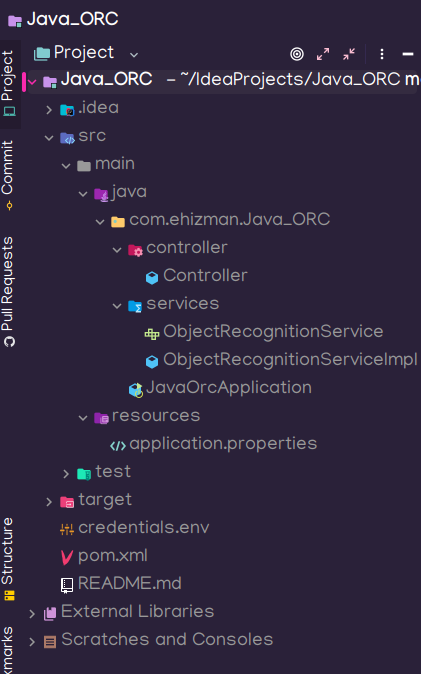
Your project structure should be similar to this:

Configure your Twilio WhatsApp Sandbox
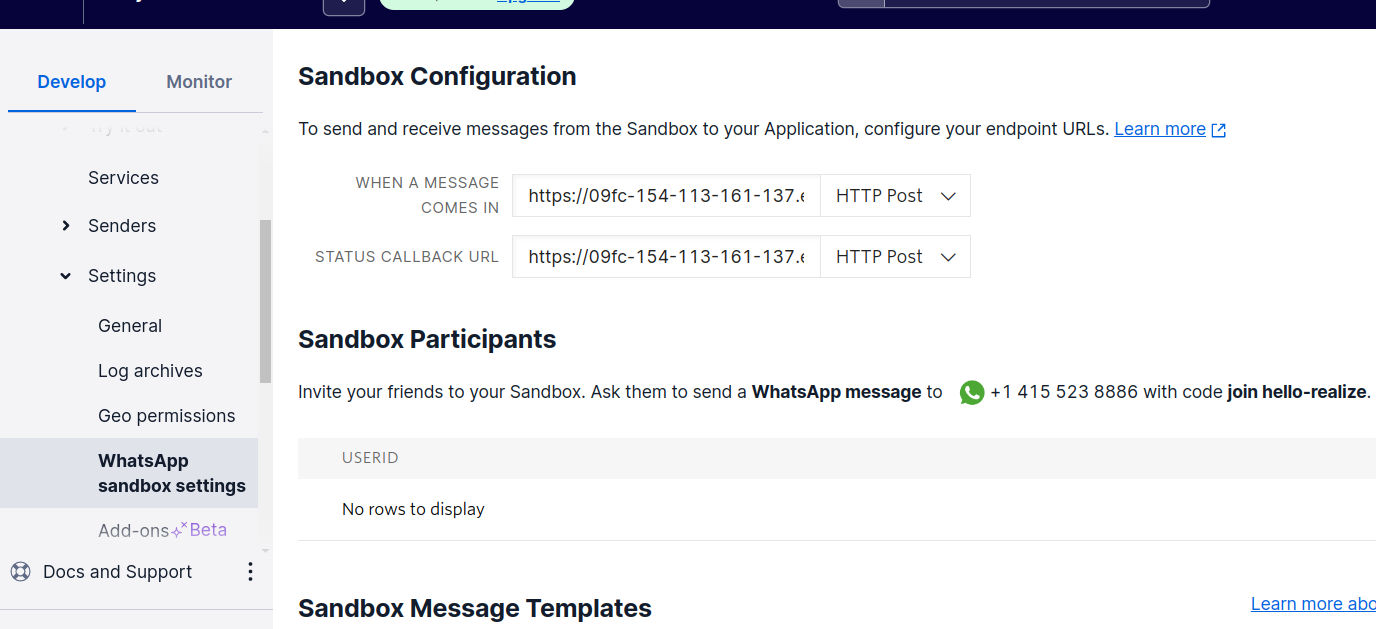
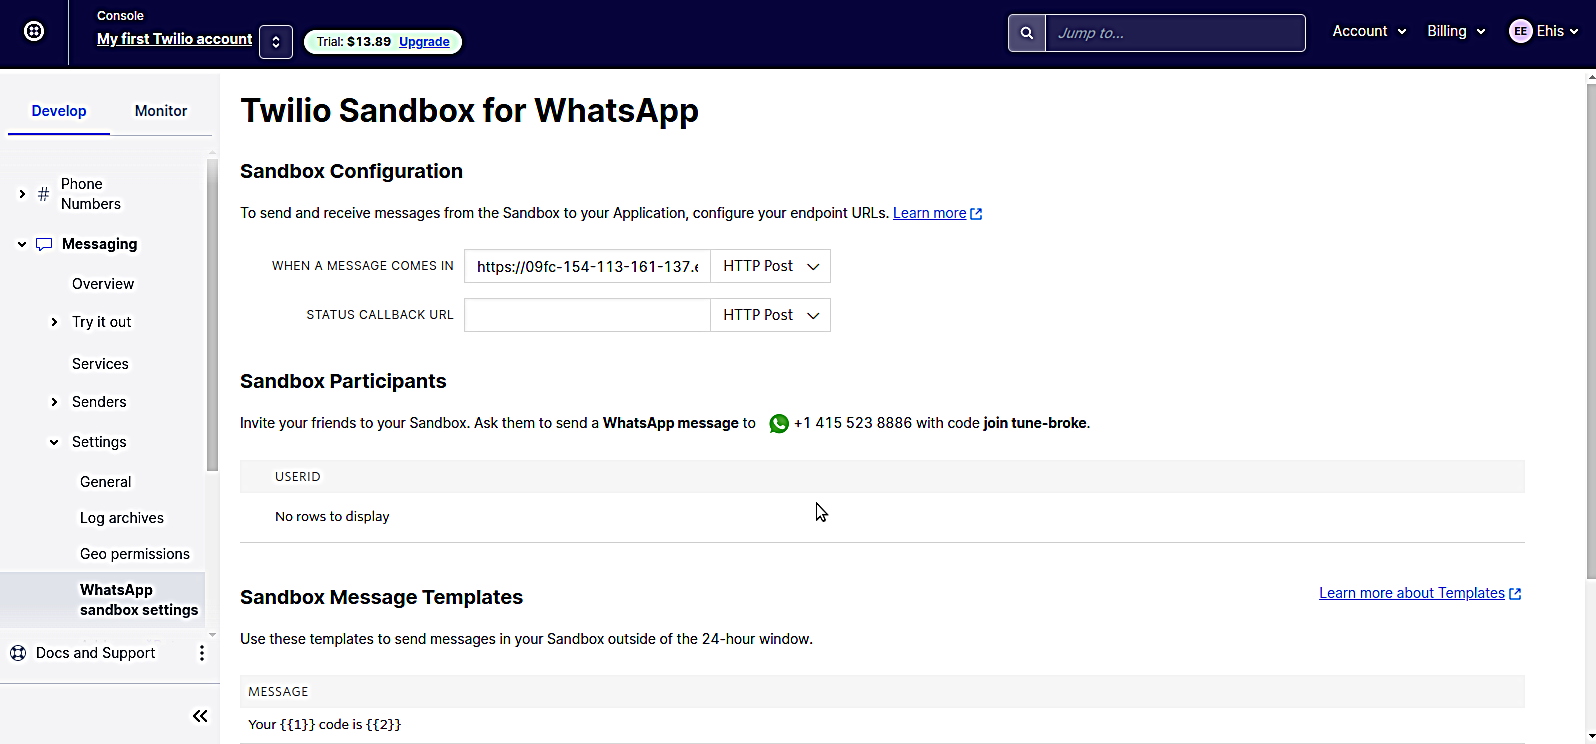
Log into your Twilio Console to configure your Twilio WhatsApp Sandbox. Click on the Messaging tab on the sidebar. Under Messaging, click on Settings and select WhatsApp Sandbox Settings.
The sandbox allows you to test your application in a developer environment. For production, you can request an upgrade to your account.
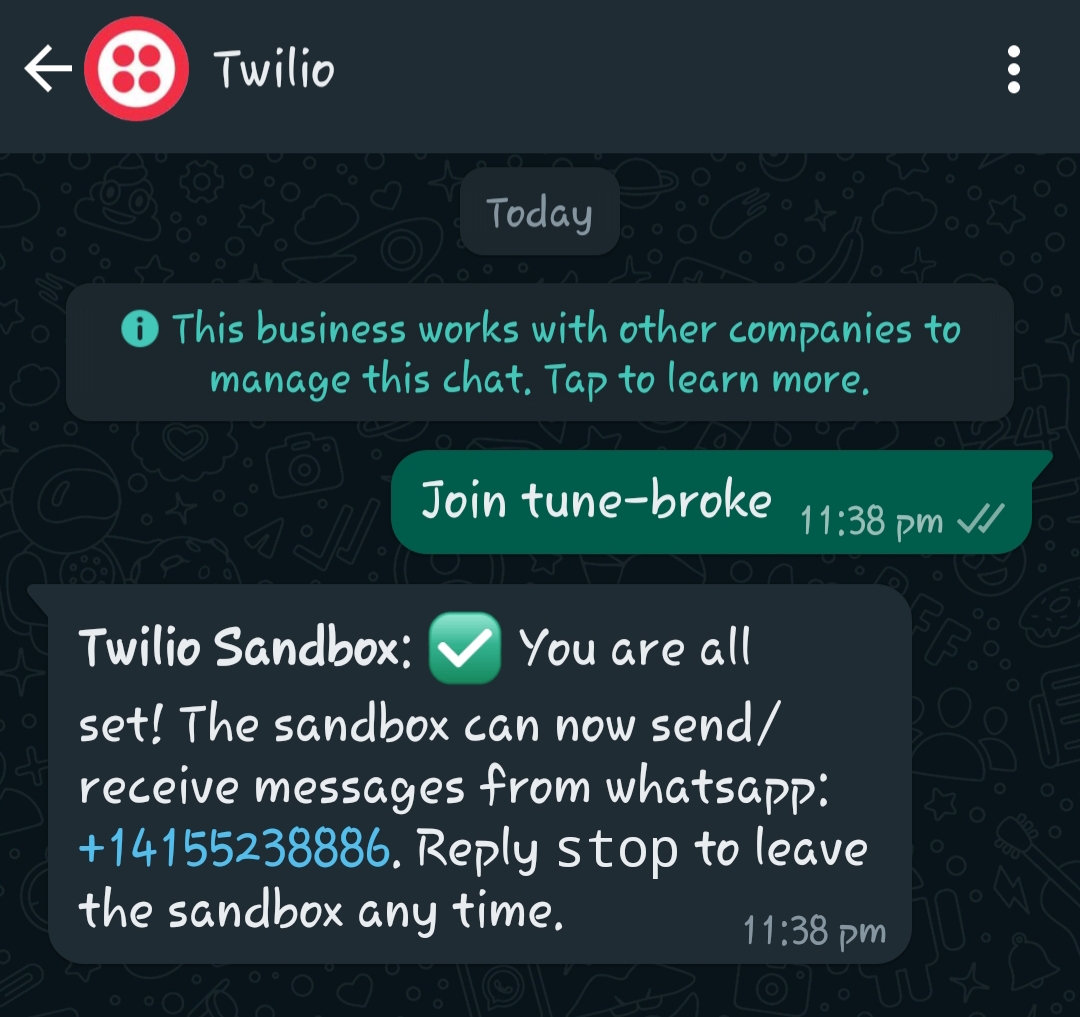
To begin using the Twilio WhatsApp Sandbox, use your WhatsApp-enabled mobile device to text in the unique phrase specified on your console to the WhatsApp number assigned to your sandbox (In the screenshot above, the phrase is: "join tune-broke").
You should receive a message on your WhatsApp-enabled mobile device as shown below:
Build out the Functions of the Application
The goal of this application is to use the Google Cloud Vision API to analyze images to find and read printed text from images.
After joining the Twilio WhatsApp Sandbox, users must send in a picture of the desired item. Twilio receives the image sent by the user and routes them to the application via a webhook. The webhook allows real-time data to be delivered to the application through ngrok (ngrok maps the localhost URL that cannot be accessed over the internet to a public URL that can be accessed over the internet).
The application receives the user’s image and extracts labels that identify the image and also any printed text from the image using the Google Cloud Vision API.
Set up the Twilio SDK
Open your pom.xml file and add the following dependency:
The Twilio SDK is an interface between your Java application and Twilio. It provides classes and utilities that allow your application to send requests to and receive responses from Twilio.
After adding the SDK, you have to initialize the Twilio service in the main method of your application. Initializing the Twilio service in your application involves storing your unique Twilio Account SID and Auth Token as secrets in a .env file and then passing those values into the Twilio.init() method. The following section shows how you can set up your environment variables using the EnvFile plugin in IntelliJ.
Set up your environment variables using the EnvFile plugin in IntelliJ
Click on the File tab on the top left-hand corner of your screen and then click on the Settings tab.
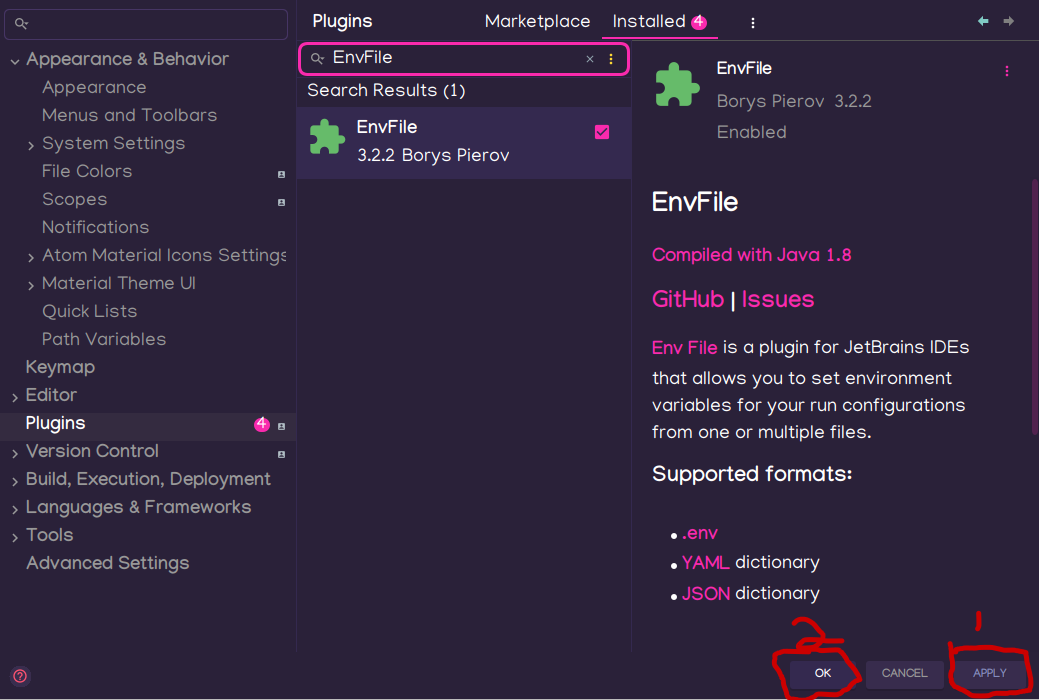
On the Settings tab, click on Plugins. In the search bar, search for the EnvFile plugin in the marketplace. You should see the following screen:
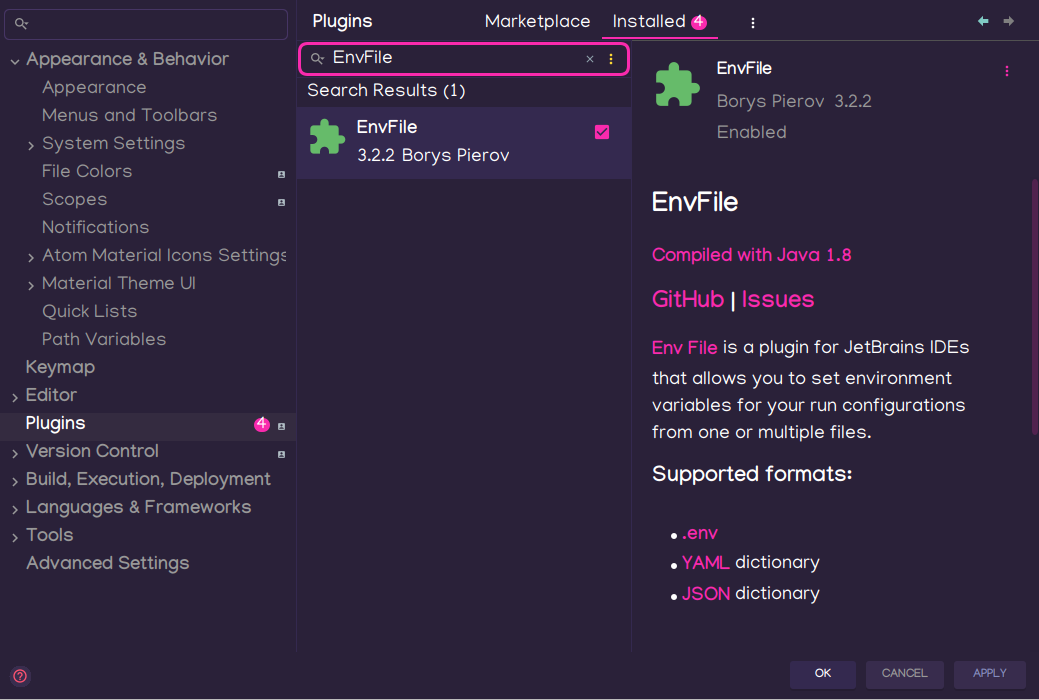
Install the EnvFile plugin and then click on APPLY and then on OK at the bottom of your screen.
Restart your IDE after installing the EnvFile plugin.
Upon restarting your IntelliJ IDE, create a .env file in the root directory of your application and enter your unique TWILIO_ACCOUNT_SID and TWILIO_AUTH_SERVICE as seen in the image below.
Note that your ACCOUNT_SID and AUTH_TOKEN are unique and should be kept as secrets. The .env file should not be tracked by git, should not be pushed to Github and if possible should be encrypted.
Click on the RUN tab on your IDE and then select Edit Configurations. You will see the name of your application on the sidebar.
If you don’t see the application name, click on the “+” icon at the top of the sidebar. This should lead you to create a new application and then point to the directory where the main method of your application resides.
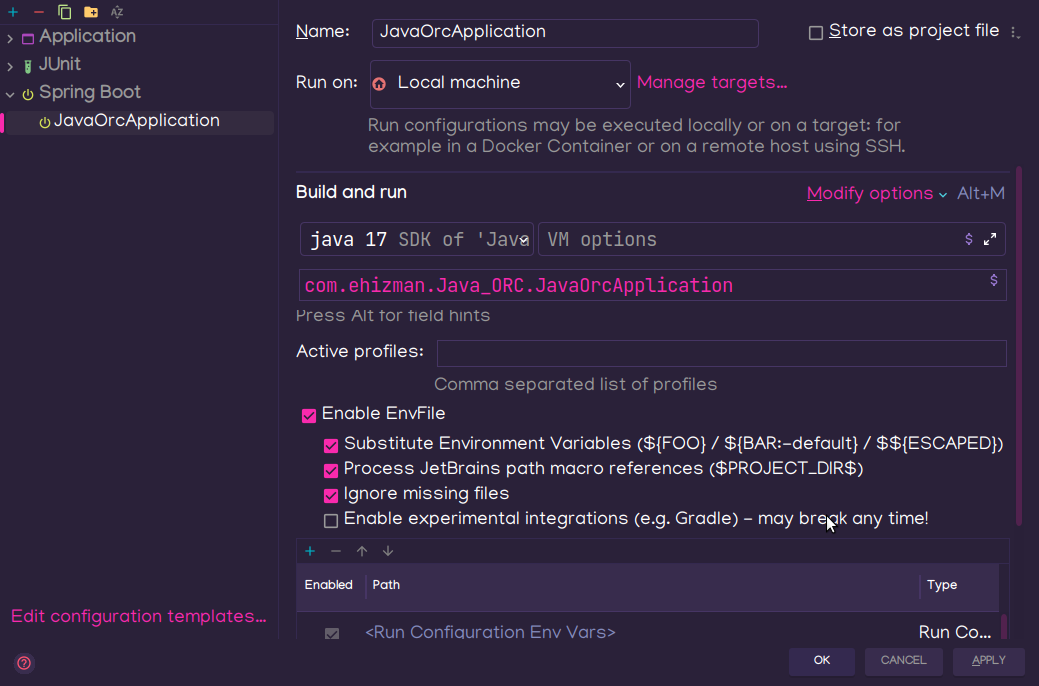
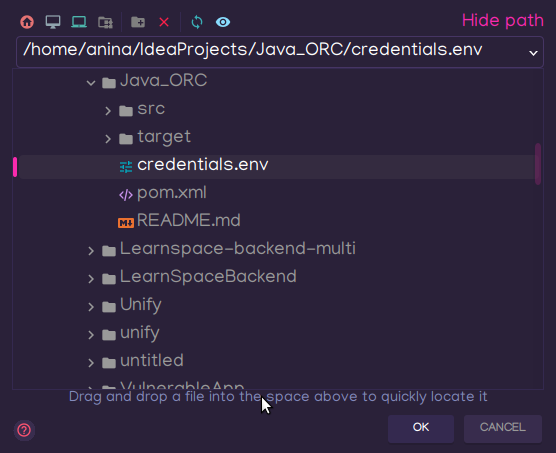
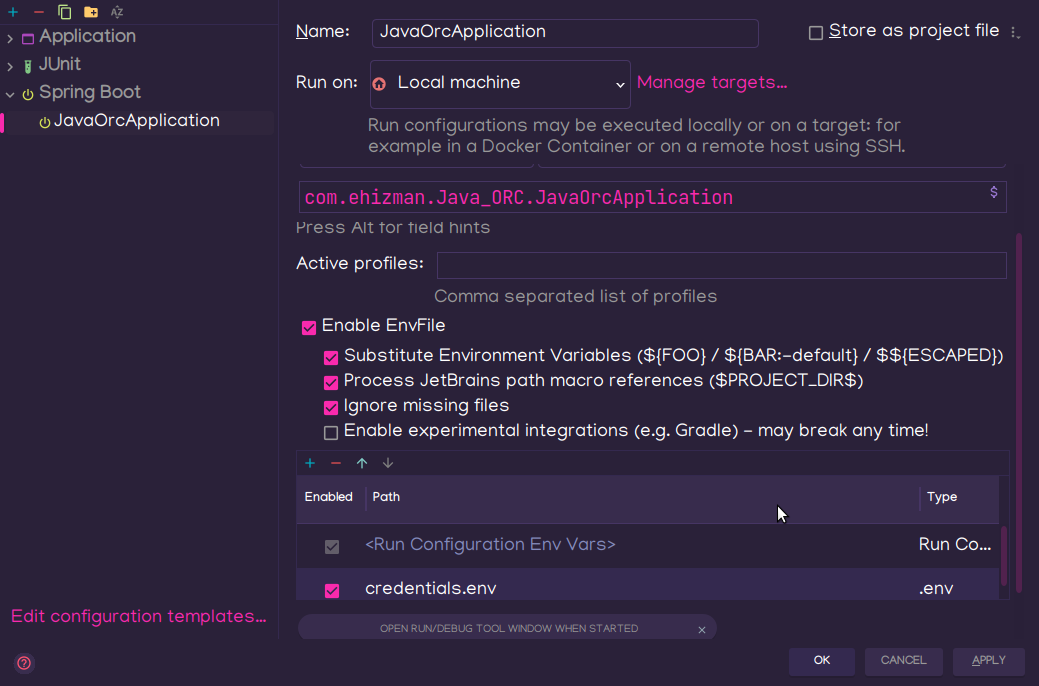
In the Configuration box, you should see a section for EnvFile. Check the boxes that enable the EnvFile plugin and all the other boxes underneath. Click on the “+” icon below the checkboxes and point to the location of your .env file.
Now, you can use the values of the environment variables in your .env file to initialize the Twilio service in the main method of your application. Place the snippet below in the JavaOrcApplication.class file:
The System.getenv method reads the value of the key specified as a string from the application’s configuration and stores it in a variable.
The Twilio.init method initializes the Twilio service with the values of ACCOUNT_SID and AUTH_TOKEN which are read from the .env file.
NOTE: If the ACCOUNT_SID or AUTH_TOKEN is not provided, then the following error occurs:
Configure the ngrok agent
The localhost server cannot be reached over the internet because it is protected by firewalls. Ngrok solves this problem by routing the localhost server to a secure public URL that other applications (for example Twilio) can connect to via a webhook.
Follow the instructions in this article to create an account and install the ngrok agent on your machine.
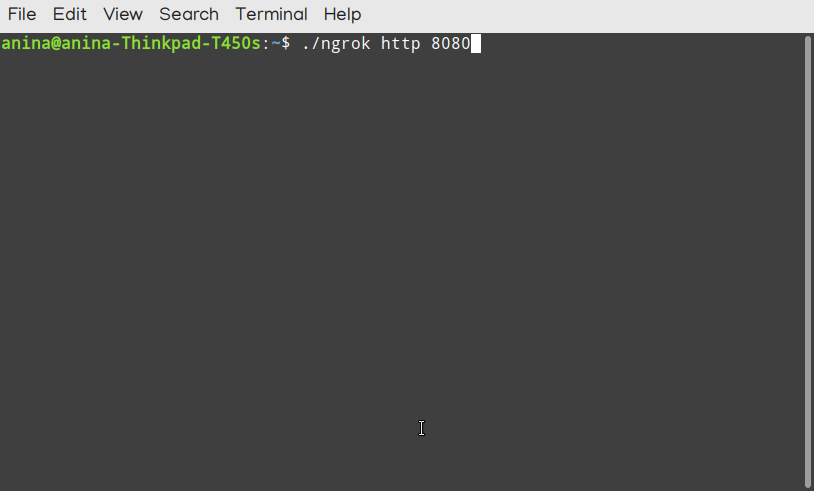
Start ngrok on your project directory with the following command:
./ngrok http 8080. If your application runs on port 9090 then the command will be ./ngrok http 9090
Copy the ngrok URL and append "webook" to the end of the URL. Paste it in the Twilio Sandbox configuration in the Twilio Console under the section WHEN A MESSAGE COMES IN. This allows Twilio to send incoming notifications sent by users over WhatsApp to this URL. The /webhook will be defined later in the article.
Ngrok on its part takes the notifications from the user and routes the notifications to our application via a controller endpoint, which you will create and register later on the Twilio Console as a webhook.
Set up Google Cloud Vision in your application
Now that Twilio can receive the pictures texted in by the user, the Google Cloud Vision API is required to perform object and text recognition on the images that the users send over WhatsApp.
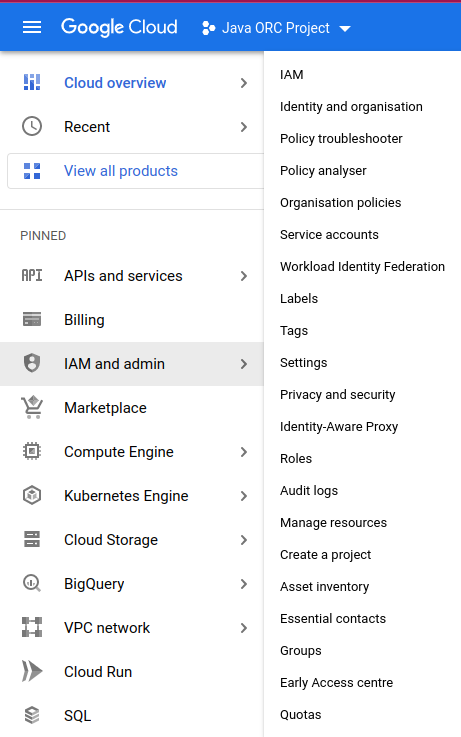
Go to the Google Cloud Platform Developers Console and log in with your Google account. Ensure that you have a Billing Account setup with Google Cloud Platform.
Click on the IAM and ADMIN tab on the sidebar and then select the Create a Project option from the drop menu. This should yield the following screens:

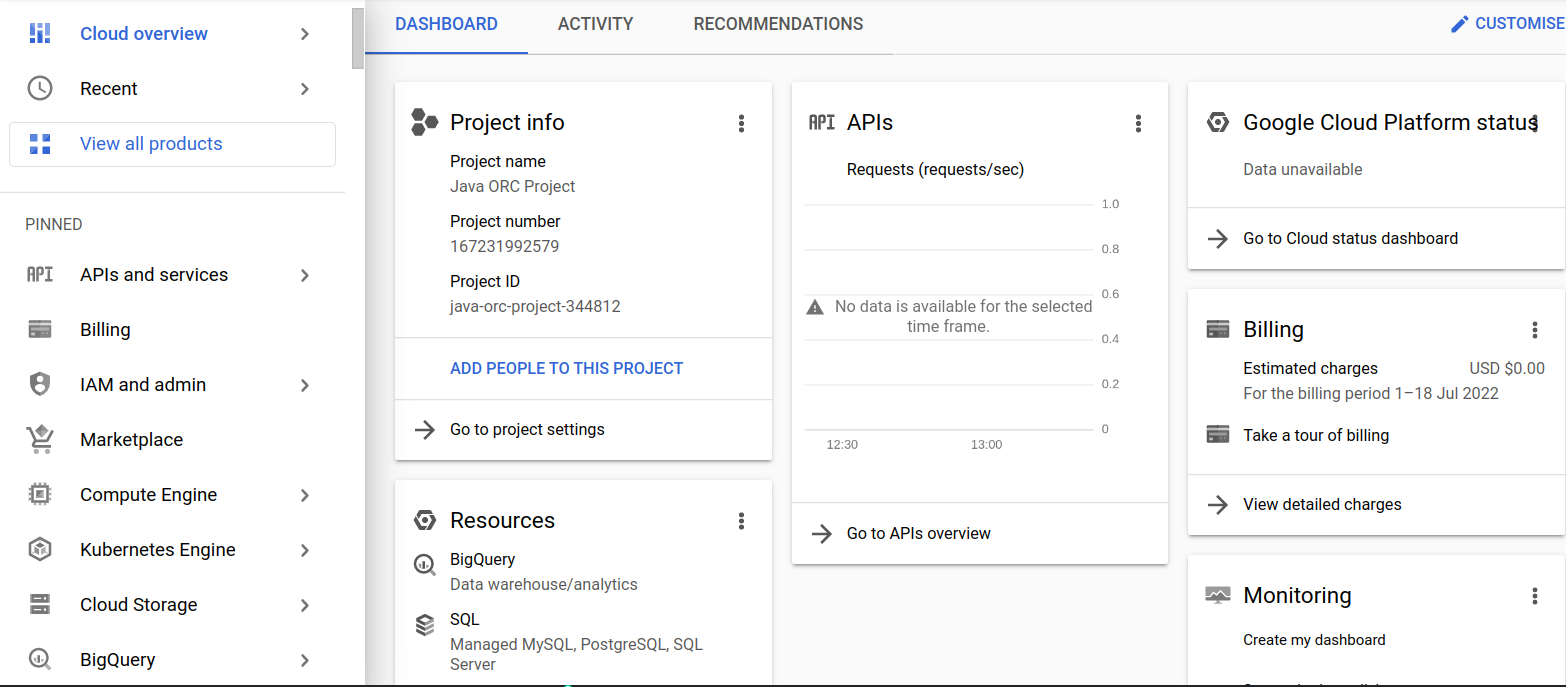
Give the project a name such as "ORC Project". Fill out the project form and click on the Create button at the bottom of the form. This should redirect to a project dashboard as follows:
Enable Google Cloud Vision API for your project. To do this, click on the APIs and Services tab on the sidebar. Select the Enabled APIs and services option. This should take you to the following screen:
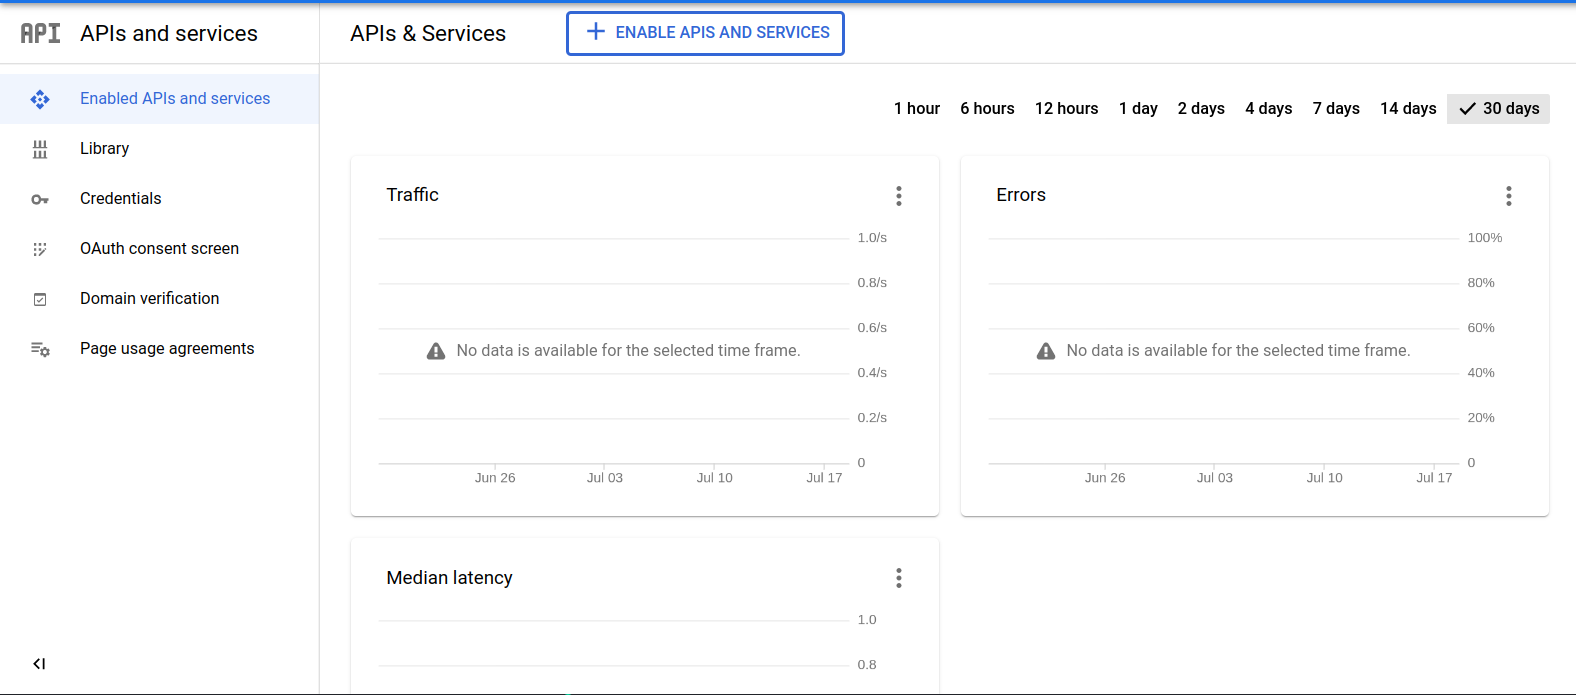
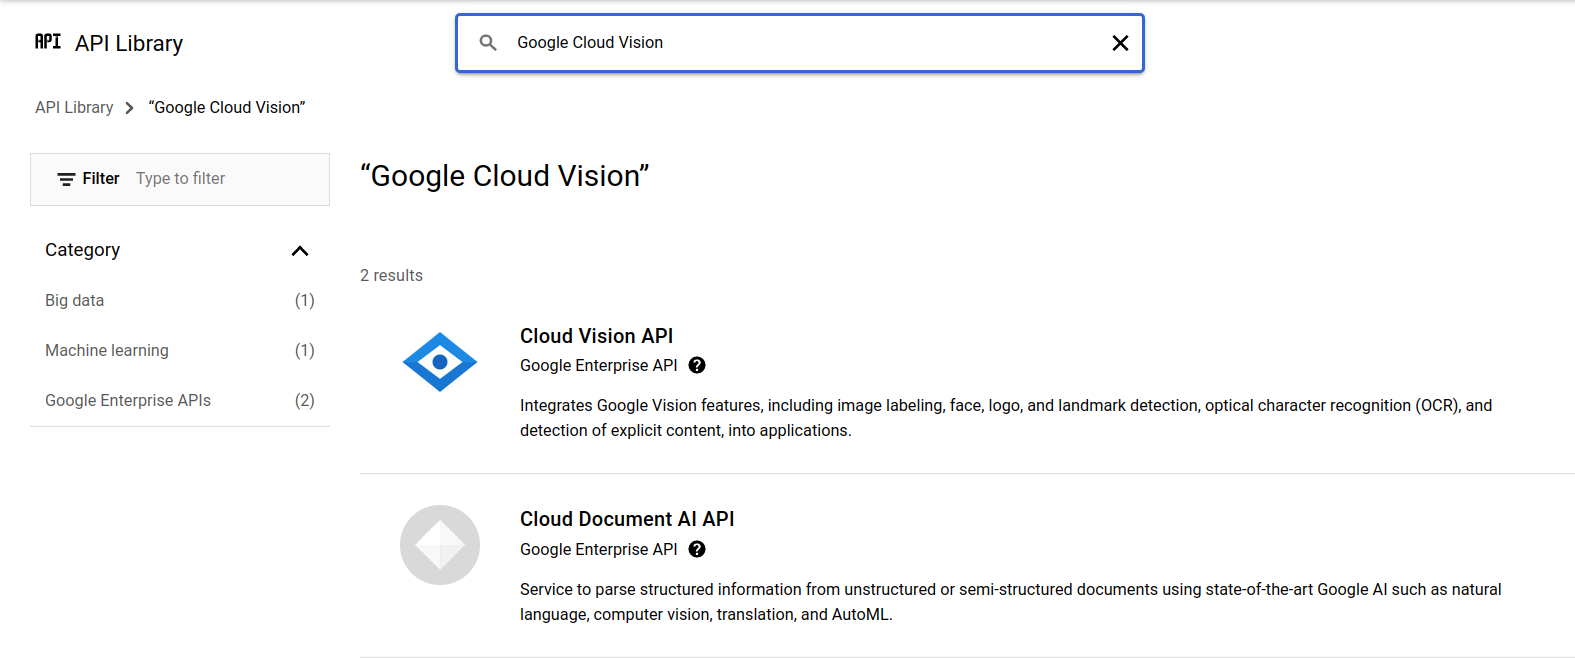
Click on the + Enable APIs and Services option at the top of the dashboard. Search for "Google Cloud Vision" in the search bar and select the Cloud Vision API to enable it for use in the newly created project.
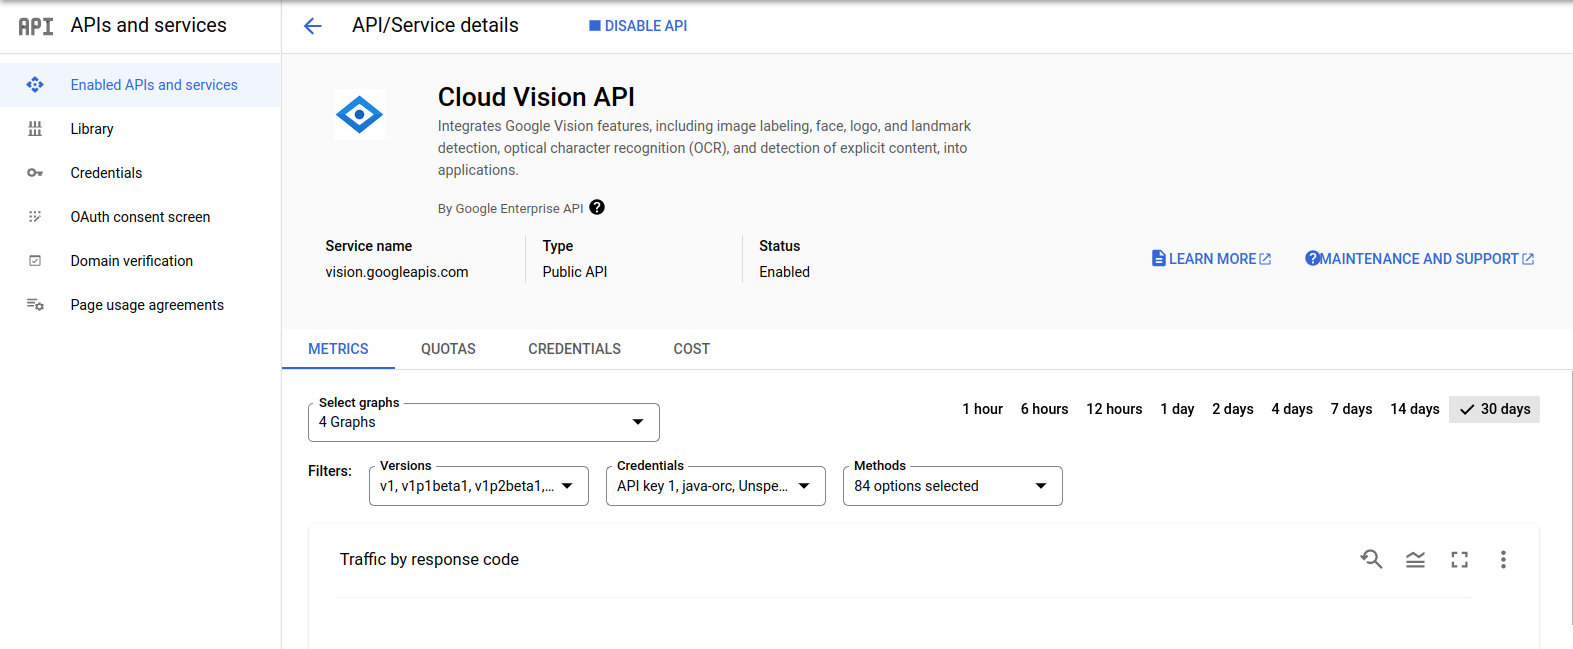
Next, you have to create credentials for the Cloud Vision API. This includes creating a service account in your project and keys for that service account. To do this, click on the Credentials tab on the sidebar as seen in the image below:
Click on Create Credentials at the top of the page and select the Service Account option. This leads you to the Create credentials page. Fill out the Create Credentials form as appropriate.
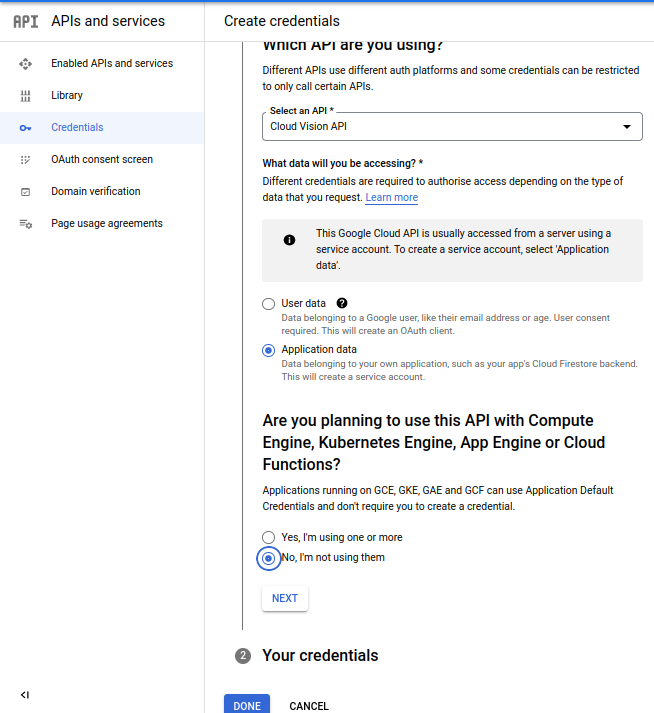
Click on the Next button. This should lead you to the following screen where you add your Service Account Details:
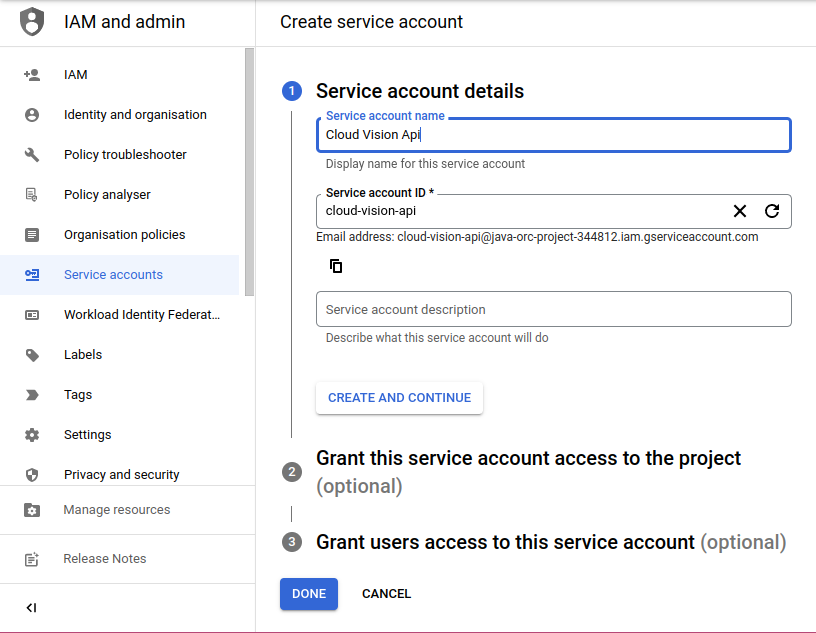
Skip the optional sections and click on the Done button. You should see an automatic email created for your service account.
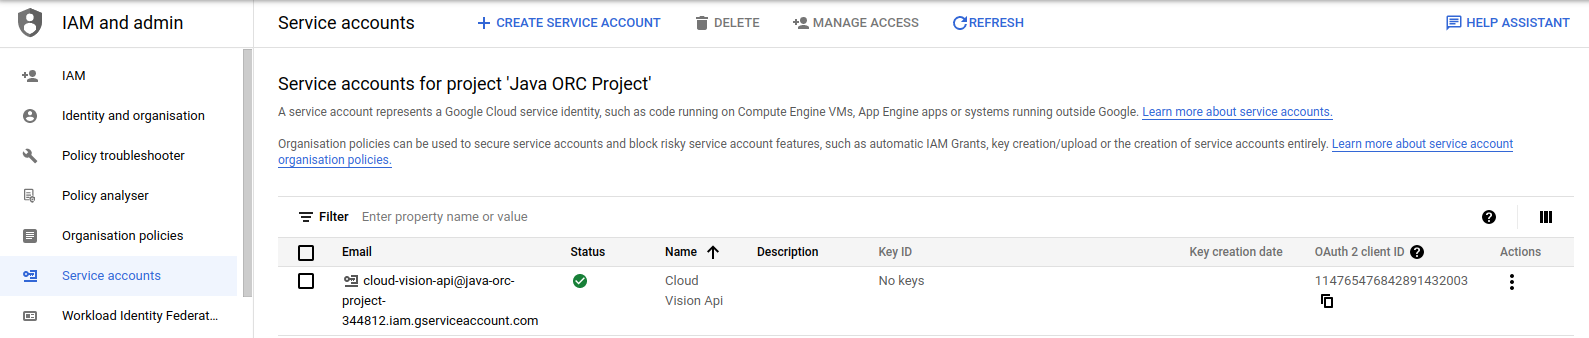
Next, create service keys and download them as a JSON file. You can do this by clicking on the email for the service account. This redirects to the following screen.
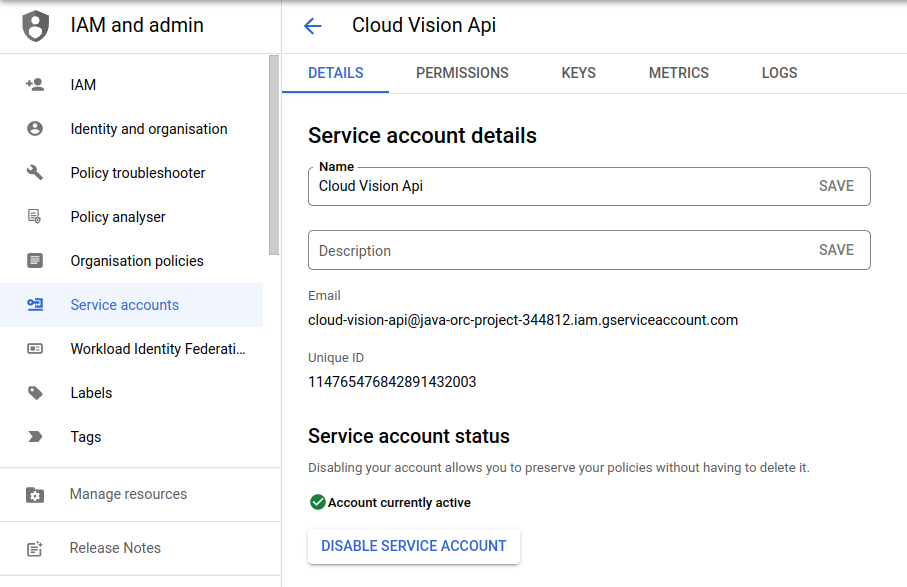
Click on the KEYS tab at the top bar. Next, click on the ADD KEY and select Create new key. Choose the recommended JSON keys. Download the JSON keys into the project directory.
Create another entry in your .env file that directs to the directory where your JSON key is stored.
The .env file should be similar to what I have here(parts of the TWILIO_ACCOUNT_SID and the TWILIO_AUTH_TOKEN have been hidden for security purposes):
Build the image recognition service
Open the pom.xml file and add the following <dependencyManagement> head before the other dependencies for the Spring Cloud GCP BOM:
Add the following dependency to your dependencies section of your pom.xml:
To perform image analysis, create a services package. Inside the services package, create an ObjectRecognitionService.java interface file. Throughout this project, you can use the interface to define contracts that your services will have to implement.
The essence of this is to decouple the controller which calls the service from the actual implementation that does the object and text recognition. The ObjectRecognitionService interface should contain the following code:
Now, it is time to define a class that implements the contracts in the interface. Create an ObjectRecognitionServiceImpl class that implements the ObjectRecognitionService interface as shown above:
First, you have to autowire a CloudVisionTemplate and a ResourceLoader into your service. According to the Google Cloud Vision documentation. The CloudVisionTemplate is a wrapper around the Vision API Client Libraries and lets you process images easily through the Vision API."
The extractLabelsFromImage() method receives the image that is loaded by the resource loader from the specified URL and extracts labels from the image. The labels extracted from the image are mapped to a score (between 0 and 1).
The extractTextFromImage() method receives the image that is loaded by the resource loader from the specified URL. The method scans the image for text and then returns the text. If the image does not contain any printed text, then an empty string is returned back.
Perform image analysis
A webhook is necessary to take in the user's image for Google Cloud Vision to analyze. Create a package called controller. Inside it, create a Controller.java class and paste the following code into it:
At this point, your project folder structure should be as follows:
The POST route, /webhook receives the user’s response as a multivalue map. ngrok provides an inspection interface that displays the details of every request and response to and from your ngrok client. It is important to note that the ngrok inspection interface truncates requests when the entity-body is too long.
Run the image recognition Twilio app
Before running the app, you can refer to this repository for the full code in the project.
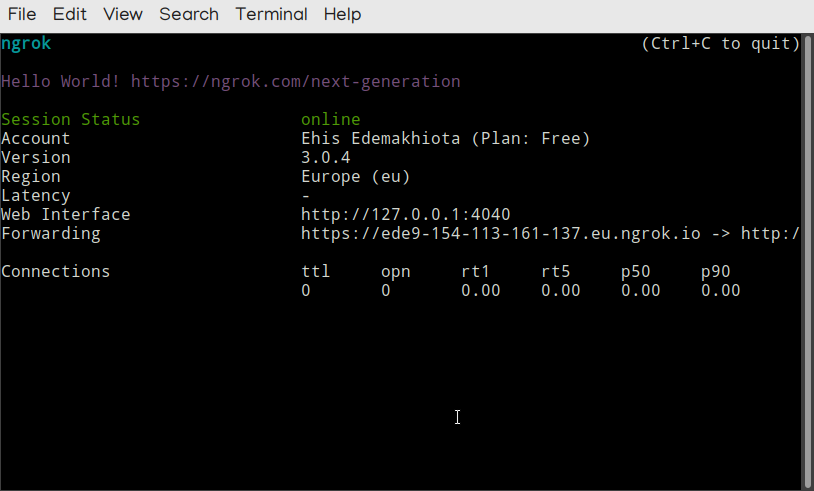
To view the inspection interface, start the ngrok agent if you haven't done so already. Navigate to the JavaOrcApplication.class file on IntelliJ and click on the Play icon in the gutter near the class declaration. Select Run or press Ctrl + Shift + F10 if you are on a Windows machine.
To run the application on Eclipse IDE select the Run menu from the menu options at the top of the window. Click on the Run button or press Ctrl + F11 if you are on a Windows machine Open http://localhost:4040 in a browser on the same machine.
A snapshot of the ngrok agent on my machine is shown below:
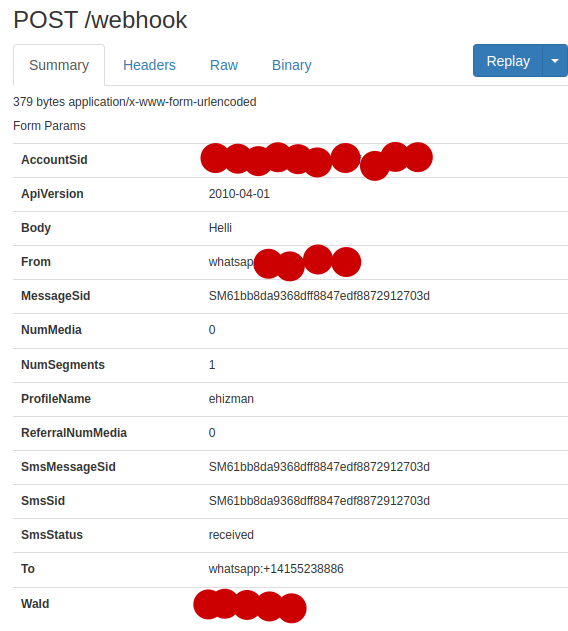
The code retrieves the receiver’s and the sender’s phone numbers. Then, the code checks that the user sends an image file. If the user sends an image file, the NumMedia field in the map is set to 1 otherwise it is set to 0 and informs the user to send a picture.
The image URL is extracted and passed to the objectRecogntionService that contains the methods extractLabelsFromImage, which extract labels from the image, and extractTextFromImage, which identifies any printed text on the image.
The sendMessage method sends a message back to the user with the given message and phone numbers declared in String format.
If you have not done so already, paste the Forwarding URL copied from the ngrok session and append "webhook" to the end into the A MESSAGE COMES IN field in the WhatsApp Sandbox dashboard.
Grab the SMS enabled device and join the WhatsApp sandbox if you haven't done so already.
Below is a demonstration of how the application works:
What is next for Image Recognition and Twilio Apps?
Congratulations on building your first WhatsApp Image Recognition in Java! In completing this post, you have learned how to use the Google Cloud Vision API in a Java Spring Boot application that analyzes images and reads printed text from images in a private WhatsApp sandbox created using the Twilio WhatsApp API. I hope you are excited to showcase this project to your friends.
- Learn Data Visualization with WhatsApp, Google Maps, Python, Twilio, and Clarifai
- Extract, translate, and analyze text from images using the Google Cloud Vision, Translation and Natural Language APIs
- How to Make a Mysterious Phone Call with Twilio Voice and Java
Ehis Edemakhiota is a Software Engineer at Semicolon Africa. He loves building out his imagination. He can be reached at edemaehiz@gmail.com or on Twitter or LinkedIn.


Related Resources
Twilio Docs
From APIs to SDKs to sample apps
API reference documentation, SDKs, helper libraries, quickstarts, and tutorials for your language and platform.
Resource Center
The latest ebooks, industry reports, and webinars
Learn from customer engagement experts to improve your own communication.
Ahoy
Twilio's developer community hub
Best practices, code samples, and inspiration to build communications and digital engagement experiences.