Create Queues and Skills for A Flex Contact Center
Time to read:
March 26, 2020
Written by

You’ve just deployed Flex and you might be asking yourself: what’s next.
Next, you’ll need to start thinking about your routing and queueing strategy. In this blog post, we will cover some basic options for queueing and skilling – it sets the groundwork on how you will report and analyze your contact center business.
Let’s get started!
What We’re Building Today
Flex has the ability to leverage the full power of Twilio TaskRouter. TaskRouter is a powerful attributes-based routing system, the heart of the contact center. It’s also fully programmable, allowing you to control your contact center from your code. We’ll walk through a simple use case today: “How can I setup a contact center to support my customers and employees using Flex?”.
To do this, we are going to build two new Task Queues: Customer Service and Employee Service. These will provide the ability to easily segment our customer and employee traffic and lay the groundwork for easy reporting. Our Employee Services group consists of two different teams, HR and IT. To ensure these calls are routed to the correct contact center agents we will also leverage skills (or attributes) based routing.
We also want to empower our managers and supervisors with the ability to manage their employees. To do this, we will give our frontline managers the ability to control the queues and skills from within the Flex User Interface.
Before We Get Started
To get started with the project you will need the following:
- A Twilio account. Sign up for a free trial account and get a $10 credit.
- An Existing Flex Project. Check out Deploy a Remote Agent Contact Center in 30 Minutes With Twilio Flex
Build Skills-based Routing Flows and Queues
Now that you have a basic Flex project set up, we’re ready to start adding multiple queues and setting up our skills. We’ll walk through the skills setup, TaskQueues, multiple Workflows, creating the IVR, and finally assigning a phone number to our second queue.
Define Your Skills
To get started, we will first configure our skills from within the Flex Admin view.
Login to Flex as an administrator, this can be done as a standard user with the “admin” role or by launching Flex from the Twilio Console. From within Flex, select the Admin view and then click the Skills button:
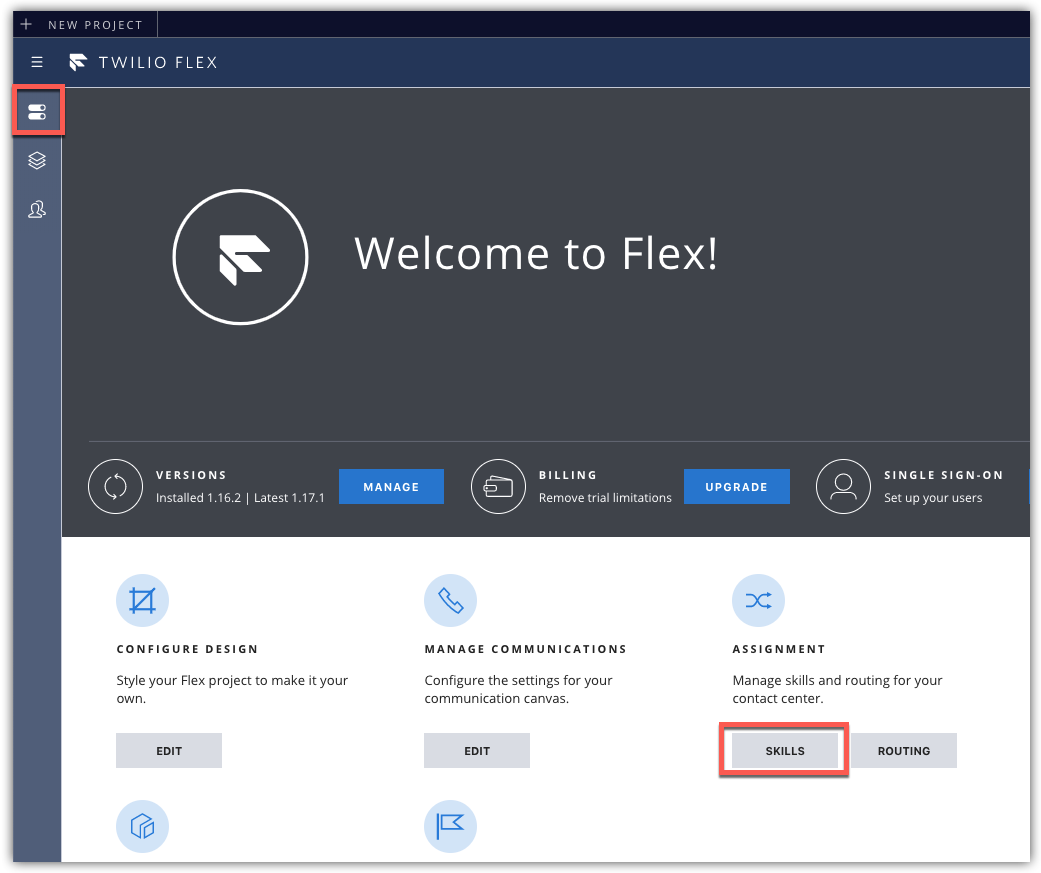
Create three new skills, enter the name of the skill, and press the Add New Skill button.
For this example we will create the following skills:
- Customer Service
- HR
- IT

Assign Skills to your Agents
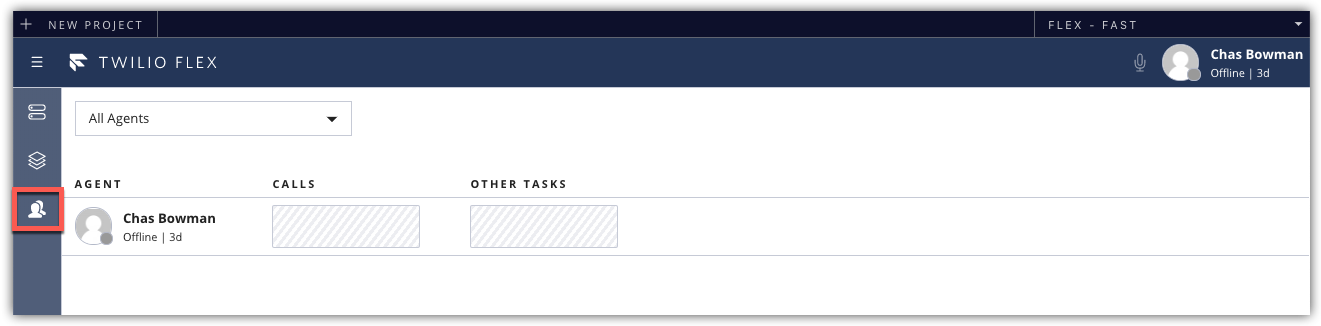
Our next step for managing the Skills is to assign them to our agents. We will do this using the Flex Teams View. A Flex user with the supervisor role will be able to modify the skills for the contact center users.
To start, open Flex and Select the Teams View by clicking on the People icon on the left:
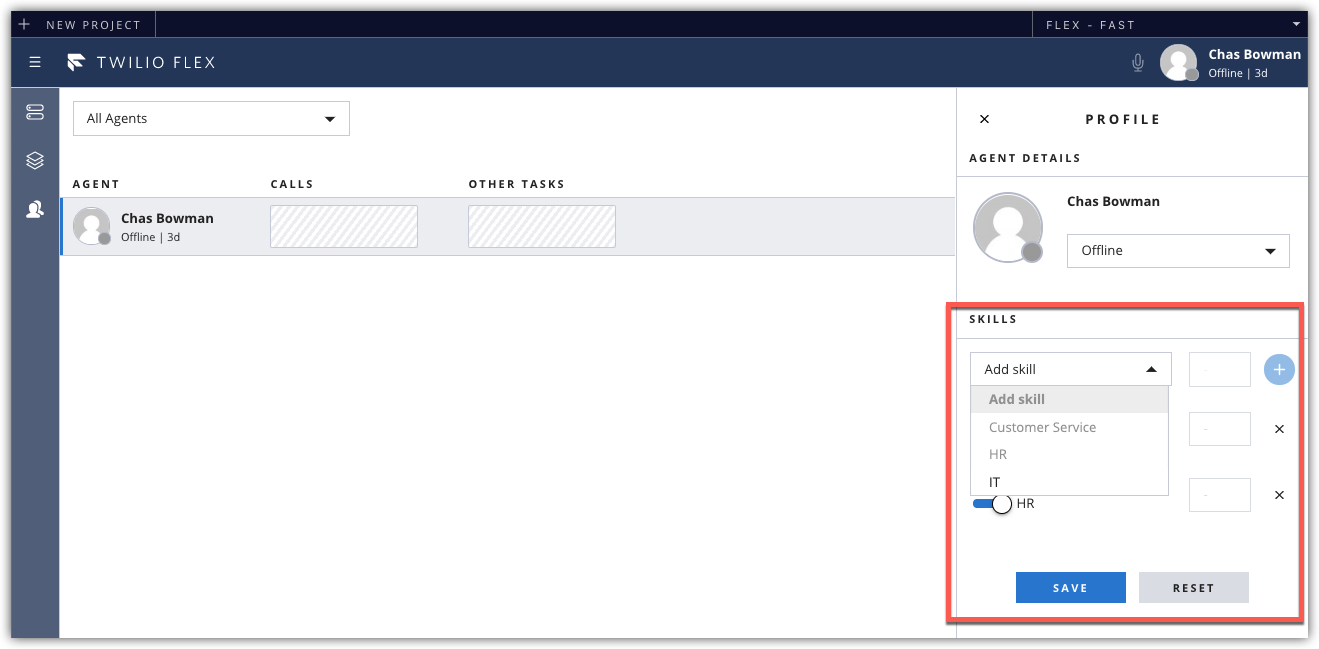
From the Teams View, select the Flex User you wish to update, this will display the Agent Detail view. From here you can add the skills to this agent’s Profile.
Apply the appropriate skill and save the profile:
Create your TaskQueues
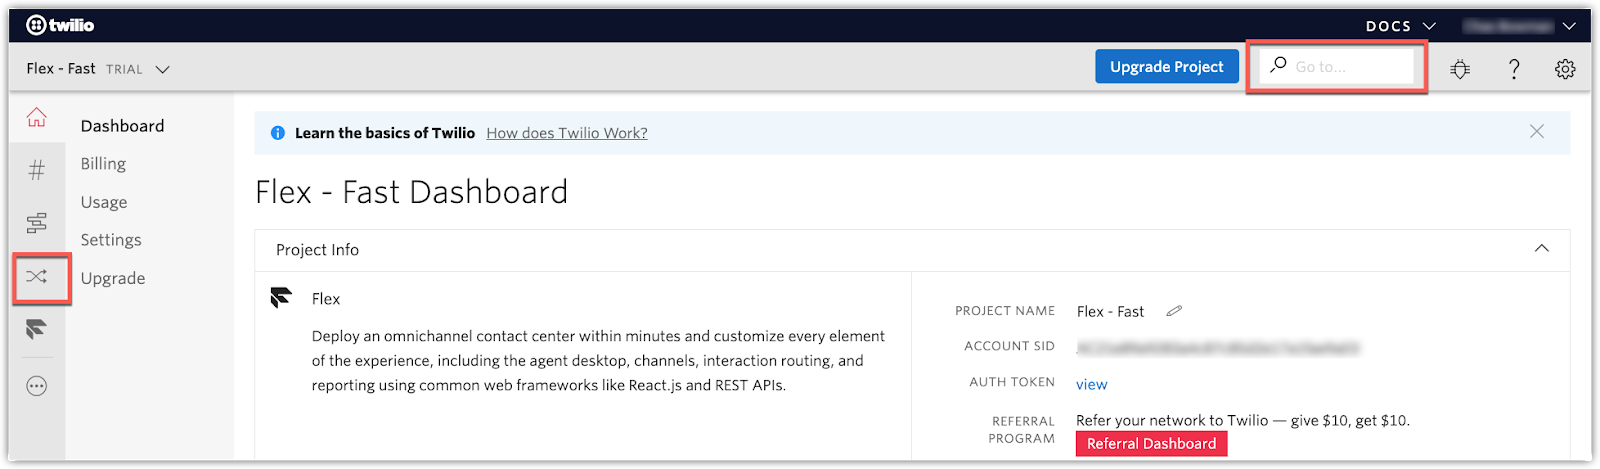
In this section, we will be using TaskRouter from within Twilio Console.
From your browser navigate to https://twilio.com/console. Verify that you are viewing your new Flex Project by checking the Project Name in the upper left corner. To access Task Router, select TaskRouter from the left side navigation bar or using the “Go to” search box at the top right.
From the TaskRouter dashboard select Workspaces and then open Flex Task Assignment. This is where your Flex routing configuration is managed.
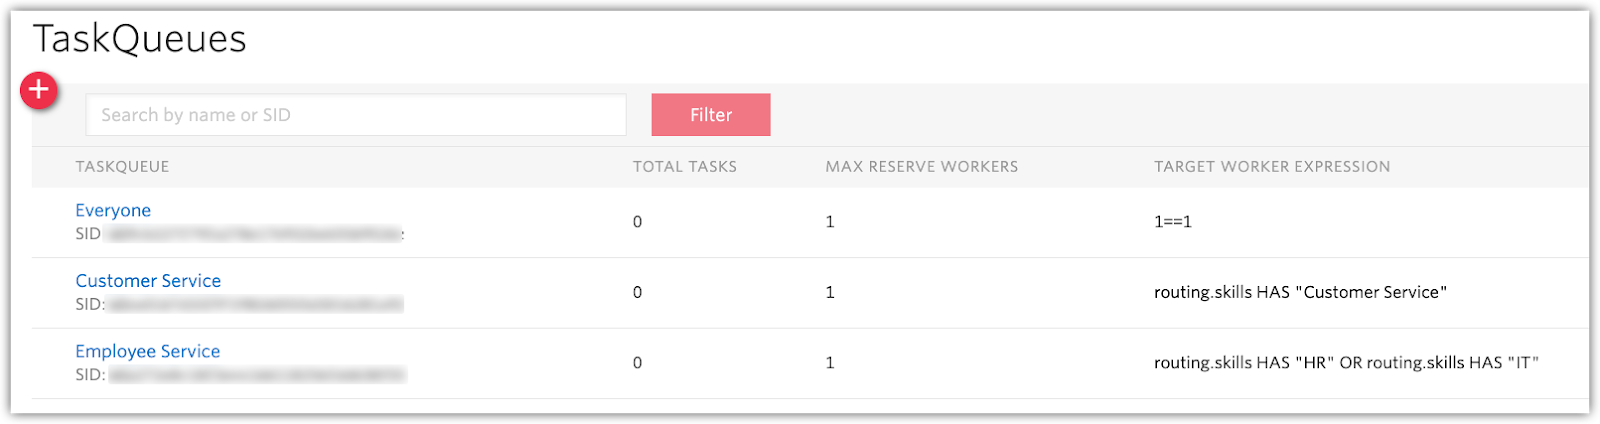
Next, we will create three new TaskQueues. These will be the ACD queues that are used to separate Customer Service, HR and IT. By default, Flex comes with a single queue, the Everyone queue.
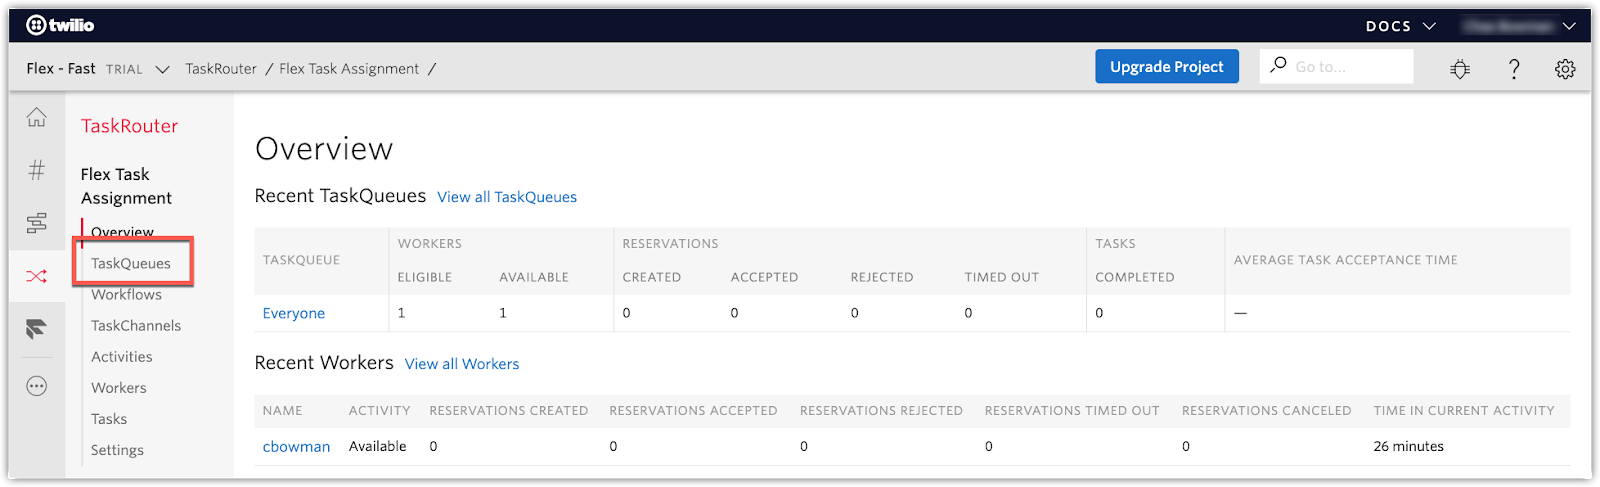
To add our additional queues, select TaskQueue from the Flex Task Assignment menu:
Create new TaskQueues for each ACD Queue by pressing the red plus (‘+’) button at the top of the page to add a new TaskQueue:

We’ll need to enter a TaskQueue Name, Set Max Reserved Workers to ‘1’, and provide the appropriate Queue Expression.
Create a queue for both Customer Service and Employee Service:
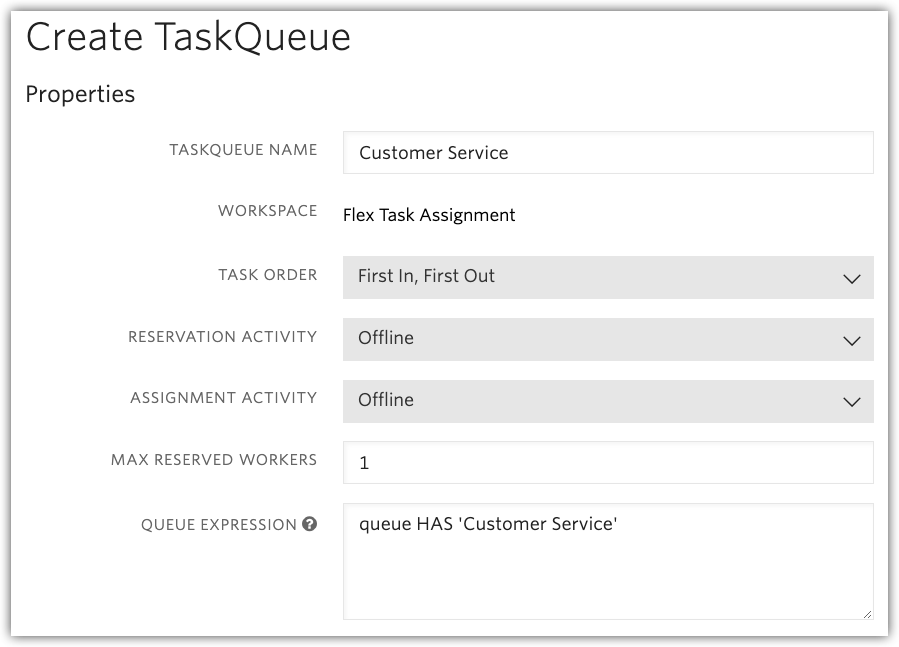
- TaskQueue Name: Customer Service
Queue Expression:routing.skills HAS "Customer Service" - TaskQueue Name: Employee Service
Queue Expression:routing.skills HAS "HR" OR routing.skills HAS "IT"
Create your Workflows
Workflows are used to deliver Tasks to the appropriate queue. The TaskRouter Workflow is where you can use powerful expressions to create skills- and attribute-based routing strategies. For this example, we will create a simple queue strategy for Customer Service and a skills routing strategy for Employee Service.
Check out the TaskRouter Workflow Docs to learn more about Workflow Expressions.
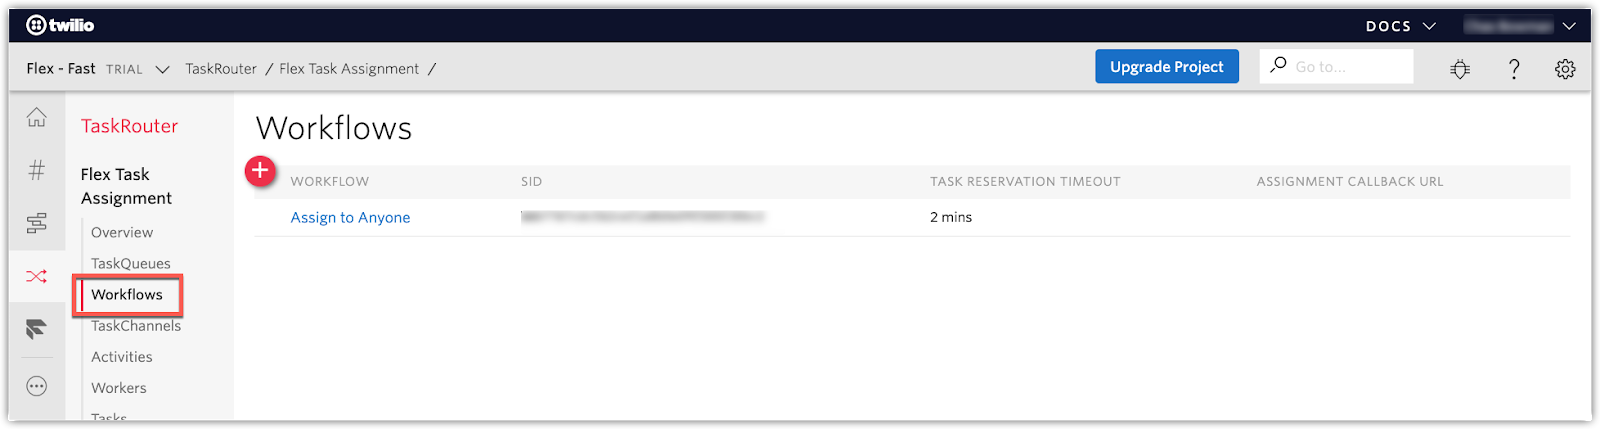
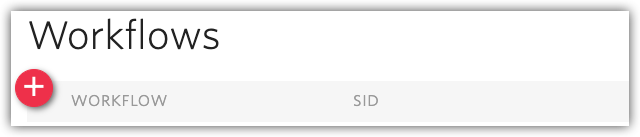
Select Workflows from the Flex Task Assignment menu:
Create a new Workflow for the Customer Service queue. Press the red plus (‘+’) button at the top of the page to add a new Workflow:
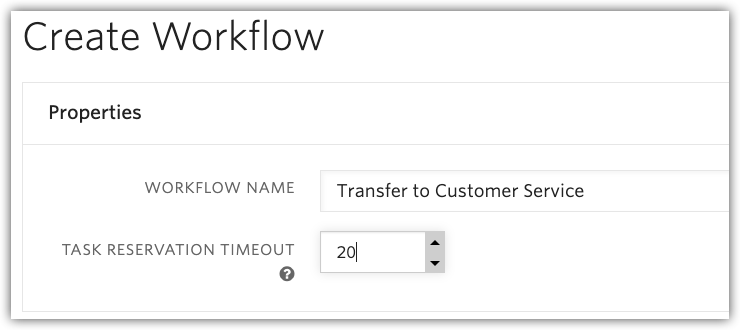
Enter Transfer to Customer Service as the Workflow Name and set the Task Reservation Timeout to 20 seconds.
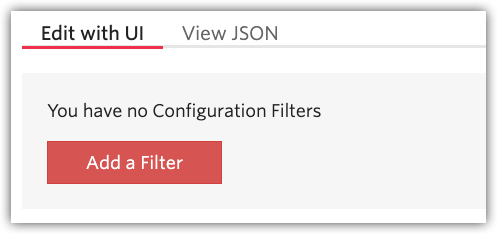
Now add a Filter to the Workflow. Set the filter name to ‘Customer Service’, and select ‘Customer Service’ as the Queue.

- Filter Name: Customer Service
- Queue: Customer Service
Next, we will create another Workflow for Employee Service.
Name the workflow Transfer to Employee Service and set the Task Reservation Timeout to 20 seconds. For this Workflow, we will create two filters: one for HR and one for IT.
- Filter Name:
HR
Matching Tasks:"HR" IN skillsNeeded
Queue:Employee Service
Expression:routing.skills HAS "HR"
Priority:100(This optional field can be used to prioritize calls. We will set a priority to ensure HR tasks are answered before IT tasks.) - Filter Name:
IT
Matching Tasks:"IT" IN skillsNeeded
Queue:Employee Service
Expression:routing.skills HAS "IT"
Setup Studio Flows
With our queues defined, we will now build out two simple Studio flows for voice routing. In this tutorial, we’ll only cover Voice Studio Flows but these same concepts apply for additional channels, such as SMS.
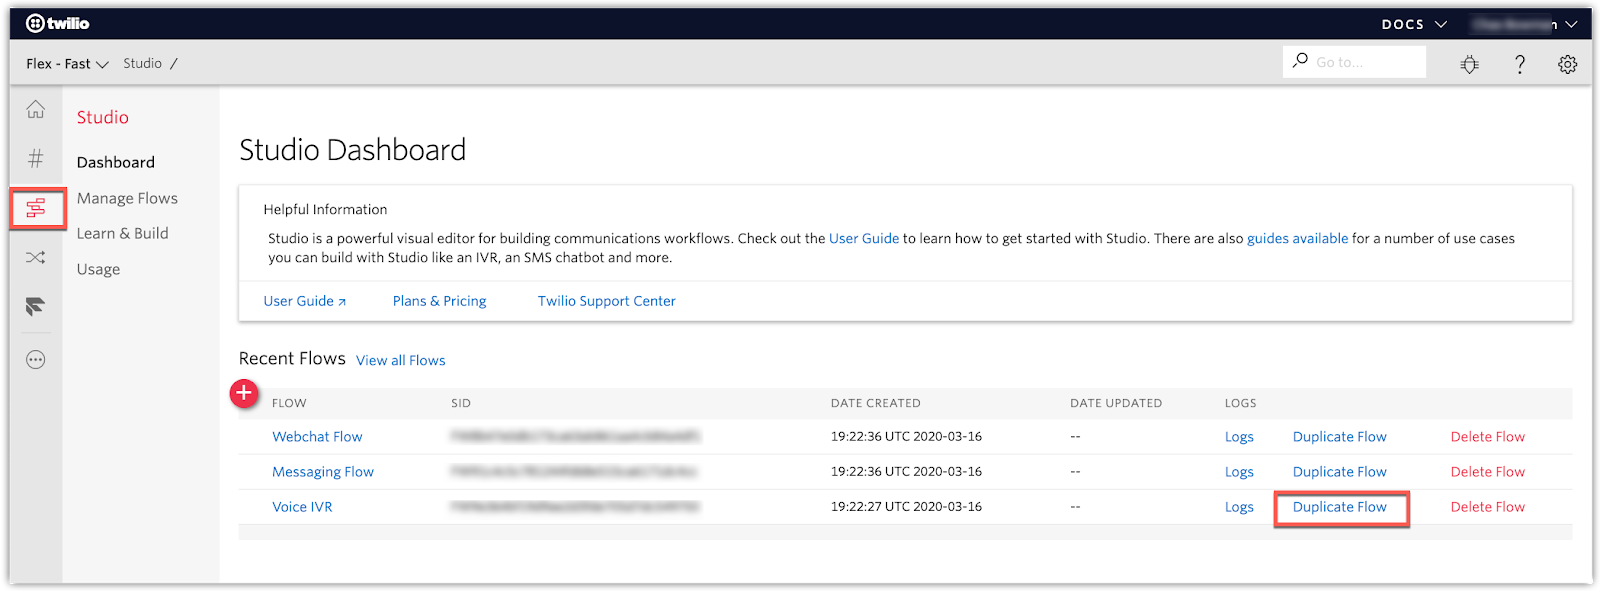
Inside Twilio Console navigate to Studio. On this page, you will see three default Studio Flows. Locate the Voice IVR and click Duplicate Flow.
The new flow “Copy of Voice IVR” will open.
Let’s change this name by clicking on the Trigger widget. On the widget configuration, change the Flow Name to Customer Service Voice IVR.

Select the SendCallToAgent Widget and configure the widget to use the Transfer to Customer Service Workflow.

Click ‘Save’ on the Widget Config and ‘Publish’ the Studio Flow.
For now, let’s return to the main Studio screen and repeat the steps to create a Studio Flow for Employee Service. This time, we will add a basic menu to determine if the caller needs to speak to HR or IT.
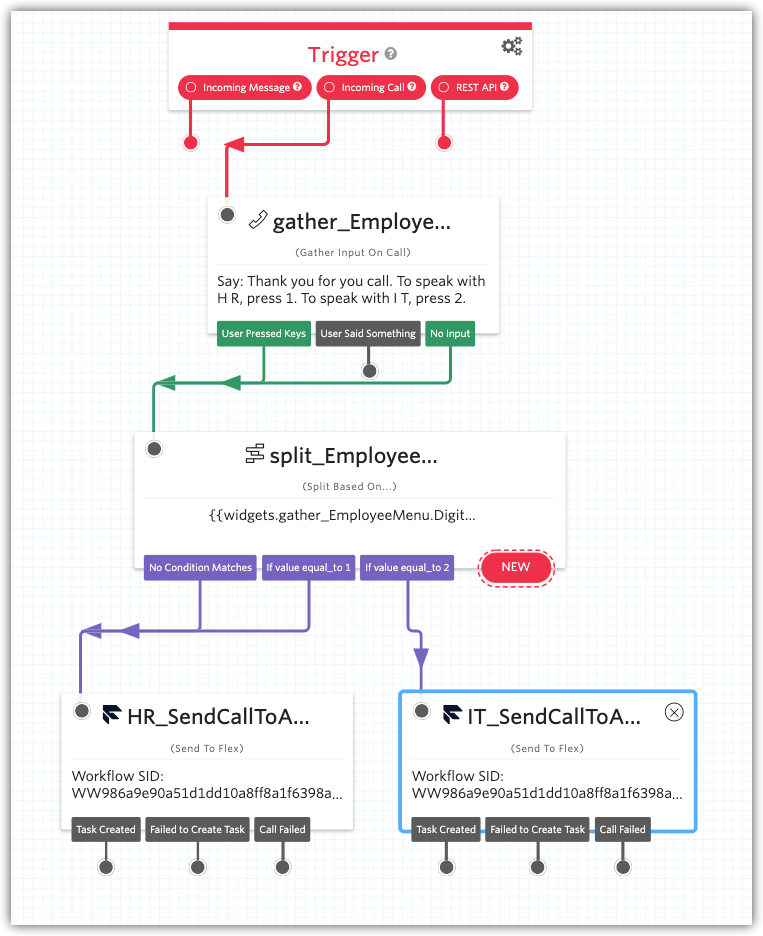
- Trigger: Set the Flow Name to
Employee Service Voice IVR. - Gather_EmployeeMenu: Add a Gather widget prompting the caller to “enter 1 for HR or 2 for IT”.
- split_EmployeeMenu: Add a Split widget to evaluate the digits. This widget should evaluate the digits output from the Gather_EmployeeMenu widget. Add a transition for both “equals to 1” and “equals to 2” conditions.
- Duplicate the SendCallToAgent Widget; name one of them
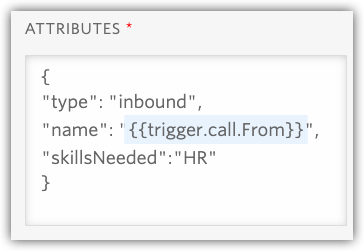
HR_SendCallToAgentand the otherIT_SendCallToAgent. - HR_SendCalltoAgent: Set the Workflow to Transfer to Employee Service. In the attributes section, add a new property to the JSON object: “skillsNeeded”:”HR”
- IT_SendCalltoAgent: Set the Workflow to Transfer to Employee Service. In the attributes section, add a new property to the JSON object. “skillsNeeded”:”IT”
- ‘Save’ your widget updates and ‘Publish’ your IVR.
In this section, we’ve built a simple Voice IVR with Twilio Studio to get you started. At this point, callers will be able to dial in and use ‘1’ and ‘2’ to route into the HR and IT queues, respectively. However, we’re barely scraping the surface with Studio to highlight the queues and routing. We encourage you to play with Studio and add additional functionality.
Check out these great resources for building more with Studio:
- Twilio Support: Getting Started with Twilio Studio
- Blog: Introducing Twilio Studio, the Fastest Way to Build With Twilio
Add an Additional Phone Number
Since our example is covering both customers and employees, we are going to set up a new Twilio Number. We already have one number that was configured with our original Flex Project; we will use that number for Customer Service. We will purchase another Twilio Number to use for Employee Service.
From the Twilio Console, navigate to Phone Numbers:
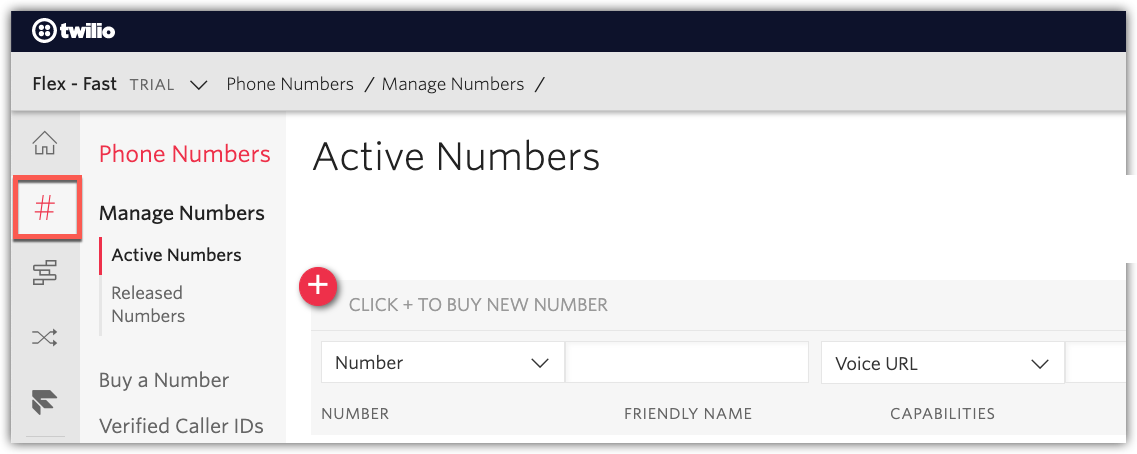
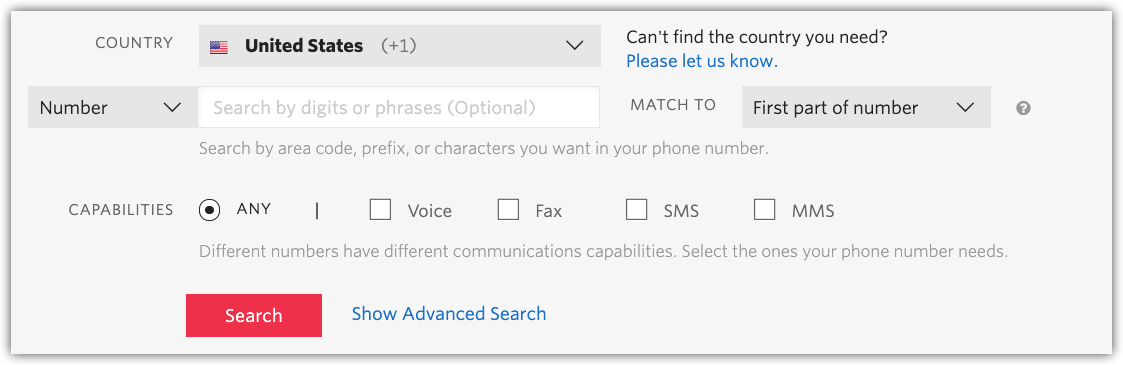
Press the red plus (‘+’) button to select a new phone number. Use the search tools to find a desirable number and complete the number purchase.
(Check out this support article if you need help purchasing a number: How to Search for and Buy a Twilio Phone Number from Console.)
Once you have completed the purchase, you see the management screen for the new Number.
From here we will configure the Name, Call Destination, and SMS Destination.
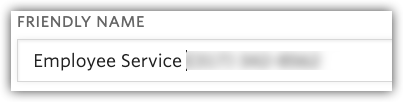
Name: you should prepend “Employee Service” to the beginning of the Friendly Name Field, to help you better identify the number’s purpose.
A Call Comes In: Select Studio Flow from the first list and Employee Service Voice IVR from the second drop-down list. This will direct all inbound calls on that number toward your IVR.

Now, let’s update our original Flex phone number to use the Customer Service Voice IVR.
Select Manage Numbers from the Phone Numbers menu on the left side. Click on the phone number from the lists of Active numbers and configure the “A Call Comes In” settings to use the Customer Service Voice IVR.
Test Your Queues and Skills Routing
Now that everything is configured you can start testing. Place a few test calls into your new Flex phone numbers. You can verify that the call was routed correctly by viewing the Real-Time Queues View or by clicking the Info tab on the Call.
If you are not seeing the calls route to the correct queues the I would suggest reviewing your Queue Expression and Workflow expressions. Make sure these match up with what was displayed when you setup the skills. If you do get stuck, please reach out to our friendly Customer Support team for help.
Queues and Skill-Based Routing in the Contact Center
You now have enhanced your basic call center with two queues, and have added skills-based routing to properly hand off inbound calls to the proper talent. With your routing all set you are ready to explore some more advanced customizations. A great next step would be to check out our docs on the Flex UI and Flex Plugins.
We can’t wait to see what you build!
Chas Bowman is a Contact Center Solution Architect with over 20 years of experience in the contact center market. He enjoys evangelizing technology and helping customers deliver amazing customer experiences. He can be reached at bowman [at] twilio.com.


Related Resources
Twilio Docs
From APIs to SDKs to sample apps
API reference documentation, SDKs, helper libraries, quickstarts, and tutorials for your language and platform.
Resource Center
The latest ebooks, industry reports, and webinars
Learn from customer engagement experts to improve your own communication.
Ahoy
Twilio's developer community hub
Best practices, code samples, and inspiration to build communications and digital engagement experiences.