Real-time SMS Alerting for Your IoT Prototype Demonstration: A Hands-On Guide
Time to read:
May 31, 2023
Written by

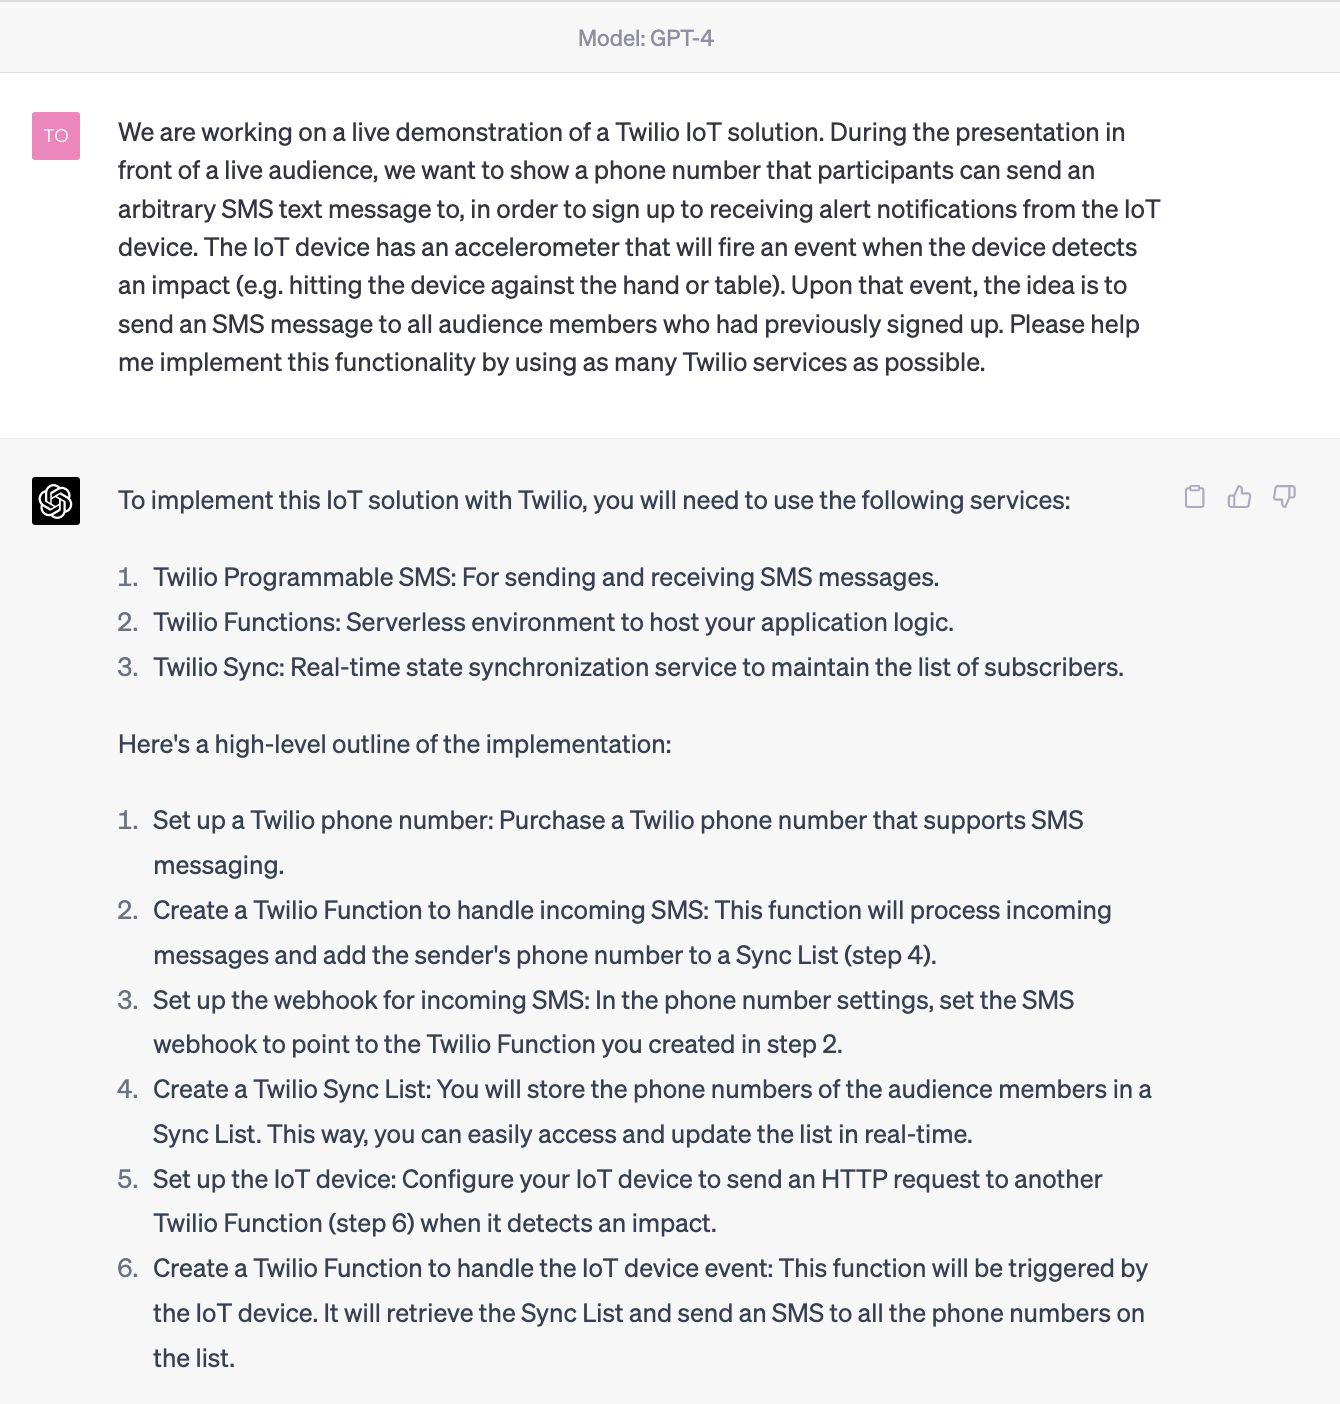
As part of my work to promote Twilio Microvisor to the market, I have been collaborating with one of our firmware engineers on an upcoming live demonstration at a partner conference. We are preparing to show an implementation of an asset tracker, and I am adamant about having some audience participation. "Wouldn't it be cool if people in the audience would get an SMS alert on their phones upon an IoT event, such as the onboard accelerometer detecting an impact or the temperature sensor detecting high temperature?" I thought... My colleague agreed, but wanted to focus on the firmware aspects of the demo. Could I take things on myself if I used ChatGPT to guide me? 🤔
I have foundational programming skills and have meshed up services in the past, so I decided to take on that challenge and explore how real-time alerting could be added to our Asset Tracker prototype (which was built on our Nucleo Development Board) – with the help of various Twilio services. In this hands-on blog post, I'll share my experience and list the steps required to integrate Twilio services into the project in order to send real-time alerts to a live audience. If you are an IoT engineer looking to showcase a prototype yourself, this post is for you!
Setting up the Twilio Services

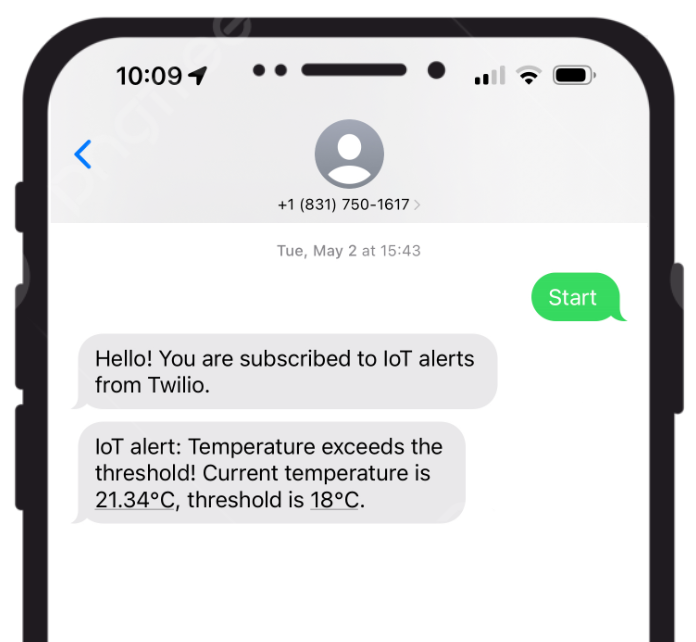
The goal is to have a live demonstration that audience members could participate in – by signing up live to receive alert notifications from our asset tracker. The device, equipped with a temperature sensor, would trigger an event upon detecting increased temperature. I am planning to use a hair dryer to heat up the device for additional show effect 😁
Those who signed up would then receive an SMS alert. So I needed a phone number, the ability to send and receive SMS, and the ability to store and lookup the phone numbers of the audience members.
To implement this functionality, I used the following Twilio services:
- Twilio Phone Numbers – to have a number for subscribing to the alert service
- Twilio Programmable SMS – to be able to receive and send SMS messages
- Twilio Functions – to implement my (trivial) application logic
- Twilio Sync – to preserve state, ie. store which phone numbers have subscribed for the alert service
Since I didn't have much time (who does that anyway these days?), I turned to my new best buddy for help: ChatGPT. Would it know enough about Twilio's tech to be able to help me step-by-step? Well duh, of course it would...
The astute reader will have noticed that I originally had a different idea about the triggering event – using the onboard accelerometer, but we can all agree that using a hair dryer on stage would be more fun, yes?
So here are the steps to take. Since I know you are smart and capable, I will not spell out each step in minute detail – you should be able to get the idea and let the Twilio experience serve you along the way:
1) Purchasing a Twilio phone number that supports SMS messaging.
Go to the Twilio Console (create a free account) and buy a phone number that supports SMS messaging.
2) Creating a Twilio Function to handle incoming SMS messages, adding the sender's phone number to a Sync List.
We'll need a new Sync Service, for which we'll get an SID. We then want to create a Sync List called "subscribers", which is an ordered collection of individual items, each storing separate JSON objects. This list will hold our phone numbers.
Once we have created the Service and within it the List, navigate to Twilio Functions and create a new function with the following code, replacing YOUR_SYNC_SERVICE_SID with the SID of your newly created Sync service:
3) Setting the SMS webhook in the phone number settings to point to the Twilio Function from step 2.
Copy the URL of the Twilio Function created in step 2 and paste it in the SMS webhook field in the phone number settings.
4) Configuring the IoT device to send an HTTP request to another Twilio Function when a temperature increase is detected.
Depending on your IoT device, you need to write code that sends an HTTP request to the Twilio Function created in step 5.
5) Creating a Twilio Function to handle the IoT device event, retrieving the Sync List and sending an SMS to all phone numbers on the list.
Create another Twilio Function with the following code, replacing `YOUR_TWILIO_PHONE_NUMBER` with your actual Twilio phone number:
As someone with an entry-level programming background, it was easy enough to use the Twilio Functions service to give me a serverless environment for hosting the straightforward application logic. By the way: I did get some errors from Twilio after my first attempt at copy-and-pasting the code from ChatGPT. So I took the error messages (found under the Monitor tab in the Twilio Console on the left) and asked ChatGPT how to deal with them, so it could adjust its instructions for me. After a couple iterations, I arrived at a functioning setup!
Later on, we improved the implementation to also send the measured temperature and the configured threshold
If you're an IoT engineer tasked with showcasing a prototype, consider using Twilio services to add communications functionalities and enhance your project's capabilities!


Related Resources
Twilio Docs
From APIs to SDKs to sample apps
API reference documentation, SDKs, helper libraries, quickstarts, and tutorials for your language and platform.
Resource Center
The latest ebooks, industry reports, and webinars
Learn from customer engagement experts to improve your own communication.
Ahoy
Twilio's developer community hub
Best practices, code samples, and inspiration to build communications and digital engagement experiences.