Respond to Twilio Webhooks using AWS Lambda and .NET
Time to read: 10 minutes
August 10, 2022
Written by
Reviewed by

In this article, you will learn how to develop a web API with .NET 6 to handle Twilio webhooks and deploy it to AWS Lambda. You will also learn how to save call recordings to AWS S3 as MP3 files.
Prerequisites
- A free Twilio account (sign up for a free Twilio account and get trial credit to try out Twilio products)
- A Twilio Phone Number
- An AWS account
- An OS that supports .NET (Windows/macOS/Linux)
- .NET 6.0 SDK (newer and older versions may work too)
- A code editor or IDE (Recommended: Visual Studio Code with the C# plugin, Visual Studio, or JetBrains Rider)
- AWS CLI
What are webhooks?
In today’s API-driven world, integrating applications is easier than ever. Most of the time, you can get the information you need from an external system’s API, but sometimes you want to be notified by the external system when something happens. That’s where webhooks come in. You register your own endpoint with the external system, and they post data to your endpoint when the event you’re looking for occurs.
Twilio Webhooks
The type of data you can expect from webhooks depends on the Twilio service. For the Twilio Voice API, there are several types of webhooks, three of which you'll use in this tutorial:
- Incoming voice call
- Status callback
- Recording status callback
Incoming voice call webhook, as the name implies, is where you handle the incoming calls. When you use a programmable voice service such as Twilio, this is the core functionality you would want to implement. If you don’t handle the incoming call, you hear three beeps when you call your Twilio number, and the call is terminated. The call doesn’t even appear in the logs. As you will see later in this article, when you implement a call handler, you can provide instructions to Twilio to record the call, play audio, and more. Some of these actions also have their own follow-up webhooks. These instructions are implemented in TwiML (the Twilio Markup Language). TwiML is an XML-based markup language that has elements such as Say (read text to the caller), Dial (add another party to the call) and Record (record the caller's voice). You will use Say and Record in your project later.
After a call has been completed (inbound or outbound), Twilio sends an HTTP request to your endpoint. This is called the status callback.
You could receive the recording status callback if you requested to record the call. Then, Twilio sends your endpoint a message with the recording status and a URL to access the recording file. You have to specify your webhook URL to handle this callback message.
In this tutorial you will interact with the Twilio Voice product, but many other products also use webhooks and you can apply the same technique for them as you will for Voice.
Now that you’ve learned about these three webhooks, let's move on to the next section.
Set up AWS IAM User
You will need credentials to deploy your application to AWS from the command line. To create the credentials, follow the steps below:
First, go to the AWS IAM Users Dashboard and click the Add users button.
Enter the user name such as twilio-webhook-user and tick the Access key - Programmatic access checkbox:
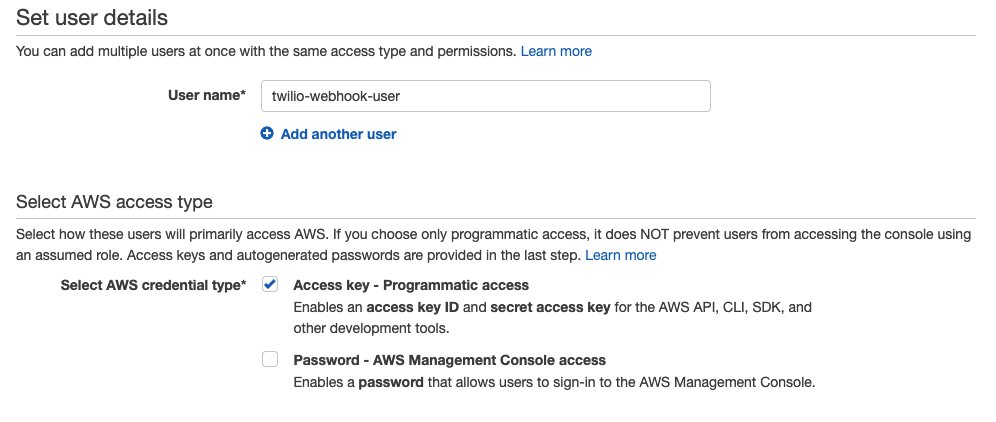
Click the Next: Permissions button at the bottom right.
Then, select Attach existing policies directly and select AdministratorAccess:
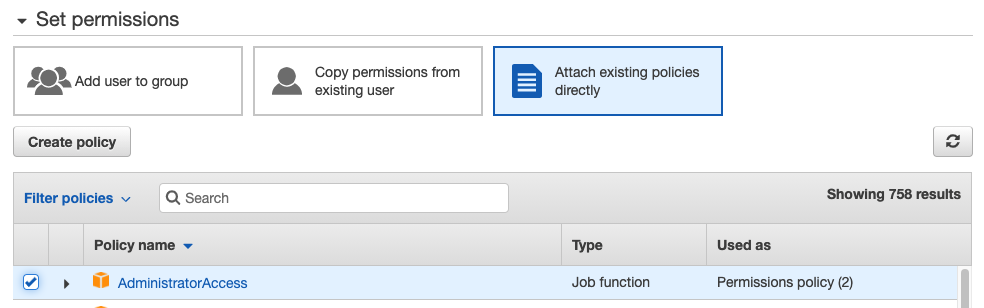
Click the Next: Tags button at the bottom right. Tags are optional (and quite valuable information), and it’s a good practice to add descriptive tags to the resources you create. Since this is a demo project, you can skip this step and click the Next: Review button at the bottom.
Confirm your selection on the review page. It should look like this:
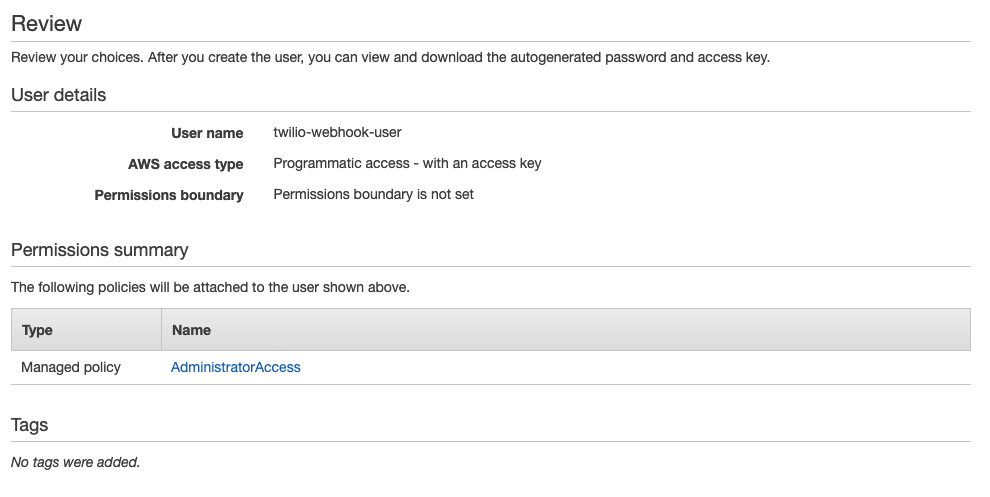
Then, click the Create user button.
In the final step of the user creation process, you should see your credentials for the first and the last time.
Now, open a terminal window and run the following command:
You should see a prompt for AWS Access Key ID. Copy and paste your access key ID and press enter.
Then, copy and paste your secret access key and press enter.

When prompted, type us-east-1 as the default region name and press enter.
As the default output format, type json and press enter.
To confirm you have configured your AWS profile correctly, run the following command:
The output should look like this:
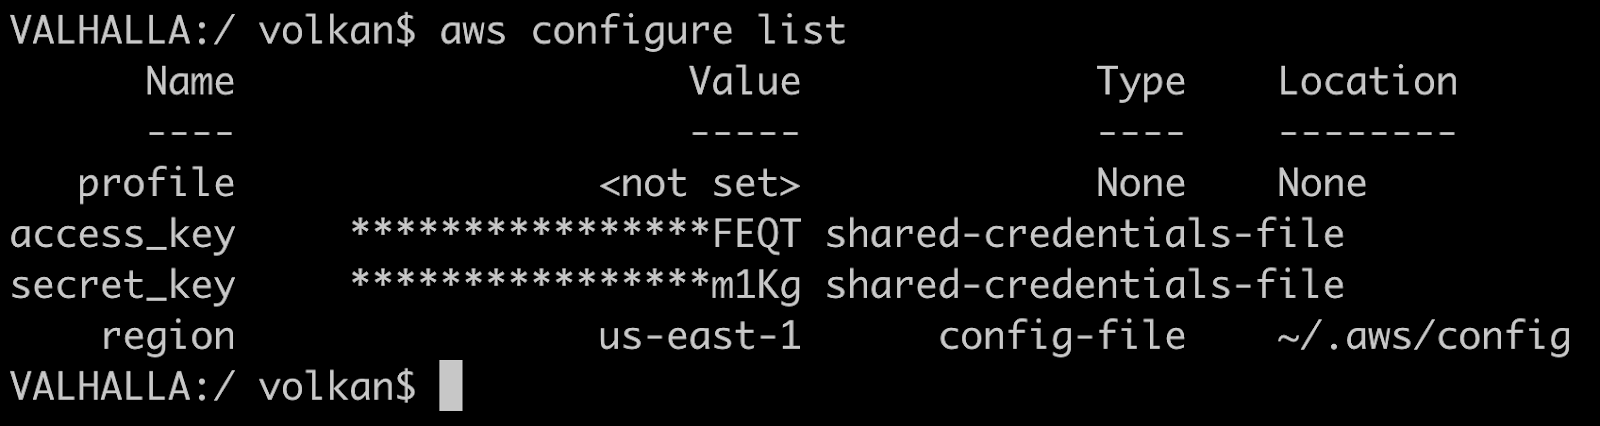
Now that you have set up your AWS credentials, you can move on to setting up the code.
Create an ASP.NET Core project for AWS Lambda
You can download the finished project from GitHub. However, this article will provide step-by-step instructions to set it up yourself.
Open a terminal and navigate to the directory that will be the root of your project.
You will use the Lambda ASP.NET Core Web API project template in the sample project. So, first, install Lambda templates by running the following command:
You should see the results of a successful installation:
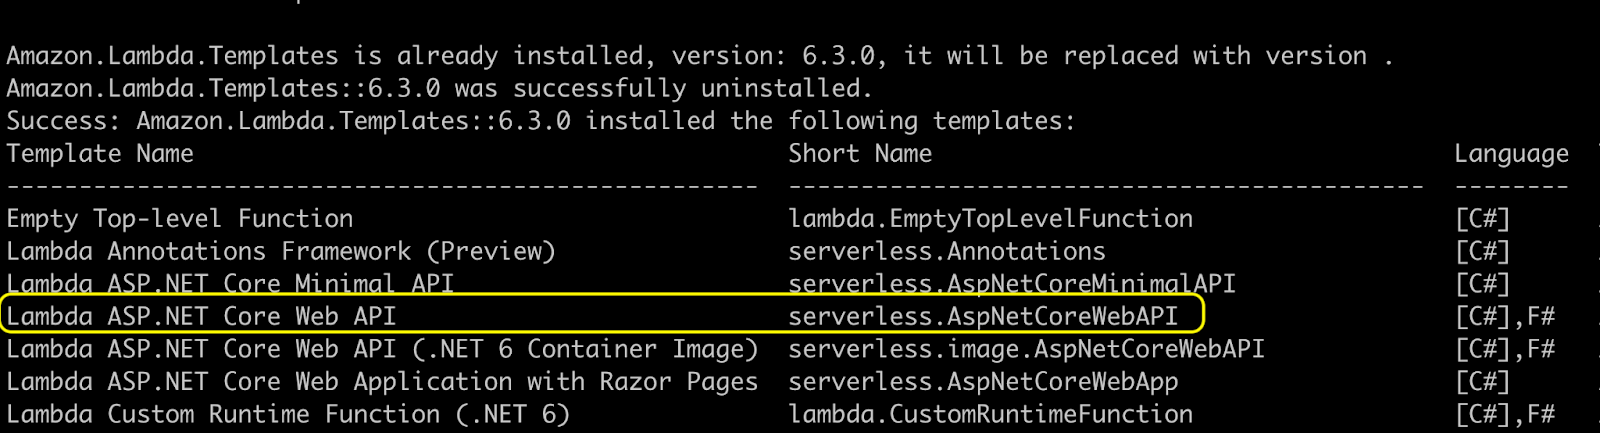
Take note of the short name of Lambda ASP.NET Core Web API: serverless.AspNetCoreWebAPI.
Then, run the following command to create the project:
The command above will create a new project with the following file structure:
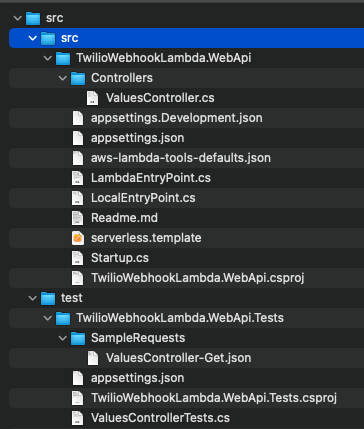
Note that the template creates a folder named src and puts the project in that folder. You can move the code to your root folder, but the rest of the article will use the default paths.
You will leverage a new AWS Lambda feature called Function URLs to make the function publicly available. For this to work with your API you need to install the Amazon.Lambda.AspNetCoreServer.Hosting NuGet package. In the terminal window, navigate to the project folder and run:
Then, open Startup.cs in your IDE, update the ConfigureServices method so that it looks like this:
Lambda Function URLs use HttpApi behind the scenes, so you need to use LambdaEventSource.HttpApi as the event source type.
You will need the Amazon Lambda Tools .NET tool to deploy the function via the command line. You can install it by running the command below:
Amazon Lambda Tools, use the aws-lambda-tools-defaults.json file to get some details about the installation. Unfortunately, it doesn’t come with all the values it needs. For example, you can store the runtime and the function's name in this file, so you don't have to keep entering it whenever you deploy it from scratch.
Open the file and update it so that it looks like this:
If you don’t provide profile and region values, it uses the default profile and region in your AWS configuration. If you want to override the defaults, update those values as well.
Then, deploy the Lambda function by running the following command:
Your Lambda function needs an IAM role to execute. The policies attached to this role determine the permissions of the function. By default, the Amazon Lambda Tools create a role on your behalf and attach it to the function.
During the deployment, it lists the existing roles along with an option to create a new role:
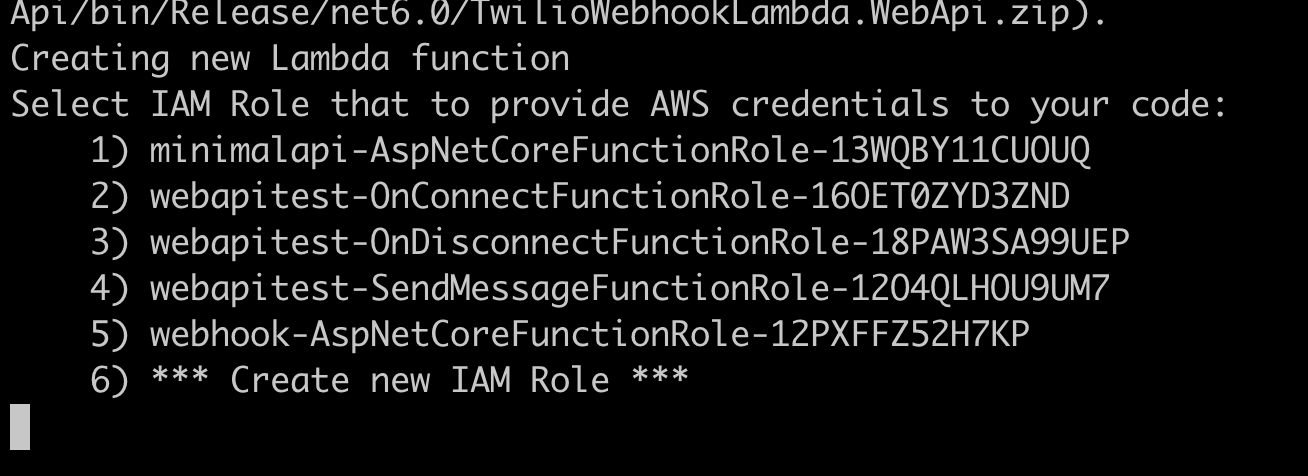
Select the Create new IAM Role option.
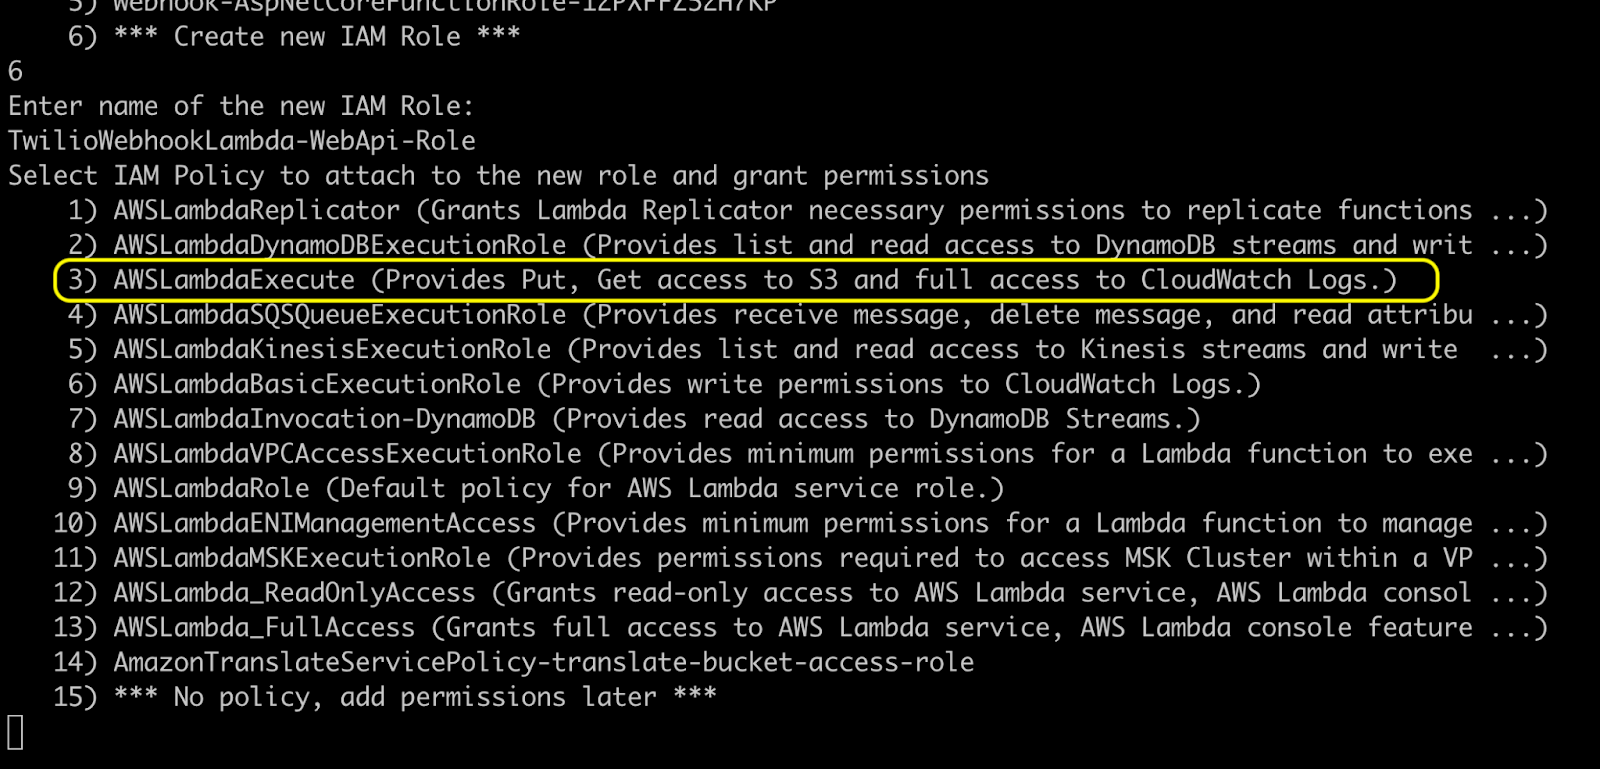
Give it a descriptive name, such as TwilioWebhookLambda-WebApi-Role, so that you can easily determine its purpose when you see it in your IAM dashboard.
The next step is to select the IAM policy. Your project will need Amazon S3 access to store call recordings. Also, having access to CloudWatch logs is always helpful. So choose 3 - AWSLambdaExecute from the list:
After the deployment has finished, you should see the successful deployment message:

The publicly available URL shown above is only created because you enabled the Function URL feature in the aws-lambda-tools-defaults.json file.
Without this feature, you wouldn’t be able to use a Lambda function as a webhook handler.
Now open that URL in a browser and you should see the default GET / endpoint result:

The API works like any other API. This template comes with a sample controller called ValuesController. Test the controller by appending /api/values to your function URL:

You should see an array of strings (value1 and value2) displayed on your browser.
You just deployed your ASP.NET Core web API to Lambda and made it publicly available. Great job!
Receive Incoming Calls
The Twilio .NET SDK and the helper library for ASP.NET make it easier to build Twilio applications. In this tutorial, you'll use the SDK to generate TwiML and the helper library to respond to webhook requests. Add the SDK and helper library via NuGet:
Under the Controllers folder, add a new file called IncomingCallController.cs and replace its contents with the following code:
In the terminal, deploy the updated function:
You should get a successful update message on your screen:

At this point, you have a publicly available endpoint but Twilio is not aware of it yet.
Go to the Twilio console. Select your account, and then click Phone Numbers → Manage → Active Numbers on the left pane. (If Phone Numbers isn't on the left pane, click on Explore Products and then on Phone Numbers.)
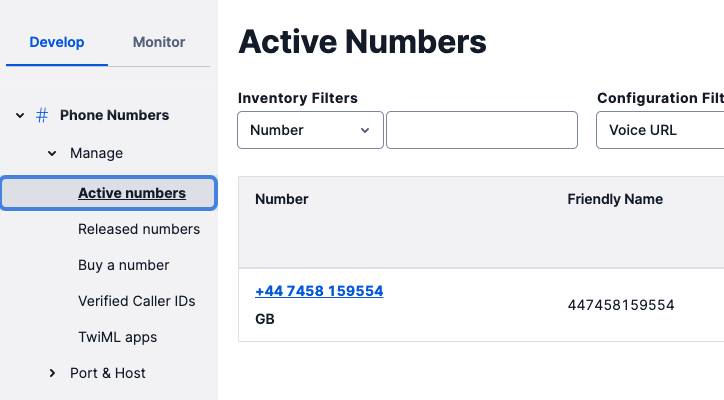
Click on the phone number you want to use for your project and scroll down to the Voice section.
Under the “A Call Comes In” label, set the dropdown to Webhook, the text field next to it to your Lambda Function URL suffixed with the /IncomingCall path, the next dropdown to HTTP POST, and click Save. It should look like this:

To test, call your Twilio number, and you should hear the message “Hello. Please leave a message after the beep.”. It doesn’t actually wait for the message, but at least you know you have implemented an incoming voice webhook. Your code is executed when your Twilio number receives a call.
In the next section, you will handle the second webhook type: Call Status Updates.
Receive Call Status Updates
Create a new file in the Controllers folder called CallStatusChangeController.cs with the code below:
This code logs some of the values posted to your webhook.
Go back to the active number configuration in the Twilio Console and update the "Call Status Changes" field with your Lambda Function URL suffixed with /CallStatusChange, as shown below:

Save your configuration, and then deploy your project again using dotnet lambda deploy-function.
Now call your Twilio number again, and after the call has been completed, you should see the callback logs in CloudWatch:

You received this message when the call status changed to “completed”.
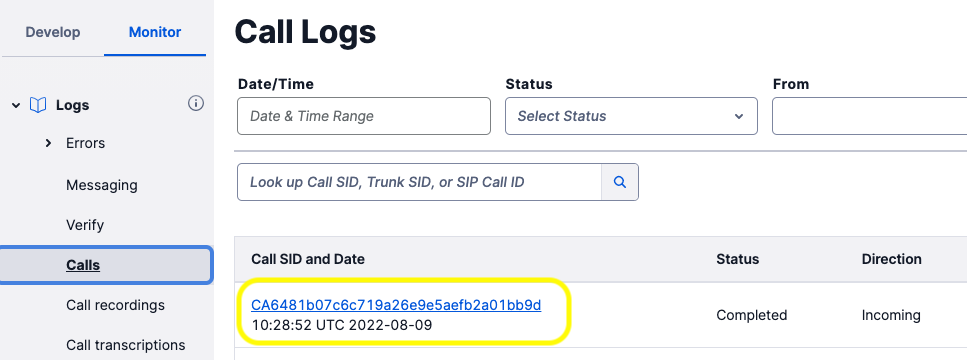
You can also use the Twilio console to view all call logs: Click Monitor → Calls on the left pane.
Locate the call in the list and click the Call SID link to view the details.
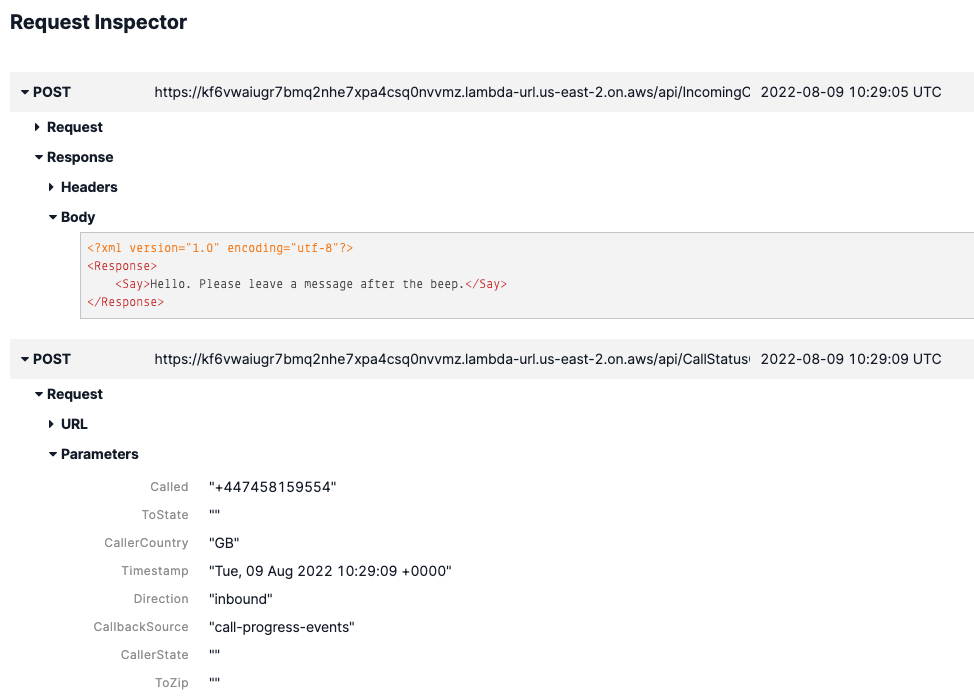
In the Request Inspector section, you can see all the callbacks with their requests and responses in detail:
Next, you will look into the third and final type of voice webhook: Recording Status Updates.
Receive Recording Status Updates
Create a new controller called RecordingStatusChangeController and replace its contents with the code below:
Similar to the status change handler, this code only logs some request details. Once you’ve seen all webhooks are working fine, you will update the implementation with more meaningful code.
You also need to modify the IncomingCallController and replace the code in the Index method as below:
Now you’re telling Twilio that you’d like to record the phone call. You are also specifying the webhook URL that will receive the recording status update. Unlike the other webhook types, there is no field in the Twilio console to set the recording status callback.
Deploy this update and call your number again. This time you should be able to leave a message after the beep. Once you've done that, check your CloudWatch logs, and you should see two status updates: One for the call status and one for the recording status:
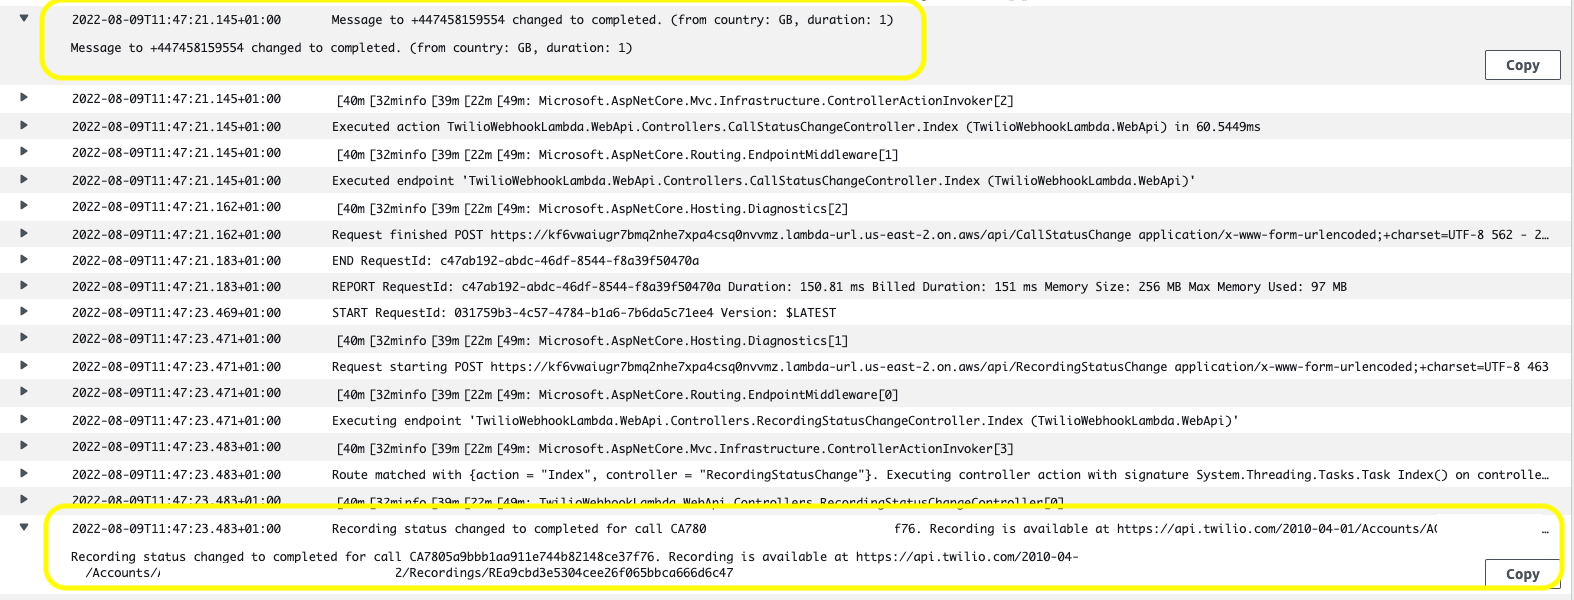
As you can see in the logs, the recording URLs are public by default, but the recordings have long random names, so they cannot be iterated through and downloaded by unauthorized parties. To increase the security of the recordings, you can enable Enforce HTTP Auth on Media URLs and Voice Recording Encryption options in Voice Settings in your account.
Save Recording MP3 files to an Amazon S3 Bucket
Now let's see how you can retrieve the recording file and upload it to an Amazon S3 bucket from your ASP.NET Core project.
First, you will need an S3 bucket to store the files. To create the bucket, go to AWS Management Console and search for S3:

Then, click the link to go to the S3 service dashboard.
Click Create Bucket button:

Give it a descriptive and globally unique name, accept all the defaults and click the Create Bucket button at the bottom of the screen.
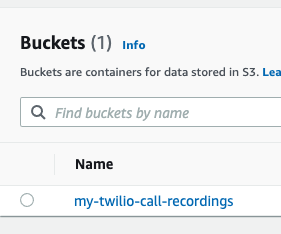
You should see your bucket in the bucket list:
In your application, you need to install the AWS SDK packages to talk to the Amazon S3 API.
In the terminal, run the following command:
Update the RecordingStatusChangeController code as below:
Make sure to set the bucketName with your bucket’s name.
In this code, when you receive the recording URL, you extract the recording file name, retrieve the file content via a stream and pass the stream to S3 TransferUtility which uploads it to the Amazon S3 bucket as {fileName}.mp3.
During the setup process, you didn’t explicitly tell AWS that your Lambda function should have access to your S3 bucket. So you might be wondering how you have permission to do that. The reason is you chose AWSLambdaExecute policy to be attached to your function’s role. So if you go to the IAM dashboard and search AWSLambdaExecute, you should see the policy’s permissions are defined like this:
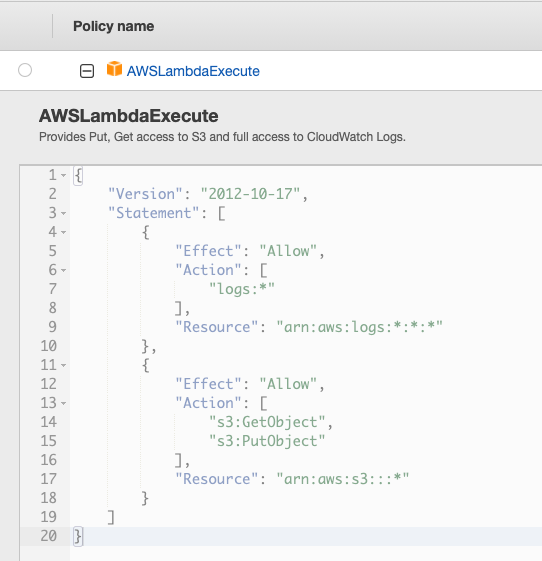
You can see that this policy has permission to put objects into all S3 buckets. Since this is a demo project, I decided to keep things simple. However, in production, I’d recommend writing your own policy and giving the minimum required permissions, such as using the names of the resources instead of using wildcards. You can read more on that here: IAM Best Practices: Apply least-privilege permissions
Deploy the final version of the API and call your number again.
A short while after you’ve completed the call, you should see the recording in your bucket:

Conclusion
Congratulations! You covered three types of webhooks for the Twilio Voice service and implemented handlers for all of them. In addition, you managed to download recordings to your own storage. Later on, you can download or move the files to cold storage using Amazon S3 Glacier. The possibilities are endless when you can manage all of this programmatically. For example, you could use Amazon Transcribe to transcribe the call recording to text, or you could use Twilio's transcribe attribute on the record-verb.
If you didn’t follow along and implement the project, don’t worry. You can always download the final project from my GitHub repository and experiment on your own.
If you enjoyed playing with call recordings and webhooks using Twilio API, I’d recommend you take a look at these articles as well:
- How to use Twilio SMS and Voice with a .NET 6 Minimal API
- Organize Incoming Email Attachments with C# and ASP.NET Core using Twilio SendGrid Inbound Parse Webhook
- Use Visual Studio Port Tunneling to handle Twilio Webhooks
Volkan Paksoy is a software developer with more than 15 years of experience, focusing mostly on C# and AWS. He’s a home lab and self-hosting fan who loves to spend his personal time developing hobby projects with Raspberry Pi, Arduino, LEGO and everything in-between.
Related Resources
Twilio Docs
From APIs to SDKs to sample apps
API reference documentation, SDKs, helper libraries, quickstarts, and tutorials for your language and platform.
Resource Center
The latest ebooks, industry reports, and webinars
Learn from customer engagement experts to improve your own communication.
Ahoy
Twilio's developer community hub
Best practices, code samples, and inspiration to build communications and digital engagement experiences.