Send Serverless Emails using SendGrid and Twilio Functions
Time to read: 2 minutes
November 20, 2019
Written by

Software developers are moving away from the expensive, traditional, server-based architecture platforms and shifting towards the trendy serverless applications. This new way of developing applications is event-driven, cheaper in comparison to the operating costs of maintaining a server, offers a quick way of deploying functions and allows businesses to pay for only what they use.
In this tutorial, you will learn how to send emails using Twilio Functions and SendGrid.
Project Setup
To complete this tutorial you will need the following:
Getting Started
After creating a free account on Twilio, install the Twilio CLI which enables you to develop and deploy functions locally. To install the tool, run the following command in your console window.
NOTE: This command is specific to Mac users. If you are on a different platform, you can find the setup instructions here.
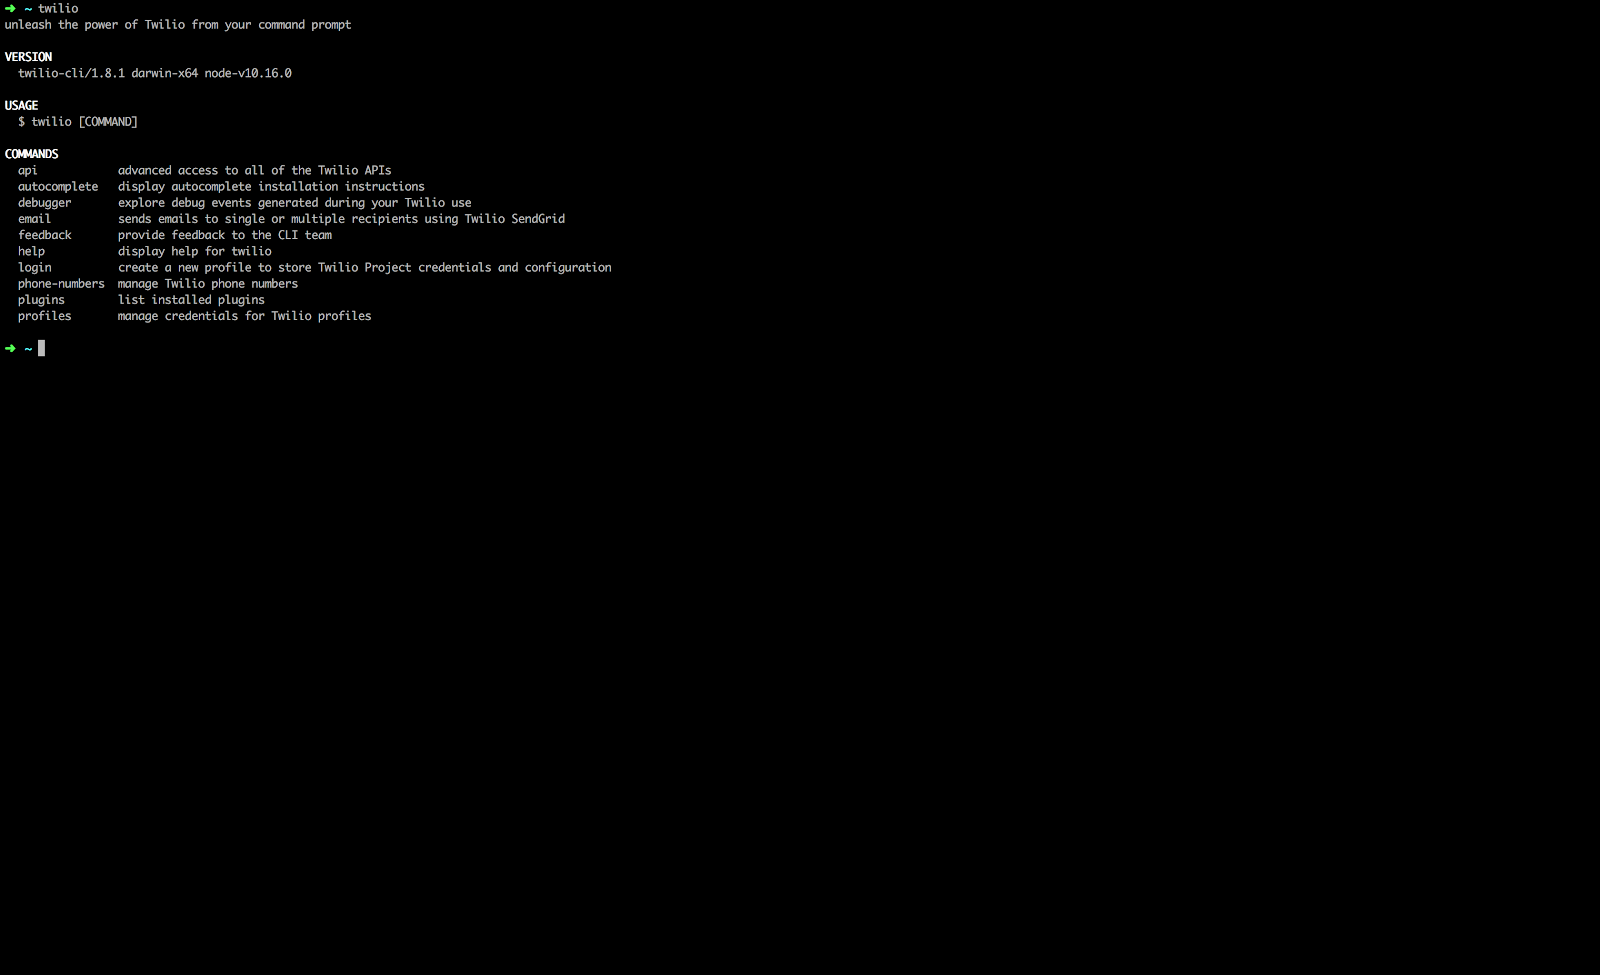
To confirm a successful installation of the tool, type twilio on your console and a similar screen should appear.
A clean installation of the Twilio CLI doesn’t have the serverless commands. In order to obtain this, run the following command to install the serverless plugins:
Log in to your Twilio account in the console and create an API key by running twilio login. You will be prompted for your Twilio Account SID and Auth Token which can be obtained from your Twilio console.
Obtaining SendGrid API Key
You’ll need a SendGrid API key in order to send your emails. Create an account with SendGrid, then navigate to the API Keys section under settings to create one. Be sure to select the Full Access option like shown below:
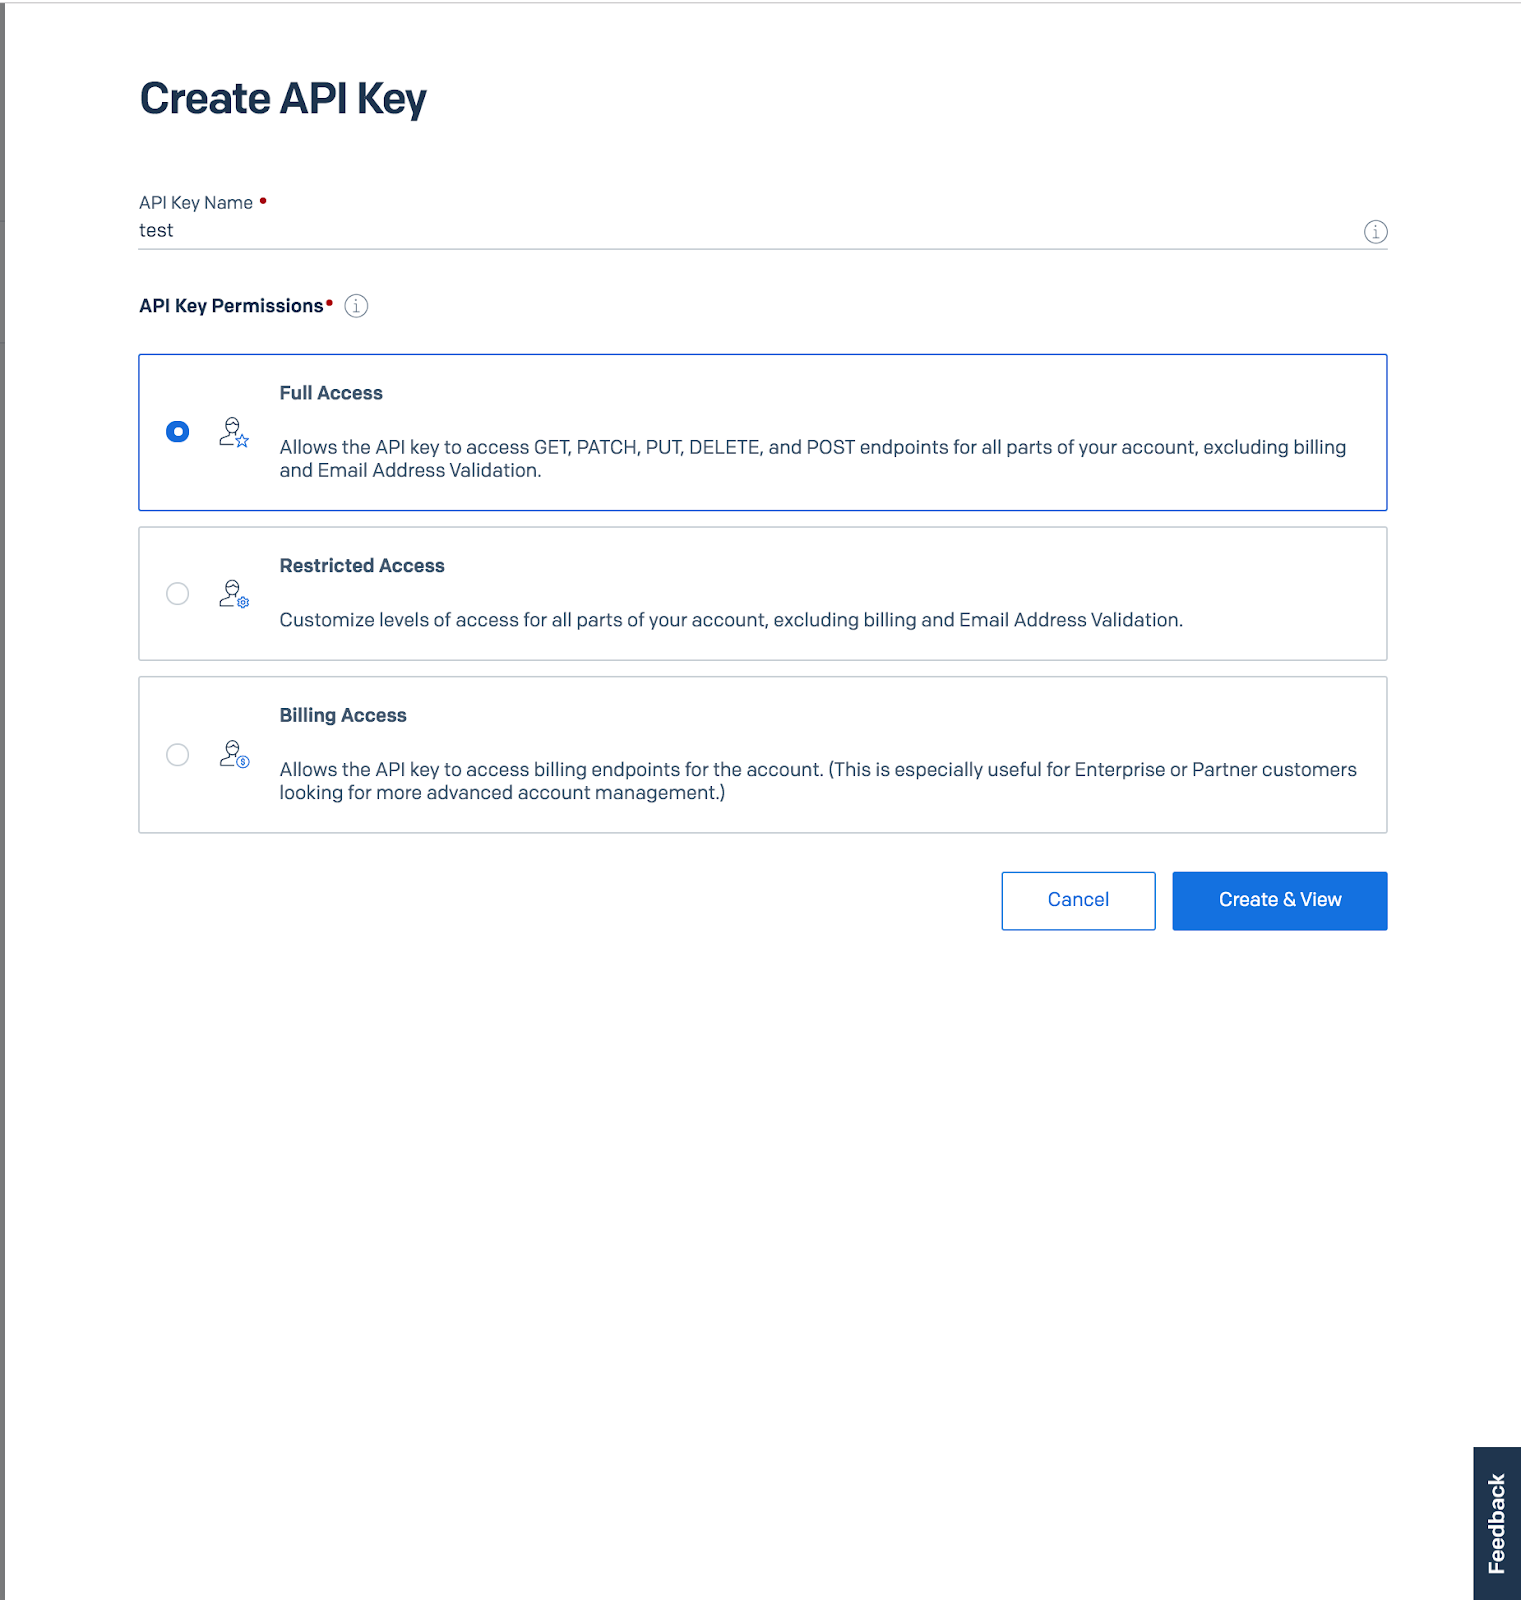
Take note of the API Key created since we are going to use it later.
Project Setup
On a new terminal window, run the following commands:
These commands have created our functions project with the name demo-email and cleared the boilerplate code under the functions folder since we will create our function from scratch. Before we get to the exciting part, add the following keys in the .env file created.
Be sure to check the Enable ACCOUNT_SID and AUTH_TOKEN checkbox in the configuration.
Creating Our Server Function
Add the following few lines of code inside our mail.js file.
In the snippet above, a function is exported while passing three arguments whose main purpose are:
context- an object that provides access to environment variables and helper methods within the Twilio functions execution environment.event- an object containing request parameters passed into your function.callback- a function that is invoked at the end of execution.
Inside the function, we are leveraging the @sendgrid/mail npm package to help us send emails via SendGrid.
Ensure to change the to key inside the message object to your own email.
Deploying and Testing Our Function
In your console, run the following command:
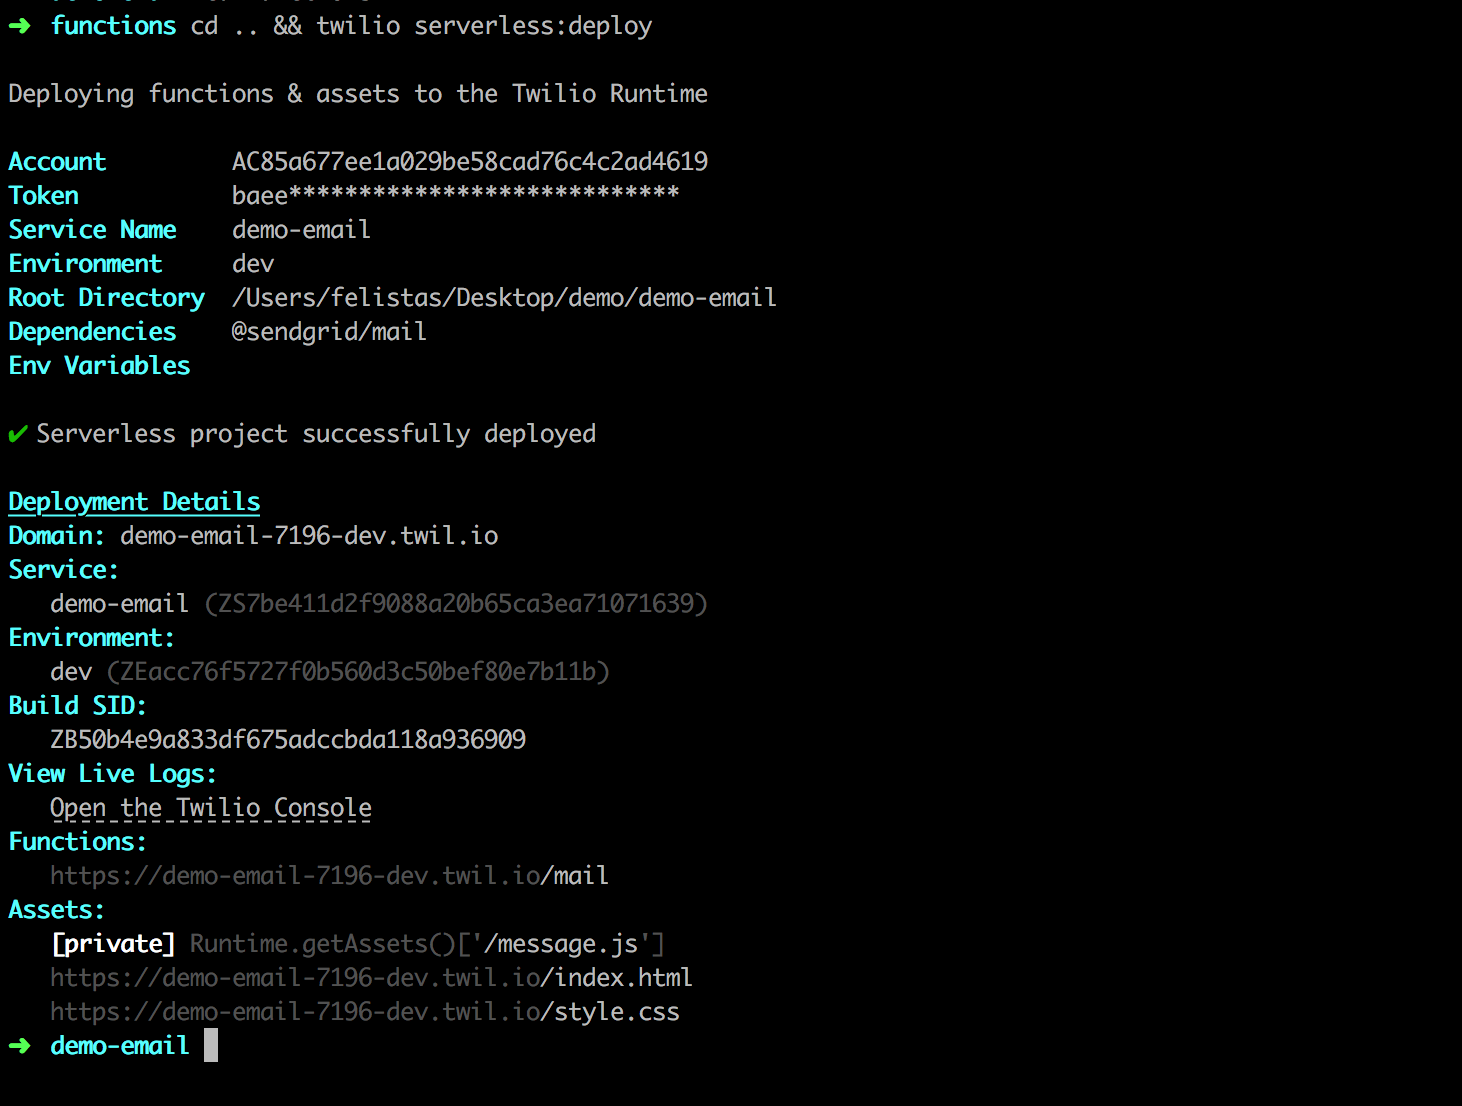
After a successful deployment, you should see a screen similar to the one below:
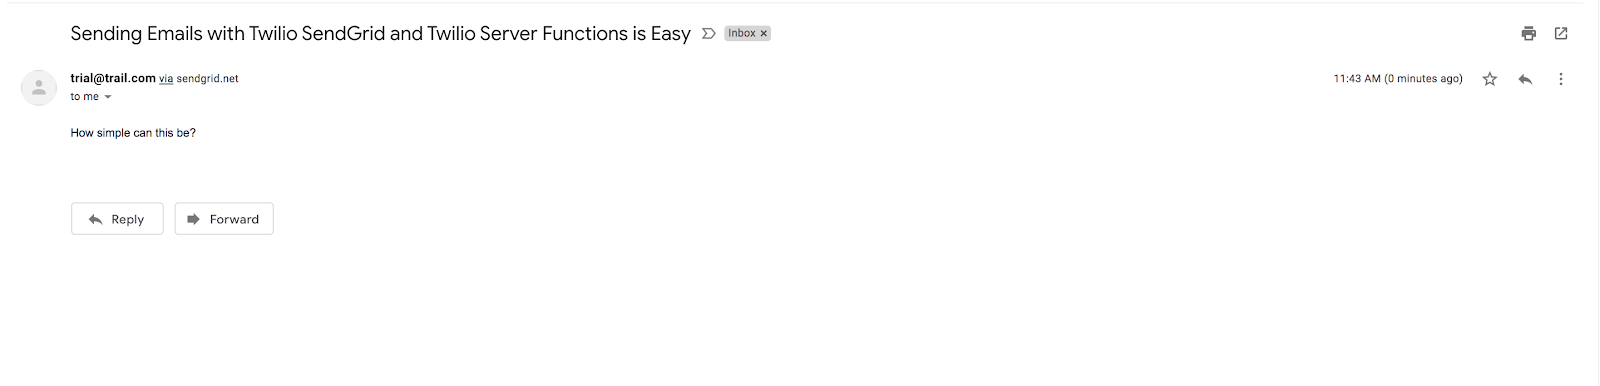
Copy the URL under Functions and paste it in your browser. You should expect to receive an email.
Testing Locally
In order to test your function locally, change the code to:
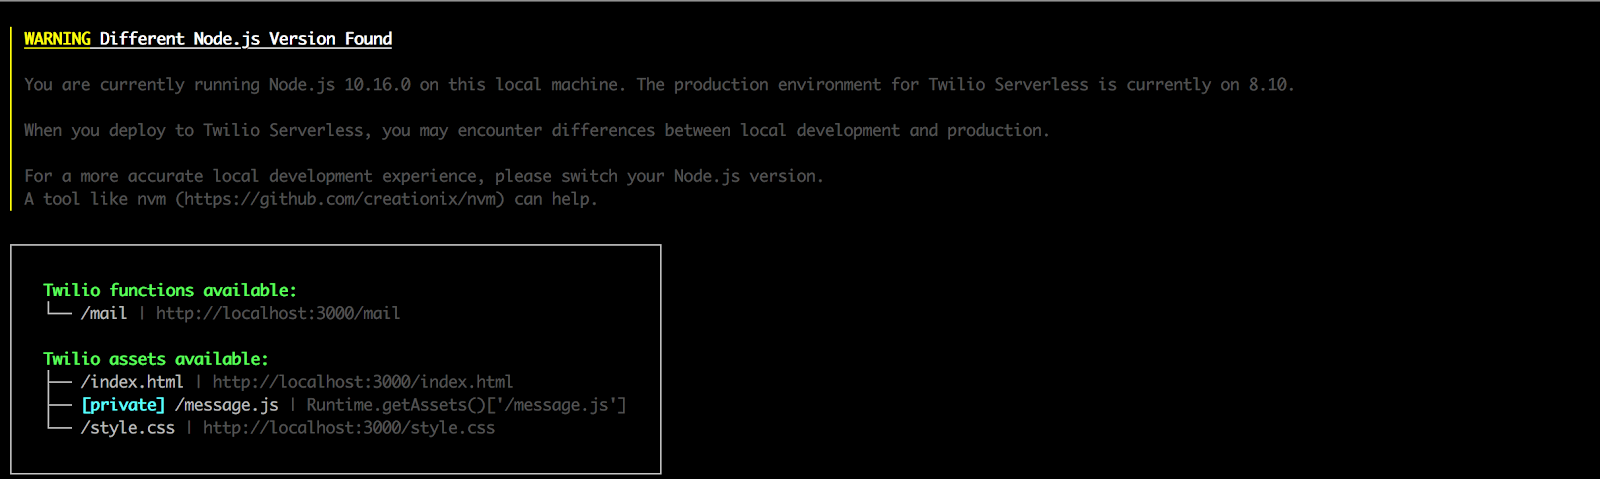
Run twilio serverless:start and copy the mail functions URL as shown below and paste in your browser.
And voila, you have a new email in your inbox!
Conclusion
In this tutorial, you have learned how to send a serverless email using Twilio SendGrid and Twilio Functions. I would love to hear from you. Happy hacking!

Related Resources
Twilio Docs
From APIs to SDKs to sample apps
API reference documentation, SDKs, helper libraries, quickstarts, and tutorials for your language and platform.
Resource Center
The latest ebooks, industry reports, and webinars
Learn from customer engagement experts to improve your own communication.
Ahoy
Twilio's developer community hub
Best practices, code samples, and inspiration to build communications and digital engagement experiences.