Send an SMS with Vue and Twilio Functions
Time to read: 6 minutes
December 01, 2021
Written by
Reviewed by

In this article you’ll learn how to send an SMS using Vue 3 on the front end and Twilio Functions on the backend. Because Vue is a front end framework, you’ll use Twilio functions to handle sending a message and to avoid exposing your Twilio credentials.
To demonstrate these concepts, you’ll build a Vue app with a button. When the button is clicked, a POST request will be made to your API. The API will send a message and then return a response back to your Vue application.
Prerequisites
In order to follow along with this tutorial, you’ll need these tools and technologies:
- npm or yarn
- Node.js installed on your machine
- A free Twilio account (if you sign up with this link, we’ll both get $10 in Twilio credit when you upgrade!)
- A Twilio phone number
Create your API with Twilio Functions
Create a new Function Service
Twilio Functions is a serverless environment that lets you deploy backend services without the overhead of setting up a server. Twilio Functions is especially convenient because it includes your Twilio Account SID and Auth Token as environment variables out of the box.
To create an API with Twilio Functions, you have to first create a Function Service. A Service is a collection of functions and resources that create a cohesive development environment.
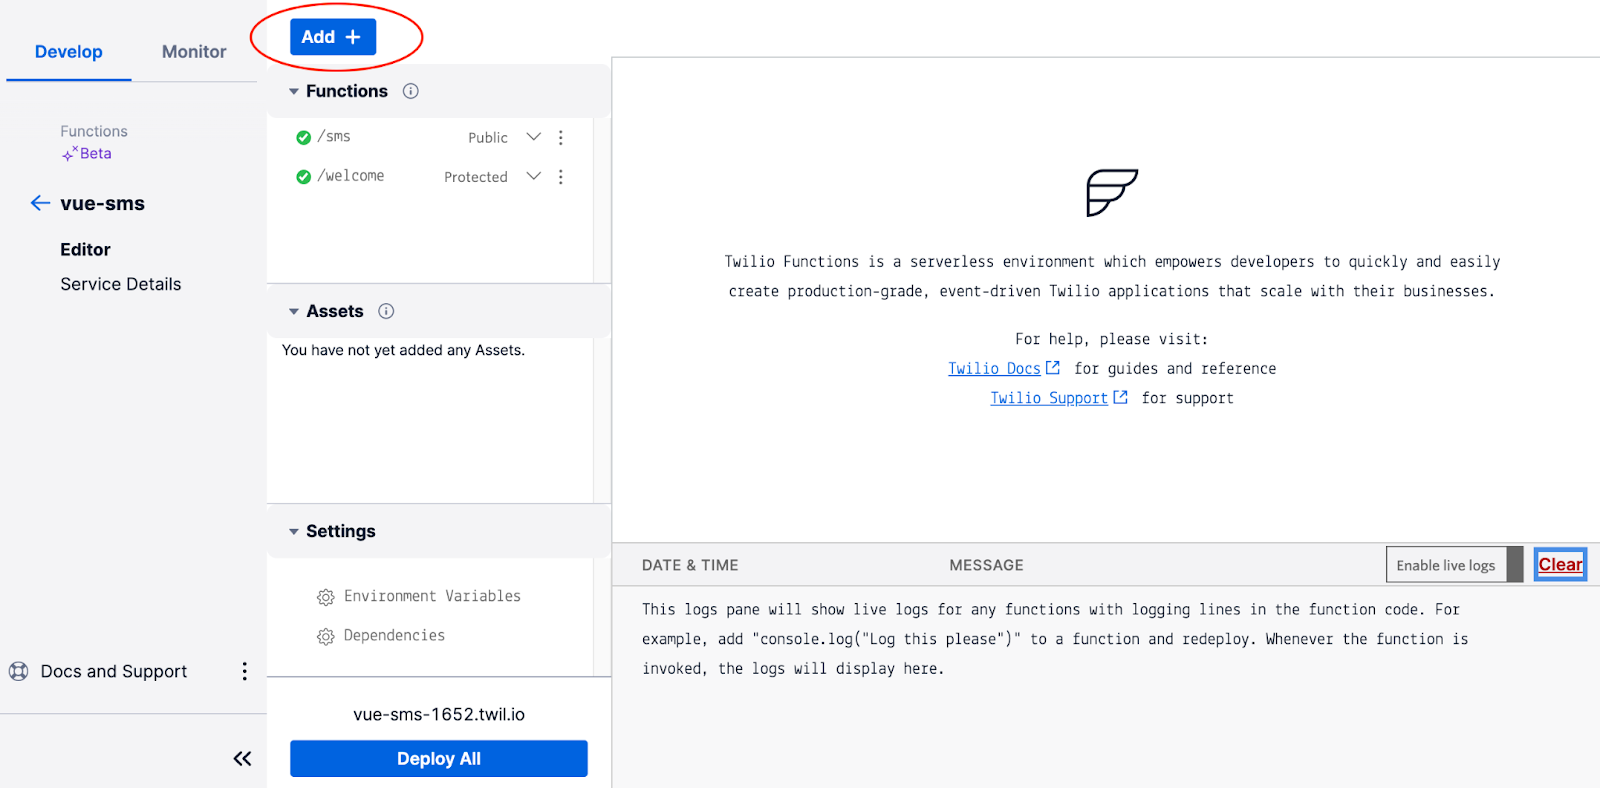
To get started, navigate to the Functions section of the Twilio Console. Click the Create Service button, and when prompted, give your service the friendly name “vue-sms” and then click Next.
This will take you to your new Service’s dashboard, where you can create functions as part of your Service.
Click the Add + button toward the top of the screen, as shown below, and then click Add Function. This will create a new function. Change the path name of your new function to /sms.
Write your Function
After a moment, you’ll see a new tab open in the editor on the right side of your screen. This is where you can edit your function. Delete all the boilerplate code inside.
Copy and paste the following code into the editor to create a shell for your function:
This creates a new async function with three parameters: context, event, and callback. context is an object that gives you access to the Twilio Node.js helper library. The event object is used to access any request data.
Inside your function, add the following two variables, as shown in the highlighted lines:
In the code above, twilioClient is an instance of the Twilio Node.js REST Client, and messageDetails is an object that includes import details about the SMS message you’re going to send:
bodyis the content of the messagetois your personal phone number - be sure to use E.164 formattingfromis your Twilio phone number
Be sure to change the placeholder values for both phone numbers in the code above before moving on.
Because your Vue app is not running on the same domain as your Twilio Function, you’ll need to enable CORS to send a response back to your Vue app. Beneath the messageDetails variable, inside your function, add the following code:
Now you’ll add the code to send your message. Beneath the existing code, still within your function, add the following:
This code uses the Twilio Client to send the message and then returns a response with either a success message or an error.
Click the Save button beneath the editor.
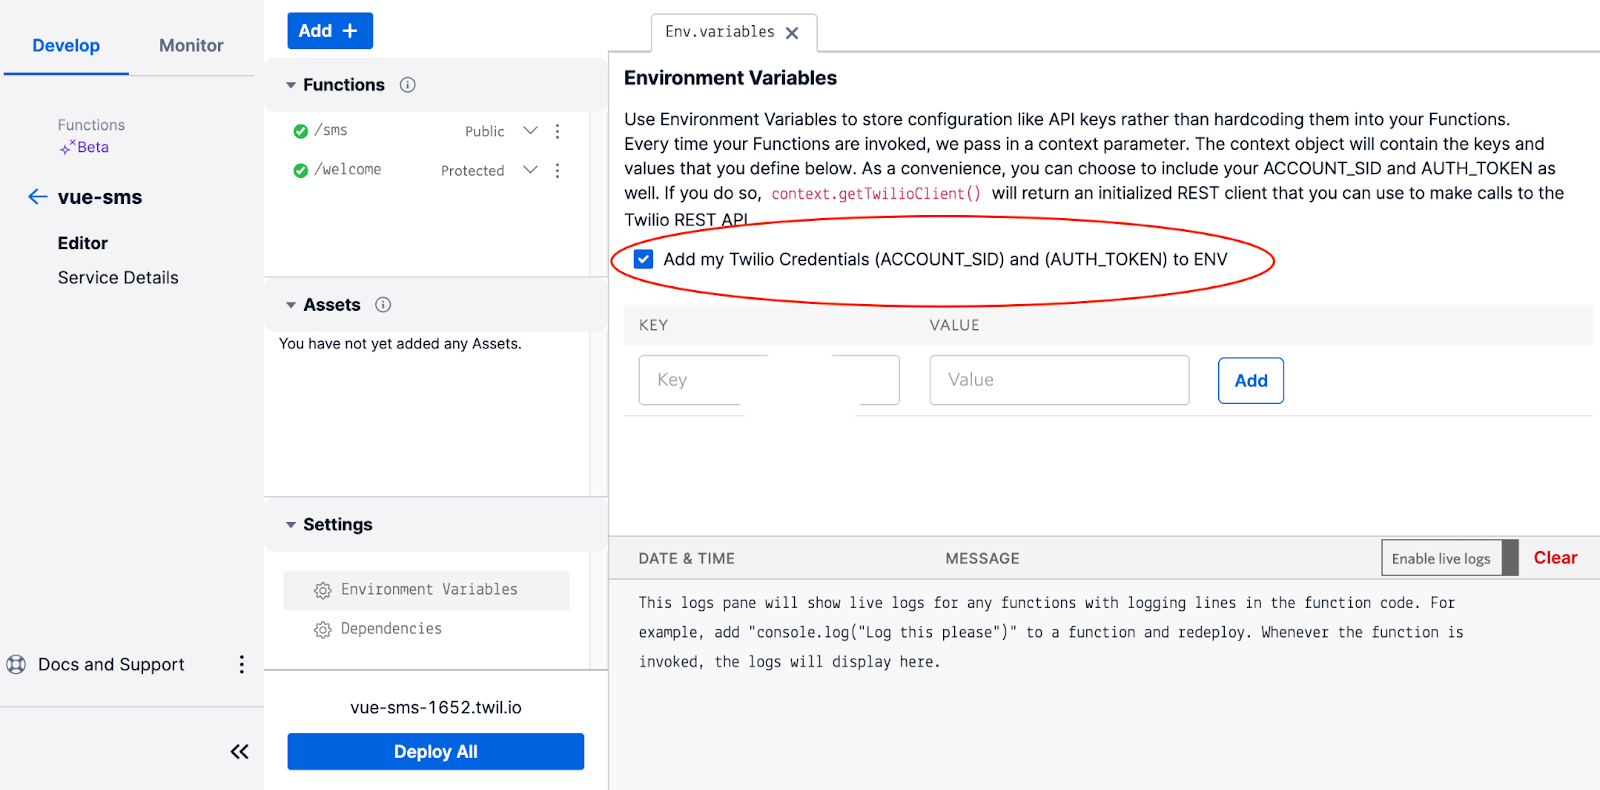
Along the left hand menu of your Function Service dashboard, look under the Settings heading for Environment Variables. Click Environment Variables and make sure the checkbox is checked next to the line that says “Add my Twilio Credentials (ACCOUNT_SID) and (AUTH_TOKEN) to ENV”. This will ensure that twilioClient will be initialized correctly with your credentials.
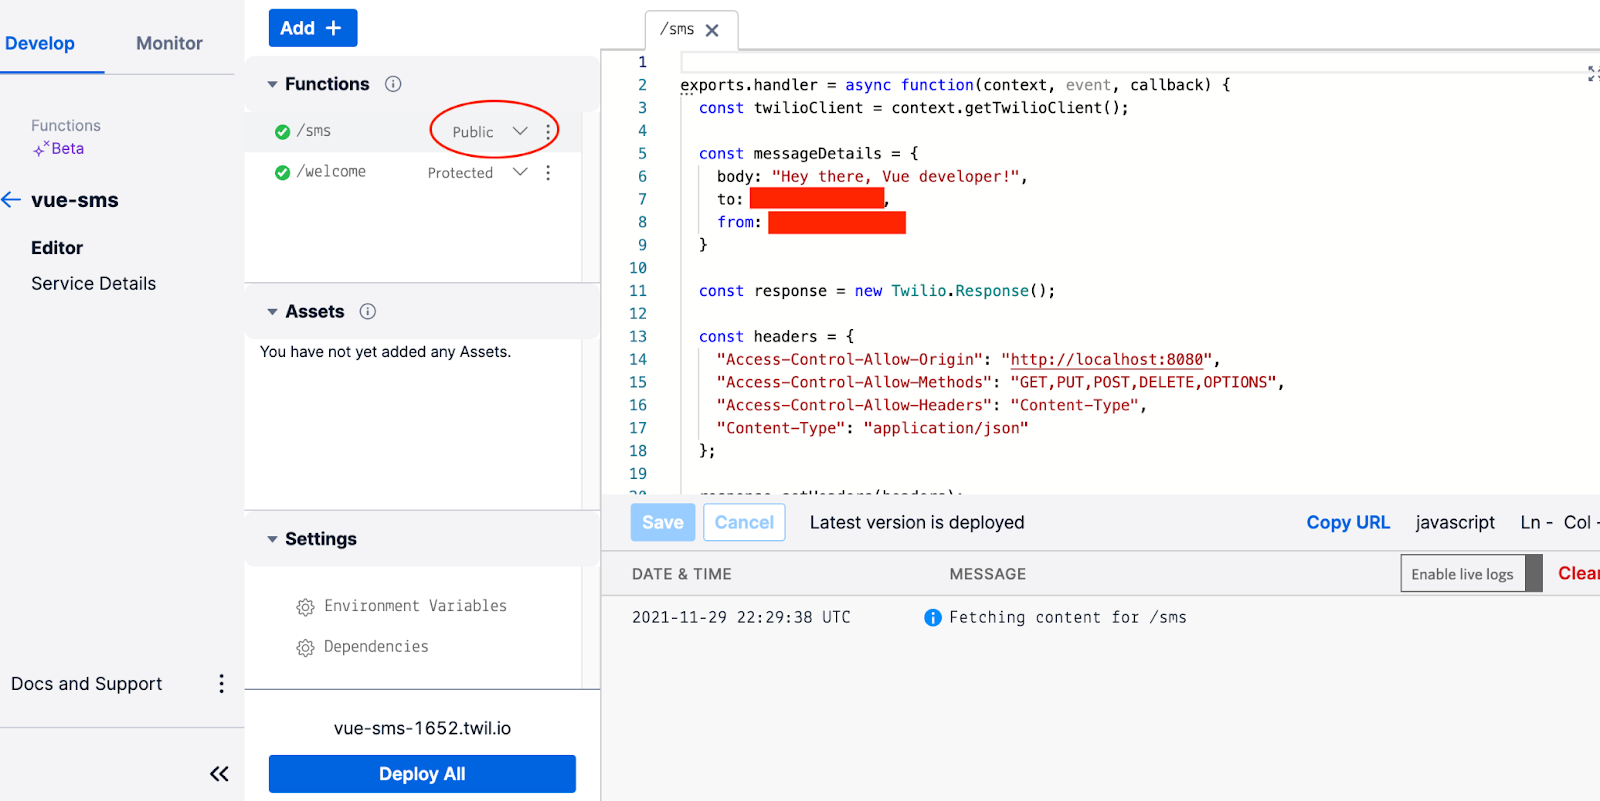
Before deploying, click the drop down next to your function’s path name under the Functions heading and select “Public”.
Then, to the right of the drop down, click the three vertical dots and then click Copy URL. This URL is the endpoint you’ll make a POST request to in your Vue app.
Store this URL in a handy location for now. It should look like this:
To finish your API, click Deploy All at the bottom of the screen.
Create your Vue app
Scaffold the app
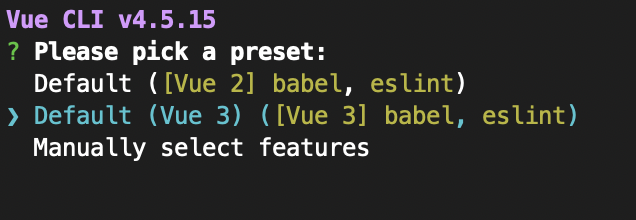
Now it’s time to switch gears and create your Vue app. Open up a new terminal window. To scaffold a basic Vue app, you’ll first need to globally install the vue-cli. Run the following commands to install vue-cli and create a basic Vue application:
Choose the Vue 3 preset:
Change directory into your new vue-sms folder and run the application:
Confirm the application is running at localhost:8080:
Add your HTML and CSS
Once that’s done, open the vue-sms/src folder and look for a file called App.vue. Open this file in your favorite text editor. In Vue, you write the HTML, CSS, and JavaScript for your component all in one file, called a Single File Component. App.vue is your application’s main component file.
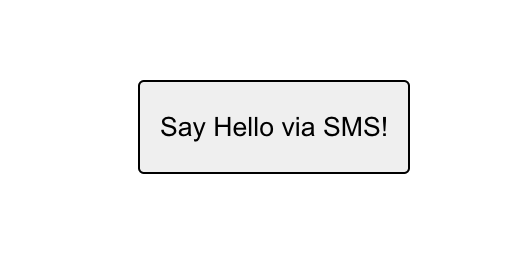
App.vue renders one component, called <HelloWorld/>. You’ll reuse this component to create a button to send an SMS. First, delete the Vue logo image tag, as well as the msg attribute on the <HelloWorld/> component. Save this file when you’re done.
Next, open the HelloWorld component at vue-sms/components/HelloWorld.vue. Delete everything inside in the <template> tags. Delete everything inside the <style> tags as well.
Copy and paste the following code into the template tags to create a <button> element:
Then, in the style tags:
Save your file.
Head back to your terminal and run the following command to start your local server if it’s not currently running:
Once your server starts, visit http:localhost:8080 in your browser to see your app so far.
Add your JavaScript
Back in HelloWorld.vue, notice the object being exported between the script tags of the single file component. This object is the core of the HelloWorld component, where you can access many of Vue’s options. This is where you’ll add your JavaScript.
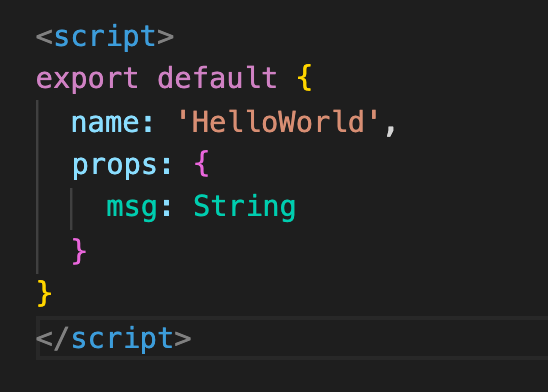
Delete the props key:value pair, as you won’t need it for the app.
Under name, add a data() property to your Vue component. The data() property is used to hold your component’s state. It must be a function that returns an object. Add a piece of state called status, and set its value to an empty string. You’ll use this piece of state in a moment.
Under the data() property, add a methods object. The methods object is where you’ll handle click events and other application functionality. Methods you define here are automatically available in your component template.
Inside the methods object, add an asynchronous function called handleClick().
You’ll make your POST request to your API from inside the handleClick() method. Grab the URL you saved for your /sms API endpoint (something like https://vue-sms-XXXX.twil.io/sms); you’ll use it now.
Inside your handleClick() method, add the following code:
This code updates the status state you created earlier to the status returned from the API call. It will be used to display a message to the user letting them know whether the message was sent successfully or not.
The handleClick() function will be called when the <button> is clicked, and this is where your POST request is made (see highlighted line 2). Be sure to change the URL in the fetch() method to reflect your actual endpoint.
Connect your HTML and JavaScript
With your click handler in place, it’s time to let the <button> element know how to respond when it’s clicked. You do this with Vue’s v-on: directive.
Edit your <button> element toward the top of HelloWorld.vue so it looks like this:
And then, right below your <button>, inside the <div> element, add a <p> element for the status state:
Save your file.
Test your work
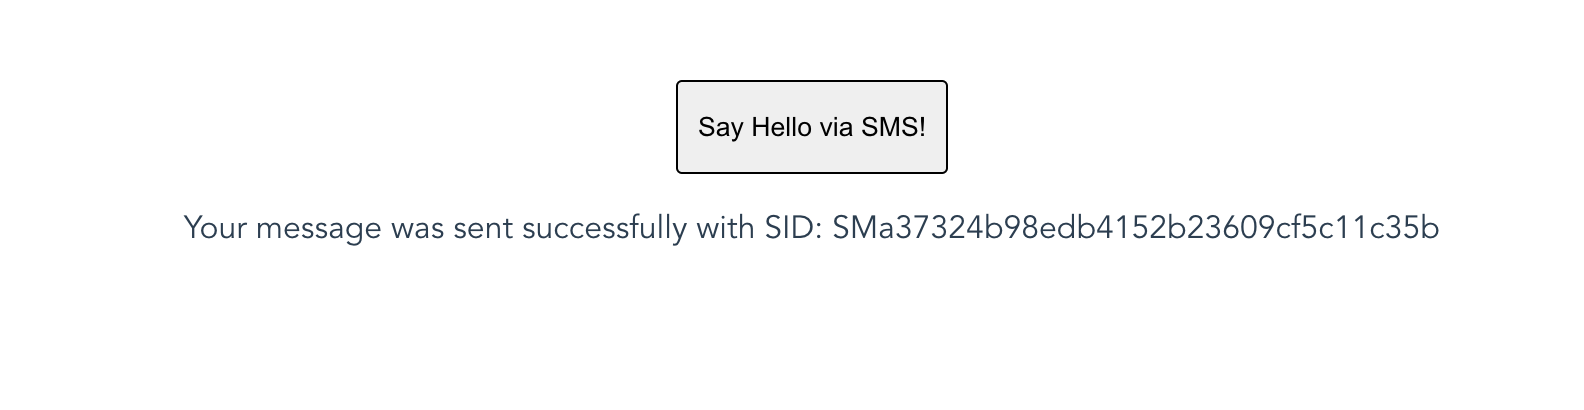
Restart your server if needed and head back to your browser. Click the button. In a few moments, you’ll receive an SMS on your personal phone number that says “Hey there, Vue developer!”
The UI of your Vue app will also update to show a success status that includes the SID of the message that was sent:
Conclusion
If you’re going to use Twilio to send an SMS from a JavaScript framework, it’s very important that you create an API in order to protect your Twilio credentials. I hope you enjoyed this demonstration of how you can do that in your Vue app using Twilio Functions.
Treasure Porth is a software engineer and technical writer based in Portland, OR. Say hi on Twitter.


Related Resources
Twilio Docs
From APIs to SDKs to sample apps
API reference documentation, SDKs, helper libraries, quickstarts, and tutorials for your language and platform.
Resource Center
The latest ebooks, industry reports, and webinars
Learn from customer engagement experts to improve your own communication.
Ahoy
Twilio's developer community hub
Best practices, code samples, and inspiration to build communications and digital engagement experiences.