Add an Interpreter to a Telehealth App with VOYCE and Twilio Programmable Video

November 09, 2020
Written by
Xiang Xu
Contributor
Opinions expressed by Twilio contributors are their own

VOYCE Interpreter Telehealth Room

This article is for reference only. We're not onboarding new customers to Programmable Video. Existing customers can continue to use the product until December 5, 2024.


We recommend migrating your application to the API provided by our preferred video partner, Zoom. We've prepared this migration guide to assist you in minimizing any service disruption.

Xiang Xu from VOYCE joins us today for this guest post on how to add VOYCE’s interpreter capabilities to a telemedicine waiting room and video chat app.

VOYCE provides remote video interpretation services to the health care, legal, and business communities. Our professional, qualified, and medically trained interpreters service 220+ languages and dialects. Our platform can tightly integrate with Twilio Programmable Video and Programmable Voice.

This post will show you how to add VOYCE’s interpretation services to a Twilio Programmable Video telemedicine room. A medical provider can add an interpreter to the room with a single click of a button.

At a high level, here are the steps we’ll be following:

  • Generate a Twilio Video token for a VOYCE interpreter
  • Set up a basic front end user interface for the VOYCE service
  • Build an integration with the VOYCE service related core APIs

If you’d like to skip straight to the code, the whole project is on GitHub.

Prerequisites

Before you can complete the build today, you'll need to have a VOYCE sandbox account and a telemedicine app built.

Once you have your sandbox account and the telemedicine app is working correctly, you're ready to add the interpreter integration.

Add interpreter integration to the telemedicine app

Once you’ve finished setting up your telemedicine waiting room with Twilio Programmable Video, these steps will help you add the VOYCE interpretation service into your telemedicine waiting room.

In production, you'll need to architect your application to run on a secure server with appropriate authentication. Read more in Twilio's Architecting for HIPAA guide.

Set up your environment with a VOYCEToken

You will have a .env file already in the directory if you finish building the Twilio Video Room. Please add another variable, VOYCE_TOKEN, into the file to store the VOYCE credentials for the back end.

You should have a file that looks something like this:

TWILIO_ACCOUNT_SID=ACXXXXXXXXXXXX
TWILIO_API_KEY=SKXXXXXXXXXXX
TWILIO_API_SECRET=XXXXXXXXXXXXXXXXX
VOYCE_TOKEN=XXXXXXXXXXXXXXXXX

Add an interpreter request button on the provider page

Let’s start with a front end change. Please copy the following code to replace the code currently in the provider.html file.

<!DOCTYPE html>
<html>
  <head>
    <title>Owl Hospital Telemedicine App</title>
    <link rel="stylesheet" href="index.css" />
  </head>

  <body>
    <h1>🦉 Welcome to Owl Hospital Telemedicine 🦉</h1>
    <p>Thanks for caring for our patients <3</p>
  </body>
  <button id="join-button">Join Room</button>
  <button id="leave-button" class="hidden">Leave Room</button>
  <button id="Mute-button">Mute</button>
  <button id="Unmute-button" class="hidden">Unmute</button>
  <button id="Pause-button" >Pause</button>
  <button id="Unpause-button" class="hidden">Unpause</button>
  <button id="find-interpreter-button">Add Interpreter</button>
  <button id="finish-button" class="hidden">Finish Interpretation</button>

  <div class="status" style="display:none" id="request_status"></div>
  <div style="display:none" id="reqeust_estimation_time"></div>

  <div id="local-media-container"></div>
  <script src="//media.twiliocdn.com/sdk/js/video/releases/2.3.0/twilio-video.min.js"></script>
  <script src="https://code.jquery.com/jquery-3.5.1.min.js" integrity="sha256-9/aliU8dGd2tb6OSsuzixeV4y/faTqgFtohetphbbj0=" crossorigin="anonymous"></script>
  <script src="./index.js"></script>
  <script>
    const joinButton = document.getElementById("join-button");
    joinButton.addEventListener("click", async (event) => {
      await joinRoom(event, "provider");
    });

    const leaveButton = document.getElementById("leave-button");
    leaveButton.addEventListener("click", onLeaveButtonClick);

    const findInterpreterButton = document.getElementById("find-interpreter-button");
    findInterpreterButton.addEventListener("click", findInterpter);

    const finishButton = document.getElementById("finish-button");
    finishButton.addEventListener("click", finishRequest);

    const Mutebutton = document.getElementById("Mute-button");
    Mutebutton.addEventListener("click", mute);

    const Unmutebutton = document.getElementById("Unmute-button");
    Unmutebutton.addEventListener("click", unmute);

    const Pausebutton = document.getElementById("Pause-button");
    Pausebutton.addEventListener("click", pause);

    const Unpausebutton = document.getElementById("Unpause-button");
    Unpausebutton.addEventListener("click", unpause);
  </script>
</html>

Here, we import Twilio’s client-side Video SDK and the jQuery Library as well as the JavaScript file from the telemedicine app build. Then, we implement all the click handling functions for the buttons to do the right thing when the provider enters and leaves.

Different from the previous app, we also add a button to add an interpreter to the call. This we'll eventually wire up to VOYCE.

Add a VOYCE interpreter into the video room

This section will show you how to add the VOYCE functionality to index.js, needed for the HTML file we just edited.

Open up public/index.js and replace what’s in there with the code from the following blocks – I’ll explain what’s going on in turn. (You can also find the code in the repo).

Twilio room related setup

This section at the top of the file will set up the Twilio video room, and wire up the buttons with their advertised behavior.  

let room;
let interpreter_token;
let requestId;
let preInviteToken;
let url;
let child;
var timer;
const joinRoom = async (event, identity) => {
  const response = await fetch(`/token?identity=${identity}`);
  const jsonResponse = await response.json();
  const token = jsonResponse.token;
  const Video = Twilio.Video;
  const localTracks = await Video.createLocalTracks({
   audio: true,
   video: { width: 640 },
  });
  try {
     room = await Video.connect(token, {
      name: "telemedicineAppointment",
    tracks: localTracks,
   });
  } catch (error) {
   console.log(error);
  }
 
  // display your own video element in DOM
  // localParticipants are handled differently
  // you don't need to fetch your own video/audio streams from the server
  const localMediaContainer = document.getElementById("local-media-container");
  localTracks.forEach((localTrack) => {
    localMediaContainer.appendChild(localTrack.attach());
  });
 
  // display video/audio of other participants who have already joined
  room.participants.forEach(onParticipantConnected);
 
  // subscribe to new participant joining event so we can display their video/audio
  room.on("participantConnected", onParticipantConnected);
 
  room.on("participantDisconnected", onParticipantDisconnected);
 
  toggleButtons();
  await generatorInterpreterToken("interpreter");
  event.preventDefault();
};
 
// when a participant disconnects, remove their video and audio from the DOM.
const onParticipantDisconnected = (participant) => {
  const participantDiv = document.getElementById(participant.sid);
  participantDiv.parentNode.removeChild(participantDiv);
};
 
// when a participant connected, add their tracks
const onParticipantConnected = (participant) => {
  const participantDiv = document.createElement("div");
  participantDiv.id = participant.sid;
 
  // when a remote participant joins, add their audio and video to the DOM
  const trackSubscribed = (track) => {
    participantDiv.appendChild(track.attach());
  };
  participant.on("trackSubscribed", trackSubscribed);
 
  participant.tracks.forEach((publication) => {
   if (publication.isSubscribed) {
      trackSubscribed(publication.track);
   }
  });
 
  document.body.appendChild(participantDiv);
 
  const trackUnsubscribed = (track) => {
    track.detach().forEach((element) => element.remove());
  };
 
  participant.on("trackUnsubscribed", trackUnsubscribed);
};
 
//leave the room
const onLeaveButtonClick = (event) => {
  room.localParticipant.tracks.forEach((publication) => {
   const track = publication.track;
   // stop releases the media element from the browser control
   // which is useful to turn off the camera light, etc.
   track.stop();
   const elements = track.detach();
    elements.forEach((element) => element.remove());
  });
  room.disconnect();
 
  toggleButtons();
  // close the voyce interpretation service before you leave the video room
  if(requestId != null && requestId != ""){
   finishRequest();
  }
};
 
//hide leave/join buttons
const toggleButtons = () => {
  document.getElementById("leave-button").classList.toggle("hidden");
  document.getElementById("join-button").classList.toggle("hidden");
};

In the code above, we implement functions including joining the room, and setting up a callback for a participant joining and leaving the video room. The user can join the video room by clicking the join button, and when other participants join the video room their audio and video track will be added to the web page.

VOYCE related setup

In the next step, we’ll add the interpretation service into our project. In the following code, we will generate a video token for VOYCE’s interpreter to join the video room and send the token, video room name and other related information to VOYCE API calls.

Paste this code after the code from the above section.

//hide/show voyce interpretation buttons
const toggleFindButtons = () => {
  document.getElementById("find-interpreter-button").classList.toggle("hidden");
  document.getElementById("finish-button").classList.toggle("hidden");
};

//Generate a twilio video token for the interpreter and send to VOYCE's server
const generatorInterpreterToken = async (identity) => {
  const response = await fetch(`/token?identity=${identity}`);
  const jsonResponse = await response.json();
  interpreter_token = jsonResponse.token;
}

//initialize interpretation service using VOYCE API
const findInterpter = async () => {
  if(interpreter_token == "" || interpreter_token == null){
    //If the room doesn't exist, do not join.
    alert("please join room first");
    return;
  }
  //Post data including the information of the interpretation service and twilio related info
  var postData = {
    "Note": "Test Note",
    "ReferenceId": "",
    "isVideo": true,
    "VideoInfo": {
      "VideoToken": interpreter_token,
      "RoomName": "telemedicineAppointment"
    }
  }
  //Create ajax API call to VOYCE Server
  $.ajax({
    type: "POST",
    url: "/Request/InviteWithoutLangauge",
    data: JSON.stringify(postData),
    headers: {
        'Content-Type': 'application/json'
    },
    success: function(result){
      if(result.Successful){
        //VOYCE response data including PreInviteToken, URL.
        preInviteToken = result.PreInviteToken;
        url = result.URL;
        //Open the URL using a new window.
        child = window.open(url, '_blank', 'location=yes,height=570,width=1024,scrollbars=yes,status=yes');
        //hide/show voyce interpretation buttons
        toggleFindButtons();
        //Create a thread to pull status information about the service just sent.
        statusPulling();
      }else{
        alert(result.Reason)
      }
    },
    dataType: "json"
  });
}

//Create a thread to pull status information about the service just sent.
const statusPulling = () =>{
  var postData = {
    "Token":preInviteToken
  }
  $.ajax({
    type: "POST",
    url: `/Request/StatusByPreInviteToken`,
    data: JSON.stringify(postData),
    headers: {
        'Content-Type': 'application/json'
    },
    success: function(result){
      if(result.Successful){
        // update status/estimation time
        $("#request_status").show();
        $("#request_status").html("Request Status: "+result.Status);
        $("#reqeust_estimation_time").show();
        $("#reqeust_estimation_time").html(result.EstimationTimeString);
        if(result.StatusCodeId >= 2){
          child.close();
        }
      }
    },
    complete:function(){
      timer = setTimeout(function(){
        statusPulling();
      },2000)
    },
    dataType: "json"
  });
}

//Finish the interpretation service if no longer needed.
const finishRequest = () =>{
  $.ajax({
    type: "POST",
    url: `/Request/FinishByPreInvite/${preInviteToken}`,
    success: function(result){
      if(result.Successful){
        alert("request finished")
        requestId = null;
        clearTimeout(timer);
        timer = null;
        $("#request_status").hide();
        $("#request_status").html("");
        $("#reqeust_estimation_time").hide();
        $("#reqeust_estimation_time").html("");
        toggleFindButtons();
        interpreter_token = null;
      }else{
        alert(result.Reason);
      }
    },
    dataType: "json"
  });
}

//switch mute/unmute button UI
const toggleMuteButtons = () => {
    document.getElementById("Mute-button").classList.toggle("hidden");
    document.getElementById("Unmute-button").classList.toggle("hidden");
};

//switch pause/resume button UI
const togglePauseButtons = () => {
    document.getElementById("Pause-button").classList.toggle("hidden");
    document.getElementById("Unpause-button").classList.toggle("hidden");
};

//mute the microphone
const mute = () => {
    var localParticipant = room.localParticipant;
    localParticipant.audioTracks.forEach(function (audioTrack) {
        audioTrack.track.disable();
    });
    toggleMuteButtons();
}

//unmute the microphone
const unmute = () => {
    var localParticipant = room.localParticipant;
    localParticipant.audioTracks.forEach(function (audioTrack) {
        audioTrack.track.enable();
    });
    toggleMuteButtons();

}

In addition to the things I described above the code block, we also implement a mute/unmute and a pause/resume function using Twilio’s SDK. This will let you keep your test clean and quiet.

Now that you have the code in index.js, you can see the whole service lifestyle. These are the steps the app will work through:

  1. Set up a Twilio Programmable Video Room
  2. Generate a Twilio video token for the VOYCE interpreter
  3. Initialize a VOYCE request by sending a Twilio video token and the room name.
  4. Poll the VOYCE request status to display necessary information to the customer
  5. Finish the VOYCE request when you don’t need it anymore

(Optional) Understand the VOYCE API

Optionally, I'm going to explain how the VOYCE API works here. Feel free to move onto the next section if you're working through the implementation.

Every VOYCE API call needs to use https://www.voyceglobal.com/APITwilio as a root url. You can check the detailed documentation via this link.

All VOYCE API calls require a VOYCEToken parameter in the request headers. (You would have received everything you need for authentication with your sandbox account.)

All VOYCE APIs require HTTPS to help ensure confidentiality, authenticity, and integrity.

Sample Header:

--header 'VOYCEToken': '5gsdc3feb-4564-46c8d-9816-1c9f4436cccc'
--header 'Content-Type: application/json'

In this section, I’m going to explain the 3 main API calls we’ll be using – one to invite a translator, one to get the call status, and one to finish a call (and cleanup).

Invite an interpreter to a room

POST Request/InviteWithoutLanguage

POST DATA:

{
  "Reference": "sample string 1",
  "MeetingId": "sample string 2",
  "Note": "sample string 3",
  "ClientUserInfo": {
        "ClientId": "sample string 1",
        "ClientName": "sample string 2",
        "UserId": "sample string 3",
        "UserName": "sample string 4",
        "AdditionalInfo": "sample string 5"
  },
  "isVideo": true,
  "VideoInfo": {
        "VideoToken": "sample string 1",
        "RoomName": "sample string 2"
  },
  "AudioInfo": {
        "AudioToken": "sample string 1",
        "To": "sample string 2"
  }
}

RESPONSE DATA SAMPLE:

{
  "PreInviteToken": "sample string 1", //used for status call
  "URL": "sample string 2", //application needs to open this url for customer
  "Successful": true,
  "Reason": "sample string 4"
}

This call starts an interpretation request by inviting an interpreter to the room.

Check the status of an interpretation request

GET Request/StatusByPreInviteToken?PreInviteToken={PreInviteToken}

{
  "Status": "In Service", //Status 0: Not Initialized 1: New 2: In Service 3: Serviced 4: Cancelled 5: Interpreter Accepted 9: No Interpreter Available
  "StatusCodeId": 2, //Status CodeId 1: New 2: In Service 3: Serviced 4: Cancelled 5: Interpreter Accepted 9: No Interpreter Available
  "EstimationTimeString": "Your estimated waiting time is less than 5 minutes.", //This is an estimation time we provide to your customer
  "Successful": true, //Whether the function call is successful True: Successful False: Failed
  "Reason": "" //If the call is failed, return the reason.
}

This is the API call to get the status of a service request.

Close a translation session

POST Request/FinishByPreInvite?PreInviteToken={PreInviteToken}

RESPONSE DATA SAMPLE:

{
  "Successful": true, //Whether the function call is successful True: Successful False: Failed
  "Reason": "" //If the call is failed, return the reason.
}

This is the API call to finish a request when the connection should be concluded.

Add VOYCE API calls from the server

Now that you understand the VOYCE API, next let’s set up all the API calls from server.js.

Open up server.js and replace it with the following code (I’ll explain what’s going on in each block). As before, you can also find the code in the repo.

Twilio and boilerplate setup

In this section, we scaffold our server and add the necessary code for Twilio Programmable Video.

require("dotenv").config();
const http = require("http");
const express = require("express");
const path = require("path");
const app = express();
const https = require('https');

const AccessToken = require("twilio").jwt.AccessToken;
const VideoGrant = AccessToken.VideoGrant;

const ROOM_NAME = "telemedicineAppointment";

// Max. period that a Participant is allowed to be in a Room (currently 14400 seconds or 4 hours)
const MAX_ALLOWED_SESSION_DURATION = 14400;
app.use(express.urlencoded({ extended: true }))

// Parse JSON bodies (as sent by API clients)
app.use(express.json());

const patientPath = path.join(__dirname, "./public/patient.html");
app.use("/patient", express.static(patientPath));

const providerPath = path.join(__dirname, "./public/provider.html");
app.use("/provider", express.static(providerPath));

// serving up some fierce CSS lewks
app.use(express.static(__dirname + "/public"));

// suppress missing favicon warning
app.get("/favicon.ico", (req, res) => res.status(204));

app.get("/token", function (request, response) {
  const identity = request.query.identity;

  // Create an access token which we will sign and return to the client,
  // containing the grant we just created.

  const token = new AccessToken(
    process.env.TWILIO_ACCOUNT_SID,
    process.env.TWILIO_API_KEY,
    process.env.TWILIO_API_SECRET,
    { ttl: MAX_ALLOWED_SESSION_DURATION }
  );

  // Assign the generated identity to the token.
  token.identity = identity;

  // Grant the access token Twilio Video capabilities.
  const grant = new VideoGrant({ room: ROOM_NAME });
  token.addGrant(grant);

  // Serialize the token to a JWT string and include it in a JSON response.
  response.send({
    identity: identity,
    token: token.toJwt(),
  });
});

http.createServer(app).listen(1337, () => {
 console.log("express server listening on port 1337");
});

VOYCE API Setup

This section adds the code to make the calls described in the "Understand the VOYCE API" section. I'll cover each in turn – but in your server.js, paste these blocks one after the other at the end of the file.

Invite an interpreter functionality

This code calls Request/InviteWithoutLanguage, which will kick off inviting an interpreter to the room.

//start an interpretation service API call to VOYCE
app.post('/Request/InviteWithoutLangauge', function (request, response) {
   console.log('Got body:', request.body);
   let returnData = '';
   const postData = request.body;
   const voyce_token = process.env.VOYCE_TOKEN;
   const options = {
     hostname: 'www.voyceglobal.com',
     path: '/APITwilio/Request/InviteWithoutLangauge',
     port: 443,
     method: 'POST',
     headers: {
       'Content-Type': 'application/json',
       'VOYCEToken':voyce_token
     }
   }
   const req = https.request(options, res => {
     res.on('data', d => {
        returnData += d;
     })
     res.on('end', () => {
       console.log("end")
       response.json(JSON.parse(returnData));
     })

   });
   req.on('error', error => {
     response.json("Error:"+error.message);
   })
   req.write(JSON.stringify(postData))
   req.end()
});

Check interpreter session status

This code calls Request/StatusByPreInviteToken to check on interpreter status.

//Status pulling API Call to VOYCE
app.post('/Request/StatusByPreInviteToken', function (request, response) {
   let returnData = '';

   const voyce_token = process.env.VOYCE_TOKEN;
   const options = {
     hostname: 'www.voyceglobal.com',
     path: '/APITwilio/Request/StatusByPreInviteToken?PreInviteToken='+request.body.Token,
     port: 443,
     method: 'GET',
     headers: {
       'Content-Type': 'application/json',
       'VOYCEToken':voyce_token
     }
   }
   const req = https.request(options, res => {
     res.on('data', d => {
        returnData += d;
     })

     res.on('end', () => {
       try {
         response.json(JSON.parse(returnData));
       } catch (e) {
         response.json(JSON.parse("{}"));
       }
     })
   });
   req.on('error', error => {
     response.json("Error:"+error.message);
   })
   req.end()
});

Close an interpreter session

Finally, here is the code to call Request/FinishByPreInvite and close out a session.

//Finish the interpretation service API Call to VOYCE
app.post('/Request/FinishByPreInvite/:preInviteToken', function (request, response) {
   // First read existing users.
   let returnData = '';
   const postData = request.body;
   const voyce_token = process.env.VOYCE_TOKEN;
   const options = {
     hostname: 'www.voyceglobal.com',
     path: '/APITwilio/Request/FinishByPreInvite?PreInviteToken='+request.params.preInviteToken,
     port: 443,
     method: 'POST',
     headers: {
       'Content-Type': 'application/json',
       'VOYCEToken':voyce_token
     }
   }
   const req = https.request(options, res => {
     res.on('data', d => {
        returnData += d;
     })
     res.on('end', () => {
       try {
         response.json(JSON.parse(returnData));
       } catch (e) {
         response.json(JSON.parse("{}"));
       }
     })
   });
   req.on('error', error => {
     response.json("Error:"+error.message);
   })
   req.end()

})

And that's all you need! Now let's try it out and see how everything comes together.

Try out your new translation service

Ready to try it all out and see it working?

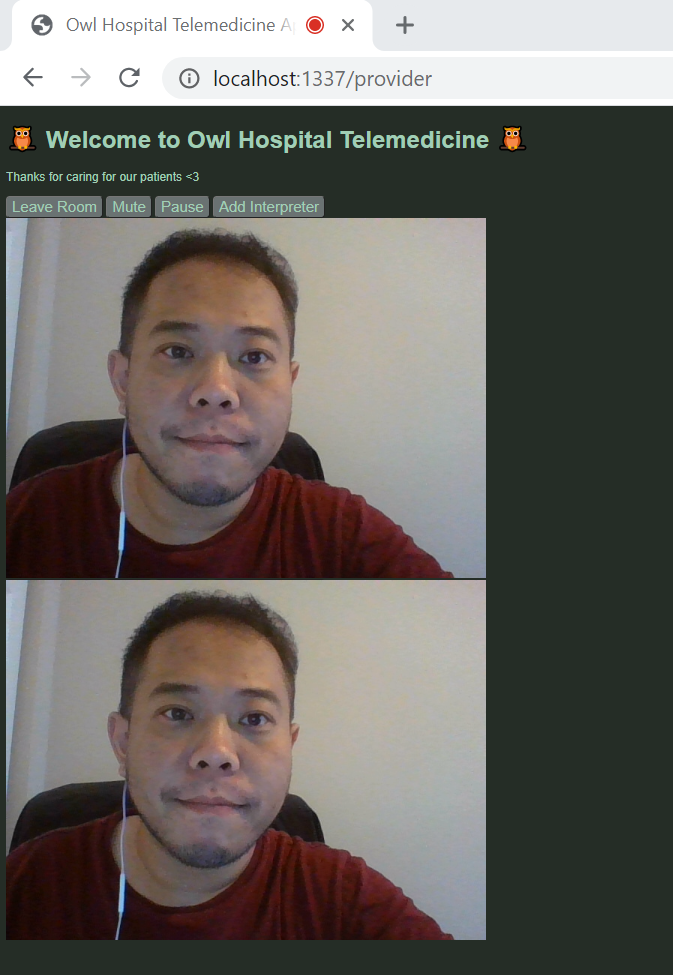
Navigate to http://localhost:1337/provider in your browser and click the “Join Room” button:

Telehealth provider room (with a patient shown)

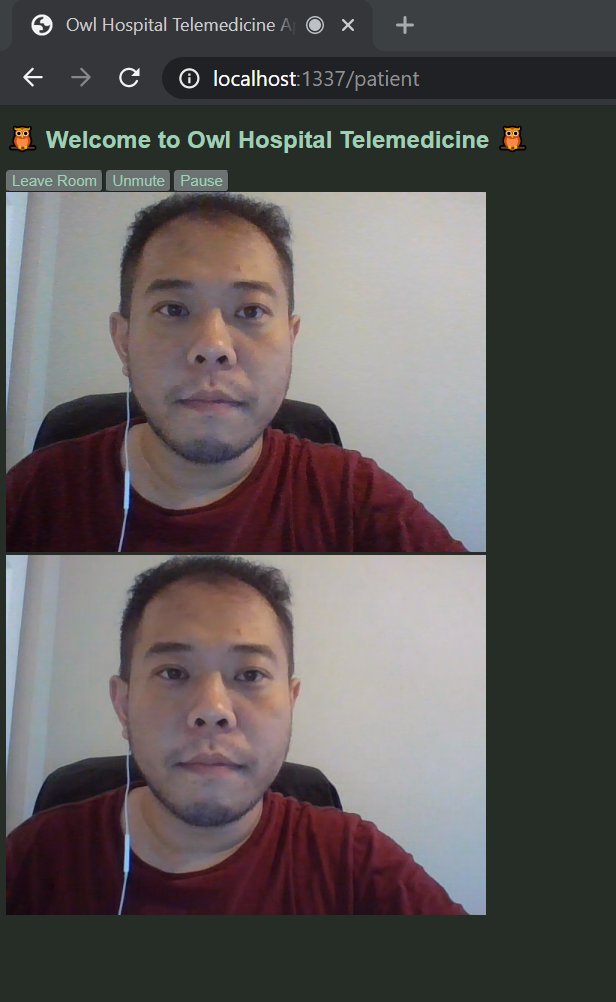
Then open a new tab to http://localhost:1337/patient in your browser and click the “Join Room” button:

Telehealth room with patient and provider, about to add a translator

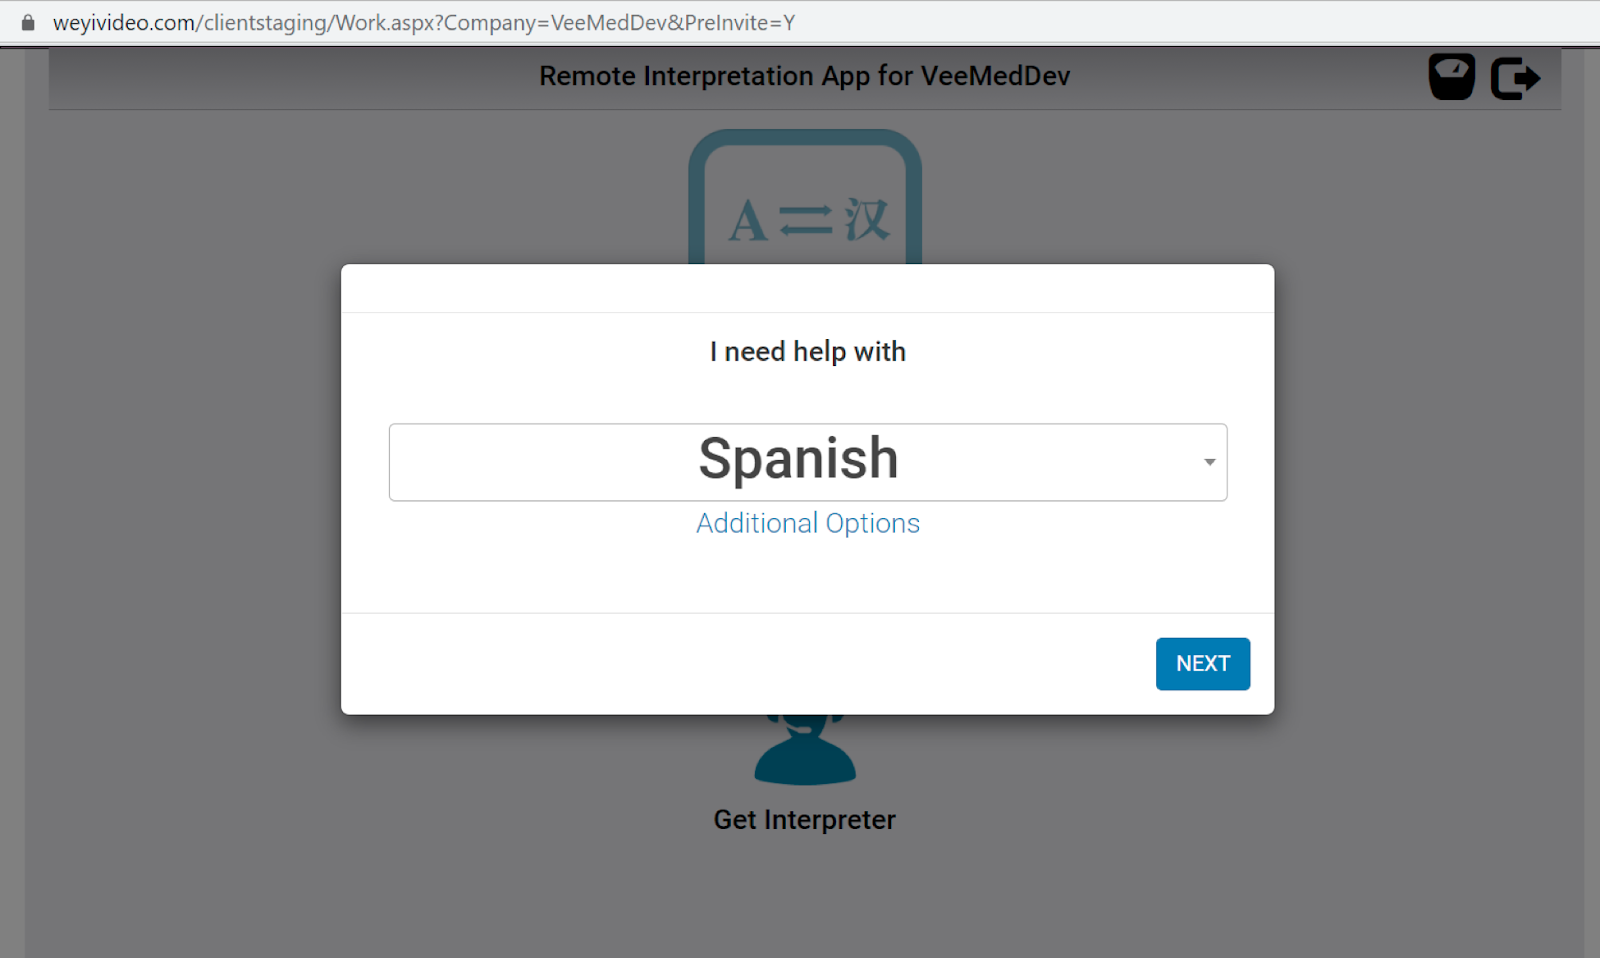
Then, open the interpreter portal in a new tab: https://www.voyceglobal.com/providerstaging/?Company=TwilioSandbox.

Please log in using the test interpreter sandbox account we provided you. If you don’t have the sandbox account yet, please contact us for a free one.

Next, click the add interpreter button on the provider page. A new window will open. Please follow the instructions:

Adding a VOYCE interpreter for Spanish translation in a telehealth room

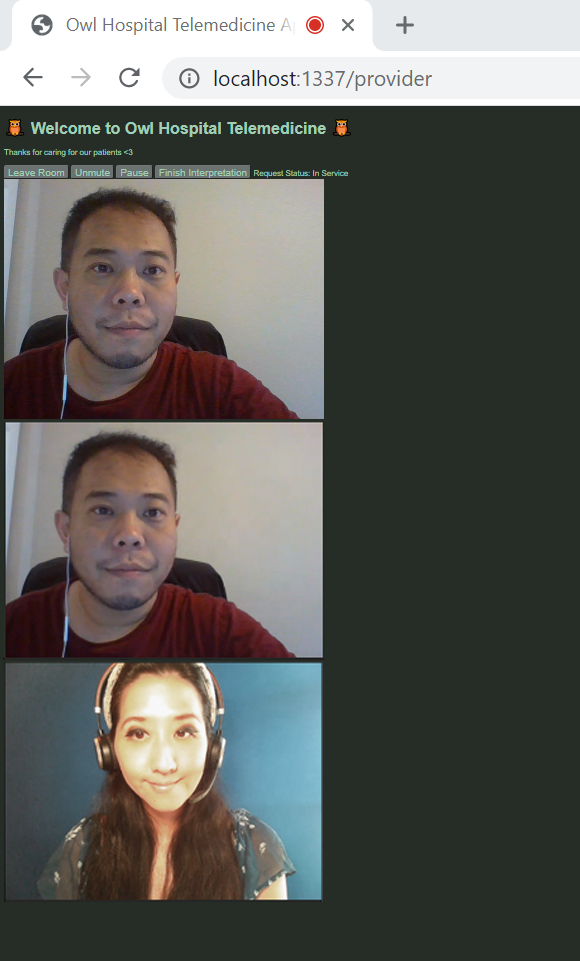
You will receive a new request in the interpreter portal. Click the accept button to join the service, then you will be able to see that all three parties are all in the room.

VOYCE translator in a telehealth room

And, congratulations, you've now added translation services to a telemedicine app using VOYCE and Twilio Programmable Video. You're now ready to start productizing your app!

Adding a translation service to a Twilio Programmable Video telehealth app

Let’s review what we’ve learned today:

  • How to add a VOYCE interpretation service
  • How to show the VOYCE request status on a page
  • How to show a remote participant’s audio and video elements on a page
  • How to show and hide elements on the page when participants enter and leave a video room

This sample code to add a VOYCE interpretation service is admittedly pretty basic. There are so many add-ons you could imagine to make it truly innovative and awesome, such as:

  • You could design a better looking interpretation related UI of the service options for your customers
  • Design and implement the process to request and end the interpretation service request and provide a simple and better user experience

But either way, you've got the makings of a great telemedicine app. Let us know how you expand it!

Xiang Xu is the Vice President of Technology at VOYCE. He's currently working on improvements to provide more professional, stable, and better quality interpretation services to our customers. To discuss a partnership with VOYCE for interpretation services, reach out to us on our site.