Text an AI Assistant with GPT-3 using AWS Lambda and Twilio
Time to read: 5 minutes
March 06, 2023
Written by
Reviewed by

Are you tired of scrolling through countless web pages to find the information you need? Do you wish there was an easier way to access accurate and relevant answers to your questions? Well, look no further! This tutorial shows you how to use Twilio and AWS Lambda to set up a phone number you can text to reach GPT - your very own personal language model and virtual assistant.
You can interact with GPT in a way that is more natural and convenient than ever before. Simply send a text message with your question or topic of interest, and GPT will respond with accurate and informative answers. By following the step-by-step instructions in this post, you will learn how to use the Twilio API, AWS Lambda and the OpenAI API to build a powerful and versatile language-based application.
Thank you, ChatGPT, for writing the previous two paragraphs for me! Now let's get started building a textable interface for GPT – while Artificial Intelligence is working for us rather than the other way around.

The process is simple:
- You text your question to your Twilio phone number
- After receiving the text, the Twilio server calls an AWS Lambda function that relays the body of your text message to OpenAI via its API
- The Lambda function receives OpenAI’s response and sends it as a text message back to your phone
Requirements
To complete this tutorial you’ll need:
Get Keys Ready
We’ll need a few auth keys to get started. First an OpenAI API key and, second, your Twilio auth token and SID. We’ll then add them to the Environment Variables after creating the Lambda function.
OpenAI API Key
Navigate to https://platform.openai.com/account/api-keys and log in with your OpenAI username and password.
Click on Create new secret key and then save the key to a secure location.
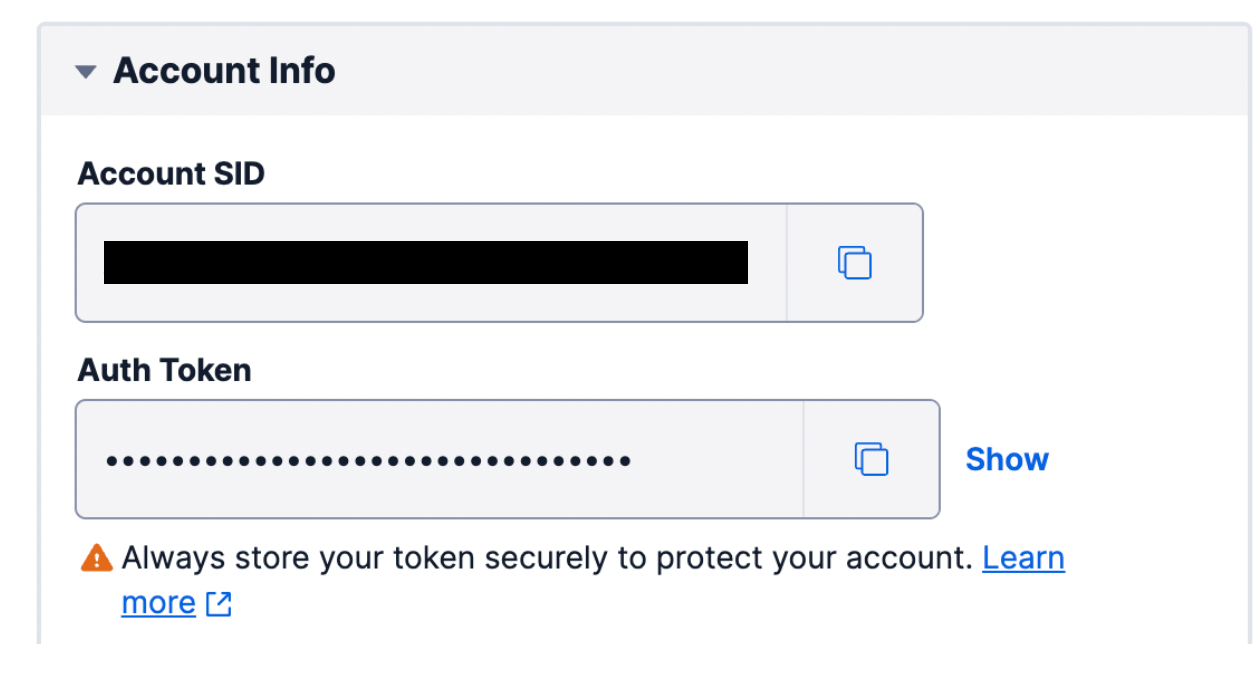
Twilio Auth Token and SID
Go to the Twilio Console https://console.twilio.com/ and scroll down until you see the section titled Account Info. There you’ll see your Account SID and Auth Token.
Create and Configure Your Lambda Function
Lambda is Amazon’s serverless infrastructure: it lets you execute code without having a dedicated server. A Lambda function is the code that will run; we’ll write it in nodeJS for this tutorial but you can also do it in Python or an array of other languages.
Log into the AWS console with your AWS developer account and navigate to the Lambda homepage. Click on the Create Function button and you’ll be redirected to the Create Function Page to fill out info for your new function.
Fill out the fields as follows:
- Function name: queryGPT
- Runtime: node.js 18.x
- Architecture: x86_64
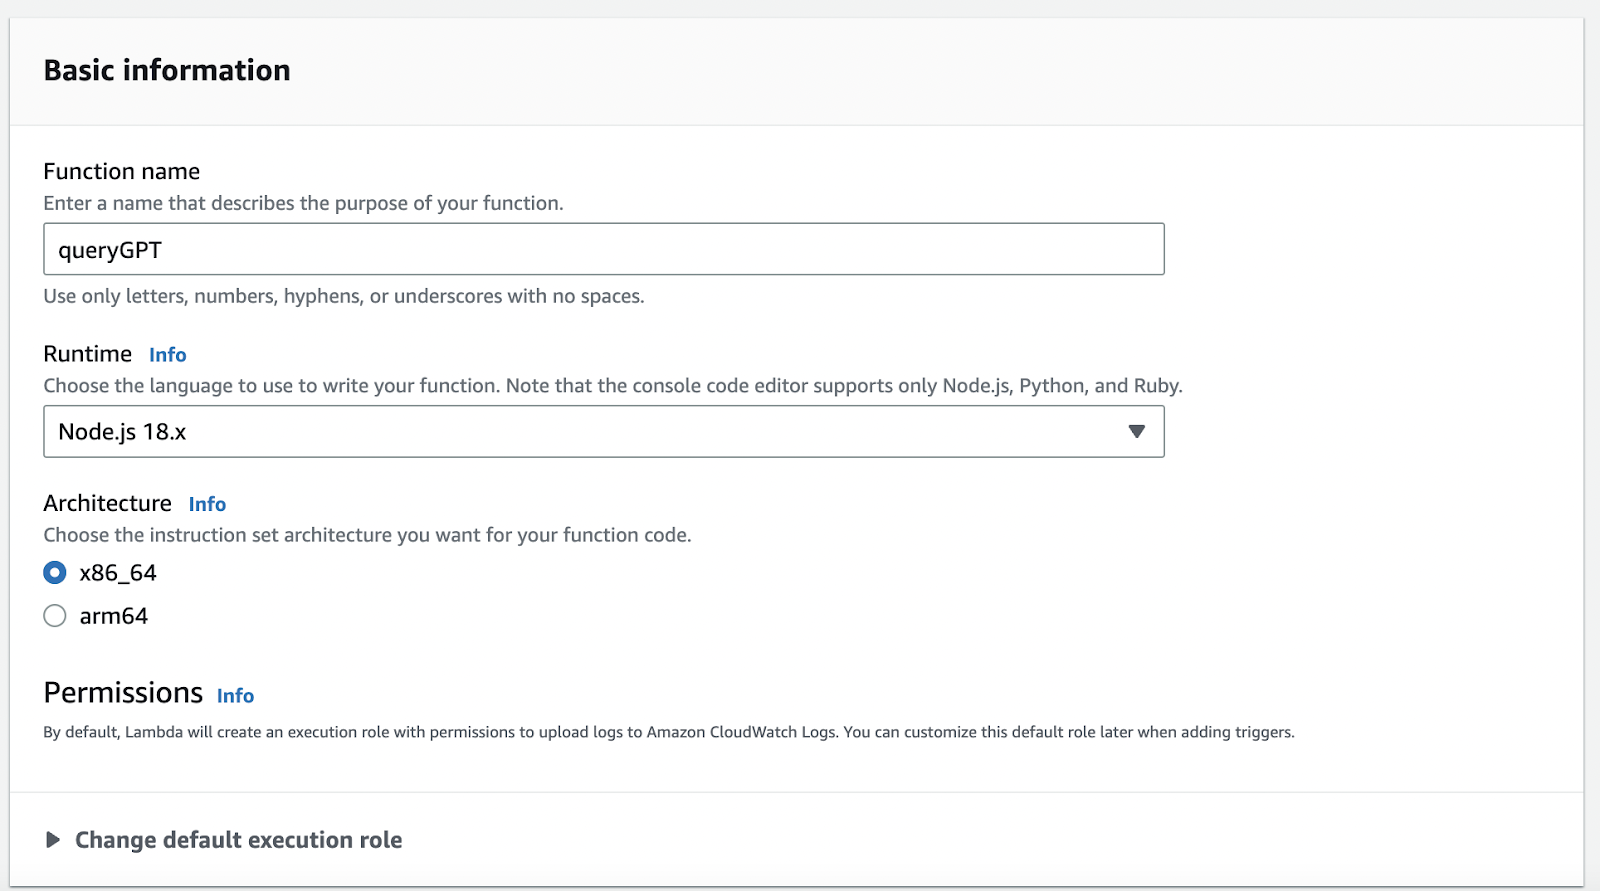
Click the Create Function button and your Lambda function will be created.
In the Configuration tab click Edit on General configuration and set the Timeout to be 20 seconds. The timeout needs to be longer so the server doesn’t shut down before we have a chance to get a response from GPT and send it back over text.

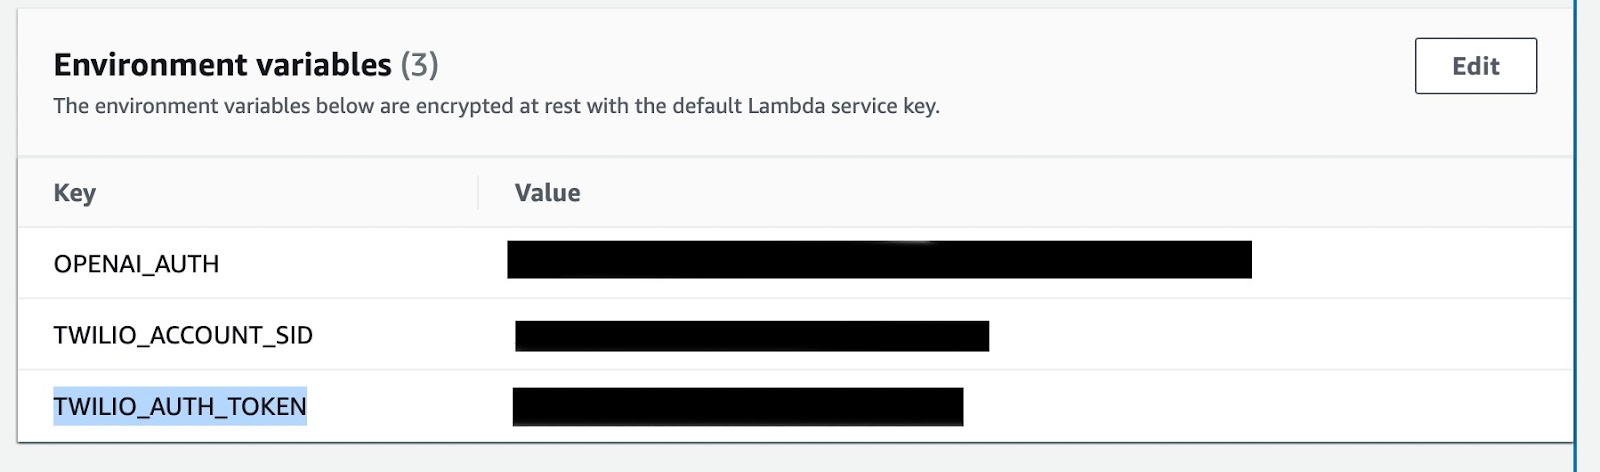
Then click on Environment variables on the left hand side. This is where we’ll use the OpenAI API key and the Twilio auth you got above. Add in the following environment variables: OPENAI_AUTH, TWILIO_ACCOUNT_SID, TWILIO_AUTH_TOKEN.
And fill in the values with the respective keys. Later on you’ll add an additional environment variable with the Twilio phone number you register.
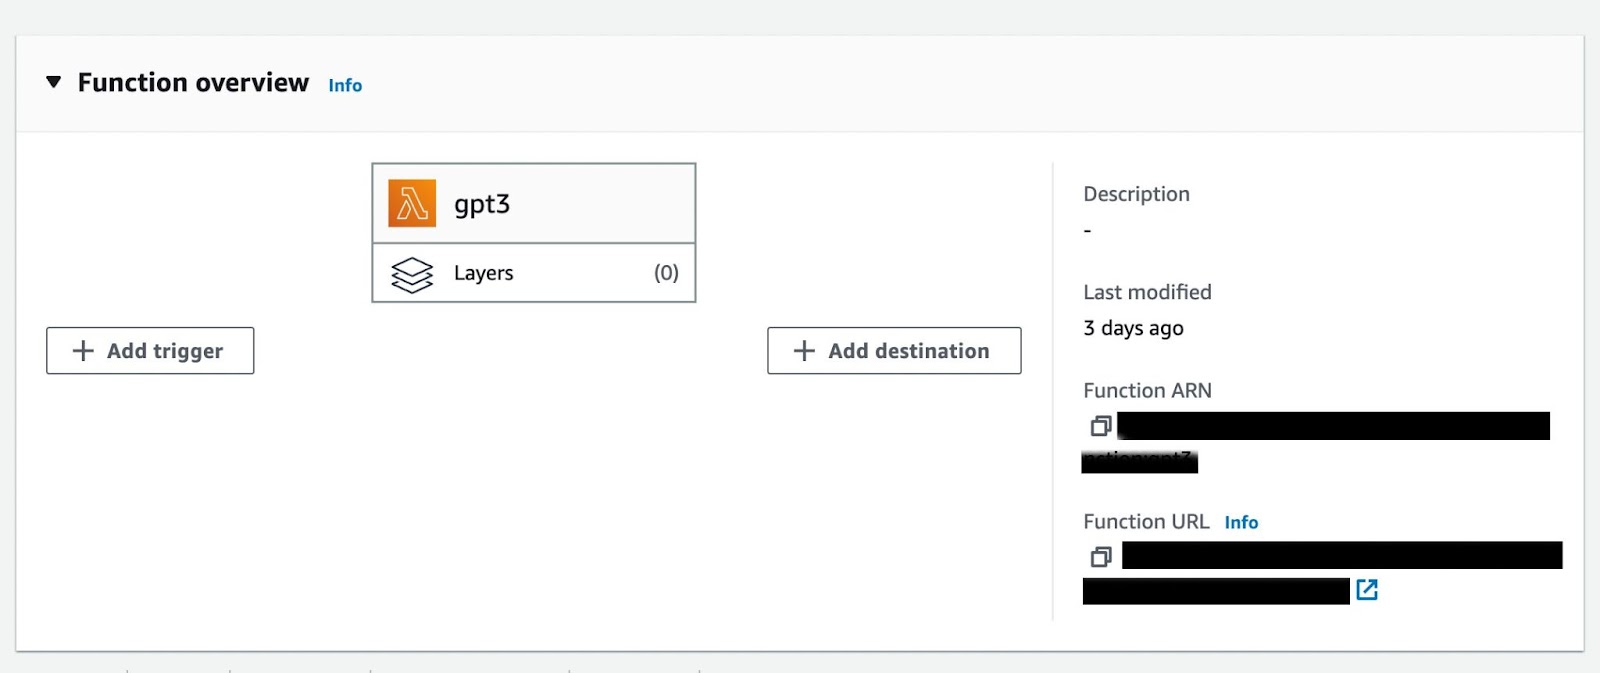
Next click on the Function URL tab on the left hand side and click the Create function URL button.
Select NONE for Auth type and enable Configure cross-origin resource sharing (CORS). This allows your lambda to be called from anywhere.
Under Allow methods select POST.
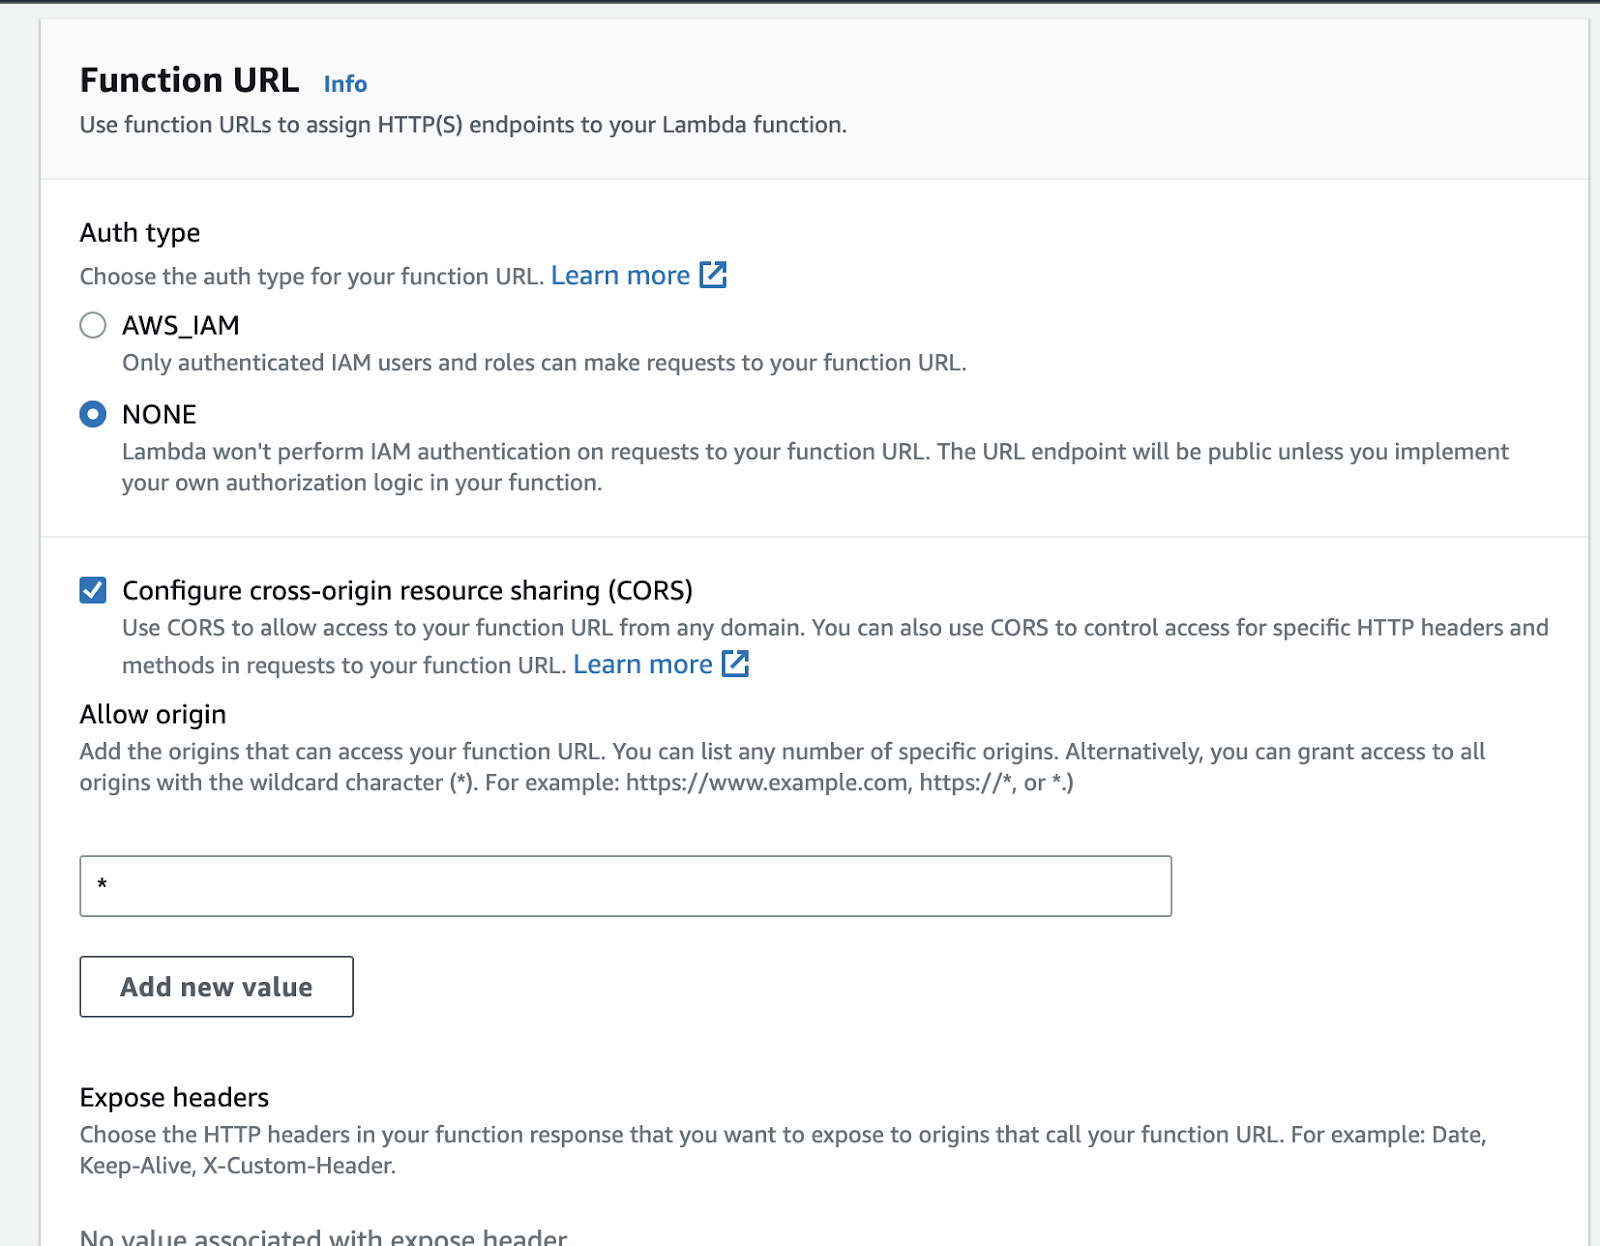
Click Save and then you’ll see your Function URL on the right hand side - we'll need this URL when we configure our Twilio phone number.
Set Up Phone Number with Twilio
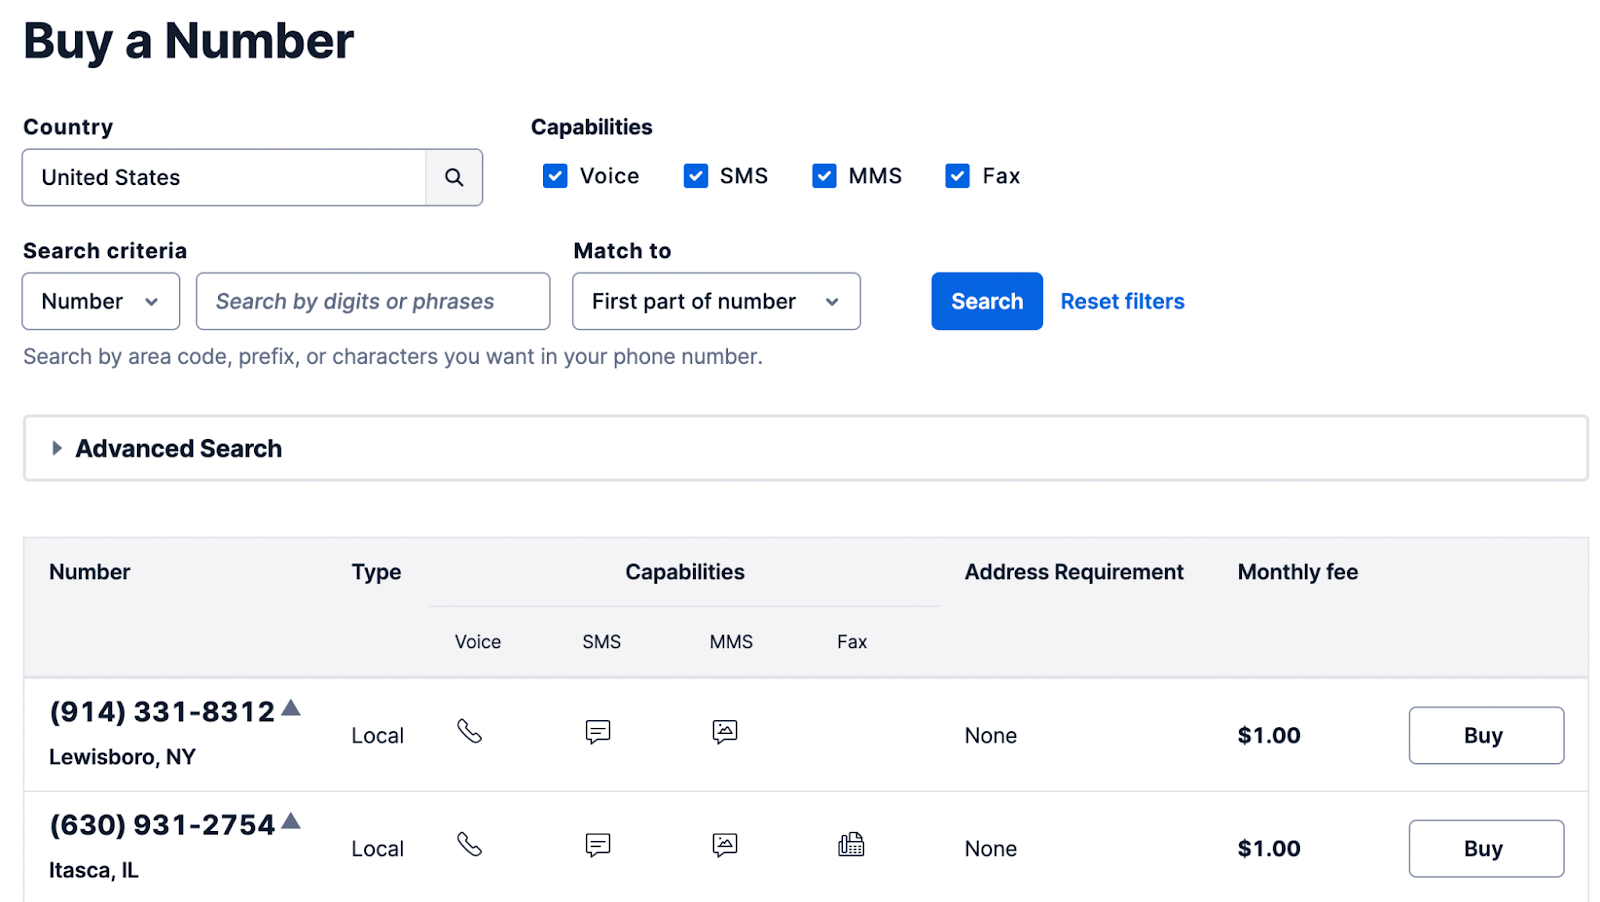
The next step is to configure a Twilio phone number. You will text the phone number a question and it will text you back an answer from the same number. Log in to the Twilio Console and access the Phone Numbers page. Click the Buy a Number button on the top right and select a phone number that you like. If you are using a trial account you will be making this purchase with your trial balance. If you are using a paid account, most phone numbers cost $1 USD per month.
Once you have a phone number, click on it to access its configuration page. Scroll to the bottom of the Configure tab until you see the Messaging section. Then ensure the drop down under the A MESSAGE COMES IN label has Webhook selected. Then paste in the Function URL from Amazon Lambda into the textbox. Keep Webhook and HTTP POST settings as below.
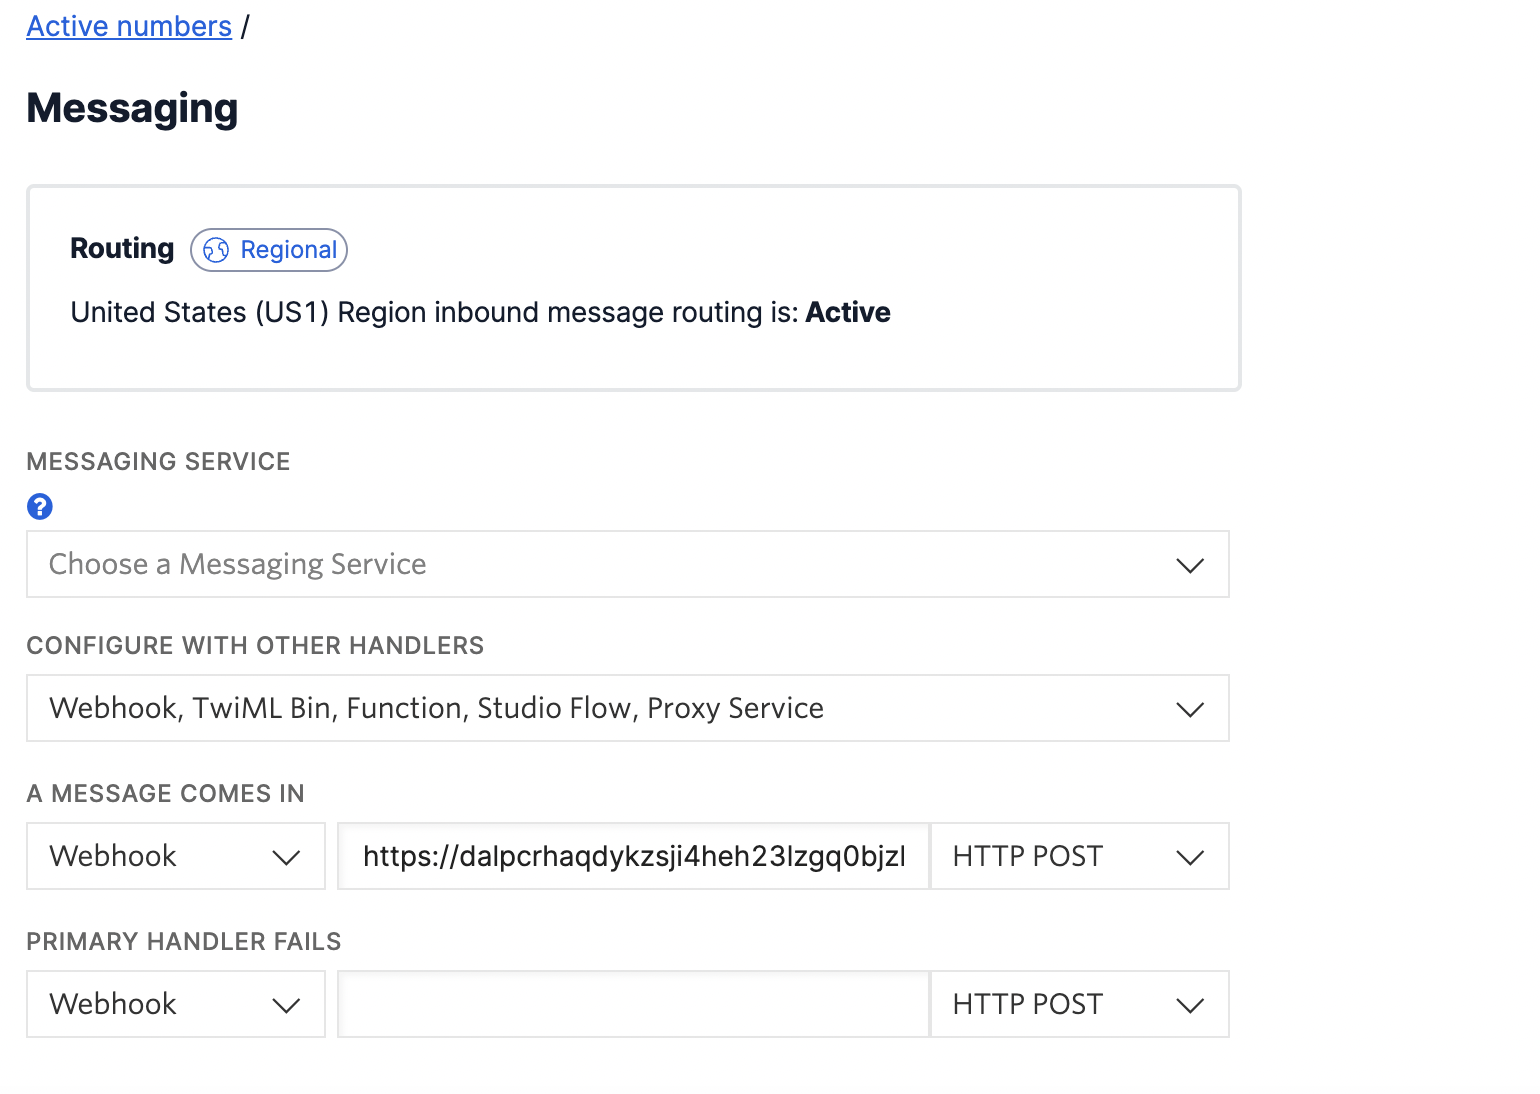
Click Save and now when an incoming text message comes in Twilio will POST to that URL and your Lambda code will execute.
Before we write the Lambda code let's add the phone number to the environment variables.
Go to your Lambda function, click on Configuration and then Environment variables on the left hand side. You should see the three environment variables you added earlier. Next add a new Environment Variable with the key “TWILIO_PHONE_NUM” and for the value put in the phone number you just registered in E.164 format.
Click Save.
Finish Setting Up Your Lambda Function
Now let's write the Lambda code that will execute when you get an incoming text message.
Open up your console on your computer and make a new directory and Node project by typing in:
Then install the Twilio and OpenAI npm libraries by typing in the following into console:
Then in your favorite text editor create a file named index.js within the textable directory and add in the following code:
exports.handler is the function called when you run your Lambda function. The code above parses the information it got from Twilio’s POST request to get the body of the text message and the phone number it was called from. Then it sends the message to OpenAI and waits for a response. Once it receives the answer from OpenAI, it calls Twilio’s Node.js library and sends a message back to the phone number it received the response from.
Zip the folder by opening up console, navigating into the folder and running
Upload to Lambda
Upload the zipped file to Amazon Lambda by navigating to the Code tab, clicking the Upload From button and selecting the zipped file. The zipped file can be found in the same directory where the textable project directory is stored.
You should be all set! If you have any issues you can look at the Monitor tab and look through the logs.
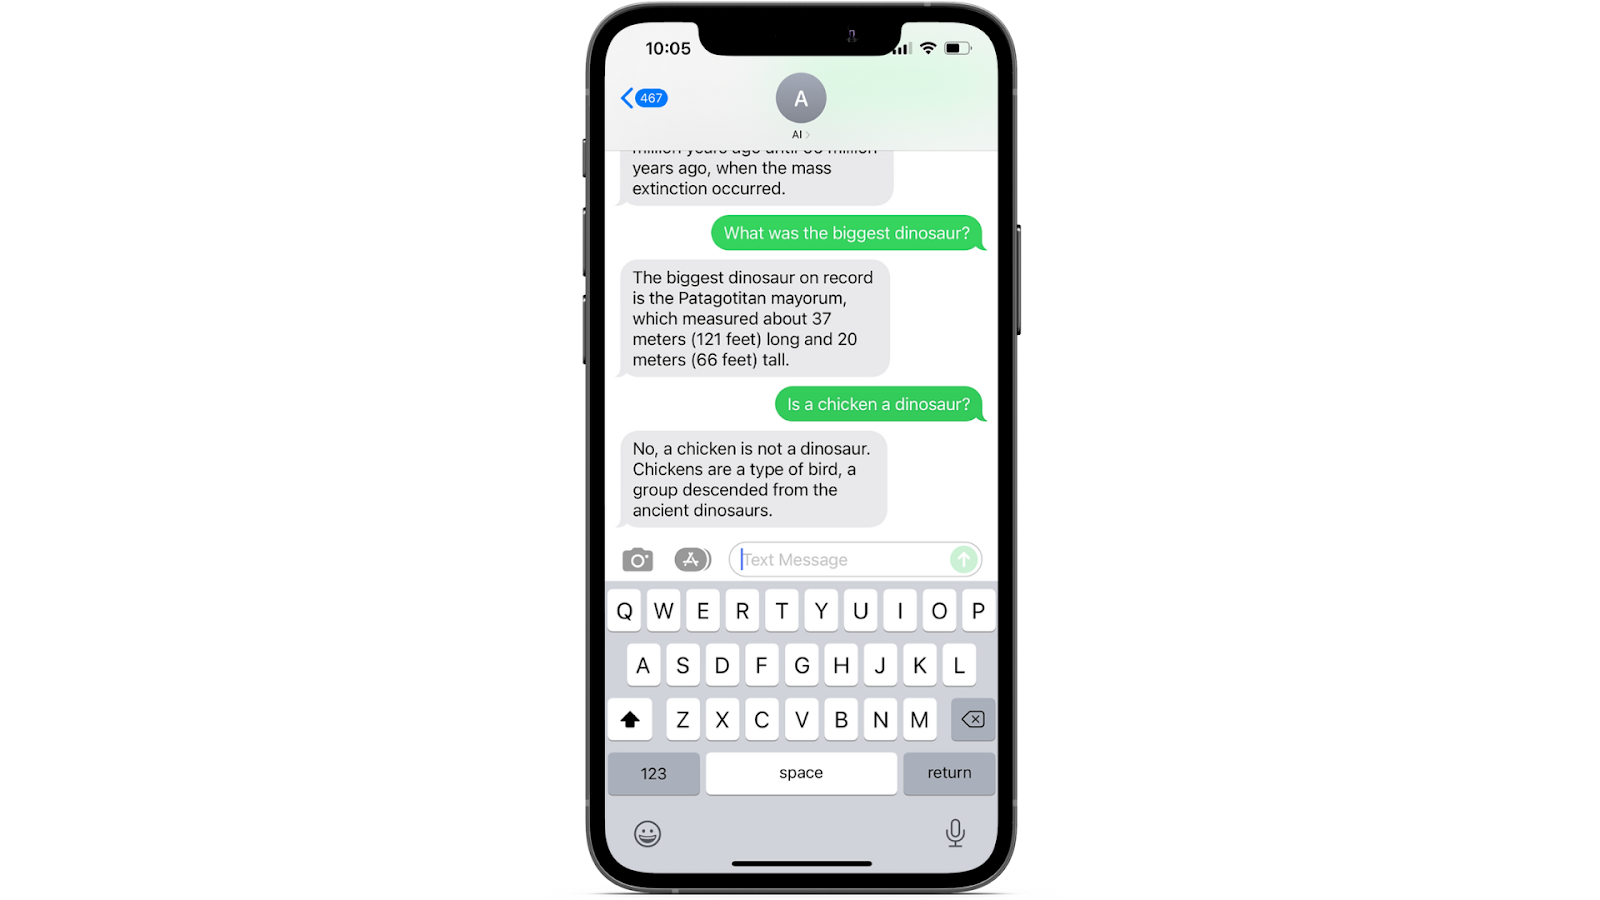
As you can see, in our house it’s already come in handy for settling important matters about dinosaurs. You can give the phone number to your friends and family but remember that it’s tied to your OpenAI account. I hope you enjoy your new AI assistant as much as we do. Happy building!

Related Resources
Twilio Docs
From APIs to SDKs to sample apps
API reference documentation, SDKs, helper libraries, quickstarts, and tutorials for your language and platform.
Resource Center
The latest ebooks, industry reports, and webinars
Learn from customer engagement experts to improve your own communication.
Ahoy
Twilio's developer community hub
Best practices, code samples, and inspiration to build communications and digital engagement experiences.