Learn How to Use Twilio Functions by Building an SMS Measurement Converter for JavaScript Beginners
Time to read: 8 minutes
August 05, 2022
Written by
Reviewed by

There I was, in a desolate cabin with nothing except my maladaptive daydreams, 2G coverage, and ingredients for the only dish I had ever managed to write down splayed out on the countertops. There was just one problem. After desperately rummaging through the rental’s kitchen cabinets, I found only a single tablespoon hanging lonesomely on an otherwise empty ring.
The proportions of ingredients were important in this dish, but I hadn’t actually sat down and memorized all the conversion rates before. Without internet service, not even Google could save me, but I did my best to eyeball it and make due.

It turned out terrible, and I vowed to never be in such a predicament again.
With some beginner-friendly JavaScript and hosting by Twilio Functions, we could make a measurement converter that can be used anywhere with cell service. In this tutorial, we will do just that! May our recipes never be subject to missing conversion rate knowledge again.
Prerequisites
Before we start the tutorial, make sure you have the following things:
- A Twilio account—click here to sign up for a free trial
- A Twilio phone number—configure one here
- NodeJS installed on your machine
- Your favorite IDE – mine is VSCode
Write and export a JSON file
JSON is a data format that is used to store information in a neat little package that can be sent across the web and easily converted to – and accessed as – a JavaScript object. Although we may use JSON for many things, such as for API calls or sending information between servers and clients, manually writing a JSON file can lead to lots of problems due to the restrictive nature of the format.
So, to simplify things, we will use our IDE to create a JSON file that will store all our conversion rates so we can cut down on the amount of code we need to put directly into a Twilio Function.
First, navigate to a place on your computer you want to store your project files and enter these commands in your terminal to make a project directory:
Open up your IDE to the directory you just made. Create a new .js file, and paste the following code:
Run this code. You will notice that a new file called output.json shows up in the same directory as your .js file. Keep note of this file, because we will be uploading it to a remote directory called Assets when we create a Function in the next section.
JSON exporter code explanation
There is quite a lot going on, so let’s break it down. The fs module imported at the top is a very handy NodeJS library which lets our JavaScript code interact with our machine’s file system.
The fs module is used after creating a JavaScript object named conversionRates, which stores all the conversion rates between two different measurements in the form of conversionRates[ ‘measurement converting from’ ][ ‘measurement converting to’ ]. The object's use will be evident when we use the JSON file in a Twilio Service later on.
Below the object definition, a JSON function called stringify receives the conversionRates object as an argument. This function converts the object into a JSON string and assigns it to the variable jsonContent. At this point, jsonContent is no longer accessible as a JavaScript object, and it is this string content which is written to the file.
Finally, the fs writeFile function sets the file name to output.json, writes the content of the file jsonContent, encodes the file as utf8 (the encoding system for Unicode), and uses a callback function function(err) in case there were any errors in writing the file.
If successful, the console will show “JSON file has been saved”. If not, it will show an error message.
Create a service in the Twilio Console
Now that the JSON file is ready, let’s proceed with the setup of a Twilio Service where we upload the file and write a function!
Navigate to the Twilio Console and in the left-hand sidebar, click "Explore Products". Then, under Developer tools, click "Functions and Assets" and then click on the blue "Create Service" button. Name the new service "converter", and then click "Next".
You should be redirected to a new page where you can see your empty service like the following:
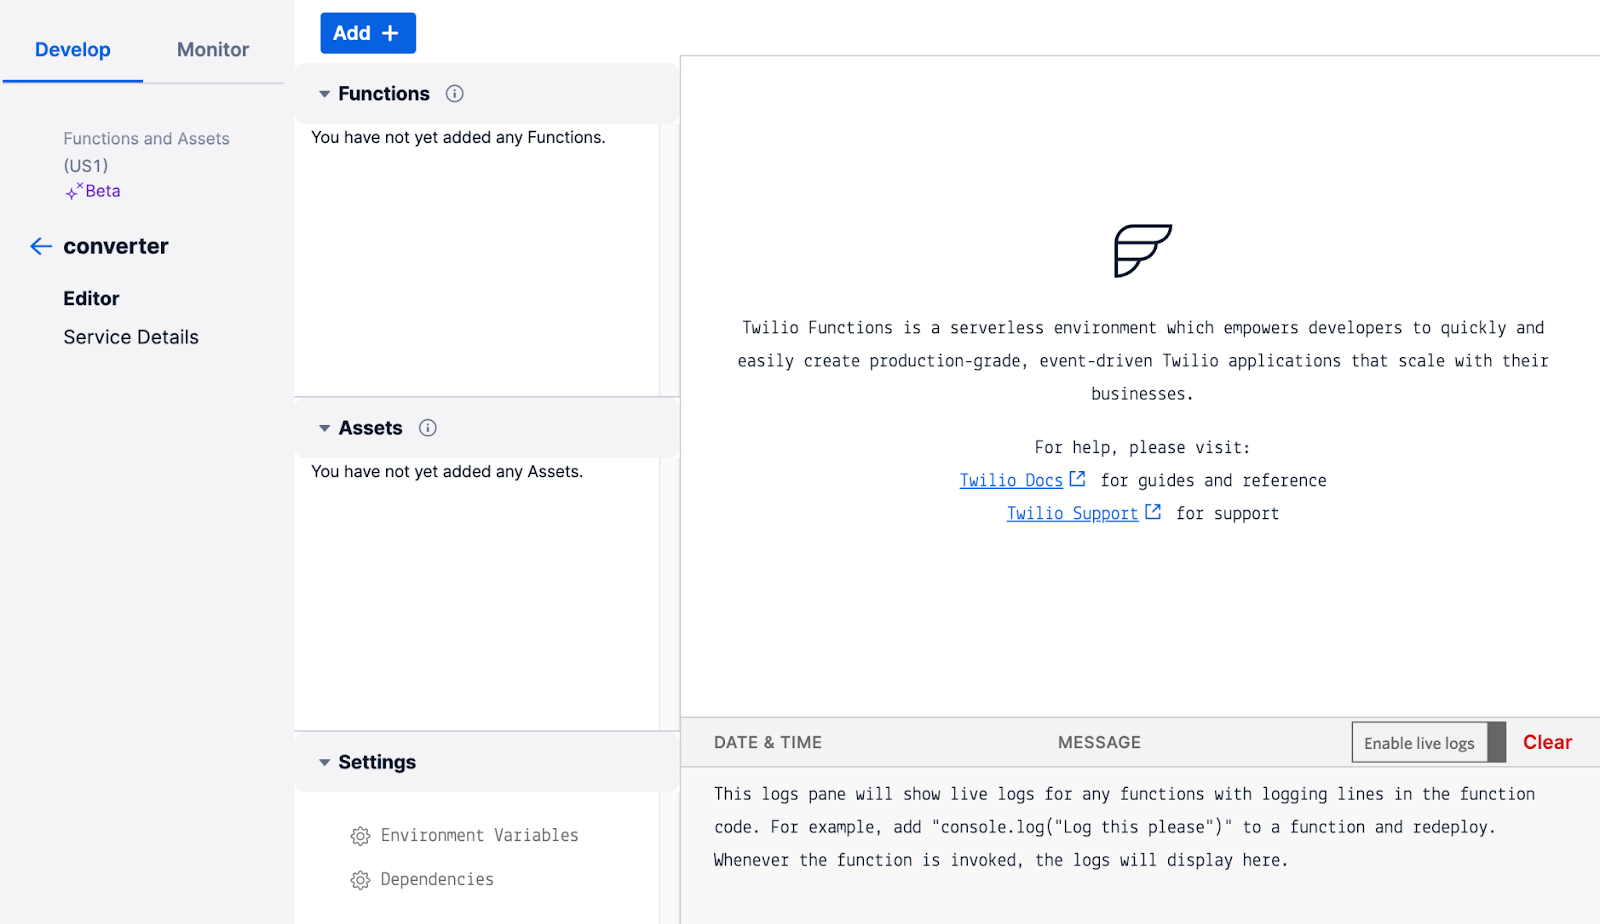
The two areas to pay the most attention to are Functions and Assets.
Create an Asset
Click the blue "Add +" button directly above the Functions panel, and click "Upload file". Then, navigate to where you saved theoutput.json file. A new panel will appear in the editor with your file, along with radio buttons indicating whether you want this file to be Private, Protected, or Public. Choose "Public".
Before clicking the blue "Upload" button, save the below image to your project directory because it will be uploaded as well:
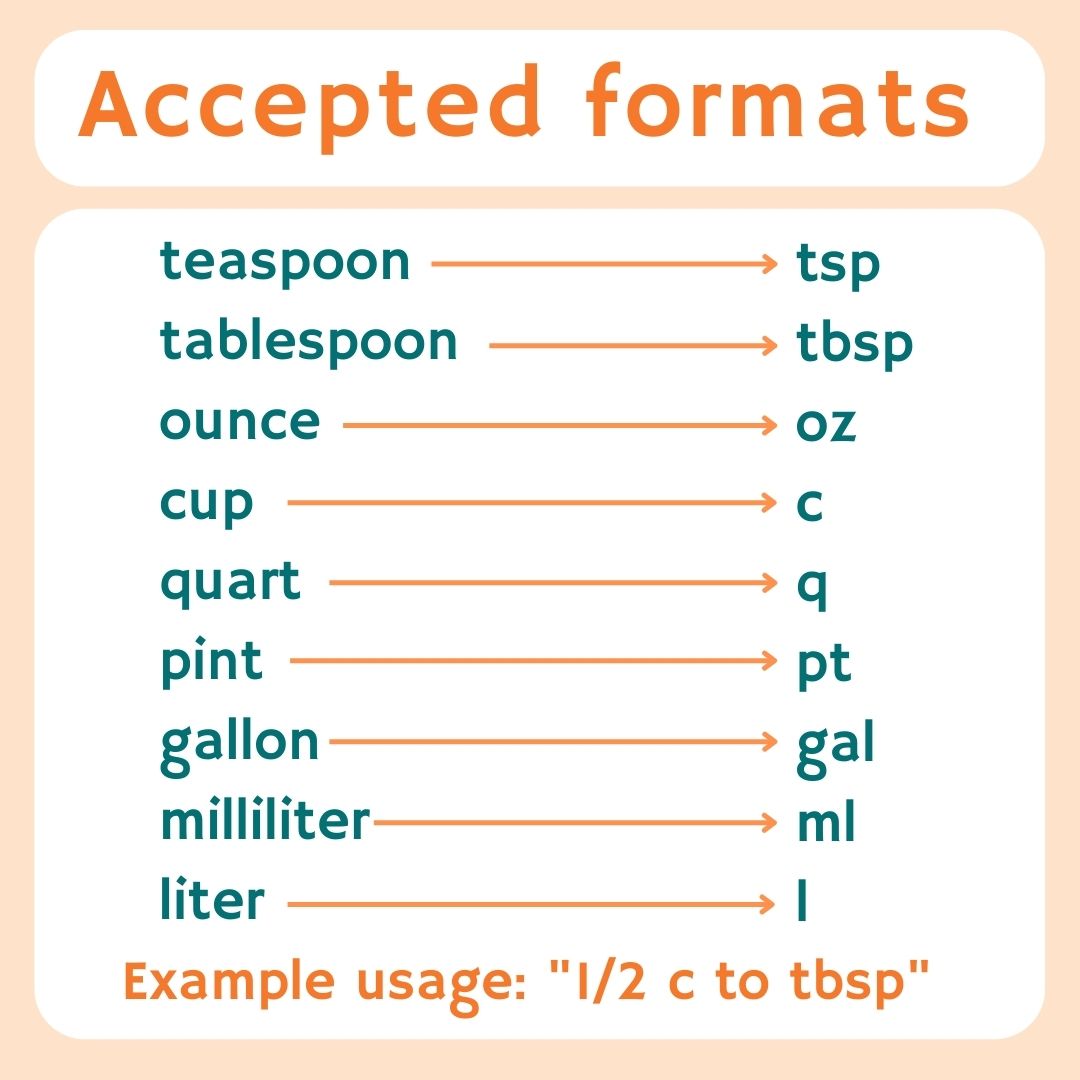
Click the "Add Additional Files" button and upload the above image. This will be a nice visual aid for anyone who texts our Twilio number but does not provide a format that our converter recognizes. This image will be sent if the sender has cellular data available, in addition to a normal SMS message – just in case they find themselves in a desolate cabin.
At this point, this is what the files will look like.
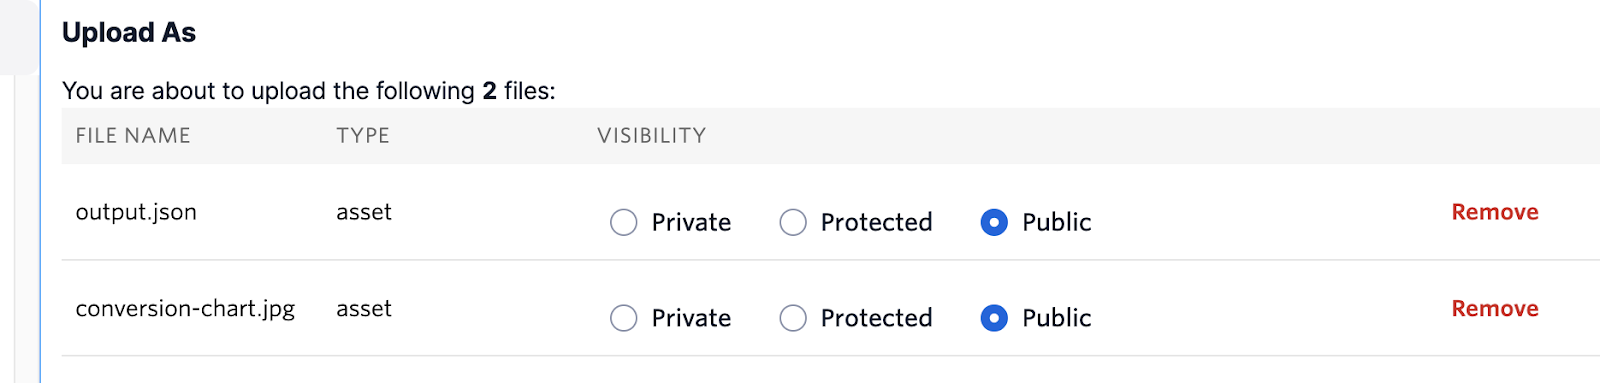
Ensure both are set to Public, and then click "Upload". This will upload two files under Assets, which are saved but not yet visible because we haven’t deployed the service yet.
Add dependencies and environment variables
An additional dependency called node-fetch is required for the JavaScript code to access a file from a public link. Beneath the Settings label, click on "Dependencies" and a new panel will open in the editor. Here you can add any dependencies that are available via npm.
In the Module text box, enter “node-fetch” and in the Version box enter “2.x”, like so:

Click the "Add" button and watch the dependency appear in the table of dependencies.
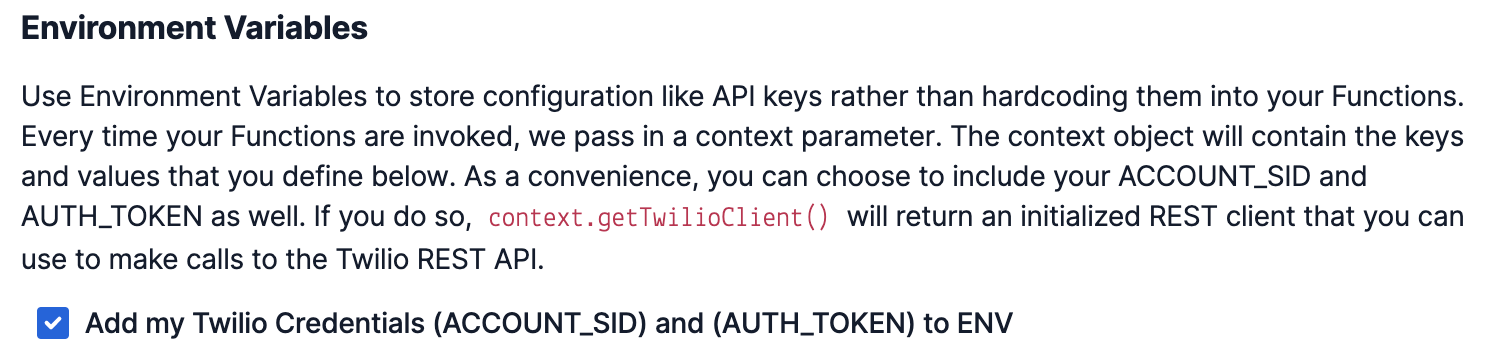
Next, navigate to Environment Variables which is located right above Dependencies. Click it to open up its own tab that looks very similar. Here you will create an environment variable to store your Twilio phone number.
Under “Key”, enter TWILIO_PHONE_NUM and under “Value” enter the number in E.164 format. Click the white "Add" button and it should appear below.

Also ensure that the checkbox to add your Twilio account credentials is checked.
You are now all set to start coding the Function!
Write the conversion functionality
Click on the same blue "Add +" button you used to upload your assets, but now choose "Add Function". This will create a new function path which defaults to the name /path_1. Go ahead and rename this function to /convert. Make sure the function is set to Protected and press "Enter".
The editor has some pre-written code in it already. Go ahead and delete everything. Then, paste the following code in the editor for your /convert function:
Explanation of convertMeasurement function
Remember when I mentioned we will find out how we are going to use the conversionRates object in our function? Well, here it is! So, what’s happening here?
convertMeasurement accepts four parameters (conversionRates, qty, from, and to). conversionRates is the JavaScript object defined earlier, except for this function we need to convert the JSON back into an object for us to access the data. We do this in the next section.
qty stores the measurement amount we are converting from. For example, if I wanted to convert 5 tbsp into tsp, qty would be set to 5. from is the measurement being converted from (in the previous example, this would be tbsp), to is the measurement being converted to (tsp).
The first thing the function does is check to make sure it can find the given from and to measurements in the conversionRates object using the hasOwnProperty function, which tells us whether a value is present in the object. If the object does not contain the given measurements, then it cannot convert them. It makes a final check to make sure that the qty argument is of number type because we need to do some math with it.
The last two lines of the function are where the magic happens. newQty calculates the amount needed in order to convert from to to. We use eval on both the qty and conversionRates[from][to] so we can interpret division and multiplication in one line. The returned string puts it all together by using a template literal, which is returned and eventually sent back in the reply. We also use the toFixed method to round our newQty variable to two decimal places.
Write the exports handler function
The only way Twilio can run our function is if it has exports.handler method with a callback function as a way to signal the end of the function’s execution. In ours, we will call convertMeasurement from exports.handler and craft two different responses based on whether or not the sender sent a parsable text message.
Underneath the convertMeasurement function, paste the following in the function editor:
The exports.handler function receives the text message from the sender (accessed via event.Body), and parses it for the qty, from, and to arguments to use in the convertMeasurement function.
The first block after parsing is a try/catch block where we attempt to parse the JSON file that we uploaded. If you turn your attention to the highlighted portion of the code in this block, you will see a placeholder in the fetch function: ’YOUR OUTPUT JSON LINK’. We need to gather the link to our JSON file asset and paste it here. This link can be found by clicking the three stacked dots next to the asset and clicking “Copy URL”.

If the try/catch block was successful, the convertMeasurement function returns a string that either contains the conversion or Unknown. We make sure that the returned string does not equal ‘Unknown’ in an if statement, and if true, will use a twiml.message to store the string. The callback function then sends the twiml message back to the sender, which concludes the execution of the function.
However, if the returned string does equal Unknown, the code constructs a response indicating that the sender hadn’t sent a properly formatted text and sends our conversion-chart.jpg with the message. Twilio Functions automatically connect your account credentials through a REST client with the line const twilioClient = context.getTwilioClient();.
Similar to the JSON file asset, we will need to copy the URL in the same way and paste it into the mediaUrl property: mediaUrl: 'YOUR CONVERSION CHART JPG LINK'.
Once these two lines are changed, click the blue "Save" button below the editor window and then click "Deploy All".
Connect your Twilio phone number
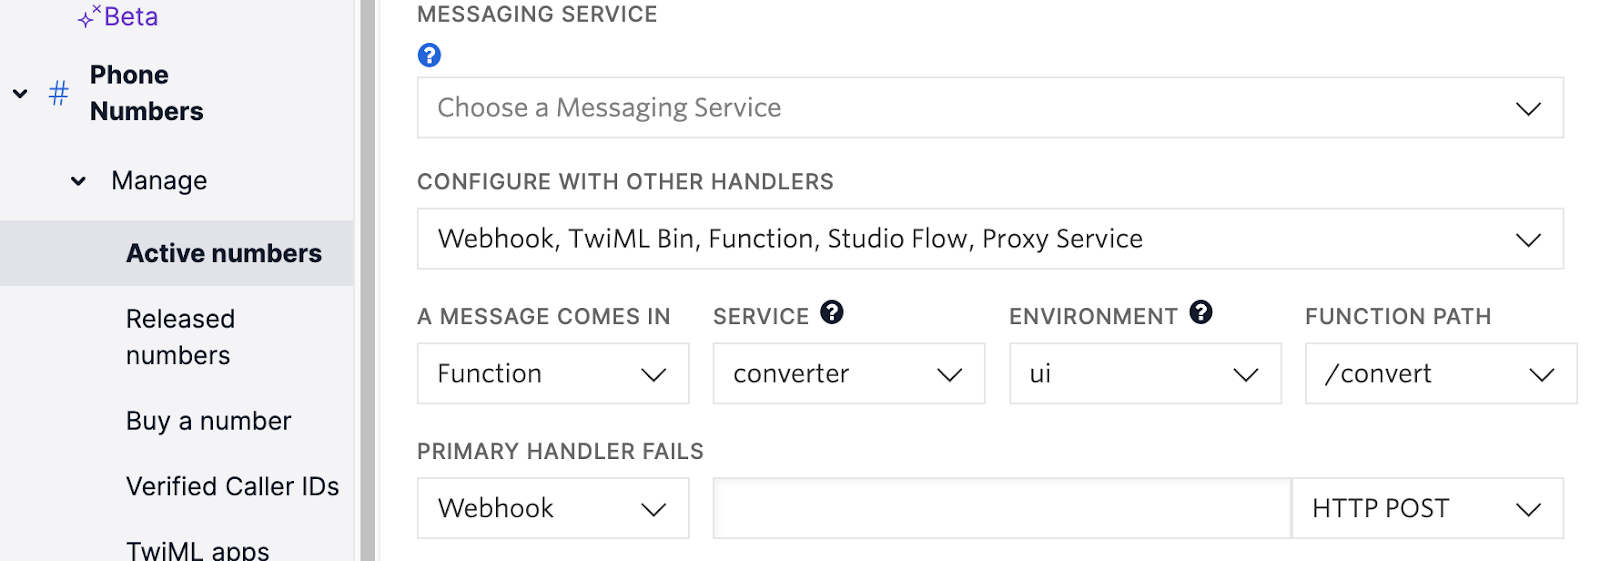
Go back to the Twilio Console dashboard and navigate to your Active Numbers in the left sidebar under "Phone Numbers > Manage > Active Numbers". Choose the number that you added as an environment variable earlier in the tutorial and scroll down to Messaging.
In the boxes under "A MESSAGE COMES IN" choose "Function", under SERVICE choose "converter’", under ENVIRONMENT choose -"ui", and in the last box select our /convert function.
Click the blue "Save" button at the bottom of the page, and let’s test this out!
Test the converter
At this point, our number should be ready to receive text messages. Send a few and see what happens!

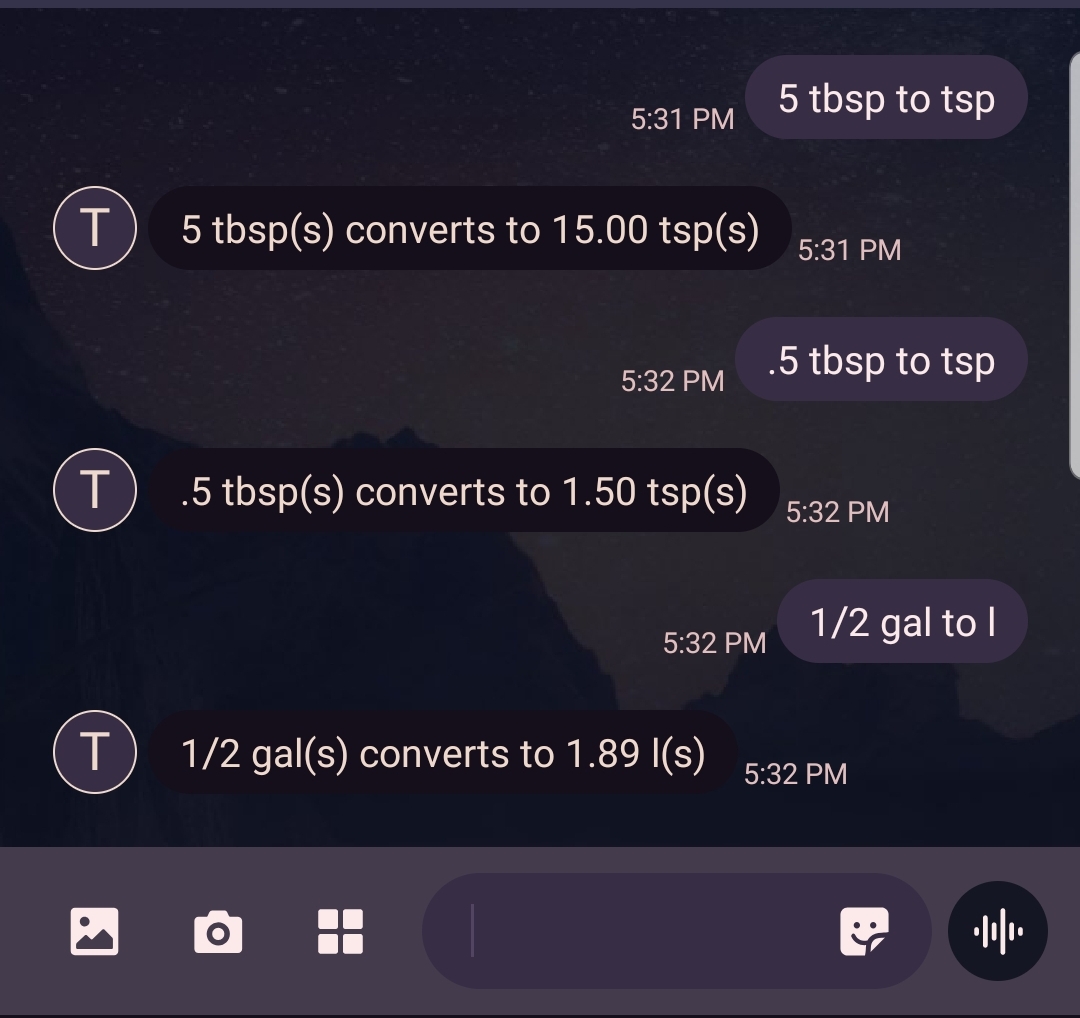
Notice in my testing when I sent an SMS that the converter didn’t recognize, it forwarded me the JPG, but when I did send an SMS in a recognized format, it sent me back some pretty accurate conversions!
Now you are familiar with Twilio Functions
Congratulations on building a cooking measurement converter that even Gordon Ramsay would be proud of! It doesn’t have to end here though, as there are literally millions of things you can build now that you know your way around Twilio Functions. Be sure to check out our other Twilio blog posts if you still want more practice or inspiration for your next project. Whatever it is you decide to make in the future, I hope you have fun and make it tasty!
Hayden Powers is a Developer Voices intern on Twilio’s Developer Network team. She enjoys enthusing over creative ideas and endeavors, and hopes you will reach out to her with yours at hpowers[at]twilio.com or on LinkedIn.

Related Resources
Twilio Docs
From APIs to SDKs to sample apps
API reference documentation, SDKs, helper libraries, quickstarts, and tutorials for your language and platform.
Resource Center
The latest ebooks, industry reports, and webinars
Learn from customer engagement experts to improve your own communication.
Ahoy
Twilio's developer community hub
Best practices, code samples, and inspiration to build communications and digital engagement experiences.