Using Ember Data With Firebase
Time to read: 6 minutes
September 02, 2015
Written by

One of the most important things in evaluating client-side JavaScript frameworks is how easy it is to access data. Ember.js makes data retrieval and manipulation a breeze with a library called Ember Data. Ember Data provides ORM functionality that works with any backend using adapters which map operations on model objects in the frontend to the database persistence layer in the backend.
There are many adapters available for Ember Data. One of the easiest to work with is Firebase. With Firebase there’s no need to set up a database so you can get to building your application very quickly. Changes in Firebase data update immediately in your app across all clients viewing that data. As an added bonus, the addon for using Firebase with Ember Data is super easy to work with. In this post we’ll build a soda list for a make believe online soda retailer using Firebase and Ember Data.
If you’re just getting started with Ember.js, head on over to this blog post and get everything installed. I’ll just wait here while you do that and drink a soda…
Generating and Configuring Model Objects
Data in applications that use Ember Data is represented by model objects. These model objects map to data structures in the backend of the application. In our application the model objects will represent different brands of soda. Let’s see how this works by creating a new Ember application with Ember CLI and switching directories into the new project:
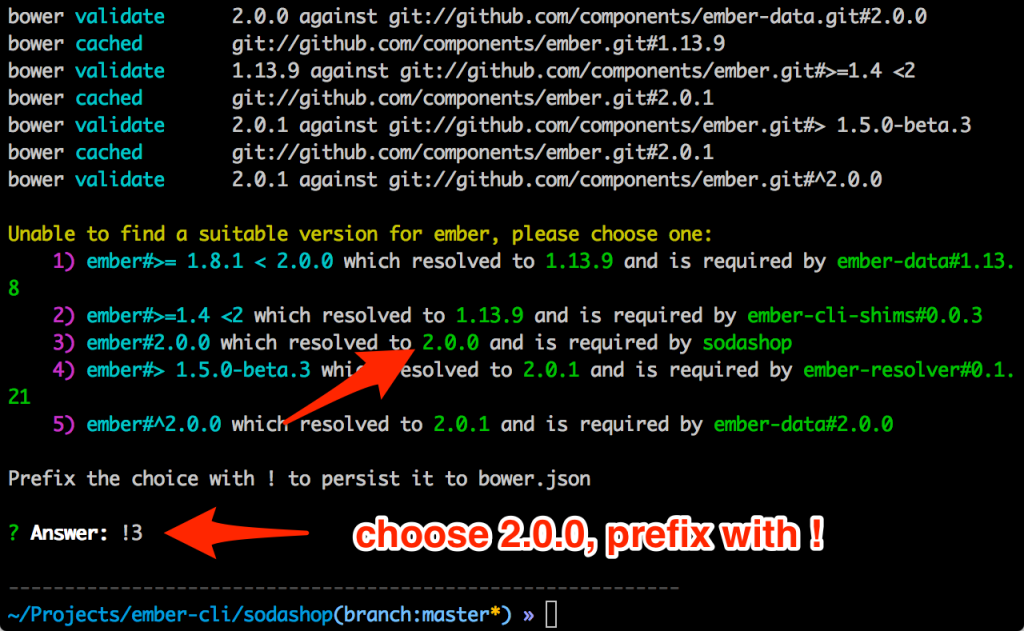
Modify the generated bower.json file so that both Ember and Ember Data versions are 2.0.0 since Ember CLI has yet to ship version 2.0:
Now let’s generate a model object to represent a soda. Run the following Ember CLI command from the terminal:
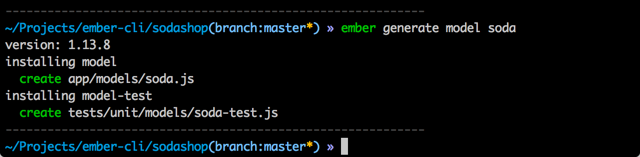
Ember CLI creates a model object at app/models/soda.js as well as a unit test file for the soda object at tests/unit/models/soda-test.js. Open up app/models/soda.js and modify it to contain the properties we’ll store for each soda in our system:
Our sodas will have a brand name (e.g. Coca-Cola), a soda name (e.g. Diet Coke) and an image URL. Properties in Ember Data are specified with a call to DS.attr(). By default the property types will automatically match what is provided by the backend server. For explicit control, it is possible to specify the data type for a property. Now that we have our model object let’s get Firebase ready to store our soda.
Setting Up Firebase
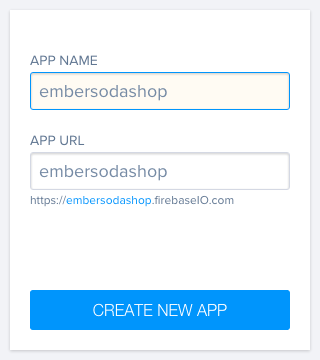
Head over to Firebase and create a free account if you don’t already have one. Once logged in, create a new Firebase app and give it whatever App Name and App URL you want. Just be sure to note the App URL as we’ll need it when we configure the Firebase addon for Ember Data.
That’s it. We don’t need to create tables or a schema or even set anything else up in Firebase. Everything will be handled by our Ember application. Now that we have Firebase set up let’s see how to use it with Ember Data.
Installing and Configuring the EmberFire Addon
Ember CLI provides an easy way to add libraries built by the community into your applications. The Ember Addons site aggregates all of the available addons and provides a search box to help you find what you are looking for. The addon we will use for Firebase access is called EmberFire. It was built by and is maintained by Firebase engineers. EmberFire’s release branch hasn’t been updated to support Ember Data 2.0 but recent commits by the Firebase team have brought it up to speed with Ember 2.0. Let’s install EmberFire from the d280d89 commit using the following Ember CLI command:
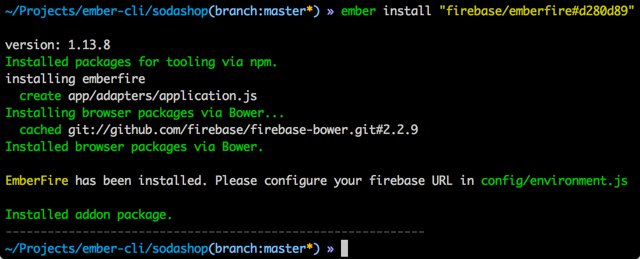
This command creates a file at app/adapters/application.js. Take a peek at this file you should see the following:
This code sets up the FirebaseAdapter for use in our application. The highlighted line injects the FirebaseAdapter into the application using Ember’s service injection mechanism. This basically means that our entire application will have access to the data in our Firebase app.
There is one more thing we need to configure before we can use this adapter and if you’re eagle-eyed you probably saw it at the end of the addon installation. We haven’t told our Ember application where to find our Firebase app. Update config/environment.js to set the Firebase URL to the URL of the Firebase app we created earlier:
At this point we’re ready to start creating Ember Data objects and persisting them to Firebase. However, let’s add one more thing to our toolbelt to make that easier.
Installing the Ember Inspector
Ember Inspector is a tool for debugging Ember applications that works in Chrome and Firefox. It’s an invaluable tool for inspecting all aspects of an Ember app including but not limited to the view tree, routes and data loaded by Ember Data. Install either the Chrome version or the Firefox version depending on your browser of choice. They are functionally equivalent so it’s really a matter of taste. Head to the terminal and run the sodashop project with ember server. Go to http://localhost:4200 and open up the developer tools in your browser. You should see a new tab labeled ‘Ember’:
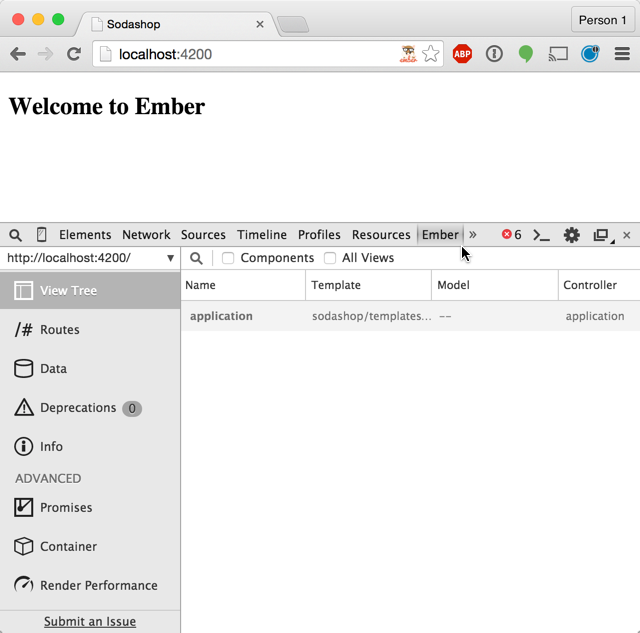
We’ll use this Ember Inspector to gain access to Ember objects during app runtime to manipulate them. This will allow us to add data to Firebase from the JavaScript console in the browser.
Creating and Persisting Ember Data Models From the JavaScript Console
The object responsible for setting up models for a particular template or component is the route. At this point in the application we haven’t setup any routes but if you click on the Routes node in Ember Inspector you’ll see we already have a handful of routes created automatically by Ember. We can use one of these routes from the JavaScript console to add data to our soda database. Click on the >$E link next to the index route in Ember Inspector:
This gives us access to the index route using the $E variable in the console. We’ll use $E to access the store property on the index route which represents the Ember Data store. It is available from all route and controller objects in your application. We use this store to query and create data. Let’s create a soda record by running the following code in the JavaScript console:
Now we can specify the properties for our newly fizzed soda by continuing in the console with:
We haven’t persisted our soda to Firebase yet. Let’s do that with one more command from the JavaScript console:
Take a look at your Firebase app. The data should already be there. The fun thing with Firebase is that changes update immediately. Not only do they update immediately but they update immediately in every instance of an app that is using the data! To see this in action in our app we’ll need to display the soda list.
Putting Our Sodas in the Display Case
The first thing we need to create to get our sodas on screen is a route for the drinks. Let’s use Ember CLI to generate a sodas route:
Next we’ll configure the model hook in app/routes/sodas.js to return all of the soda objects from the data store:
In the highlighted line we use the Ember Data store to find all of our soda objects from Firebase and return them as the model for our sodas route. Now we can loop through the soda model objects in app/templates/sodas.hbs. For now we’ll just display the soda name:
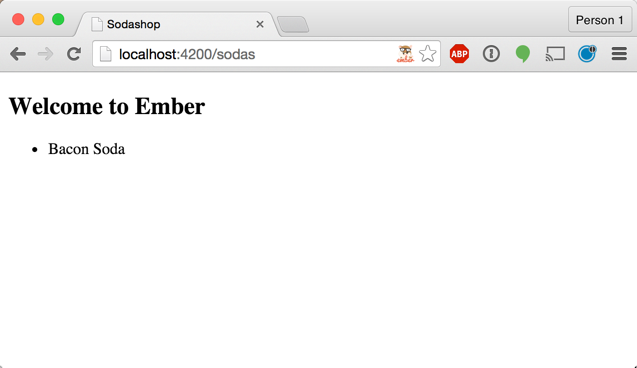
Head to http://localhost:4200/sodas in your browser and you should see the soda list (with just one soda in it for now) appear under the “Welcome to Ember” header.
Back over in Firebase, drill down to the “Bacon Soda” item and change the soda name. Commit the change by hitting Enter. When the change is committed you should see the name of the soda update immediately in your Ember application:
What’s Next
In this post we built a Firebase-powered soda list using Ember.js 2.0, Firebase and Ember Data. We saw how changes in the Firebase dataset live-update in our Ember application and changes from the Ember app can instantly persist to Firebase as well. Here are some other things you can try on your own:
- Create other model objects (locations, reviews, etc.)
- Define relationships for your data (e.g. sodas could have reviews)
- Explore some of the other adapters available for Ember Data
- Build some Ember components – more on that in this post
Hopefully you’re enjoying creating Ember.js applications. I’m super excited to see what you build with it so please share what you make. You can find me on Twitter @brentschooley or at Rocket Fizz in Philadelphia drinking a Bacon Soda.

Related Resources
Twilio Docs
From APIs to SDKs to sample apps
API reference documentation, SDKs, helper libraries, quickstarts, and tutorials for your language and platform.
Resource Center
The latest ebooks, industry reports, and webinars
Learn from customer engagement experts to improve your own communication.
Ahoy
Twilio's developer community hub
Best practices, code samples, and inspiration to build communications and digital engagement experiences.